Salut les gourmands!
I still remember the precise moment when I first encountered a chocolate brownie cookie—that sublime hybrid that seemed to defy categorization, existing in the liminal space between two beloved desserts. It was in a tiny Brooklyn bakery on a rain-soaked October afternoon, where the baker, a former pastry chef from Lyon, handed me something that looked like a cookie but shattered that assumption with the first bite. The exterior crackled delicately, giving way to an interior so fudgy, so intensely chocolatey, that I stood there motionless, experiencing what the French call “le coup de foudre”—love at first bite.
That revelation sent me on a years-long quest to recreate that perfect marriage of textures and flavors. I learned that chocolate brownie cookies aren’t simply brownies cut into circles or cookies with extra cocoa—they’re an entirely distinct creation requiring precise understanding of how chocolate, butter, sugar, and flour interact under specific conditions. The balance proves delicate: too much flour and you get ordinary cookies; too little and they spread into puddles. The chocolate ratio must be calibrated exactly, the mixing method choreographed with precision, the baking temperature and duration controlled within narrow parameters.
This recipe represents the culmination of that journey—dozens of experimental batches, conversations with professional bakers, deep dives into the chemistry of chocolate and gluten development, and countless taste tests with increasingly spoiled friends who now refuse ordinary cookies. You’ll discover how to achieve that signature crackled top that shatters satisfyingly under your teeth, revealing an interior with the precise density and moisture of perfect brownies. The chocolate flavor doesn’t merely exist—it dominates, layered and complex, with notes ranging from dark cacao bitterness to caramelized sweetness.
Whether you’re a chocolate devotee seeking your new obsession, a baker wanting to master a technique that impresses without intimidating, or simply someone craving the most extraordinary cookie experience possible, this recipe delivers transformation. These aren’t treats you’ll forget after the last bite—they’re the cookies people request by name, the dessert that converts skeptics into believers, the chocolate experience that redefines expectations.

Présentation de la recette
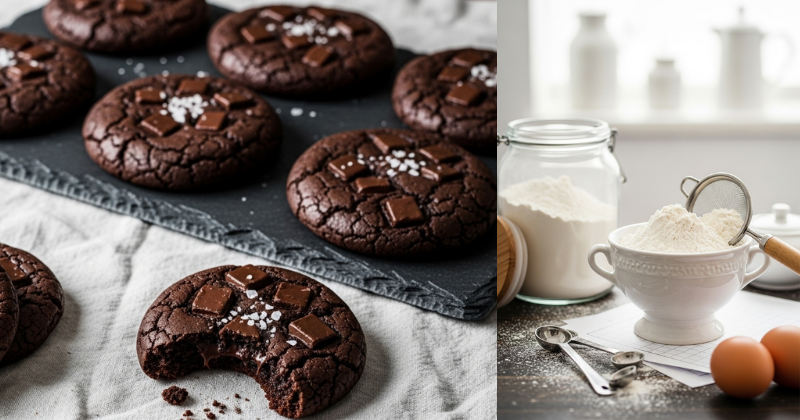
Chocolate brownie cookies occupy a unique evolutionary niche in the dessert taxonomy—they possess the portability and approachability of cookies while delivering the decadent intensity and fudgy texture that make brownies irresistible. This particular recipe has been refined through countless iterations to achieve what I consider the platonic ideal: cookies with paper-thin crackled shells concealing molten-centered interiors that remain chewy for days.
The preparation timeline proves remarkably accessible considering the sophisticated results. Active hands-on work spans approximately 25 minutes—time devoted to melting chocolate, whisking eggs, and portioning dough. The critical dough resting period requires 30 minutes in the refrigerator, during which the mixture firms sufficiently for shaping while fats crystallize into structures that will create those coveted crackled tops during baking. Baking proceeds in quick 10-12 minute intervals, with cookies emerging from the oven looking dramatically underdone—a calculated appearance that signals perfect doneness for these particular treats.
Time breakdown:
- Active preparation: 25 minutes
- Dough chilling: 30 minutes (essential, non-negotiable)
- Baking: 10-12 minutes per batch
- Cooling: 10 minutes on baking sheet, 20 minutes complete cooling
- Total: Approximately 1 hour 45 minutes for complete process
This recipe yields 18-20 generously sized cookies measuring approximately 3 inches in diameter—substantial enough to satisfy serious chocolate cravings while maintaining elegant proportions. The difficulty level registers at intermediate: the techniques involved aren’t complex, but they demand precision. Slight variations in chocolate temperature, mixing duration, or baking time produce dramatically different results, making attentiveness crucial.
The conceptual origins and evolution:
Brownie cookies emerged from the American baking tradition’s obsession with hybridization—the same impulse that birthed cronuts, brookies, and countless other portmanteau desserts. However, unlike many fusion creations that feel gimmicky, chocolate brownie cookies represent genuine culinary innovation, solving legitimate textural and practical challenges. Brownies, while delicious, require cutting and plating. Cookies offer portability but often lack brownies’ fudgy intensity. The brownie cookie synthesizes advantages while transcending limitations.
The technique draws from French chocolate foundations—the importance of quality chocolate, precise tempering concepts, and understanding of how cocoa butter crystallization affects texture. It incorporates American pragmatism regarding portability and casual elegance. The result feels simultaneously sophisticated enough for dinner parties yet approachable for weeknight indulgence.
Ingrédients pour des chocolate brownie cookies exceptionnels
The ingredient list appears deceptively brief—just seven components transform into something extraordinary through proper selection and technique. However, quality variations within these elements profoundly influence final results, making thoughtful sourcing the foundation of success.
For approximately 18-20 cookies:
- 8 ounces (226g) dark chocolate (60-70% cacao), chopped into small uniform pieces
- 3 tablespoons (42g) unsalted butter, cut into cubes
- 2 large eggs, room temperature
- ¾ cup (150g) granulated sugar
- 1 teaspoon pure vanilla extract
- ¼ cup (30g) all-purpose flour, spooned and leveled
- ¼ teaspoon fine sea salt
- Optional: ½ cup (85g) dark chocolate chunks or chips for added texture
The chocolate selection represents your most critical decision. This recipe demands real chocolate—not chocolate chips, not cocoa powder mixed with oil, but genuine couverture chocolate containing cocoa solids, cocoa butter, and minimal additives. The percentage indicates cocoa content: 60% chocolate contains 60% cacao derivatives, with the remainder being sugar and vanilla. This recipe works beautifully across the 60-70% range, with lower percentages yielding sweeter, more accessible cookies while higher percentages create intense, sophisticated bitterness balanced by surrounding sweetness.
I typically use 65-68% chocolate—brands like Valrhona, Callebaut, or Guittard produce reliable results, though supermarket alternatives like Ghirardelli or Lindt baking chocolate work admirably. Avoid chocolate chips for the base recipe; their formulation includes stabilizers preventing complete melting, producing grainy rather than silky texture. However, stirring chocolate chunks into the finished dough adds delightful textural contrast—pockets of pure chocolate that remain distinct from the fudgy matrix.
Butter quality and the importance of unsalted varieties cannot be overstated. European-style butter, with its elevated butterfat content (82-84% versus standard 80%), creates richer flavor and more tender texture. The unsalted specification matters because salt content varies dramatically between brands; using salted butter introduces unpredictable seasoning that could overwhelm the carefully calibrated chocolate intensity.
Eggs at room temperature incorporate more smoothly into the chocolate-butter mixture, creating stable emulsions rather than the separated, curdled appearance that occurs when cold eggs meet warm chocolate. This emulsion stability directly affects final cookie texture—proper emulsification creates silky, cohesive dough that bakes into uniform cookies, while broken emulsions produce grainy, uneven results.
Sugar selection influences both flavor and texture. Granulated white sugar provides clean sweetness that allows chocolate’s complexity to shine while contributing to the cookies’ characteristic crackled tops. The sugar dissolves into the egg mixture, creating a stable foam that traps air bubbles—these bubbles expand during baking, causing surface cracking as interior moisture pushes through crystallizing sugar crusts. Brown sugar, while delicious in many cookies, would interfere with this cracking mechanism while adding molasses notes that compete with chocolate’s nuances.
Flour quantity seems almost absurdly minimal—just ¼ cup for nearly twenty cookies. This radical reduction proves intentional: flour contains gluten-forming proteins that create structure and chewiness desirable in many cookies but antithetical to the fudgy brownie texture we’re pursuing. The small flour amount provides just enough structure to prevent complete spreading while maintaining that dense, moist interior characteristic of exemplary brownies.
Salt functions as flavor amplifier rather than seasoning. The tiny ¼ teaspoon enhances chocolate’s inherent flavors through suppression of bitter taste receptors while amplifying sweetness perception—the same principle making salted caramel so compelling. Use fine sea salt or table salt; coarse salts won’t distribute evenly through the small dough quantity, creating pockets of intense saltiness rather than balanced enhancement.
Préparation détaillée – L’alchimie du chocolat
The transformation of these simple ingredients into transcendent chocolate brownie cookies unfolds through carefully orchestrated steps, each demanding specific attention to temperature, timing, and technique. Understanding not merely the actions but the scientific principles underlying them elevates your execution from mechanical recipe-following to mastery.
1. Mise en place and mental preparation (5 minutes)
Begin by arranging ingredients in order of use—a ritual that creates mental clarity while preventing the forgotten component that derails otherwise careful work. This organizational practice, fundamental to professional kitchens, proves especially crucial for recipes like this where timing matters profoundly.
Line two baking sheets with parchment paper or silicone baking mats. I strongly prefer parchment for its ability to slide entire batches onto cooling racks, facilitating rapid pan turnover for multiple batches. Position oven racks in the upper-middle and lower-middle positions—you’ll rotate pans midway through baking for even heat distribution.
Chop the chocolate into small, uniform pieces roughly the size of chocolate chips. This uniformity ensures simultaneous melting, preventing scenarios where some chocolate burns while other pieces remain solid. Place chopped chocolate and butter cubes in a heatproof bowl—I prefer glass or stainless steel over plastic, which can retain odors and doesn’t conduct heat as predictably.
2. The chocolate melting ritual – Tempering for texture (8-10 minutes)
Chocolate melting represents a meditation—a moment demanding full presence, as the margin between perfectly melted and scorched chocolate spans mere seconds. I employ the double boiler method: fill a saucepan with 1-2 inches of water, bring it to a gentle simmer, then place the chocolate-butter bowl atop the pan, ensuring the bowl’s bottom doesn’t touch water. This indirect heat method prevents the scorching that occurs with direct heat application.
Stir the chocolate and butter mixture constantly using a silicone spatula, scraping bowl sides and bottom to distribute heat evenly. Watch the transformation: solid chocolate softens, its surface developing a glossy sheen as cocoa butter melts. Butter incorporates, its yellow fat emulsifying with dark chocolate into homogeneous liquid silk. The mixture should feel warm but not hot to the touch—approximately 110-115°F if you’re using a thermometer, though temperature assessment by touch works perfectly with practice.
Remove the bowl from heat when 90% of chocolate has melted, with just a few small solid pieces remaining. Residual heat will complete melting during continued stirring—this technique prevents overheating that would cause chocolate to seize or develop grainy texture from separated cocoa butter. Let the mixture cool for 5-7 minutes, stirring occasionally. It should reach approximately room temperature (70-75°F) before combining with eggs—this cooling prevents the eggs from cooking on contact, which would create scrambled egg bits rather than smooth emulsion.
3. The egg foam – Building structure through aeration (5-7 minutes)
In a separate large bowl, combine eggs, sugar, and vanilla extract. Using a whisk or electric hand mixer, beat this mixture vigorously for 4-6 minutes. This extended beating serves crucial functions: it dissolves sugar into the eggs, creates a stable foam through mechanical incorporation of air, and develops the structure that will support the cookies during baking.
Watch the transformation closely. Initially, the mixture appears yellow and liquid, with granular sugar visible. Gradually, it pales to cream color, thickens considerably, and increases in volume—sometimes doubling. The texture should achieve “ribbon stage”: when you lift the whisk, the mixture falls in thick ribbons that sit briefly on the surface before slowly dissolving back into the mass. This consistency indicates sufficient air incorporation and sugar dissolution.
The science behind this step fascinates me. Egg proteins, when agitated, unfold and form networks that trap air bubbles. Sugar dissolves into the aqueous egg matrix while simultaneously interfering with protein bonding in ways that stabilize the foam. This creates a structure capable of supporting the heavy chocolate you’ll add next while maintaining enough delicacy to produce tender rather than rubbery cookies.
4. The marriage of chocolate and foam (2-3 minutes)
Pour the cooled melted chocolate mixture into the egg foam. This moment demands reverence—you’re combining two meticulously prepared components whose successful union determines everything that follows. Begin folding using a wide rubber spatula, employing the classic folding motion: cut down through the center, scrape along the bowl’s bottom, then fold up and over, rotating the bowl slightly after each stroke.
The chocolate initially creates dark streaks through pale foam. Continue folding patiently—the mixture gradually homogenizes into glossy, dark chocolate batter. This takes 15-25 folds typically, depending on bowl size and your folding technique. Avoid the temptation to stir vigorously or use electric mixers at this stage; aggressive mixing deflates the carefully built foam structure, producing dense rather than fudgy cookies.
5. Flour incorporation – Minimal mixing for maximum tenderness (1 minute)
Sift the flour and salt directly over the chocolate mixture. Sifting aerates flour while breaking up clumps, ensuring even distribution throughout the small quantity used. Fold gently but thoroughly, using perhaps 10-12 strokes until no visible flour streaks remain. The batter should appear glossy and thick—more like brownie batter than traditional cookie dough.
At this stage, if incorporating chocolate chunks, fold them in with just 3-4 additional strokes. These chunks will create pockets of intense chocolate that remain distinct from the fudgy cookie matrix—a textural variation I find irresistible, though the cookies prove equally magnificent without this addition.
6. The crucial chilling period (30 minutes minimum)
Transfer the batter to a clean bowl if it’s become messy, then cover with plastic wrap pressed directly onto the surface to prevent skin formation. Refrigerate for exactly 30 minutes—time for the mixture to firm sufficiently for portioning while fats crystallize into structures that will create those signature crackled tops.
During this waiting period, the butter and cocoa butter in the mixture solidify from their melted liquid state into semi-solid form. This phase change proves essential: when you place cold, firm dough in a hot oven, the exterior sets quickly while interior moisture generates steam. This steam pressure pushes against the hardening surface, creating the cracks and fissures that define chocolate brownie cookies’ appearance.
If you over-chill (beyond 45 minutes), the dough becomes too firm for easy portioning. Simply let it sit at room temperature for 5-10 minutes until pliable. Under-chilling produces spread-out, flat cookies lacking proper texture—don’t skip or abbreviate this step.
7. Portioning and the final preparation (5 minutes)
Preheat your oven to 350°F (175°C). Using a spring-loaded cookie scoop (2-tablespoon capacity) or two spoons, portion the chilled dough into mounds on your prepared baking sheets, spacing them 3 inches apart to allow for spreading. The dough will be soft but firm enough to hold shape—somewhere between brownie batter and traditional cookie dough consistency.
I use a cookie scoop for uniform sizing, which ensures even baking—larger cookies require more time, creating scenarios where some cookies burn while others remain underdone. Each portion should contain approximately 2 tablespoons of dough, creating cookies about 3 inches in diameter after baking.
8. Baking – The transformation through controlled heat (10-12 minutes)
Place one pan in the upper rack position, one in the lower. Bake for 6 minutes, then rotate pans—move the top pan to bottom position and vice versa, while also rotating each pan 180 degrees. This rotation compensates for oven hot spots and rack-position temperature differences, ensuring even baking across all cookies.
Continue baking for additional 4-6 minutes. Here’s where experience and courage intersect: these cookies are done when they appear dramatically underdone. The tops should have developed those characteristic cracks, with glossy, wet-looking centers visible through fissures. The edges will appear set but the centers will still jiggle slightly when the pan is gently shaken. An instant-read thermometer inserted into a cookie’s center should register 165-170°F.
This appearance terrifies first-time bakers, who instinctively think “These aren’t done!” and continue baking. Resist this instinct completely. The cookies continue cooking through carryover heat after removal from the oven. What looks underdone at 12 minutes becomes perfect at 15 minutes of cooling. What looks “just right” in the oven becomes overbaked and cakey after cooling—the antithesis of what we’re creating.
9. The cooling discipline (10 minutes on pan, 20 minutes total)
Remove pans from the oven and place them on wire cooling racks. Do not attempt to move the cookies for 10 full minutes—they’re too delicate in their hot, soft state and will break apart. During this critical cooling phase on the pan, the cookies’ structure sets as temperatures decline and residual heat completes the cooking process.
After 10 minutes, use a thin metal spatula to transfer cookies to wire cooling racks for complete cooling. They’ll firm further as they cool but maintain that fudgy interior texture. These cookies actually improve slightly over the first 24 hours as flavors meld and textures achieve perfect balance—rare among cookies, most of which peak within hours of baking.
Petit conseil pro: Les secrets de la perfection fudgy
Through countless batches—some triumphant, others teaching through failure—I’ve accumulated insights that separate merely good chocolate brownie cookies from transcendent specimens that convert skeptics and create legends.
The chocolate percentage sweet spot:
While I’ve specified 60-70% cacao, the specific percentage you choose dramatically affects final flavor profiles. At 60-62%, cookies taste sweeter and more accessible—crowd-pleasers that appeal even to those who claim not to love dark chocolate. At 65-68%, you achieve sophisticated balance—enough bitterness to create complexity without overwhelming. At 70%+, intensity dominates—these cookies become statements for serious chocolate devotees, less sweet, more aggressively cacao-forward. Know your audience and adjust accordingly.
The melting temperature precision:
Chocolate scorches at surprisingly low temperatures—around 115-120°F for dark chocolate. Once scorched, no recovery exists; the chocolate develops grainy texture and bitter, acrid flavor. Using the double boiler method with water at a bare simmer (not rolling boil) provides insurance against this disaster. If you must use a microwave, heat in 15-second intervals at 50% power, stirring between each, and stop when 75% melted—residual heat completes the process safely.
The critical importance of dough temperature at portioning:
The ideal dough consistency for portioning resembles firm peanut butter—soft enough to scoop but firm enough to hold shape. If your kitchen is particularly warm (above 75°F), the dough may remain too soft even after 30 minutes refrigeration. Simply chill longer, checking every 10 minutes. Conversely, if over-chilled into solid firmness, letting it sit at room temperature for 5-10 minutes restores workability. Temperature matters because it affects how cookies spread and crack during baking—too warm yields flat puddles, too cold produces thick, under-spread cookies.
The underbaking confidence:
This represents the single most challenging aspect for home bakers: accepting that done looks underdone. I tell students to bake until they think “These need 2-3 more minutes”—then immediately remove them. Set a timer and stop when it sounds, even if your instincts scream otherwise. Take photos of properly baked cookies still in the oven so you can reference that appearance for future batches. After you’ve experienced the perfect fudgy texture that results from this “underbaking,” you’ll understand and embrace it.
The surface cracking enhancement:
While proper technique produces natural cracking, you can enhance this aesthetic by rolling dough portions in granulated sugar before placing on baking sheets. The sugar creates a crystalline shell that cracks more dramatically during baking, producing especially photogenic results. This addition also provides slight textural variation—a thin, sweet crackly layer giving way to fudgy interior.
The chocolate chunk strategy:
If adding chocolate chunks, use chocolate with higher cacao percentage than the base chocolate—if using 65% for melted chocolate, incorporate 70-75% chunks. This creates intensity variation throughout cookies, with pockets of more assertive chocolate flavor. Alternatively, use a contrasting chocolate type entirely—white chocolate chunks in dark chocolate cookies provide visual drama and sweet-bitter contrast, while milk chocolate chunks appeal to those who prefer milder intensity.
The storage wisdom for maintaining texture:
These cookies remain at peak texture for 3-4 days when stored properly: in airtight containers at room temperature with parchment paper between layers. The parchment prevents sticking while the container prevents moisture loss that would dry the fudgy centers. Resist refrigeration, which firms them excessively. Freezing works beautifully—freeze individually on parchment, then transfer to freezer bags. They thaw to near-original quality in 20-30 minutes at room temperature.
The altitude adjustment necessity:
Bakers at elevations above 3,000 feet must adjust because lower atmospheric pressure affects spreading and moisture evaporation. Increase oven temperature by 15°F and decrease baking time by 1-2 minutes. The cookies may spread more than at sea level—counteract this by chilling dough an additional 10-15 minutes before portioning.
Accompagnements et variations – L’univers des possibilités
Chocolate brownie cookies, while magnificent unadorned, welcome creative elaborations that showcase different facets of their chocolate-forward character. These variations and serving suggestions expand your repertoire while honoring the cookies’ essential nature.
Ice cream sandwiches – The ultimate indulgence:
Sandwich a scoop of vanilla bean, coffee, or salted caramel ice cream between two cookies. The temperature contrast—cold ice cream, room-temperature fudgy cookies—creates sensory dialogue as cream softens and cookies chill slightly. Roll the edges in mini chocolate chips or chopped nuts for visual polish and textural variation. This construction elevates simple cookies into restaurant-worthy plated desserts.
Ganache filling – Amplifying chocolate intensity:
Create simple ganache by heating ½ cup heavy cream until steaming, then pouring over 4 ounces chopped dark chocolate. Let it sit for 2 minutes, then stir until smooth. Once cooled but still spreadable, sandwich between cookie pairs. The ganache adds luxurious smoothness while intensifying overall chocolate experience—essentially creating triple-chocolate decadence.
Espresso enhancement – Complexity through contrast:
Add 2 teaspoons instant espresso powder to the melted chocolate-butter mixture. Coffee doesn’t make cookies taste like coffee when used in this quantity—instead, it amplifies chocolate’s inherent flavors through contrast, making chocolate taste more intensely chocolatey. The subtle bitter complexity also balances sweetness beautifully.
Sea salt finish – Sophisticated flavor elevation:
Immediately after removing cookies from the oven, sprinkle them with flaky sea salt—Maldon, fleur de sel, or similar. The large salt crystals provide textural crunch while their salinity enhances sweetness perception and brings forward chocolate’s complex flavor notes. This simple addition transforms cookies from delicious to memorable.
Peppermint variation – Seasonal sophistication:
Add ½ teaspoon peppermint extract along with vanilla, and stir crushed candy canes or peppermint crunch into the dough. This variation creates holiday-appropriate treats that evoke chocolate-peppermint bark in cookie form. For visual impact, press a few small candy cane pieces onto cookie tops just before baking.
Nutella swirl – Hazelnut harmony:
Dollop ½ teaspoon Nutella onto each cookie portion before baking, swirling it decoratively with a toothpick. The hazelnut-chocolate combination proves classic for good reason, while the Nutella remains slightly molten in finished cookies, creating pockets of contrasting flavor and texture.
Raspberry complement – Fruit and chocolate dialogue:
Serve cookies alongside fresh raspberries or raspberry coulis. The berries’ tartness cuts chocolate richness while their bright flavor creates palate refreshment between bites. This pairing works beautifully for dinner party dessert courses where something rich yet not overwhelming feels appropriate.
Bourbon balls transformation – Adult sophistication:
Crumble leftover cookies (if such things exist), mix with bourbon and light corn syrup to create moldable paste, roll into balls, and coat in cocoa powder. These bourbon balls capture the cookies’ chocolate intensity in truffle-like form perfect for gifting or elegant after-dinner treats.
La science et la philosophie du brownie cookie
Understanding the chemistry and conceptual foundations underlying chocolate brownie cookies deepens appreciation while informing technique refinements that elevate results. This seemingly simple hybrid embodies sophisticated food science and fascinating culinary philosophy.
The gluten minimization strategy:
Traditional cookies derive structure primarily from gluten networks—protein strands that form when flour’s glutenin and gliadin proteins hydrate and undergo mechanical mixing. These networks create the chewy texture beloved in chocolate chip cookies. However, brownies deliberately minimize gluten development to achieve their characteristic tender crumb. This recipe splits the difference: just enough flour to prevent complete spread (¼ cup), while the high fat content from chocolate and butter lubricates and shortens whatever gluten does form, maintaining tenderness.
The emulsification chemistry:
The technique of folding melted chocolate into beaten eggs creates an emulsion—a stable mixture of fat (from cocoa butter and butter) and water (from eggs). Emulsions require emulsifying agents to remain stable; in this case, egg yolk lecithin serves this function. Proper emulsification creates smooth, homogeneous batter that bakes into uniform cookies. Temperature proves crucial—too-hot chocolate cooks eggs, destroying emulsifying capacity, while too-cold chocolate doesn’t incorporate smoothly.
The crackled top phenomenon:
Those signature surface cracks result from specific physical processes during baking. As cookies heat, water in the dough converts to steam, creating internal pressure. Simultaneously, the exterior dries and forms a crust as sugars crystallize. The differential between rapidly expanding interior and rigid exterior creates stress that relieves through crack formation. The effect resembles dried earth cracking—moisture loss creates shrinkage and fracture patterns.
The Maillard reaction and brownie flavor:
While often associated with meat browning, Maillard reactions—interactions between amino acids and reducing sugars under heat—prove crucial to chocolate’s cooked flavor profile. These reactions generate hundreds of aromatic compounds including pyrazines (nutty, roasted notes), furans (caramel, sweet notes), and thiazoles (savory depth). The reactions accelerate above 285°F, occurring primarily on cookie surfaces where temperatures peak.
The philosophical dimension – Hybrid identity:
Chocolate brownie cookies raise interesting questions about culinary categories and identity. Are they cookies that taste like brownies, or brownies shaped like cookies? This ambiguity mirrors broader questions about fusion cuisines and hybrid identities—when does combination create something new rather than merely juxtaposing existing elements? The best hybrids transcend their components, offering experiences unavailable from either parent form. These cookies achieve this transcendence through textural alchemy—the crisp-yet-tender dichotomy impossible in conventional brownies or cookies.
The textural gradient and sensory experience:
Eating one of these cookies involves a journey through textural zones: the initial crack through the thin surface shell, the transition to fudgy interior, the occasional encounter with chocolate chunks if included. This progression creates dynamic sensory experience rather than the textural monotony of many cookies. The Japanese aesthetic concept of “ma”—the space or interval between things—finds resonance here: the transitions between textural zones create as much interest as the zones themselves.
À vos tabliers!
The journey from a handful of simple ingredients to these extraordinary chocolate brownie cookies teaches lessons extending far beyond baking technique. It demonstrates how understanding underlying principles—the science of emulsification, the physics of gluten development, the chemistry of sugar crystallization—transforms cooking from mechanical recipe-following into creative mastery where intuition and knowledge guide adaptation.
These cookies embody what I love most about serious home baking: they demand attention and technique, rewarding care with results that transcend their ingredients’ humble simplicity. Each batch offers opportunities for refinement, for noticing subtle variations in chocolate behavior or dough consistency, for calibrating your oven’s quirks and your own evolving sensory literacy.
I encourage you to make this recipe your own. Start with the foundation I’ve provided, master the fundamental techniques, then experiment. Perhaps you’ll discover that you prefer even darker chocolate, or a hint of cardamom alongside vanilla, or a specific chocolate chunk brand that becomes your signature. Maybe you’ll develop serving presentations that make these cookies centerpieces of memorable gatherings. This evolution represents baking’s living tradition—maintained not through rigid adherence but through respectful innovation.
Share your chocolate brownie cookie experiences in the comments below. Did the underbaking confidence prove as challenging as I warned? Did you discover a variation that became your household obsession? What memories does the aroma of baking chocolate evoke for you? Your insights enrich our community’s collective knowledge, creating a tapestry of experience more valuable than any single recipe could provide.
If this recipe brought joy to your kitchen—if it solved your chocolate cravings, became your signature contribution to potlucks, or simply made you smile as you experienced that perfect fudgy bite—please share it with others seeking extraordinary chocolate experiences. In our complex world, simple pleasures like exceptional homemade cookies remind us that beauty often emerges from patience, attention, and the willingness to honor ingredients and techniques with the care they deserve.
Bon appétit!