Salut les gourmands!
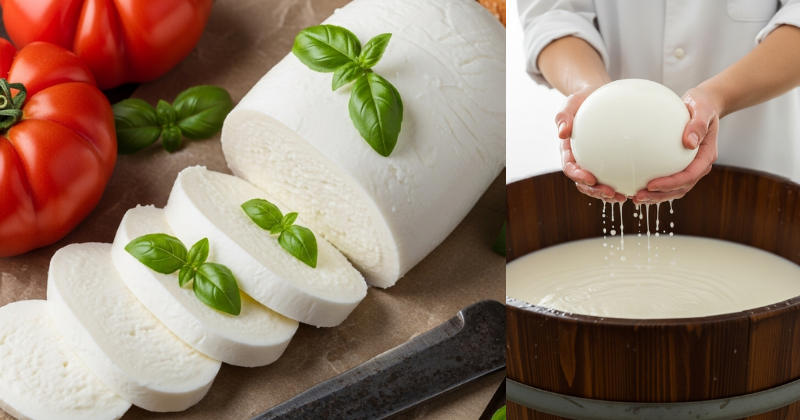
There exists a moment in Southern Italian farmhouses, just after dawn, when cheesemakers plunge their hands into hot whey and begin the ancient dance of pasta filata—stretching, folding, shaping curds into glossy white spheres that will grace tables by noon. I first witnessed this alchemy in a small caseificio outside Naples, where Signora Rosa, her weathered hands moving with balletic precision, transformed yesterday’s milk into today’s mozzarella while steam rose like morning mist and the air grew thick with the scent of fresh dairy and possibility.
That morning changed my understanding of cheese forever. What I had known only as those rubbery supermarket balls bore no resemblance to the silken, cloud-like treasures Rosa pulled from her copper kettle—their surfaces gleaming like porcelain, their interiors so delicate they wept milky tears when torn, their flavor a revelation of sweet cream and subtle tang that spoke of green pastures and patient craft.
This fresh mozzarella recipe brings that Roman countryside magic into your kitchen. You’ll discover that authentic mozzarella requires no industrial equipment, no aging caves, no mysterious expertise—only milk, rennet, time, and your willing hands. The transformation from liquid to solid, the molecular restructuring of proteins into elastic networks, the tactile satisfaction of shaping warm cheese—these experiences connect you to dairy traditions stretching back millennia while delivering mozzarella so superior to commercial versions that you’ll question ever purchasing it again.

Présentation de la Recette: The Mozzarella Journey
Understanding the temporal landscape and technical territory of fresh mozzarella creation establishes both realistic expectations and appreciation for the process you’re about to undertake.
Temps de Préparation Active: 45-60 minutes of hands-on engagement—measuring, heating, cutting, stretching. This concentrated period demands full attention as milk undergoes rapid transformation.
Temps de Maturation: 30-90 minutes of passive waiting while milk acidifies and curds develop structure. During this phase, ancient biochemistry unfolds—enzymes cleaving proteins, acid altering pH, calcium migrating through casein networks.
Temps Total: Approximately 2-3 hours from pouring milk to enjoying finished mozzarella, though most of this passes in quiet anticipation rather than active labor.
Rendement: This recipe produces approximately 1 pound (450g) of fresh mozzarella—enough for a substantial caprese salad for 4-6 people, or pizza topping for 2-3 homemade pies, or simply eating warm with nothing but good olive oil and salt.
Niveau de Difficulté: Intermediate. The techniques are learnable and the chemistry forgiving within reasonable parameters, but success requires attention to temperature, timing, and the subtle feedback your developing cheese provides. Your first attempt teaches you the process; your second reveals the nuances; your third produces confidence.
The Science and Soul of Fresh Cheese
Mozzarella belongs to the pasta filata family—Italian for “spun paste”—describing the distinctive stretching process that creates its characteristic layered texture. Unlike aged cheeses requiring weeks or months of ripening, fresh mozzarella achieves completion within hours, capturing milk’s essential sweetness before time and microbes transform it into something more complex but less innocent.
The magic occurs through controlled protein coagulation. Milk contains casein proteins suspended in solution, surrounded by calcium ions and water molecules. Rennet—an enzyme complex traditionally derived from calf stomach but now often produced through microbial fermentation—cleaves these proteins at specific points, while acid (from citric acid or bacterial fermentation) lowers pH, causing proteins to aggregate. The result: a three-dimensional network that traps fat globules and whey, creating what we recognize as cheese curd.
The stretching phase—unique to mozzarella and its relatives—further aligns these protein strands, creating the fibrous structure that allows mozzarella to melt into those gorgeous strings beloved by pizza enthusiasts worldwide. This isn’t mere cooking; it’s applied biochemistry occurring in your kitchen, as profound as any laboratory transformation yet edible and delicious.
Ingrédients: The Elemental Foundation
Fresh mozzarella’s purity means ingredient quality directly determines final results. Each component plays essential roles in the molecular choreography transforming liquid milk into solid cheese.
For the Cheese:
- 1 gallon (3.8 liters) whole milk—the foundation carrying all other elements
- 1½ teaspoons citric acid powder (approximately 8g)—the pH adjuster initiating protein coagulation
- ¼ teaspoon liquid rennet OR ¼ rennet tablet dissolved in ¼ cup cool, non-chlorinated water—the enzyme catalyst completing coagulation
- 1 tablespoon kosher salt or sea salt (plus additional for finishing)—flavor enhancement and moisture regulation
- Cool, non-chlorinated water for dissolving citric acid and rennet
For Storing:
- Cool water or light brine solution (optional)—maintaining moisture during short-term storage
- High-quality extra virgin olive oil for serving—the perfect complement to fresh dairy
Critical Ingredient Considerations:
Milk Selection—The Most Crucial Decision:
The milk you choose fundamentally determines your success or struggle. This isn’t area for compromise.
Ideal Choice: Whole Milk (Not Ultra-Pasteurized)
Standard pasteurized whole milk from local dairies works beautifully. The fat content (3.25-3.5%) provides richness and proper texture. Pasteurization—heating to 161°F (72°C) for 15 seconds—eliminates pathogens while preserving the protein structures necessary for proper curd formation.
Avoid: Ultra-Pasteurized Milk
Ultra-pasteurization (UP) involves heating milk to 280°F (138°C) for 2-4 seconds. This extended shelf life convenience comes at devastating cost to cheesemaking: the extreme heat permanently denatures whey proteins, causing them to bind with casein in ways that prevent proper curd formation. UP milk produces weak, crumbly curds that won’t stretch—only frustration and wasted ingredients.
Check your milk carton carefully. If it says “ultra-pasteurized” or has a sell-by date months away, it won’t work. Fresh milk with reasonable expiration dates (2-3 weeks) typically indicates standard pasteurization.
Raw Milk: The Traditional Choice
If accessing legal raw milk from trusted sources, you’re working with the material Italian grandmothers used for centuries. Raw milk contains intact enzyme systems and diverse microbial populations that contribute subtle flavor complexity. However, raw milk requires impeccable handling and knowledge of source herd health. For most home cheesemakers, good pasteurized milk offers simpler, safer entry point.
Organic vs. Conventional:
Organic milk from grass-fed cows often exhibits richer flavor and higher levels of beneficial omega-3 fatty acids and conjugated linoleic acid (CLA). The improved animal welfare and environmental practices provide additional reasons to choose organic when budget permits. However, conventional pasteurized milk from reputable dairies also produces excellent mozzarella—the ultra-pasteurization question matters more than organic certification.
Citric Acid—The Acidification Shortcut:
Traditional mozzarella employs bacterial cultures (thermophilic Streptococcus thermophilus) that ferment lactose into lactic acid over several hours. Citric acid provides instant acidification, completing in minutes what bacteria require hours to achieve. This shortcut sacrifices some flavor complexity—cultured mozzarella develops more nuanced tang—but offers beginner-friendly reliability and speed.
Food-grade citric acid appears in baking aisles (often used for candy making) or online through cheesemaking suppliers. The white crystalline powder is pure, stable, and safe when used in appropriate quantities.
Rennet—The Coagulation Catalyst:
Rennet contains chymosin, a proteolytic enzyme that cleaves kappa-casein at a specific peptide bond (between amino acids 105 and 106), destabilizing casein micelles and initiating aggregation that forms curds.
Liquid Rennet: Easier to measure and mix uniformly. Most liquid rennets are “single strength”—use ¼ teaspoon per gallon of milk. Available as animal rennet (from calf stomach lining) or microbial rennet (from fungi like Rhizomucor miehei). Both work excellently; microbial rennet suits vegetarian preferences.
Rennet Tablets: Typically “double strength”—use ¼ tablet per gallon. Crush tablet and dissolve completely in ¼ cup cool water before adding to milk. Ensure complete dissolution to prevent uneven coagulation.
Purchase rennet from cheesemaking suppliers rather than grocery store “junket tablets” intended for puddings—these contain insufficient enzyme concentration for proper cheese production.
Salt—Beyond Seasoning:
Salt serves multiple functions in cheesemaking: it enhances flavor perception, controls moisture through osmotic effects, and influences protein structure. The salt added during stretching penetrates the cheese matrix, while finishing salt applied before serving provides textural contrast and flavor burst.
Use pure salt without additives—avoid iodized salt (iodine can inhibit beneficial bacteria if you later explore cultured versions) or anti-caking agents.
Water Quality Matters:
Chlorine in municipal water can interfere with rennet activity and affect curd development. If your tap water tastes strongly chlorinated, use filtered water or let water stand uncovered overnight allowing chlorine to dissipate. For dissolving rennet, always use non-chlorinated water—the enzyme is chlorine-sensitive.
Préparation: The Alchemical Transformation
Fresh mozzarella creation unfolds through distinct phases, each representing specific biochemical processes that transform milk’s liquid structure into cheese’s solid architecture.
Phase 1: Acidification—Preparing the Protein Matrix
Step 1: Citric Acid Dissolution
In small bowl, dissolve 1½ teaspoons citric acid in ¼ cup cool, non-chlorinated water. Stir until powder completely disappears, creating clear solution. This pre-dissolution ensures even distribution throughout milk rather than concentrated pockets that would create uneven acidification.
Step 2: Milk and Acid Combination
Pour 1 gallon cold whole milk into large, heavy-bottomed pot (stainless steel preferred—avoid aluminum or cast iron which may react with acid). Add dissolved citric acid, stirring gently but thoroughly for 30 seconds. The acid immediately begins lowering milk’s pH from approximately 6.7 toward the target range of 5.2-5.4 where optimal protein coagulation occurs.
You’ll notice no visible change yet—the transformation remains molecular, invisible to casual observation. The citric acid is migrating through liquid, encountering casein micelles, beginning to neutralize their negative surface charges that normally keep them suspended and separated.
Step 3: Gentle Heating Begins
Place pot over medium-low heat. Insert cooking thermometer, ensuring bulb sits in milk without touching pot bottom (which conducts heat unevenly and may give false readings).
Heat slowly while stirring occasionally—target heating rate is approximately 5°F per minute. Patience here prevents scorching and ensures even temperature distribution throughout milk volume. As temperature climbs toward 90°F (32°C), you may notice milk appearing slightly thinner as fat globules liquefy more completely.
Phase 2: Coagulation—The Curd Emerges
Step 4: Rennet Addition—The Critical Moment
When milk temperature reaches exactly 90°F (32°C), remove pot from heat. This temperature matters enormously—too cold and rennet works sluggishly; too hot and proteins coagulate too rapidly, creating tough, grainy curds.
While stirring gently, add your dissolved rennet (¼ teaspoon liquid rennet or ¼ crushed tablet dissolved in ¼ cup cool water). Stir with up-and-down motion for 30 seconds, ensuring complete distribution. The rennet molecules are now dispersing through milk, seeking their target proteins, preparing to cleave peptide bonds.
Step 5: The Sacred Stillness
Stop all stirring. Cover pot with lid. Set timer for 5 minutes. Do not disturb—even gentle movement can disrupt the delicate curd structure forming on microscopic scale.
During this quiet interval, profound transformation occurs. The rennet’s chymosin enzymes are severing kappa-casein’s protective layer, exposing hydrophobic protein regions that aggregate with their neighbors. What was liquid is becoming solid, though you cannot yet see evidence.
I use these five minutes for meditation—standing near the warm pot, listening to the house’s quiet sounds, reflecting on the ancient tradition I’m participating in. Cheesemaking demands presence, pulling us away from distraction into full engagement with physical transformation.
Step 6: The Cut Test—Evaluating Set
After 5 minutes (potentially up to 10 minutes for less-fresh milk or cooler room temperatures), check for “clean break.” Insert clean knife or offset spatula at 45-degree angle into curd surface. Lift gently. If properly set, curd will crack cleanly like custard, with whey (yellowish-clear liquid) filling the crack. The curd should feel firm yet tender, like soft tofu or delicate custard.
If curd remains too liquid or breaks into particles rather than clean pieces, cover and wait 3-5 additional minutes. Under-set curd produces weak cheese that won’t stretch properly; patience ensures proper protein network formation.
Step 7: Cutting the Curd—Creating Surface Area
Using long knife that reaches pot bottom, cut curd into 1-inch grid pattern. Make parallel cuts in one direction, then perpendicular cuts creating checkerboard. Finally, angle knife and make diagonal cuts attempting to divide curds through their depth into roughly 1-inch cubes.
Perfect uniformity is impossible—strive for approximate consistency. Smaller pieces release whey faster; larger pieces retain more moisture. The 1-inch size balances whey expulsion with adequate moisture retention for stretchy, tender mozzarella.
This cutting increases surface area dramatically, accelerating whey separation. You’ll immediately see whey pooling between curd pieces—the cheese matrix is contracting, expelling the liquid component.
Phase 3: Cooking and Whey Separation
Step 8: Second Heating—Firming the Curd
Return pot to medium-low heat. Slowly warm curds and whey to 105°F (40°C), stirring very gently every minute or two. This gentle agitation prevents curds from matting together while encouraging additional whey expulsion.
As temperature rises, curds shrink noticeably, releasing more whey and becoming firmer. The heat further denatures proteins while reducing moisture content to proper level for stretching. If heated too rapidly or to excessive temperature (above 110°F), curds become tough and resistant to stretching—maintain patience and temperature control.
Step 9: Holding at Temperature
Once reaching 105°F, maintain this temperature for 5-10 minutes, stirring gently occasionally. The curds will continue firming, transforming from very soft and fragile to more resilient pieces that hold shape when lifted.
During this phase, I often taste a small curd piece—it should be pleasantly mild and milky, with slight tang from citric acid. The texture should feel slightly squeaky against teeth (a characteristic of fresh cheese curds) but not rubbery or hard.
Step 10: Whey Separation
Line colander with fine-mesh cheesecloth or butter muslin. Gently pour or ladle curds into lined colander, allowing whey to drain. The whey—that yellowish liquid—contains water-soluble proteins (albumin, globulins), lactose, minerals, and vitamins. Don’t discard it! Whey enriches bread doughs, provides protein in smoothies, nourishes gardens, or feeds to chickens or pigs if you have access to livestock.
Let curds drain 5-10 minutes. They’ll knit together somewhat, forming cohesive mass. If you’re aiming for maximum yield, gently press curds to expel additional whey, though this isn’t essential.
Phase 4: Pasta Filata—The Stretching Magic
This phase represents mozzarella’s defining characteristic—the hot water stretching that creates its unique texture. The process requires courage, heat tolerance, and willingness to work with very hot cheese.
Step 11: Microwave Method (Easiest for Beginners)
Transfer drained curds to microwave-safe bowl. Microwave on high for 1 minute. The curds will heat, becoming more pliable. Carefully drain any expelled whey.
Using rubber gloves or very quick hands (the curds are HOT—approximately 135-140°F/57-60°C), begin folding and kneading curds like kneading dough. They’ll start shiny, stretchy, and beginning to feel elastic.
If curds remain stiff and won’t stretch smoothly, microwave for additional 30-second intervals, kneading between heatings. You’re aiming for consistency of thick taffy—glossy, smooth, stretchy enough to fold repeatedly without tearing.
As you work, sprinkle in approximately 1 tablespoon salt, kneading to incorporate. The salt seasons cheese while affecting protein structure and moisture retention.
Step 12: Hot Water Method (Traditional Approach)
Alternatively, heat 2 quarts water to 170-180°F (77-82°C). Place drained curds in heat-safe bowl. Pour hot water over curds, submerging them completely. Let sit 1-2 minutes as heat penetrates.
Using wooden spoon or rubber gloves, begin folding and stretching curds under the hot water. They’ll gradually become pliable, glossy, and extensible. Pour off water and add fresh hot water if curds cool too much before achieving proper stretch.
This method more closely approximates traditional technique—cheesemakers would work curds directly in the hot whey. It provides more control over temperature and stretching process compared to microwave’s sudden heat bursts.
Step 13: The Stretching Technique
Whether using microwave or hot water method, the stretching motion follows similar principles:
- Fold curd mass in half
- Stretch apart gently but firmly
- Fold again at different angle
- Repeat 10-20 times
With each fold, the cheese becomes smoother, shinier, more homogeneous. Initially grainy texture transforms into porcelain-like smoothness. You’re aligning protein strands, creating the layered structure that gives mozzarella its characteristic pull when melted.
The cheese will become noticeably elastic—stretch a small piece and watch it elongate before breaking. This elasticity indicates proper gluten-like network formation from aligned casein proteins.
Work quickly—as cheese cools below approximately 135°F, it loses plasticity and becomes difficult to shape. If it cools too much, briefly reheat and continue stretching.
Step 14: Shaping Your Mozzarella
Once cheese achieves smooth, glossy, stretchy consistency (typically after 1-2 minutes of active stretching and kneading), it’s time to shape.
Traditional Balls: Pinch off golf ball to tennis ball-sized portions. Stretch and fold edges underneath, creating smooth top surface. The bottom will have slight gathering where you pinched—this becomes the less-visible side.
Bocconcini: Create marble-sized balls using same technique—perfect for salads or antipasti platters.
Burrata Alternative: Create thin sheet of stretched mozzarella, place fresh cream and torn mozzarella pieces in center, gather edges and pinch closed. This approximates burrata’s cream-filled center, though authentic burrata requires different technique.
Braided Mozzarella: Divide cheese into three equal portions, roll each into rope, braid together. This shows off to dramatic effect while providing interesting texture variations.
As you shape each piece, immediately transfer to bowl of cool water or light brine (1 teaspoon salt per cup of cool water). This rapid cooling “sets” the shape while keeping surface from drying.
Phase 5: Storage and Serving
Step 15: Cooling and Resting
Leave shaped mozzarella in cool water for 20-30 minutes. This completes cooling throughout mass and allows texture to stabilize. The cheese will firm slightly as it cools—what feels almost too soft when hot achieves perfect texture when cool.
Step 16: Short-Term Storage
Fresh mozzarella is best consumed within 24 hours but stores adequately 3-5 days refrigerated. For storage:
Store in fresh water or light brine, changing daily. This prevents surface drying and maintains tender texture. Some sources recommend plain water; others prefer light brine (1-2% salt solution). I find plain water produces very mild flavor, while brine adds subtle salinity and extends keeping quality slightly.
Remove from refrigerator 30 minutes before serving—cold mozzarella exhibits muted flavor and firmer texture. Room temperature mozzarella reveals its full milky sweetness and tender consistency.
Step 17: The Serving Ritual
Fresh mozzarella deserves simple presentation that honors its delicacy:
Drain mozzarella, pat very gently with clean towel. Tear (never cut—tearing reveals beautiful internal structure) into irregular pieces. Arrange on serving plate. Drizzle generously with excellent extra virgin olive oil. Sprinkle with flaky sea salt and cracked black pepper.
If you made mozzarella within past few hours and it’s still slightly warm, this is perfection—tender, milky, so fresh it hasn’t finished weeping its final tears of whey. If serving chilled mozzarella, allow that crucial 30-minute tempering period.
Petit Conseil Pro: The Secrets of Superior Mozzarella
Through years of mozzarella experimentation, countless batches ranging from magnificent to merely mediocre, I’ve accumulated insights that separate adequate cheese from transcendent creation.
The Temperature Sweet Spot
Success or failure often hinges on temperature precision. Invest in reliable instant-read thermometer—guessing creates inconsistent results. The critical temperatures:
- 90°F (32°C) for rennet addition—below this, coagulation slows; above it, proteins aggregate too quickly creating grainy texture
- 105°F (40°C) for second heating—firms curds without toughening
- 135-140°F (57-60°C) for stretching—the pasta filata window where cheese becomes plastic and moldable
The Milk Temperature Memory
If your milk was very cold (just from refrigerator), it takes longer to heat and may respond differently to rennet. For most consistent results, start with milk that’s been at room temperature 30-60 minutes. This moderates heating time and ensures more predictable coagulation.
The Stretch Test
Before committing to final shaping, test a small piece of heated curd. Can you stretch it thin enough to nearly see through without it tearing? Does it have glossy, smooth appearance? If yes, proceed with shaping. If no, continue stretching and kneading—under-stretched mozzarella exhibits grainy texture and tears rather than melts when heated.
The Acid Balance
The citric acid quick method produces reliable results but creates sharper flavor compared to cultured mozzarella. If you find the tang too pronounced, reduce citric acid slightly (try 1¼ teaspoons instead of 1½) in your next batch. If curds seem weak and won’t form proper mass, increase slightly (try 1¾ teaspoons).
Personal preference guides this adjustment—some prefer pronounced tang contrasting with mozzarella’s milkiness; others seek nearly sweet mildness.
The Whey Wisdom
That gallon of milk produces only about 1 pound of cheese—the remaining 7 pounds becomes whey. This isn’t waste but treasure. Sweet whey (from rennet-coagulated cheese like mozzarella) contains:
- Whey proteins (20% of milk’s protein)
- Lactose (milk sugar providing sweetness)
- B vitamins and minerals
- Minimal fat
Use whey in bread recipes (replace water or milk in equal amounts), smoothies (protein boost), soup stocks, or garden irrigation (gentle fertilizer). Refrigerated whey keeps 3-5 days, or freeze in ice cube trays for longer storage.
The Safety Consideration
The stretching phase involves genuinely hot cheese—burns are possible if working without gloves. Invest in heat-resistant rubber gloves rated to at least 400°F. These allow confident handling without pain or injury. The alternative—quickly working with bare hands—requires practice and high pain tolerance. There’s no shame in using gloves; professionals often do.
Accompagnements Suggérés: Celebrating Your Fresh Mozzarella
Homemade mozzarella’s delicate flavor and tender texture shine in simple applications that honor rather than overwhelm its essential character.
Insalata Caprese—The Classic Trinity
This iconic pairing achieves perfection through impeccable ingredient quality and balanced composition:
- Slice mozzarella into ½-inch rounds or tear into irregular pieces
- Slice ripe heirloom tomatoes (peak season August-September) into similar thickness
- Arrange alternating tomato and mozzarella slices on serving platter
- Tuck fresh basil leaves between slices
- Drizzle generously with extra virgin olive oil (use your best—this is the moment for it)
- Sprinkle with flaky Maldon sea salt and coarse black pepper
- Optional: aged balsamic vinegar (true Aceto Balsamico Tradizionale, if you’re feeling extravagant) adds sweet-tart complexity
The Caprese trinity represents ingredient synergy at its finest—each element enhancing others while maintaining individual identity. The tomato’s acidity cuts mozzarella’s richness; basil’s aromatic complexity bridges and unifies; olive oil enriches and emulsifies flavors.
Serve immediately after assembly—the salt draws moisture from tomatoes and cheese, creating beautiful puddles of tomato juice, whey, and olive oil that become communal sauce for crusty bread dipping.
Pizza Napoletana—Melting Glory
Your fresh mozzarella transforms pizza from fast food to transcendence:
For authentic Neapolitan approach, tear mozzarella into irregular pieces rather than shredding. Dot these pieces across pizza dough spread with San Marzano tomato sauce. The irregular pieces create pockets of intense cheese flavor contrasting with areas of pure tomato, rather than uniform cheese blanket.
Bake at highest possible temperature (500-550°F if your oven permits, or use pizza steel/stone for heat retention). Fresh mozzarella’s high moisture content means it releases water during baking—this creates slight pooling that concentrates into pockets of rich, creamy cheese after 8-10 minutes in inferno-like heat.
Add fresh basil leaves only after removing from oven—the residual heat wilts them perfectly without carbonization.
Mozzarella in Carrozza—Fried Cheese Sandwich
This Neapolitan street food showcases mozzarella’s melting properties:
- Sandwich thick mozzarella slice between two pieces of bread
- Dip entire sandwich in beaten egg seasoned with salt and pepper
- Press firmly so egg coats all surfaces
- Fry in olive oil over medium heat until golden and crispy, cheese melting into gooey interior
- Drain briefly on paper towels
- Serve immediately while interior is molten
The contrast—crunchy golden exterior yielding to stretchy, creamy cheese—demonstrates why mozzarella conquered world cuisine.
Fresh Mozzarella with Summer Vegetables
Beyond traditional applications, consider fresh mozzarella as creamy element in composed salads:
Peach and Prosciutto: Arrange mozzarella torn pieces with sliced ripe peaches, torn prosciutto, arugula, toasted hazelnuts. Dress with honey-lemon vinaigrette.
Roasted Pepper Antipasto: Combine mozzarella with roasted red peppers, olives, marinated artichokes, good anchovies. Dress with olive oil and red wine vinegar.
Grain Bowl Enhancement: Add torn fresh mozzarella to warm farro or quinoa bowls with roasted vegetables, creating protein boost and textural contrast.
Burrata Approximation
While not technically burrata (which requires special technique forming outer pouch filled with cream and cheese scraps), you can create similar effect:
As you stretch mozzarella, create very thin sheet. In center, place heavy cream mixed with torn fresh mozzarella pieces. Gather edges, pinching to seal. The result: creamy center surrounded by mozzarella skin that releases its filling when cut—burrata’s essential pleasure without specialized equipment.
The Cultural Context: Mozzarella’s Journey
Understanding mozzarella’s history and cultural significance deepens appreciation for the cheese you’re creating.
Origins in Southern Italy
Mozzarella emerged in Southern Italy’s Campania region, where water buffalo (Bubalus bubalis) imported from India centuries ago found ideal habitat in marshlands around Naples and Salerno. Buffalo milk—richer, fattier, more protein-dense than cow milk—produces Mozzarella di Bufala Campana DOP, the gold standard possessing protected designation of origin status.
The pasta filata technique likely developed accidentally—overacidified cheese curds falling into hot whey and discovered to be stretchable, shapeable, and delicious. Necessity and serendipity combined, as so often occurs in culinary innovation.
By the 16th century, mozzarella had become regional staple, though it remained relatively obscure outside Southern Italy until the 20th century. The cheese’s extreme perishability—even in Mediterranean climate, it keeps only 1-2 days without refrigeration—limited distribution and cultural diffusion.
Modern Global Conquest
Mozzarella’s worldwide proliferation parallels pizza’s global dominance. As pizza evolved from regional Neapolitan specialty to international phenomenon, demand for melting cheese with proper stretch and mild flavor drove mozzarella production worldwide.
Most commercial mozzarella uses cow’s milk rather than buffalo milk—easier to source, less expensive, more consistent. Low-moisture versions developed for superior shelf life and better melting properties on pizza. What’s gained in convenience and consistency often comes at cost of flavor and texture—commercial low-moisture mozzarella bears little resemblance to fresh mozzarella’s delicate character.
Your homemade version reconnects you with pre-industrial tradition, with cheese as it existed before optimization for mass production and extended distribution.
The Biochemistry Behind Tradition
Modern understanding of mozzarella’s chemistry validates traditional techniques while explaining why specific steps matter:
The pH lowering (acidification) to 5.1-5.4 serves multiple purposes: it causes casein proteins to approach their isoelectric point where they aggregate readily; it promotes calcium phosphate solubilization, reducing calcium binding between proteins; and it creates conditions where proteins can be heat-stretched without breaking.
The hot water stretching aligns casein proteins parallel to stress direction—similar to how pulling taffy aligns sugar chains. This alignment creates mozzarella’s characteristic “grain” and enables the cheese to melt into strings rather than puddles.
Understanding the science doesn’t diminish the magic—it amplifies it. You’re orchestrating molecular transformations through temperature, pH, and mechanical force, creating edible architecture from humble milk.
À Vos Tabliers: Your Mozzarella Journey Awaits
The pot waits on your stove. The milk rests in your refrigerator. Between you and fresh mozzarella—that glossy white sphere that will transform your caprese salads and elevate your pizzas—lies only commitment to process, attention to temperature, and willingness to plunge your hands into hot curds.
Your first batch may emerge slightly grainy, perhaps over-salted, maybe torn rather than smoothly stretched. This is the apprenticeship every cheesemaker serves. But even imperfect fresh mozzarella surpasses most commercial offerings, and each attempt builds tactile knowledge that recipes cannot fully convey—how properly set curd feels when cut, the specific glossiness indicating adequate stretch, the moment when kneading cheese transforms from work to pleasure.
I encourage you to document your cheesemaking—photograph your curds, note your temperatures, describe your results. This data tracking seems clinical but actually deepens engagement with process and accelerates skill development. By your fifth batch, you’ll notice dramatic improvements. By your tenth, you’ll be advising friends on their mozzarella struggles.
What questions arise as you contemplate your first batch? What excites or intimidates you about fresh cheesemaking? Share your experiences, your successes, your spectacular failures in the comments below. This community of home cheesemakers learns collectively, each person’s experiments contributing to shared knowledge.
The transformation from milk to cheese, from liquid to solid, from potential to actualized deliciousness—this ancient alchemy awaits your participation. The ingredients are simple. The process is learnable. The satisfaction is profound.
À vos tabliers et bon appétit!