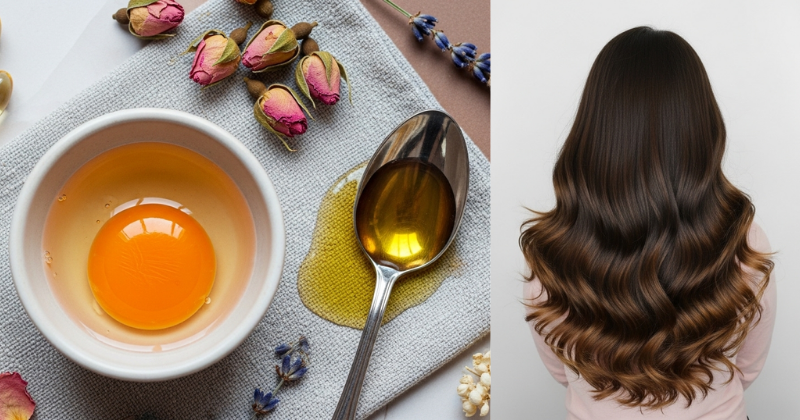
Dreaming of a voluminous, healthy mane without expensive salon treatments? Learning the secret to making a potent DIY Egg Mask For Thicker Hair is an achievable self-care practice that leverages kitchen staples to transform your hair health. This guide provides step-by-step guidance and scientific backing on how the simple egg can be your most powerful tool for achieving thicker, stronger locks. You will discover the protein power of the yolk and white, unlock easy recipes, and achieve visible gradual progress, making this an empowering and sustainable addition to your wellness topics routine.
🥚 Foundation First: The Science Behind the Egg Mask
Before you start mixing, understanding the scientific backing of why an egg mask works for achieving thicker hair will build your confidence with basic concepts and motivate your continued use.
H3: Building Confidence with Basic Concepts: Protein Power
Hair is primarily composed of a protein called keratin. When hair is damaged by heat, styling, or environmental factors, the keratin structure is weakened, leading to thinning, breakage, and dullness.
- Amino Acid Delivery: Eggs are rich sources of high-quality protein (the building blocks of hair). When applied topically, the proteins and amino acids temporarily fill in weak spots and gaps in the hair shaft, effectively strengthening the strand and increasing its perceived thickness.
- The Biotin Boost: Egg yolks are one of nature’s best sources of biotin (Vitamin B7). Biotin is essential for the production of keratin, directly supporting the growth of stronger, healthier hair from the follicle.
- Encouraging Reassurance for Beginners: This natural approach focuses on nourishing the existing hair and supporting future growth, offering an effective sustainable lifestyle change rather than a quick, superficial fix.
H3: Addressing Common Concerns: Yolk vs. White vs. Whole Egg
When making a DIY egg mask for thicker hair, knowing which part of the egg to use depends on your specific hair type and needs.
| Egg Component | Primary Benefit | Best For Hair Type | Why It Works |
| Egg Yolk | Moisture, Shine, Biotin | Dry, Brittle, Coarse Hair | High in fatty acids and vitamins, acts as an intense conditioner. |
| Egg White | Protein, Cleansing | Oily, Fine Hair | Pure protein helps strip excess oil and adds structure without weighing hair down. |
| Whole Egg | Balance, Strength | Normal, Combination Hair | Provides a balanced blend of protein and moisture. |
🍯 Section 2: Step-by-Step Process: Core DIY Egg Mask Recipes
Here are three core recipes for your DIY Egg Mask For Thicker Hair, broken down into manageable steps and tailored for different hair needs.
Recipe 1: The Ultimate Volumizing Mask (For Oily/Fine Hair)
This mask uses egg white and lemon to cleanse and add structure.
- Tool Requirements: One bowl, a whisk, and a clean shower cap.
- Ingredients: 2 Egg Whites, 1 tablespoon fresh Lemon Juice, 1 teaspoon Olive Oil (optional, for mid-shaft only).
- Step-by-Step Guidance (Actionable Language):
- Separate the egg whites into the bowl. Whisk lightly until slightly frothy.
- Mix in the lemon juice and olive oil (if using).
- Apply the mixture directly to the scalp and roots, gently massaging it in. Avoid coating the ends heavily, as this mask is root-focused.
- Leave on for 20 minutes. Rinse thoroughly with cold water.
Recipe 2: The Intense Repair and Growth Mask (For Dry/Brittle Hair)
This recipe leverages the moisturizing fats and biotin in the yolk.
- Ingredients: 2 Egg Yolks, 1 tablespoon Virgin Coconut Oil (melted), 1 tablespoon Honey.
- Timing and Planning Considerations: Coconut oil solidifies in cool temperatures, so melt it gently and ensure the mixture is still lukewarm (not hot!) before application.
- Step-by-Step Guidance (Actionable Language):
- Mix all ingredients into a smooth paste.
- Apply the mask generously from the mid-shaft to the ends of your hair, focusing on dry areas. You may apply a light layer to the scalp for the biotin boost.
- Cover your hair with a shower cap for 30-45 minutes to allow for deep penetration.
- Use this treatment once a week for gradual progress in hair repair.
3. Safety First: The Golden Rule of Rinsing
Regardless of the recipe, proper rinsing is the most critical step for success and for preventing the common “eggy smell” setback.
- Practical Tip: Never use hot water to rinse an egg mask. Hot water will cook the egg proteins, making them adhere tightly to the hair strands and causing a persistent odor that is difficult to remove.
- Actionable Language: Always rinse first with cool or lukewarm water until all mask residue is gone, then proceed with your regular shampoo and conditioner.
✨ Section 3: Advanced Strategies: Customizing Your Egg Mask
Once you’ve mastered the basics, you can customize your approach to the DIY Egg Mask For Thicker Hair by adding powerful, natural boosters.
H3: Enhancing Penetration and Scalp Health
Adding specific oils or herbs can amplify the nourishing effects of the egg mask.
- Creative Solutions (The Carrier Oil Boost): For deep conditioning, substitute or add a few drops of Castor Oil to your mask. Castor oil is rich in ricinoleic acid and is scientifically noted for its potential to stimulate circulation at the scalp, indirectly aiding the growth of thicker hair.
- Encourage Experimentation (Essential Oil Integration): Add 3-5 drops of rosemary or peppermint essential oil. Rosemary oil has been shown in studies to be as effective as some synthetic treatments for hair growth stimulation. Mix it thoroughly into the mask mixture before application.
H4: The Ultimate Pro Tip: Using the Mask as a Pre-Poo Treatment
Applying the egg mask before shampooing (“pre-poo”) is a great way to protect your hair from the drying effects of sulfates and surfactants in shampoo.
- Timing: Apply the mask 30 minutes to an hour before you plan to wash your hair.
- Benefit: The protein forms a protective barrier, reducing the stripping of natural oils while still allowing the nutrients to penetrate the hair shaft. This makes the DIY egg mask an essential part of a comprehensive hair care regimen. (Internal Linking Opportunity: Read our guide on “The Best Sulfate-Free Shampoos for Damaged Hair.”)
🚨 Section 4: Troubleshooting and Common Challenges
Even with the best intentions, you may encounter issues like residual smell or protein overload. These practical troubleshooting tips will guide you.
Featured Snippet Potential: “How often should I use a DIY egg mask for thicker hair without causing damage?”
You should use a DIY egg mask for thicker hair once or twice a week, depending on your hair’s needs. Protein treatments are highly beneficial, but excessive use (more than twice weekly) can lead to protein overload, making the hair feel brittle, dry, and prone to breakage. If your hair feels stiff or straw-like after application, reduce the frequency to once every two weeks.
Practical Troubleshooting Tips (Wellness Focus)
- Problem: Residual “eggy” smell persists after rinsing.
- Obstacle: Using hot water during the initial rinse, or not rinsing thoroughly enough before shampooing.
- Solution: Alternative Approaches: After the initial lukewarm rinse, use an acidic rinse. Dilute 1 tablespoon of apple cider vinegar (ACV) in 1 cup of cold water and pour it over your scalp and hair. Let it sit for 1 minute, then rinse. The ACV neutralizes the odor-causing alkaline residue and seals the cuticle for shine.
- Problem: My hair feels weighed down or greasy after the treatment.
- Obstacle: Using too much yolk (high fat content) on already fine or oily hair, or not rinsing thoroughly.
- Solution: Preventive Measures: Switch to the Egg White Volumizing Mask (Recipe 1). Ensure you are using a clarifying shampoo immediately after the mask to fully remove the oils and residues.
- Problem: Itchy scalp after application.
- Obstacle: Possible mild sensitivity or a reaction to a raw food application.
- Solution: Supportive, Non-Judgmental Language: If irritation occurs, discontinue use. Always perform a small patch test on your inner elbow before applying any DIY treatment to your scalp or face.
💇 Section 5: Maximizing Results: Sustainable Hair Health
Making a DIY Egg Mask For Thicker Hair is just one component of a larger picture focused on long-term hair health and sustainable lifestyle changes.
- Maintenance and Long-Term Considerations: Remember that topical treatments work best when supported by internal health. Ensure your diet includes sufficient protein, iron, and zinc. Regularly massage your scalp (using a serum or the mask itself) to stimulate blood flow, which feeds the follicles for the growth of thicker hair.
- Suggest Complementary Strategies: Combine your egg mask routine with heat protection. Always use a heat protectant spray before blow-drying or styling. Reduced damage means less need for intense repair, building upon your basic success. (Internal Linking Opportunity: Discover “Top 5 Foods to Eat for Stronger, Thicker Hair.”)
- Inspire Continued Growth and Learning: Keep a simple hair journal. Note the mask you used (yolk, white, or whole), the duration, and how your hair felt 24 hours later. This personalized data will help you fine-tune the recipe, turning an expert tip into a truly custom wellness regimen.
✅ Conclusion: Your Capability to Achieve Thicker Hair
You have now unlocked the simple, achievable power of the DIY Egg Mask For Thicker Hair. By applying the protein and biotin power of eggs, you are actively participating in the health and strength of your hair. This practice is empowering, cost-effective, and backed by the science of keratin health.
Embrace this rewarding self-care journey. Your capability to succeed in achieving thicker, more voluminous hair is waiting right in your refrigerator.
Will you start your journey today with the Ultimate Volumizing Mask (using egg whites) or the Intense Repair Mask (using egg yolks) to transform your hair?