Do your lips constantly feel dry and cracked, forcing you to reapply commercial balm dozens of times a day? Many store-bought lip care products contain drying alcohols or petroleum derivatives that offer only temporary relief. It’s time to take control! Learning this Lavender Lip Balm Easy Natural Recipe With Essential Oil is an achievable DIY project that will transform your lip care routine. Using just a handful of simple, natural ingredients, you can unlock the secret to deeply nourishing, long-lasting moisture, all while enjoying the soothing, therapeutic benefits of high-quality lavender essential oil. This comprehensive guide provides step-by-step guidance and emphasizes the cost-saving benefits and immense satisfaction of completion that comes from crafting your own premium self-care products.

💜 Section 1: Foundation First: The Power of Natural Lip Care
Before we dive into the melting and mixing, let’s build confidence by understanding why the components in this Lavender Lip Balm Easy Natural Recipe With Essential Oil are superior to synthetic alternatives.
H3: Building Confidence with Basic Concepts: The Lip Balm Trinity
Every effective natural lip balm relies on a trinity of ingredients working together. Understanding this helps you customize your approach later on.
- Waxes (Structure): Waxes, like beeswax or candelilla wax, provide the structure, stability, and necessary firmness. They also act as an occlusive barrier, preventing moisture loss.
- Butters (Nourishment): Butters, such as shea butter or cocoa butter, are rich in vitamins and fatty acids. They condition and heal dry, chapped lips, offering deep nourishment.
- Oils (Glide and Absorption): Liquid oils, like coconut or almond oil, improve the balm’s texture, making it smooth, spreadable, and easy to apply. They also aid in the absorption of nutrients.
- Encouraging Reassurance for Beginners: Mastering these three ratios is the key to mastering all DIY cosmetic recipes!
H3: Addressing Common Concerns: Why Lavender Essential Oil?
Why is lavender the perfect essential oil choice for a lip balm, and what is the scientific backing for its use?
- Soothing and Calming: Lavender is renowned for its calming aroma, but topically, it has powerful anti-inflammatory and soothing properties. This is crucial for healing the delicate, often irritated skin on the lips.
- Aromatic Benefits: The beautiful scent adds an aromatherapy element to your daily routine, promoting relaxation—a fantastic integration of wellness topics into your general lifestyle.
- Safety Consideration: When using any essential oil on the lips, you must use a high-quality, pure oil and ensure it is properly diluted (around $0.5 \text{ to } 1\%$) to prevent irritation. This recipe provides a safe dilution ratio.
👩🔬 Section 2: Core Methods: The Lavender Lip Balm Recipe
This is the central part of the guide: the step-by-step guidance for creating the perfect moisturizing Lavender Lip Balm Easy Natural Recipe With Essential Oil.
The Ultimate Lavender Lip Balm Recipe (Yields 10-12 Tubes)
| Ingredient | Quantity (by weight) | Function |
| Beeswax Pellets | $0.4 \text{ oz}$ ($12 \text{ grams}$) | Structure/Hardness (Wax) |
| Shea Butter (Unrefined) | $0.2 \text{ oz}$ ($6 \text{ grams}$) | Healing/Nourishment (Butter) |
| Sweet Almond Oil | $0.6 \text{ oz}$ ($18 \text{ grams}$) | Glide/Conditioning (Oil) |
| Vitamin E Oil | $1/4 \text{ tsp}$ | Antioxidant/Preservative |
| Lavender Essential Oil (High Quality) | $10 \text{ drops}$ | Scent/Soothing/Therapeutic |
Step-by-Step Guidance (Achievable Instructions)
- Prepare the Tools and Containers: Clean and sanitize all your equipment and lip balm tubes/tins. This is a crucial safety consideration to ensure your final product lasts. Gather your small funnel, small measuring cups, and a precise scale.
- Melt the Solids: Combine the beeswax, shea butter, and sweet almond oil in a small glass measuring cup or beaker. Place this into a saucepan with about $1 \text{ inch}$ of water (creating a double boiler setup).
- Gentle Melting: Heat the water over low heat until the beeswax is completely melted into the oils. Stir gently with a glass stirring rod or bamboo skewer. Crucial: Once completely melted, immediately remove the mixture from the heat.
- Cool Slightly and Add Sensitive Ingredients: Let the liquid mixture cool for about $2 \text{-} 3$ minutes. This timing and planning consideration is essential, as adding the essential oil while the mixture is too hot will cause the volatile aromatic compounds to evaporate.
- Final Mix and Pour: Add the Vitamin E oil and the $10 \text{ drops}$ of Lavender Essential Oil. Stir gently but thoroughly for 30 seconds. Quickly and carefully pour the hot liquid into your prepared lip balm tubes or small tins, using a small funnel for precision.
- Cure and Cap: Allow the balms to cool and harden completely at room temperature for at least 3-4 hours before capping them. You will achieve a smooth, firm surface.
💡 Section 3: Advanced Strategies: Customization and Long-Term Use
Once you’ve mastered the core Lavender Lip Balm Easy Natural Recipe, you can explore expert-level insights for variations, colors, and textures.
H3: Creative Solutions: Adjusting Balm Hardness and Texture
The perfect lip balm texture is subjective. You can easily modify the recipe to suit your preferences or the seasonal considerations of your region.
- For a Firmer Balm (Warmer Climates): Increase the beeswax by $10\%$ ($1.5 \text{ grams}$ extra). This creative solution ensures the balm doesn’t melt in your pocket during the summer.
- For a Softer, Pot-Based Balm: Decrease the beeswax by $10\%$ ($1.5 \text{ grams}$ less) and slightly increase the shea butter. This yields a softer, scoopable balm that is great for tins but less suitable for tubes.
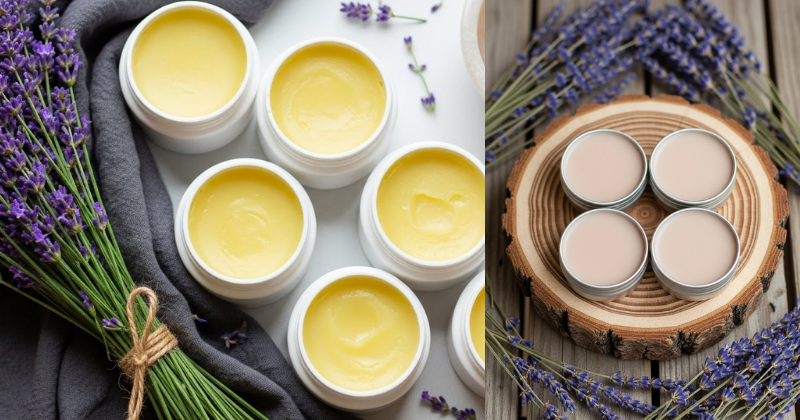
- Encourage Experimentation: Add a natural color tint! Stir in $1/8 \text{ tsp}$ of natural beet root powder for a soft pink tint, or $1/4 \text{ tsp}$ of mica powder for a subtle shimmer.
H3: Ways to Customize Approach: Complementary Essential Oils
While lavender is wonderful, you can blend other essential oil notes to enhance the therapeutic and aromatic experience.
- Healing Blend: For chapped lips, add 3 drops of Frankincense essential oil along with 7 drops of lavender. Frankincense is known for its skin-healing properties.
- Invigorating Blend: For a morning or daytime balm, use 5 drops of Lavender and 5 drops of Peppermint. Peppermint provides a cooling, plumping sensation and a bright scent. Crucial safety note: Do not exceed $5$ drops of Peppermint, as it can be irritating in high concentrations.
🛑 Section 4: Troubleshooting and Common Challenges
Even simple DIY projects can encounter issues. Here are practical troubleshooting tips for your Lavender Lip Balm Easy Natural Recipe With Essential Oil.
Featured Snippet Potential: “Why is my homemade lip balm gritty or grainy?”
Your homemade lip balm is gritty or grainy because the shea butter was not melted and cooled correctly. When shea butter cools too slowly, its fatty acids can crystallize, leading to a gritty texture. To prevent this, ensure your mixture is heated until all ingredients are liquid. After pouring into tubes, place the tubes in the refrigerator (or a cold room) to cool and solidify rapidly, bypassing the temperature range where crystallization occurs.
Practical Troubleshooting Tips (Home Tips & DIY Focus)
- Problem: The lip balm is too soft and waxy, sinking into the tube.
- Obstacle: Too much liquid oil or not enough wax, or the wax wasn’t fully melted.
- Solution: Encouragement for Setbacks: Gently scoop the balm back out and re-melt the batch. Add $0.1 \text{ oz}$ ($3 \text{ grams}$) of extra beeswax. Remelt completely, stir, and pour again, ensuring you cool quickly as described above.
- Problem: The finished balm smells faintly of burned oil.
- Obstacle: The solid ingredients were melted over direct, high heat.
- Solution: Always use the double boiler method (or a low-power microwave setting). High heat degrades the beneficial properties of the butters and oils and can lead to a scorched smell. You may need to discard and start fresh for best results.
- Problem: The color or scent of the essential oil is weak.
- Obstacle: The essential oil evaporated while the mixture was too hot, or the oil quality is poor.
- Solution: Ensure you are using a certified, high-quality essential oil and add it only after the melted mixture has cooled for $2 \text{-} 3$ minutes. You can add one extra drop of oil per tube, but never exceed $20$ drops total for the entire batch to maintain safe dilution.
🚀 Section 5: Maximizing Results: Sustainable Self-Care
Creating your own Lavender Lip Balm Easy Natural Recipe With Essential Oil is a fantastic cost-saving benefit and the beginning of a truly sustainable lifestyle change. Here’s how to maximize your success and inspire continued growth and learning.
- Maintenance and Long-Term Considerations: Store your unused tubes of DIY lip balm in a cool, dark place (like a refrigerator or pantry). The natural oils can go rancid over time, but keeping them cool will extend the shelf life to $1 \text{-}$ to $2 \text{-years}$—far longer than if they are kept in a hot car or pocket.
- Suggest Complementary Strategies: Combine this DIY approach with wellness topics focused on hydration. True lip hydration starts internally. Use your homemade balm externally, but ensure you are drinking sufficient water daily. This holistic approach shows how to build upon basic success. (Internal Linking Opportunity: Check out our article on “Hydration Tips for Glowing Skin and Lips.”)
- Inspire Continued Growth and Learning: Label and date every batch you make. This helps you track which essential oil blends, hardness ratios, and ingredients you prefer for future batches. This is a practical example of how to refine your craft and achieve consistent satisfaction of completion.
✅ Conclusion: Your Capability to Master DIY Lip Care
You have now unlocked the simple, elegant recipe for Lavender Lip Balm Easy Natural Recipe With Essential Oil. By following this step-by-step guidance, you have successfully created a superior, deeply moisturizing, and aromatically soothing product, proving that the best care is the care you make yourself. This accomplishment demonstrates your capability to succeed in mastering natural DIY beauty projects.
Embrace the beautiful scent and the smooth, long-lasting moisture of your handmade balm. Which essential oil blend will you experiment with for your next batch—healing Frankincense or cooling Peppermint?