Salut les gourmands!
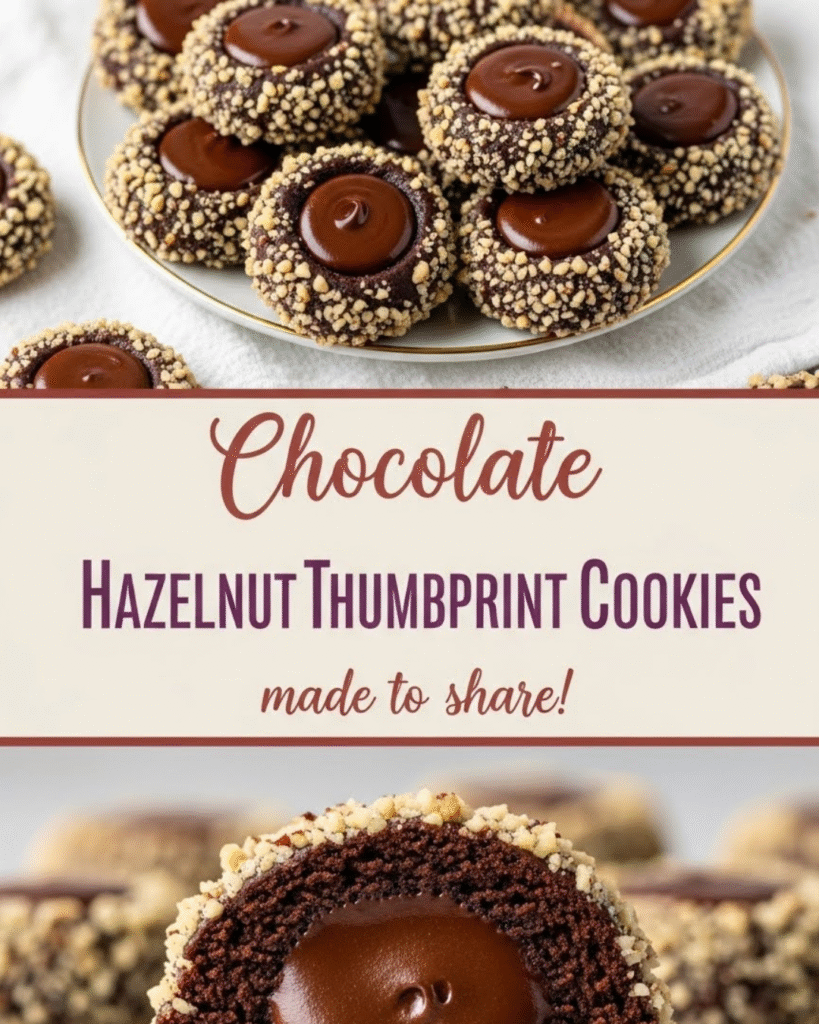
There is no cookie that screams “cozy holiday perfection” quite like a thumbprint cookie. I first encountered Chocolate Hazelnut Thumbprint Cookies during a snowy winter trip to Vienna. The scent of toasted hazelnuts and rich chocolate wafted from a small bakery, and I was hooked. It wasn’t just the flavor—it was the soft, crumbly shortbread base holding that glossy, dark chocolate filling. Since then, I’ve spent years perfecting a recipe that captures that gourmet bakery taste but remains simple enough for any home baker. This Chocolate Hazelnut Thumbprint Cookies recipe is an absolute winner, promising a chewy texture, intense hazelnut flavor, and a beautifully glossy filling. Get ready to transform your holiday baking game and discover how easy it is to create these stunning, flavorful treats.
🎄 Recipe Overview: The Perfect Chocolate Hazelnut Thumbprint Cookies
This recipe marries the classic buttery shortbread texture with the sophisticated pairing of rich chocolate and fragrant hazelnut. The process is achievable, yielding a cookie that is perfect for gift-giving or sharing with family.
| Feature | Detail |
| Prep Time | 30 minutes |
| Chill Time | 1 hour (minimum) |
| Bake Time | 12-15 minutes per batch |
| Yield | Approx. 3 Dozen Cookies |
| Difficulty | Easy to Moderate (Focus on dough consistency) |
| Goal | Achieve a tender, buttery cookie base with an intense chocolate hazelnut filling. |
This Home Tips & DIY project focuses on precise ratios and step-by-step guidance to ensure you achieve a cookie that is professional-grade in both appearance and taste.
🌰 Ingredients: Buttery Dough and Rich Filling
The ingredients list is divided into two sections: the buttery, nutty shortbread base and the smooth, decadent chocolate filling.
For the Hazelnut Cookie Base
- 1 cup (2 sticks) Unsalted Butter, softened to room temperature
- 1/2 cup Granulated Sugar
- 1 large Egg Yolk (room temperature is key!)
- 1 teaspoon Pure Vanilla Extract
- 1 3/4 cups All-Purpose Flour
- 1/2 teaspoon Kosher Salt
- 1/2 cup Finely Ground Hazelnuts (toasted, skin removed)
For the Chocolate Hazelnut Filling (Ganache)
- 4 ounces High-Quality Dark Chocolate (at least 60% cocoa), finely chopped
- 1/4 cup Heavy Cream
- 1 tablespoon Unsalted Butter
- 1/2 teaspoon Pure Hazelnut Extract (or more vanilla if unavailable)
- Garnish: 1/4 cup finely chopped toasted hazelnuts
H3: Ingredient Deep Dive: Toasting the Hazelnuts
The secret to a truly spectacular Chocolate Hazelnut Thumbprint Cookie lies in maximizing the flavor of the hazelnuts.
- Toasting is Non-Negotiable: Raw hazelnuts have a dull, flat flavor. Toasting them in the oven ($350^{\circ} \text{F}$ or $175^{\circ} \text{C}$ for $8 \text{-} 10 \text{ minutes}$) brings out their sweet, intense aromatic oils.
- Removing the Skin: The papery skins are bitter. After toasting, wrap the hot nuts in a clean kitchen towel and rub vigorously to remove the majority of the skins. This simple step ensures your cookie base is smooth and sweet.
- Grinding: Use a food processor to grind the toasted nuts into a fine flour. Like with our previous recipes, adding $1 \text{ tablespoon}$ of the recipe’s flour helps prevent the nuts from turning into paste.
👩🍳 Preparation: From Dough to Dazzling Dessert
Follow these detailed, numbered steps for the Chocolate Hazelnut Thumbprint Cookies, focusing on the crucial chilling and filling stages.
Step 1: Preparing the Shortbread Dough
- Cream Butter and Sugar: In a large bowl or stand mixer, beat the softened butter and granulated sugar until light and fluffy (about 3 minutes).
- Add Wet Ingredients: Beat in the egg yolk and vanilla extract until fully combined. The yolk adds richness and helps create that tender, melt-in-your-mouth texture.
- Mix Dry Ingredients: In a separate bowl, whisk together the flour, salt, and finely ground hazelnuts.
- Combine: Gradually add the dry ingredients to the wet, mixing on low speed until just combined. The dough will be soft.
Step 2: Chill and Shape
- Chill (Timing and Planning Considerations): Form the dough into a disk, wrap it in plastic wrap, and chill for at least 1 hour. This chilling time is vital for preventing the dough from spreading excessively during baking and for firming up the butter.
- Roll and Bake: Preheat your oven to $350^{\circ} \text{F}$ ($175^{\circ} \text{C}$). Scoop the chilled dough into $1 \text{-inch}$ balls and place them on a parchment-lined baking sheet.
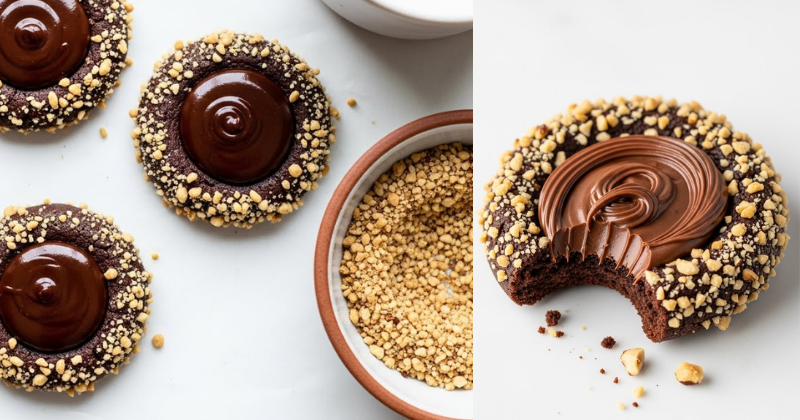
- The Thumbprint: Immediately after placing the balls, use a clean thumb or the back of a rounded teaspoon to gently press an indentation into the center of each cookie. Do not press all the way through!
- Bake: Bake for 12-15 minutes. The cookies should be set and lightly golden around the edges.
Step 3: Creating the Ganache Filling
- Heat Cream and Butter: Place the heavy cream and butter in a small saucepan over medium heat, or microwave until just simmering.
- Melt Chocolate: Place the finely chopped dark chocolate in a heatproof bowl. Pour the hot cream mixture over the chocolate. Let it sit for $5 \text{ minutes}$ without stirring.
- Whisk and Finish: Gently whisk the mixture, starting in the center and working your way out, until the ganache is smooth and glossy. Stir in the hazelnut extract.
- Fill and Garnish: Let the ganache cool for about $10 \text{ minutes}$ to thicken slightly. Spoon the ganache into the baked cookie indentations. Garnish immediately with the finely chopped toasted hazelnuts before the ganache sets.
🥜 Petit conseil pro: The Secret to a Perfect Indentation
The biggest challenge with Chocolate Hazelnut Thumbprint Cookies is keeping the center indentation intact throughout the bake.
- The Re-Press Trick: Often, the dough will puff up slightly during baking, causing the indentations to shrink. About 8 minutes into the baking time, quickly pull the cookie sheet out of the oven. Use the back of your measuring teaspoon again to gently and carefully re-press the indentations.
- The Benefit: This expert-level insight creates a deeper, wider well, allowing you to fill your Chocolate Hazelnut Thumbprint Cookies with more of that rich ganache, giving them a beautiful, professional finish. This ensures the satisfaction of completion when you see the final results.
☕ Accompagnements Suggérés: The Full Experience
These Chocolate Hazelnut Thumbprint Cookies are the star, but a few simple pairings make them unforgettable.
- Amaretto-Spiked Coffee: The almond notes in Amaretto beautifully complement the nutty, roasted flavor of the hazelnuts. A simple splash in your morning coffee turns this cookie into an elevated breakfast treat.
- Simple Vanilla Glaze: If you want a non-chocolate variation for some cookies, fill the indentation with a jam (like raspberry or apricot) before baking, then drizzle a thin vanilla glaze (confectioners’ sugar + milk) over the top after cooling.
- Hazelnut Liqueur Drizzle: For adult occasions, a tiny drizzle of Frangelico or another hazelnut liqueur over the warm ganache enhances the intensity of the hazelnut flavor. This general lifestyle/casual tip makes them a sophisticated dessert course.
🛑 Troubleshooting and Common Challenges: Saving Your Cookies
Don’t let setbacks discourage you! Even if your Chocolate Hazelnut Thumbprint Cookies don’t come out perfectly on the first try, there are solutions.
Featured Snippet Potential: “Why did my shortbread thumbprint cookies crumble when I pressed the center?”
Your shortbread thumbprint cookies crumbled when pressed because the dough was too cold or too dry. If the dough has been chilled for more than 1 hour, let the balls sit at room temperature for 10 minutes before shaping. Alternatively, if your flour measurement was heavy, the dough lacks enough binder. To fix current crumbling: Re-knead the dough briefly with $1 \text{ teaspoon}$ of melted butter or $1/2 \text{ teaspoon}$ of milk. This will bind the flour slightly and allow you to shape without cracking.
Practical Troubleshooting Tips (Baking Focus)
- Problem: The cookies taste bitter or scorched.
- Obstacle: The hazelnuts were toasted too long, or the oven temperature was too high.
- Solution: Preventive Measure: Always toast nuts visually! Pull them out the moment they turn fragrant and golden, not dark brown. For the current batch, use a creative solution by sprinkling confectioners’ sugar heavily over the finished cookies; this can sometimes mask mild bitterness.
- Problem: The ganache is too thin and runny.
- Obstacle: Too much cream was used, or the quality of the chocolate wasn’t high enough (low cocoa butter content).
- Solution: Alternative Approach: Reheat the ganache gently in the double boiler, and stir in $1 \text{ tablespoon}$ of extra chopped dark chocolate. Let it sit and cool slightly before refilling the cookies. The additional chocolate will add cocoa solids, thickening the mixture.
- Problem: The cookies spread too much and the indentations are gone.
- Obstacle: The butter was too warm when mixing, or the oven temperature was too low.
- Solution: Next time, be absolutely sure the butter is just soft, not shiny or melting. Also, chill the dough for the full time. If your current batch is too flat, consider topping them with an extra-thick layer of ganache and a large cluster of chopped nuts to visually balance the thinness.
📈 Maximizing Results: Year-Round Gourmet Baking
Mastering these Chocolate Hazelnut Thumbprint Cookies opens up a world of possibilities for gourmet sustainable lifestyle changes in your kitchen.
- Show How to Build Upon Basic Success: Flavor Variations: Use this same shortbread base recipe and swap the nuts and filling for different holidays! Try Pecan cookies with bourbon caramel filling, or Almond cookies with raspberry jam. This versatility is the ultimate baker’s cost-saving benefits tool.
- Maintenance and Long-Term Considerations: The baked, unfilled shortbread cookies freeze beautifully! Bake the cookies as directed, but skip the ganache. Once cooled, freeze them in an airtight container for up to $3 \text{ months}$. When you need a quick dessert, thaw them and fill them with freshly made ganache. This real-world scenario saves time during busy periods.
- Suggest Complementary Strategies: Making Homemade Nutella: Take your Chocolate Hazelnut Thumbprint Cookies to the next level by making your own homemade hazelnut spread (Nutella). The fresh, pure flavor of a homemade filling is unbeatable. (Internal Linking Opportunity: Check out “Our 5-Minute Homemade Vegan Nutella.”)
✨ Conclusion: Your Capability to Master Holiday Baking
You have now unlocked the simple, elegant recipe for the ultimate Chocolate Hazelnut Thumbprint Cookies. By learning the importance of toasting the nuts and mastering the shortbread technique, you have successfully achieved a cookie that is chewy, deeply flavorful, and holiday-ready. This success proves your capability to succeed in any culinary challenge.
Embrace the compliments coming your way! Will you be trying the Amaretto pairing tonight, or are you going to start a frozen batch for a hassle-free holiday treat?
À vos tabliers!
Bon appétit!