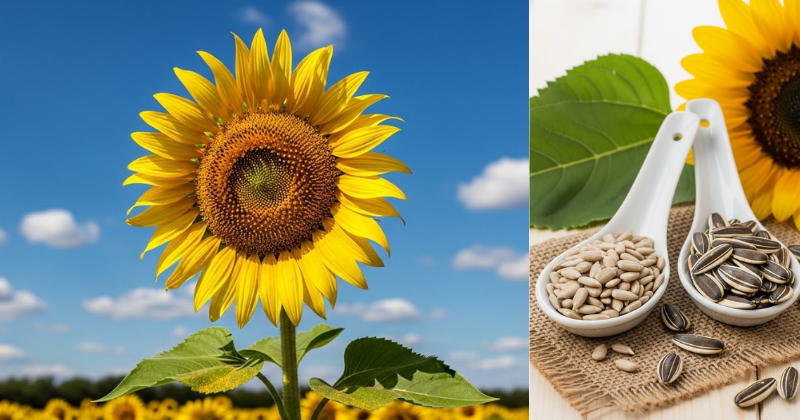
Dreaming of a vibrant summer garden dominated by giant, cheerful faces that track the sun? Learning HOW TO GROW SUNFLOWERS is one of the most rewarding and visually stunning Gardening Topics you can tackle. Sunflowers, or Helianthus annuus, offer incredible connection with nature, providing pollen for bees and seeds for birds. This comprehensive guide will give you the achievable, step-by-step guidance you need to transform a small seed into a magnificent, towering stalk bursting with life. Get ready to discover the secrets to nurturing and growing these iconic summer giants right in your backyard!
🌻 Section 1: Foundation First: Choosing Your Sunflower Variety
Before you start planting, it’s crucial to build confidence with basic concepts about the different types of sunflowers available. The variety you choose will dictate your planting method and overall garden design.
H3: Building Confidence with Basic Concepts: Types of Sunflowers
Not all sunflowers are created equal! They fall into three main categories based on size and function.
| Type | Height Range | Best Use | Key Benefit |
| Tall/Single-Stalk | $10 \text{-} 15 \text{ feet}$ | Seed production, dramatic backdrop | Ideal for harvesting seeds |
| Branching | $5 \text{-} 8 \text{ feet}$ | Continuous cut flowers, pollen for bees | Produces multiple flowers per plant |
| Dwarf | $1 \text{-} 3 \text{ feet}$ | Pots, borders, small gardens | Suitable for containers and small spaces |
- Encouraging Reassurance for Beginners: The giant varieties (like ‘Mammoth’) are exciting, but start with a manageable $6 \text{-} 8 \text{ foot}$ branching variety if this is your first time. This gives you more flowers and a higher success rate!
H3: Addressing Common Concerns: Sunlight and Soil Requirements
The most common concern about HOW TO GROW SUNFLOWERS is whether they need constant sun, and the answer is a resounding yes!
- Sunlight: Sunflowers require a minimum of 6 to 8 hours of direct sunlight every day. More sun equals bigger, stronger stalks and more robust flower heads.
- Soil: They are remarkably adaptable but prefer slightly acidic to neutral $\text{pH}$ (6.0 to 7.5). The most important factor is well-draining soil. Too much clay or standing water will cause rot and quickly ruin your chances of success.
☀️ Section 2: Step-by-Step Process: Planting and Initial Care
Sunflowers are best planted directly into the ground (direct sowing) as they have sensitive taproots that dislike being transplanted. Here is the clear, actionable language for getting them started.
1. Timing and Planning Considerations (When to Plant)
- The Golden Rule: Always wait until the danger of the last spring frost has completely passed.
- Optimal Planting: Start planting when the soil temperature is consistently $60^{\circ}\text{F}$ ($15^{\circ}\text{C}$), which is typically $1 \text{-} 2 \text{ weeks}$ after the last expected frost date in your regional variations.
- Succession Planting (Practical Tips): For continuous blooms from mid-summer until fall, plant a new batch of seeds every $2 \text{-} 3 \text{ weeks}$ until mid-July.
2. Sowing the Seeds (Core Methods)
- Prepare the Soil: Clear the area of weeds and amend the soil lightly with some compost for nutrition. Sunflowers are heavy feeders but thrive in soil that isn’t overly rich right away.
- Planting Depth: Dig small holes about $1 \text{ inch}$ deep.
- Seed Placement: Place $2 \text{-} 3 \text{ seeds}$ in each hole to ensure germination (a cost-saving benefit since seeds are cheap!).
- Spacing: Space giant varieties $18 \text{-} 24 \text{ inches}$ apart; space smaller/branching varieties $12 \text{ inches}$ apart.
- Watering: Water thoroughly immediately after planting.
3. Early Care and Thinning
- Pest Protection: Safety Consideration: Once seeds are planted, protect them from hungry squirrels or birds by covering the area with netting or a fine wire mesh until the seedlings are several inches tall.
- Thinning (Actionable Language): Once the seedlings reach $6 \text{ inches}$ tall, thin them by carefully snipping the weaker seedlings at the soil line, leaving only the strongest plant in each cluster. This ensures the remaining plant has maximum resources to grow tall.
🔩 Section 3: Advanced Strategies: Supporting Your Giants
Once your sunflowers reach $3 \text{-} 4 \text{ feet}$, they become very susceptible to strong winds and breakage. Implementing expert-level insights for support is key for towering success.
H3: Creative Solutions: Staking for Towering Blooms
Staking prevents the heavy flower heads from snapping the stalk during late summer storms.
- Preemptive Staking: Place stakes when the plants are still young ($1 \text{-} 2 \text{ feet}$ tall), rather than waiting until they are fragile giants. This avoids damaging the roots later.
- Staking Technique: Use a durable bamboo stake or a metal post inserted $6 \text{ inches}$ from the main stalk. Use soft ties (like strips of old cloth or professional plant ties) to loosely secure the stalk to the support. Creative Solutions: Use the loose ties to allow the stalk to sway slightly in the wind, which helps strengthen its structure naturally.
H3: Ways to Customize Approach: The Fertilization Schedule
Sunflowers are incredibly heavy feeders. Providing the right nutrients at the right time is essential for maximizing growth and seed production.
- Stage 1 (Leaf Growth): Once the plant is $2 \text{ feet}$ tall, apply a balanced fertilizer (like a 10-10-10) once a month to boost the initial structure.
- Stage 2 (Flowering/Budding): As buds begin to form (usually around $4 \text{-} 5 \text{ feet}$), switch to a fertilizer high in Potassium ($\text{K}$) and Phosphorus ($\text{P}$) (low-Nitrogen), like a 5-15-15. This encourages the formation of the large, magnificent blooms you want. Encourage experimentation with organic fertilizers like diluted fish emulsion or compost tea.
🐛 Section 4: Troubleshooting and Common Challenges
Even when you are following all the steps on HOW TO GROW SUNFLOWERS, nature can throw a curveball. Here are practical troubleshooting tips for common issues.
Featured Snippet Potential: “Why are the leaves on my sunflower turning yellow and dropping off?”
If the lower leaves on your sunflower are turning yellow and dropping, it is usually a sign of insufficient water or nitrogen deficiency. Sunflowers are exceptionally thirsty, especially the tall varieties in hot summer weather. Ensure you are providing deep, consistent watering at the base of the plant. If the yellowing is widespread and not just limited to the bottom leaves, it may indicate a nutrient deficiency, which can be fixed by applying a balanced liquid fertilizer.
Practical Troubleshooting Tips (Gardening Focus)
- Problem: My seedlings are being eaten right after they emerge.
- Obstacle: Pests like snails, slugs, or cutworms are attacking the young, tender stalks.
- Solution: Preventive Measures: Surround the base of the seedlings with crushed eggshells or copper tape to deter slugs. For cutworms, place a simple cardboard collar around the base of the stem, pushing it $1 \text{ inch}$ into the soil.
- Problem: The flower heads are drooping prematurely.
- Obstacle: Likely a combination of heavy heads and insufficient support.
- Solution: Encouragement for Setbacks: Immediately add a sturdy stake and secure the stalk. Provide a deep watering, as wilting from thirst can look similar to stem fatigue.
- Problem: My tall sunflower has many smaller heads instead of one giant one.
- Obstacle: You planted a branching variety, not a single-stalk variety.
- Solution: Alternative Approaches: Enjoy the continuous blooms! Branching varieties are excellent for cutting and bring an extra connection with nature to your garden, drawing more pollinators. If you want giants next year, ensure the seed packet explicitly states “single-stalk” or “giant.”
🌾 Section 5: Maximizing Results: Harvesting Seeds and Succession
The final stage of learning HOW TO GROW SUNFLOWERS is maximizing the harvest—both for seeds and for the enjoyment of the ecosystem benefits.
- Show How to Build Upon Basic Success:Harvesting the Seeds. Wait until the back of the flower head turns from green to yellow/brown, and the petals begin to dry and fall off. This signals the seeds are mature.
- Cut the head with about $1 \text{ foot}$ of stalk attached.
- Hang the heads upside down in a dry, well-ventilated area (like a garage or shed) for several weeks to cure completely.
- Once fully dry, rub the seeds out of the head using a stiff brush or your hands.
- Maintenance and Long-Term Considerations: Save Your Seeds! This provides the ultimate cost-saving benefit for next year’s garden. Store the cleaned, dried seeds in an airtight container in a cool, dark place (like the refrigerator or freezer) until spring. Remember to label the variety and the year!
- Suggest Complementary Strategies: Ecosystem Benefits: Leave a few flower heads standing in the garden throughout the fall and early winter. The dried heads provide an excellent food source for birds, like finches and chickadees, enriching your connection with nature during the colder months. (Internal Linking Opportunity: Read “Attracting Pollinators to Your Garden: Best Companion Plants.”)
✅ Conclusion: Your Capability to Nurture Giants
You are now equipped with the knowledge and achievable steps on HOW TO GROW SUNFLOWERS from tiny seeds to towering floral spectacles. By understanding the importance of full sun, consistent water, and that crucial phosphorus and potassium boost, you can expect massive blooms. This Gardening Topics project proves your capability to succeed in growing and nurturing one of the most cheerful plants on earth.
Ready to start planning your sunflower patch? Will you choose the giant single-stalk variety for seed harvesting or the branching variety for continuous cut flowers?