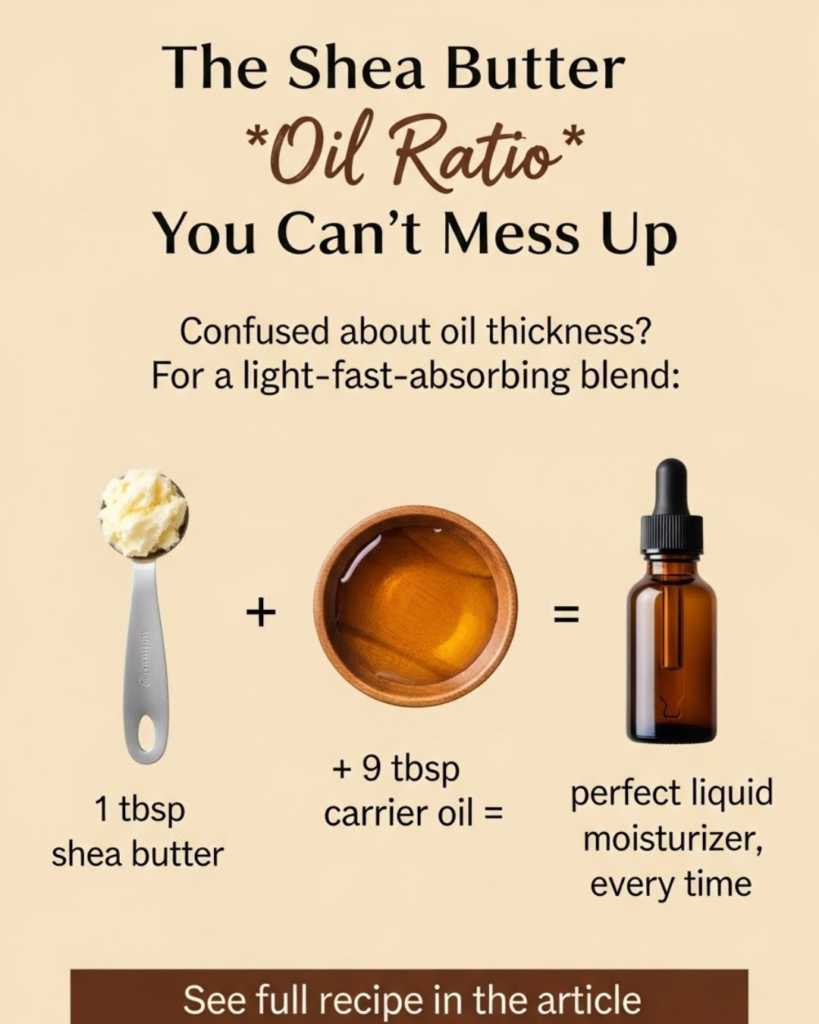
Have you ever tried to make whipped body butter only to end up with a gritty, greasy mess or a puddle of oil? You’re not alone! The secret to achieving that cloud-like, non-greasy texture everyone craves comes down to mastering The Shea Butter Oil Ratio. This definitive guide focuses on the perfect $75\% \text{ Shea Butter}$ to $25\% \text{ Liquid Oil}$ proportion—the ratio you truly can’t mess up. This is an achievable Home Tips & DIY project that will transform your skincare routine, offering a significant cost-saving benefit while tapping into crucial wellness topics. Get ready to discover how to unlock the smoothest, most luxurious whipped butter possible, maintaining scientific precision without the headache.
🛑 Important Disclaimer
Important Disclaimer: This article is for informational purposes only and should not replace professional advice. For health-related topics, consult healthcare providers. For financial or legal matters, seek qualified professional guidance. For safety procedures, verify current best practices and local regulations. Individual results may vary, and personal circumstances should always be considered when implementing any suggestions.
🧈 Section 1: Foundation First: Understanding the Ratio’s Science
To successfully make creamy body butter, you must build confidence with basic concepts about the properties of Shea Butter. The biggest mistake beginners make is using too much liquid oil, which permanently compromises the texture.
H3: Building Confidence with Basic Concepts: Why 75% Shea Butter is Key
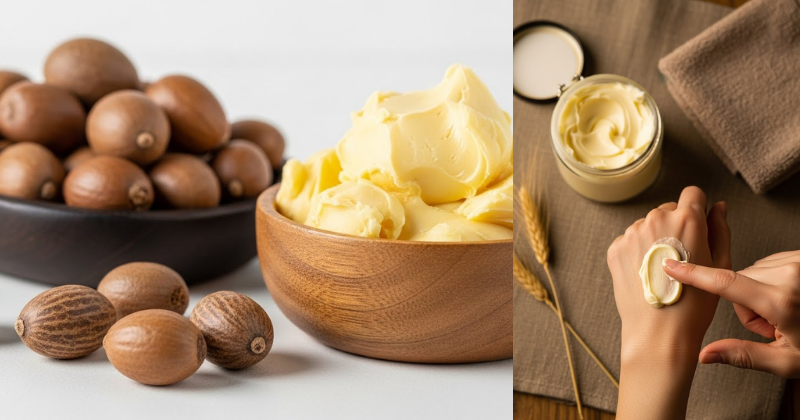
Shea Butter is naturally hard and structurally sound due to its high concentration of stearic and oleic fatty acids. However, it is also prone to crystallization (grittiness) when cooled slowly.
- The Role of Liquid Oil: The added liquid oil (the $25\%$ component) serves two primary functions: it makes the butter easier to whip by introducing fluid volume, and it lowers the overall melting point of the final product, helping the butter absorb better into your skin without feeling heavy.
- The Perfect Ratio: The ideal Shea Butter Oil Ratio is $3:1$ by volume or weight (e.g., $3/4 \text{ cup}$ Shea Butter to $1/4 \text{ cup}$ liquid oil, or $75 \text{g}$ Shea Butter to $25 \text{g}$ liquid oil). This proportion provides enough structural stability to maintain the whipped, airy volume while keeping the final product soft, spreadable, and non-greasy.
- Encouraging Reassurance for Beginners: This ratio is robust. Even if you slightly over-whip or under-whip, the resulting butter will still be creamy and effective, making this ratio the one you can’t mess up.
H3: Addressing Common Concerns: Refining vs. Unrefined Shea Butter
The quality of your core ingredient matters, influencing the final scent and texture of your whipped creation.
- Unrefined (Raw) Shea Butter: This is minimally processed, retains all its natural vitamins ($\text{A}$ and $\text{E}$), and has a characteristic smoky or nutty scent. It offers the maximum benefit for wellness topics due to its higher therapeutic compounds.
- Refined Shea Butter: This has been deodorized and bleached, removing the natural scent and color. It’s often preferred for making products intended for sensitive skin or when you want the scent of essential oils to dominate.
🥥 Section 2: Step-by-Step Process: Core Methods for Whipping
This achievable Home Tips & DIY project requires careful attention to melting and cooling times. Following these clear, actionable language steps will ensure a light, fluffy finish.
Ingredients and Tool Requirements
| Ingredient | Quantity (by Volume) | Tool Requirement |
| Shea Butter (Unrefined or Refined) | $3/4 \text{ cup}$ | Double Boiler setup or Heat-safe Bowl |
| Liquid Carrier Oil (Almond, Jojoba, etc.) | $1/4 \text{ cup}$ | Electric Hand Mixer or Stand Mixer |
| Optional: Essential Oils (Lavender, etc.) | $1 \text{ teaspoon}$ | Rubber Spatula |
| Optional: Vitamin E Oil (Preservative) | $1/2 \text{ teaspoon}$ | Airtight Jar (Sterilized) |
Step-by-Step Guidance (Core Methods)
- Melt and Combine (Safety Considerations): Set up a double boiler: place your heat-safe bowl over a pot of simmering water. Add the $3/4 \text{ cup}$ of Shea Butter and the $1/4 \text{ cup}$ of Liquid Carrier Oil. Melt the mixture completely until it is clear and uniform. Safety Consideration: Never melt the butter directly over high heat, as this can degrade its therapeutic properties.
- Rapid Cool-Down (Timing and Planning Considerations): Remove the bowl from the heat. This is the most crucial step to prevent crystallization (grittiness!). Place the bowl immediately into a larger bowl filled with ice and a small amount of water (an ice bath). Stir constantly for $5 \text{-} 10 \text{ minutes}$ until the mixture begins to solidify around the edges and turns opaque, resembling thick pudding.
- Whip to Perfection (Actionable Language): Remove the bowl from the ice bath. Using an electric hand mixer or stand mixer, begin whipping the mixture on medium-high speed. The color will lighten considerably, and the volume will increase as air is incorporated. Continue whipping for $5 \text{-} 8 \text{ minutes}$ until the butter achieves a light, airy, and fluffy consistency, much like soft meringue or frosting.
- Add Final Ingredients: Once fully whipped, add your essential oils and Vitamin E oil (if using). Whip for $30 \text{ seconds}$ more to fully incorporate.
- Store: Gently scoop the finished whipped butter into a sterilized airtight jar. Use your gorgeous, smooth product for up to $6 \text{-} 12 \text{ months}$ (depending on the freshness of your oils).
💎 Section 3: Advanced Strategies: Customizing the $25\%$ Oil Blend
While the $75:25$ Shea Butter Oil Ratio provides the structural integrity, the $25\%$ liquid oil blend is where you can apply expert-level insights and customize your approach for specific skin needs.
H3: Creative Solutions: Tailoring the Oil Profile
The liquid oil determines how quickly the butter absorbs and how deeply it nourishes.
| Skin Concern | Recommended Liquid Oil (25% portion) | Key Benefit and Absorption Rate |
| Acne-Prone/Oily Skin | Jojoba Oil or Grapeseed Oil | Low comedogenic rating (won’t clog pores); fast absorption. |
| Dry/Mature Skin | Avocado Oil or Olive Oil | Rich in Vitamin E and deep penetration; slower absorption. |
| Standard/Normal Skin | Sweet Almond Oil or Fractionated Coconut Oil | Well-balanced, moisturizing, and moderate absorption. |
H3: Encouraging Experimentation: Beyond the Basics
To truly transform this body butter, consider adding a secondary, harder butter, while maintaining the overall $75\% \text{ solid}$ to $25\% \text{ liquid}$ ratio.
- For Extra Hardness: Replace $1 \text{ Tablespoon}$ of the Shea Butter with $1 \text{ Tablespoon}$ of Cocoa Butter or Mango Butter. This makes the finished product slightly firmer and more heat-resistant, a crucial consideration for those in warmer climates.
- Adding an Emulsifier: For an even fluffier texture, you can add a small amount of starch. Petit conseil pro: Adding $1 \text{ teaspoon}$ of arrowroot powder or cornstarch during the final whipping phase reduces the oily feel on the skin, enhancing the light texture.
🥶 Section 4: Troubleshooting and Common Challenges
Even when using the perfect Shea Butter Oil Ratio, certain environmental or process issues can lead to imperfections. Here are practical troubleshooting tips for the common hurdles.
Featured Snippet Potential: “How do I fix grainy or gritty homemade Shea Butter body butter?”
To fix grainy or gritty homemade whipped Shea Butter, you must re-melt the entire batch using a double boiler until it is completely liquid and transparent. The grittiness is caused by slow cooling, which allows fatty acids to crystallize. After re-melting, immediately place the mixture into an ice bath and stir constantly until it reaches the thick, opaque consistency of pudding. Then, whip it vigorously using an electric mixer. The rapid cooling prevents crystallization, ensuring a smooth finish.
Practical Troubleshooting Tips (DIY Focus)
- Problem: The whipped butter collapses and is too soft.
- Obstacle: The ratio is off (too much liquid oil), or the storage temperature is too warm.
- Solution: Alternative Approaches: If the room is warm, store the butter in the refrigerator. To fix the texture, re-melt the batch and add $1 \text{-} 2 \text{ Tablespoons}$ of extra solid Shea Butter (or Cocoa Butter) to increase the $75\%$ solid portion, then repeat the rapid cooling and whipping process.
- Problem: The butter feels thick and too hard to spread.
- Obstacle: The ratio is too high in solids (too much Shea Butter).
- Solution: Encouragement for Setbacks: Re-melt the batch and add $1 \text{-} 2 \text{ Tablespoons}$ of your liquid oil to increase the $25\%$ liquid portion. Repeat the cooling and whipping steps. This demonstrates how easily you can adjust the Shea Butter Oil Ratio to achieve your desired consistency.
- Problem: The finished product smells slightly rancid after a few months.
- Obstacle: Oxidation of the liquid carrier oils (e.g., Almond Oil).
- Solution: Preventive Measures: Always add $1/2 \text{ teaspoon}$ of Vitamin $\text{E}$ oil to the recipe; it acts as an antioxidant, extending the shelf life of your other oils. Store the butter in a cool, dark location away from heat and direct sunlight.
✨ Section 5: Maximizing Results: Next Level Applications
Once you have mastered The Shea Butter Oil Ratio, you can leverage this knowledge to create an entire range of products, building upon this basic success and ensuring maintenance and long-term considerations for your skin.
- Show How to Build Upon Basic Success: Body Butter Bars. For a zero-mess, travel-friendly solid product, simply increase the structure by adjusting the Shea Butter Oil Ratio to $60\% \text{ Shea Butter}$ to $20\% \text{ Liquid Oil}$ and adding $20\% \text{ Beeswax}$. Melt all ingredients and pour them into a silicone mold; skip the whipping. (Internal Linking Opportunity: Read “Melt-and-Pour Solid Lotion Bar Recipes.”)
- Maintenance and Long-Term Considerations: Layering for Maximum Hydration. The best time to apply your whipped Shea Butter is immediately after showering or bathing, while your skin is still damp. The butter locks in the water remaining on your skin, providing superior, long-lasting hydration—a cornerstone of effective self-care.
- Suggest Complementary Strategies: Gifting and Personalization. The low cost-saving benefits of this recipe make it perfect for gifting. Create custom batches using different essential oils (like peppermint for feet or citrus for morning use) and label them uniquely. This is a great example of sustainable lifestyle changes that bring joy.
✅ Conclusion: Your Capability to Unlock Smooth Skin
You have successfully demystified the science of texture and mastered The Shea Butter Oil Ratio of $75\% \text{ solid}$ to $25\% \text{ liquid}$. This fundamental formula guarantees a light, creamy, and non-greasy whipped butter every time, proving your capability to succeed in sophisticated Home Tips & DIY skincare. You can now confidently transform your raw ingredients into a luxurious product, saving money and nurturing your skin.
Ready to start whipping your smoothest batch yet? Which specialized liquid oil—Jojoba or Avocado—will you choose to customize your blend?