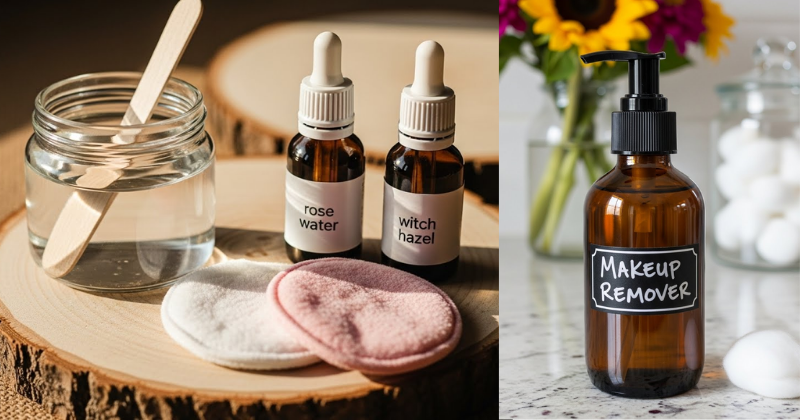
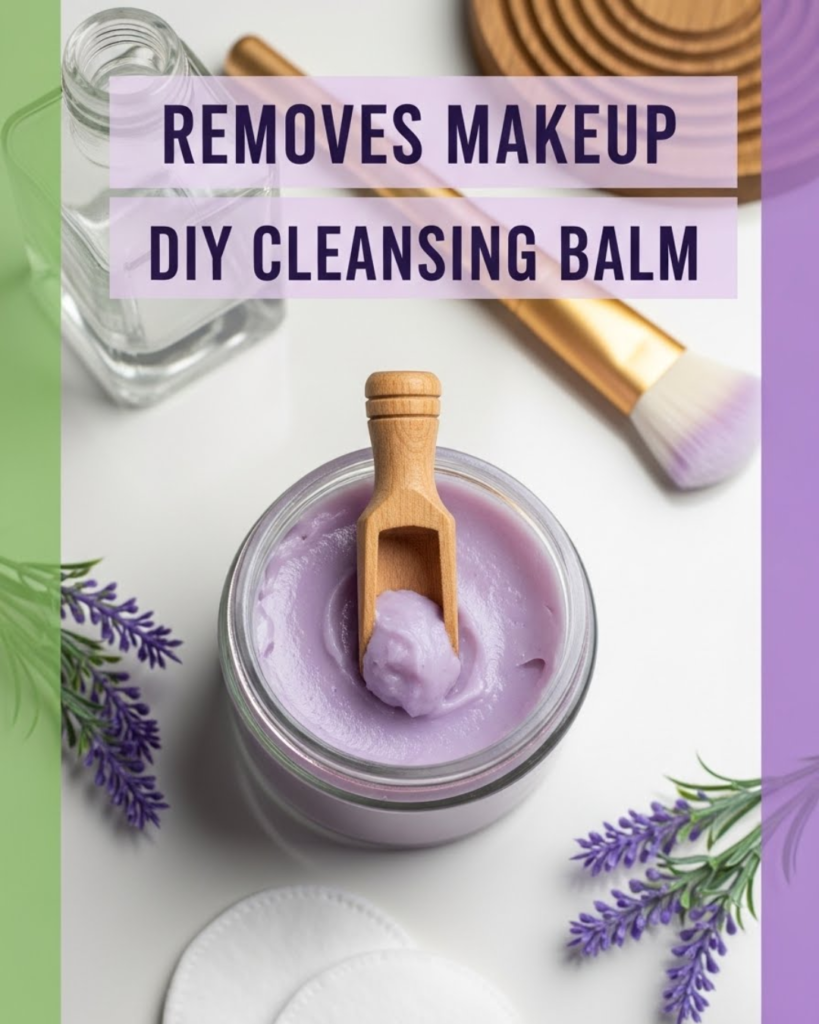
Are you tired of expensive store-bought cleansers that strip your skin and leave it feeling tight and dry? It’s time to revolutionize your nighttime routine! Learning how to make a DIY cleansing balm that removes makeup efficiently is a game-changing Home Tips & DIY project. This simple formula leverages the power of oil cleansing, melting away stubborn makeup, sunscreen, and daily grime while deeply nourishing your skin. This guide provides the achievable, step-by-step guidance you need to transform your skincare into a soothing act of self-care. Get ready to discover how to create your own luxurious, cost-effective balm and achieve naturally glowing, hydrated skin.
🛑 Important Disclaimer
Important Disclaimer: This article is for informational purposes only and should not replace professional advice. For health-related topics, consult healthcare providers. For financial or legal matters, seek qualified professional guidance. For safety procedures, verify current best practices and local regulations. Individual results may vary, and personal circumstances should always be considered when implementing any suggestions.
🌸 Section 1: Foundation First: The Science of Oil Cleansing
To successfully make a DIY cleansing balm, you must first build confidence with basic concepts about the scientific backing of oil cleansing. This method, often part of the famous Korean double-cleanse routine, is highly effective because “like dissolves like.”
H3: Building Confidence with Basic Concepts: What is a Cleansing Balm?
A cleansing balm is a solid or semi-solid product that, upon contact with warm skin, melts into a luxurious oil. This oil is designed to dissolve oil-based impurities.
- The Chemistry of Removal: Makeup, sunscreen, and sebum (skin oil) are oil-soluble. Water-based cleansers struggle to break these down. Our DIY cleansing balm uses a blend of gentle oils that bond with and lift these impurities without stripping the skin’s natural moisture barrier.
- The Magic Ingredient: The key component that elevates a simple oil mix to a balm is a wax or emulsifier, which gives it that solid texture and allows it to rinse cleanly away. For beginners, we focus on natural waxes for stability.
- Encouraging Reassurance for Beginners: This is a simple melt-and-pour project. If you can melt chocolate, you can make this balm!
H3: Addressing Common Concerns: Wax vs. Emulsifier
To create a stable balm that removes makeup effectively, you need a solid component.
- Natural Wax Option (Stable Balm): Candelilla or Beeswax are excellent stabilizers. Beeswax provides a firmer balm and is widely available. This is the simplest Home Tips & DIY option.
- The Emulsifier Option (Wash-Off Balm): Polysorbate 80 or another gentle, non-ionic emulsifier is added to commercial balms. This allows the balm to turn milky and rinse away easily with water. For simplicity and purity in your first batch, we recommend starting with the wax-based formula and removing the balm with a warm, damp cloth.
🍯 Section 2: Step-by-Step Process: Core Methods for the Basic Balm
This is the essential formula to create a luxurious, stable, and highly effective DIY cleansing balm. We focus on the ratio of oil to wax.
Essential Ingredients and Tool Requirements
| Ingredient | Quantity (by Weight) | Purpose | Tool Requirement |
| Carrier Oil (Sweet Almond or Jojoba) | $70 \text{g}$ ($\approx 70\%$) | Melts away makeup and nourishes skin | Double Boiler or Heat-Safe Glass Bowl |
| Shea Butter (Refined or Unrefined) | $20 \text{g}$ ($\approx 20\%$) | Adds slip, creaminess, and conditioning | Digital Scale (Recommended for accuracy) |
| Beeswax (or Candelilla Wax) | $10 \text{g}$ ($\approx 10\%$) | Solidifies the balm and prevents leakage | Small Jars/Containers (Sterilized) |
| Optional: Vitamin E Oil | $1/2 \text{ teaspoon}$ | Antioxidant (extending shelf life) | Stirring Rod or Spoon |
Note on Ratios (H4): The $70:20:10$ ratio of Oil:Butter:Wax provides a perfect balance—soft enough to melt easily on the skin yet firm enough to hold its shape at room temperature.
Step-by-Step Guidance (Core Methods)
- Melt the Solids (Safety Considerations): Set up a double boiler: place your heat-safe glass bowl over a pot of gently simmering water. Add the $20 \text{g}$ of Shea Butter and the $10 \text{g}$ of Beeswax (or Candelilla).
- Combine Oils: Once the wax and butter are nearly melted, add the $70 \text{g}$ of Carrier Oil. Stir constantly until the entire mixture is completely clear and fully liquid. Safety Consideration: Do not overheat the oils, as this degrades their beneficial properties.
- Cool Slightly (Timing and Planning Considerations): Remove the bowl from the heat. Allow the mixture to cool for $2 \text{-} 3 \text{ minutes}$ off the heat.
- Add Sensitive Ingredients (Actionable Language): Stir in the optional Vitamin E Oil and any essential oils now. Adding them while the mixture is still hot will cause the delicate oils to degrade or evaporate.
- Pour and Set: Carefully pour the liquid balm into your sterilized containers. Do this slowly to avoid trapping air bubbles.
- Cure: Allow the balm to set completely at room temperature for at least $3 \text{-} 4 \text{ hours}$ (or overnight). Practical Tips and Shortcuts: You can speed this up by placing the jars in the refrigerator after they have cooled for about $30 \text{ minutes}$ at room temperature. The balm is ready when it is opaque and solid.
🌿 Section 3: Advanced Strategies: Customizing for Your Skin Type
The true power of a DIY cleansing balm is the ability to customize your approach by choosing oils specifically suited to your skin’s needs, transforming this into true self-care.
H3: Creative Solutions: Tailoring Carrier Oils
The $70\%$ carrier oil component is your opportunity to apply expert-level insights for targeted results.
| Skin Type | Recommended Carrier Oil (70% portion) | Key Benefit |
| Acne-Prone/Oily | Jojoba Oil or Grapeseed Oil | Closely mimics skin sebum (Jojoba); low comedogenic rating (won’t clog pores). |
| Dry/Mature | Sweet Almond Oil or Apricot Kernel Oil | Rich in Oleic acid ($\omega \text{-} 9$) and Vitamin E; deeply moisturizing and soothing. |
| Sensitive/Irritated | Calendula-infused Oil or Chamomile Oil | Strong anti-inflammatory properties; calming and gentle. |
H3: Encouraging Experimentation: The Therapeutic Essential Oils
While essential oils are optional, they can provide powerful boosts that elevate your balm from simple cleanser to true Wellness Topics support.
- Lavender: The ultimate soothing scent. Ideal for night-time self-care routines.
- Frankincense: Known for its anti-aging and skin-regenerating properties.
- Tea Tree: If you have mild blemishes, a few drops of Tea Tree can provide anti-bacterial support. (Internal Linking Opportunity: Learn about “The Top 5 Essential Oils for Oil Cleansing.”) Encourage experimentation: Start with low concentrations (no more than $1 \text{ drop}$ per $1 \text{ oz}$ of balm).
🌡️ Section 4: Troubleshooting and Common Challenges
Making your own DIY cleansing balm is easy, but achieving the perfect texture and stability requires minor adjustments based on your climate.
Featured Snippet Potential: “Why is my homemade cleansing balm gritty or grainy?”
A homemade cleansing balm often becomes gritty or grainy when butters (like Shea Butter) cool down too slowly. This slow cooling causes the fatty acids to crystallize into tiny, hard granules. To fix this, simply re-melt the entire balm mixture until it is fully liquid and transparent. Then, place the liquid mixture into an ice bath and stir constantly until it begins to solidify and turn opaque (like thick pudding). Once it reaches this consistency, scoop it into the jars and let it set at room temperature.
Practical Troubleshooting Tips (DIY Focus)
- Problem: The balm is too soft and runny.
- Obstacle: Not enough wax for your ambient room temperature.
- Solution: Alternative Approaches: Re-melt the batch and add an additional $2 \text{g}$ of beeswax. The wax ratio might need to be increased slightly for very warm climates.
- Problem: The balm is too hard to scoop.
- Obstacle: Too much wax, or your base oil is too hard (e.g., using Coconut Oil).
- Solution: Encouragement for Setbacks: Re-melt the batch and add $5 \text{-} 10 \text{g}$ more liquid carrier oil. This increases the total oil percentage, making the final product softer and easier to use.
- Problem: Eyes sting when using the balm.
- Obstacle: Using too much or the wrong type of essential oil.
- Solution: Preventive Measures: Next time, skip the essential oils entirely, or use only a small amount of Lavender or Frankincense, which are gentler. Do not use strong oils like Peppermint or Eucalyptus near the eyes.
🧖♀️ Section 5: Maximizing Results: Application and Storage
The final step is mastering the technique of using your DIY cleansing balm to ensure it fully removes makeup and leaves your skin feeling incredible.
- Show How to Build Upon Basic Success: The Double Cleanse Technique. For truly clean, balanced skin, follow your oil cleanse with a gentle, water-based foaming cleanser. The balm removes the oil-based grime; the foam removes the last traces of residue. This is the gold standard for achieving clear skin and a perfect maintenance and long-term consideration.
- Application Method: Scoop out a dime-sized amount of the balm with clean, dry hands. Gently rub the balm between your palms until it melts into an oil. Apply the oil to a dry face (crucial!) and massage it in circular motions for $60 \text{ seconds}$, focusing on areas with heavy makeup like eyes and lips.
- Maintenance and Long-Term Considerations: Storage and Shelf Life. Because this balm contains no water, it is highly stable. The Vitamin $\text{E}$ oil acts as an antioxidant, helping the base oils stay fresh. Store the balm in a dark, airtight container away from direct sunlight. It should last $6 \text{-} 12 \text{ months}$, offering incredible cost-saving benefits over commercial products. (Internal Linking Opportunity: Read about “How to Naturally Preserve Your DIY Skincare Products.”)
✅ Conclusion: Your Capability to Nurture Your Skin
You have successfully learned the simple, luxurious process of how to make a DIY cleansing balm that removes makeup efficiently while conditioning your skin. By understanding the $70:20:10$ ratio of Oil:Butter:Wax, you have demonstrated your capability to succeed in creating high-quality, personalized skincare. This powerful Home Tips & DIY creation empowers you to nurture your skin with pure, intentional ingredients.
Ready to start melting your ingredients? Which specialized oil—Jojoba or Sweet Almond—will you choose for your first batch tailored to your skin type?