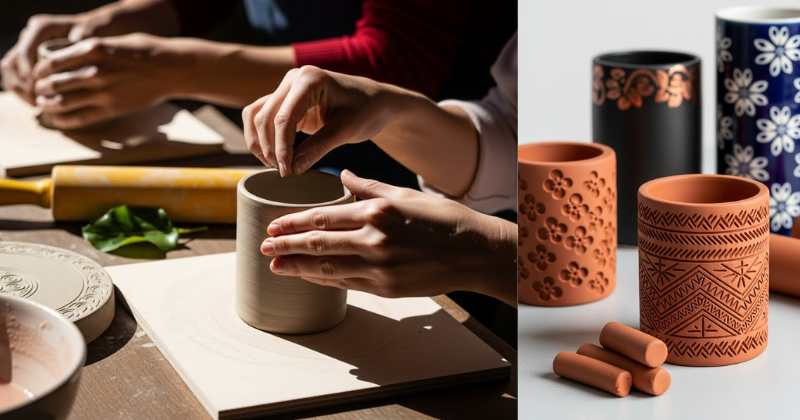
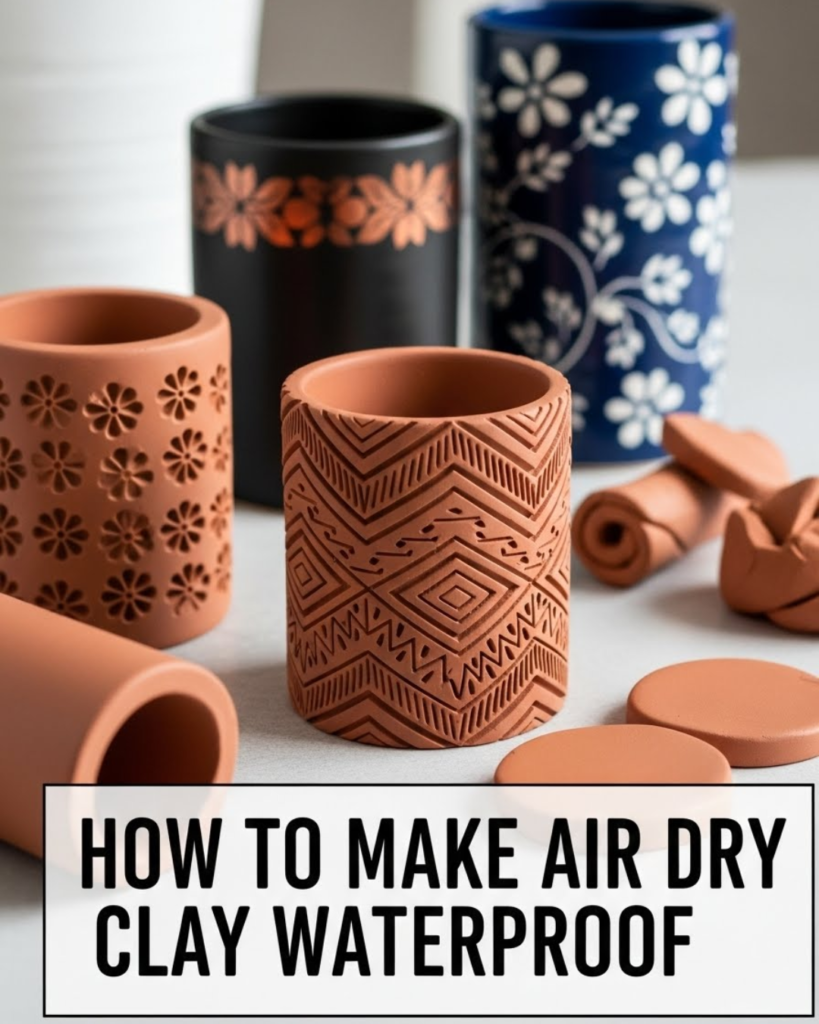
You’ve spent hours shaping, carving, and painting a beautiful piece of air dry clay, only to realize the final product is susceptible to moisture and damage. If you’ve ever wondered HOW TO MAKE AIR DRY CLAY WATERPROOF, you’ve come to the right place. This comprehensive Home Tips & DIY guide provides achievable, step-by-step guidance to effectively seal your projects. By choosing the right sealant and applying it correctly, you will transform your delicate crafts into durable, long-lasting items, unlocking the satisfaction of completion and the freedom to use your creations anywhere.
🎨 Section 1: Foundation First: Understanding Air Dry Clay’s Weakness
Before learning HOW TO MAKE AIR DRY CLAY WATERPROOF, we must address the fundamental nature of the material itself. Air dry clay is a low-fire or non-fire clay that cures through evaporation, not vitrification (the glass-forming process in a kiln). This distinction is key to understanding its vulnerability.
H3: Building Confidence with Basic Concepts: Why Clay isn’t Waterproof
- Porous Nature: Unlike kiln-fired ceramics, air dry clay remains highly porous after curing. The clay contains microscopic channels and voids where the water evaporated, leaving the material sponge-like and able to absorb moisture readily.
- Reactivation: Because it isn’t fired, prolonged exposure to water will cause the clay particles to swell, soften, and potentially revert to a muddy state. Even high-quality air dry clay requires proper sealing to prevent this breakdown.
- The Goal: Our objective is not true ‘waterproofing’ (like glass or fired ceramics, which are non-porous) but rather effective water resistance. The sealants we use will create a protective barrier on the surface that blocks water absorption.
H3: Addressing Common Concerns: Cure Time and Preparation
The biggest mistake beginners make is rushing the sealing process. Encouraging reassurance for beginners is key here: patience is the crucial first step to long-term success.
- Complete Cure Time: Your air dry clay piece must be $100\%$ dry before attempting to seal it. Depending on the thickness, this can take $24$ to $72$ hours, or sometimes even longer. Sealing a damp piece traps internal moisture, leading to mold or cracking later.
- Surface Prep: Before sealing, ensure the surface is clean, smooth, and dust-free. Lightly sanding the surface with fine-grit sandpaper ($220 \text{ grit}$ or higher) and wiping it down with a dry, soft cloth will ensure optimal sealant adhesion.
🛡️ Section 2: Step-by-Step Process: Core Sealing Methods
There are three primary methods to effectively learn HOW TO MAKE AIR DRY CLAY WATERPROOF, each utilizing a different type of sealant to achieve water resistance.
Step 1: Choosing Your Sealant (Actionable Language)
Your choice of sealant should align with the desired finish and the item’s intended use.
- Option 1: Polyurethane Varnish (Maximum Protection): This is the strongest choice for items requiring heavy-duty water resistance (e.g., decorative outdoor items or coaster backs). Choose a water-based polycrylic (a type of polyurethane) for easier cleanup and a non-yellowing finish.
- Option 2: Acrylic Sealer Spray (Ease and Speed): A clear acrylic spray varnish is fast, easy to apply, and offers excellent protection against splashes and humidity. This is ideal for sculptures or indoor items.
- Option 3: Epoxy Resin (High Gloss and Durability): Epoxy resin offers the highest level of water resistance and a glassy, durable finish. While more complex, it is unparalleled for items that mimic ceramics, like jewelry or shallow decorative trays.
Step 2: Application for Polyurethane or Brush-On Sealants
This core method ensures deep penetration and a strong barrier.
- Tool Requirements: Use a clean, synthetic brush (soft bristles prevent streaks).
- Thin First Coat: Apply a very thin, even layer to the entire surface. This coat penetrates the porous clay. Allow it to dry completely—refer to the product label, but usually $2 \text{-} 4 \text{ hours}$.
- Building the Barrier: Apply a minimum of three full coats, allowing sufficient drying time between each. Multiple thin coats are far more effective than one thick coat, which can sag, drip, or trap moisture.
Step 3: Application for Spray Sealants (Timing and Planning Considerations)
Spray sealants require proper technique and a well-ventilated space.
- Safety Considerations: Always spray outdoors or in a garage with the door open. Wear a respirator or high-quality mask to avoid inhaling fumes.
- The Sweep: Hold the can about $10 \text{-} 12 \text{ inches}$ from the piece. Use smooth, sweeping motions to apply a thin, even mist. Do not aim for full coverage on the first pass; this causes drips.
- Cure Time: Apply $3 \text{-} 4 \text{ coats}$, allowing $15 \text{ minutes}$ of flash time between sprays. Crucially, let the final coat cure for a full $24$ hours before exposing the item to any moisture.
🔬 Section 3: Advanced Strategies: Achieving Food and Dishwasher Safety
While you can learn HOW TO MAKE AIR DRY CLAY WATERPROOF for general use, making it safe for food contact or dishwasher cleaning requires expert-level insights and different materials.
H3: Sharing Expert-Level Insights: Food Safe Glazes
Air dry clay is generally not recommended for functional tableware (plates, mugs) because of its porosity and tendency to harbor bacteria, even when sealed. However, you can make decorative serving pieces water-resistant and food-safe on the surface layer.
- Food-Safe Epoxy: The only reliable way to achieve a food-safe, non-porous surface is by coating the item with a certified food-grade two-part epoxy resin. This material forms a thick, inert plastic barrier.
- Note: Even with epoxy, do not submerge air dry clay items in water or put them in the dishwasher, as water can seep through micro-cracks or the unsealed bottom surface.
H3: Creative Solutions: Customizing the Finish
Your choice of sealant also affects the final appearance. Provide ways to customize approach based on your artistic vision.
| Desired Finish | Recommended Sealant Type | Pro Tip |
| High Gloss, Wet Look | Epoxy Resin or Glossy Acrylic Varnish | Apply $2 \text{ thick}$ coats of epoxy for a dramatic depth. |
| Matte, Natural Look | Water-Based Matte Polycrylic | Matte sealants can sometimes dull paint colors; test on a hidden area first. |
| Satin/Subtle Sheen | Satin Varnish or Sealer Spray | Satin is a forgiving finish that hides minor imperfections and fingerprints well. |
🛑 Section 4: Troubleshooting and Common Challenges
Even when following the steps, you might encounter issues that prevent a smooth, water-resistant finish. Here are solutions to common problems when trying to learn HOW TO MAKE AIR DRY CLAY WATERPROOF.
Featured Snippet Potential: “Why is my air dry clay sealant tacky after drying?”
If your air dry clay sealant remains tacky or sticky after the prescribed drying time, it is usually due to improper ventilation, high humidity during curing, or applying the coats too thickly. To fix this, move the piece to a dry, well-ventilated area for several days to allow the solvents to fully evaporate. If stickiness persists, you may need to apply a thin final coat of a different, high-quality protective spray (like a polyurethane spray) to seal the tacky layer.
Practical Troubleshooting Tips
- Problem: The sealant developed bubbles or foam while applying.
- Obstacle: Shaking the sealant bottle vigorously before use introduces air bubbles, or brushing too aggressively creates foam.
- Solution: Preventive Measures: Gently stir the sealant instead of shaking. When brushing, glide the brush smoothly without scrubbing. If bubbles appear in a resin coat, use a heat gun or blow torch passed quickly over the surface to pop them.
- Problem: The finished piece cracked after sealing.
- Obstacle: The most likely cause is the piece was not fully dry before sealing, trapping residual moisture which caused internal stresses as it continued to evaporate.
- Solution: Provide encouragement for setbacks: This piece is likely decorative only. For future projects, ensure the item has fully cured for at least $72$ hours, or until it feels lightweight and cool to the touch (damp clay feels cold).
- Problem: My paint bled when I applied the varnish.
- Obstacle: The paint used was water-based (like cheap acrylics) and the first coat of sealant was also water-based, reactivating the paint pigments.
- Solution: For the next project, seal the bare clay first with a non-water-based sealant (e.g., a simple spray fixative) before painting. Alternatively, use higher-quality, fully cured artist-grade acrylic paint.
⏫ Section 5: Maximizing Results: Beyond Water Resistance
Once you master HOW TO MAKE AIR DRY CLAY WATERPROOF, you can integrate your sealed creations into more practical, long-term applications.
- Show How to Build Upon Basic Success: Creating Functional Décor. Now that your pieces are water-resistant, you can confidently use them in areas like bathrooms or kitchens. Use sealed clay pieces to make decorative knobs, hooks (using a strong epoxy adhesive for mounting), or plant pot decorations (avoiding constant contact with soil/water).
- Maintenance and Long-Term Considerations: Cleaning Sealed Clay. Properly sealed air dry clay can be gently wiped clean with a damp, non-abrasive cloth. Never scrub or soak the item. This regular maintenance ensures your creation lasts for years.
- Suggest Complementary Strategies: Making It Outdoor-Proof. For pieces intended for limited outdoor display (like garden markers), use two different sealants: an initial coat of a high-quality oil-based outdoor primer, followed by multiple coats of a UV-resistant, clear polyurethane varnish. This protects against water and sun fade. (Internal Linking Opportunity: Discover “The Best UV-Resistant Sealants for Outdoor Art.”) This inspires continued growth and learning in advanced crafting.
✅ Conclusion: Your Capability to Create Durable Art
You have now mastered the techniques required for HOW TO MAKE AIR DRY CLAY WATERPROOF, empowering you to move past delicate indoor pieces and create durable, long-lasting art. By patiently preparing your clay and meticulously applying multiple thin layers of the right sealant, you ensure your time and creativity are protected from moisture and humidity. This knowledge unlocks a new level of permanence and versatility in your crafting. Embrace the power of the finishing coat!
Ready to grab your brush? Which of the three sealing methods—Polycrylic, Spray Varnish, or Epoxy Resin—will you use on your next beautiful air dry clay creation?