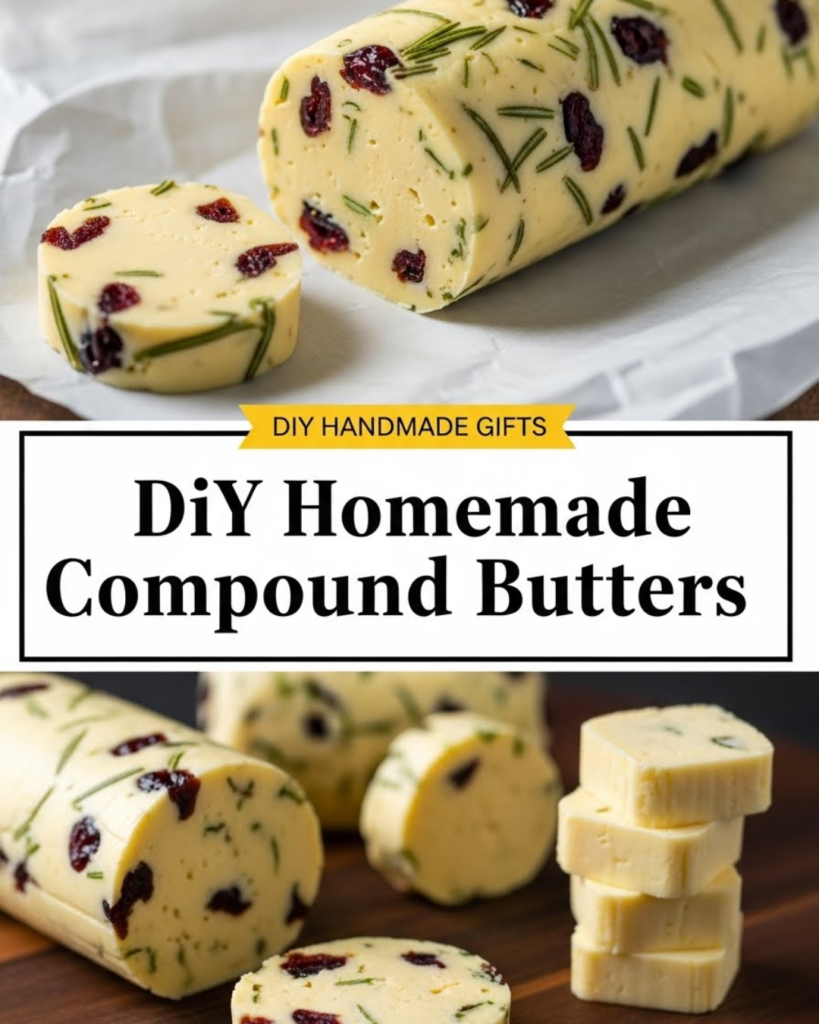
Learn how to make DIY homemade compound butters as perfect DIY handmade gifts. Discover savory and sweet recipes to achieve gourmet results in your own kitchen.
Have you ever struggled to find that perfect, thoughtful gift for a dinner host or a food-loving friend? We’ve all been there—staring at rows of generic candles or overpriced gift baskets, wishing for something more personal. What if you could create something luxurious, delicious, and incredibly practical right in your own kitchen? You are about to discover that DIY homemade compound butters are the secret weapon of DIY handmade gifts. These flavored logs of gold can transform a simple steak or a piece of morning toast into a five-star culinary experience.
By mastering this simple culinary craft, you unlock a world of gourmet gifting that is both budget-friendly and deeply impressive. You have the capability to customize every batch to suit the unique tastes of your loved ones. This guide will walk you through the process step-by-step, ensuring you achieve a professional, artisanal look every time. Get ready to empower your inner chef and discover how easy it is to spread a little joy through the art of handmade butter!
Foundation: What Makes a Great Compound Butter?
Before we start mixing, let’s build your confidence with the basic concepts. A compound butter (or beurre composé) is simply high-quality butter creamed together with various sweet or savory ingredients.
The Power of the Base
The secret to success with DIY homemade compound butters lies in the quality of the butter itself. Since butter is the main ingredient, choosing a high-fat, European-style salted or unsalted butter makes a massive difference in the final texture and “mouthfeel.” When you are presenting these as DIY handmade gifts, that extra bit of quality shows you care.
Flavor Harmony
To achieve a balanced flavor, you generally want to combine three elements:
- The Fat: High-quality grass-fed butter.
- The Aromatics: Fresh herbs, garlic, citrus zest, or spices.
- The Punch: A splash of balsamic vinegar, a drizzle of honey, or a pinch of sea salt.
Reassurance for Beginners
If you aren’t an expert cook, don’t worry! There is no cooking involved in the traditional sense—just mixing and chilling. It is one of the most accessible DIY projects because it is almost impossible to “break” the recipe. You are simply enhancing a classic ingredient to make it extraordinary.
Step-by-Step: Crafting Your Handcrafted Butter
Ready to get started? Follow these manageable steps to create beautiful logs of compound butter that are ready for gifting.
The Basic Method
- Soften the Butter: Leave two sticks of butter at room temperature for about an hour. It should be soft enough to stir easily but not melting.
- Prepare Your Mix-ins: Finely mince your herbs or grate your zest. Small pieces ensure the flavor is distributed evenly in every bite.
- Cream and Blend: In a medium bowl, use a fork or a rubber spatula to cream the butter. Stir in your chosen flavor combinations until thoroughly incorporated.
- The Shape: Lay out a piece of parchment paper or plastic wrap. Spoon the butter onto the center and fold the paper over it. Use a ruler or the back of a knife to press the butter into a tight log shape.
- The Chill: Twist the ends of the paper like a candy wrapper and refrigerate for at least two hours until firm.
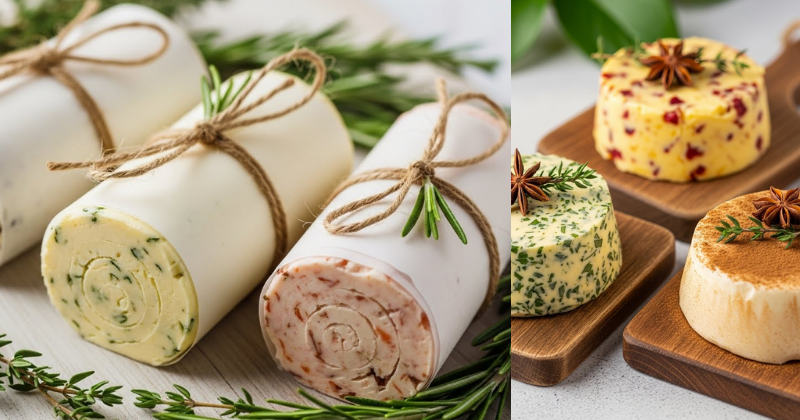
- The Presentation: Wrap the chilled log in a fresh piece of brown butcher paper, tie it with baker’s twine, and add a handwritten tag.
Featured Snippet: How do you store homemade compound butter?
For the best results, store your DIY homemade compound butters in the refrigerator for up to two weeks or in the freezer for up to six months. If you are giving them as DIY handmade gifts, remind the recipient that they can slice off a small coin of butter whenever they need it and keep the rest frozen for long-term enjoyment.
Advanced Strategies: Creative Flavor Profiles
Once you’ve mastered the technique, you can share expert-level insights by creating “themed” sets. These variations make your DIY handmade gifts feel like a curated collection from a high-end boutique.
The Savory Collection
- Steakhouse Classic: Fresh rosemary, thyme, minced garlic, and cracked black pepper.
- The Umami Bomb: Miso paste, toasted sesame seeds, and chopped scallions (perfect for salmon).
- Zesty Mediterranean: Sundried tomatoes, basil, and a squeeze of lemon.
The Sweet Collection
- Honey Cinnamon: Raw honey, ground cinnamon, and a pinch of sea salt (divine on pancakes).
- Maple Pecan: Real maple syrup and finely crushed toasted pecans.
- Berry Bliss: Freeze-dried raspberry powder and a touch of vanilla bean paste.
Internal Linking Opportunities
If you enjoy the process of making these, you might also discover a passion for other kitchen-based crafts. Try making a Cozy Immune-Boosting Flu Bomb Tea Recipe to go with a “Get Well” gift basket, or learn how to make magnesium lotion for sleep and stress for a complete relaxation package.
Troubleshooting: Common Challenges and Solutions
Even the simplest DIYs can have minor hurdles. Here is how to handle them with an encouraging mindset:
- “My butter is too hard to mix”: Don’t microwave it! Microwaving changes the molecular structure and it won’t set correctly later. Instead, cut it into small cubes and leave it near a warm (not hot) stove for 15 minutes.
- “The liquid won’t mix in”: If you are adding honey or balsamic, it may want to separate. Keep stirring! As you whip air into the butter, it will eventually emulsify.
- “My log looks lumpy”: Practice makes perfect. Using a straight-edged tool like a bench scraper to push against the parchment paper helps achieve that smooth, professional cylinder shape.
Preventive Measures
Always use fresh herbs that have been thoroughly dried. If the herbs are wet when you chop them, they will introduce moisture into the butter, which can lead to mold or a shorter shelf life.
Maximizing Results: The Art of the Gift Set
Now that you have your butter, you can build upon your success by creating a complete gift experience.
Complementary Strategies
Don’t just give the butter—give the meal! Pair your DIY handmade gifts with a fresh loaf of sourdough, a box of high-quality pasta, or a bag of gourmet coffee beans.
- Internal Link: To keep your gifting area clean and organized, check out how to clean walls fast to refresh your kitchen space.
- Internal Link: If you’re gifting during the holidays, you might also like to make simple fragrant rose potpourri for beginners to include in the box.
- Internal Link: Ensure your kitchen remains a sanitary place for food prep by learning why mold keeps coming back in bathrooms (and how to stop it in kitchens too!).
Long-Term Considerations
Start a “Butter Log” in your notes app. Every time you make a batch, write down what worked and what didn’t. Over time, you’ll discover your “signature” flavor that everyone asks for. It is a sustainable, low-waste way to give that never goes out of style.
Conclusion: Achieve Gifting Greatness
You have now discovered the secrets to creating DIY homemade compound butters that serve as the ultimate DIY handmade gifts. You have moved from worrying about generic presents to being an empowered creator of gourmet delights. By following these steps, you have achieved a way to show love and appreciation that is as delicious as it is heartfelt.
The transformation of a simple kitchen staple into a work of art is a rewarding journey. We encourage you to whip up your first batch this weekend—perhaps a Garlic Herb log for dinner tonight and a Cinnamon Honey log for a friend. You are more than capable of mastering this culinary DIY and enjoying the beautiful, tasty results!