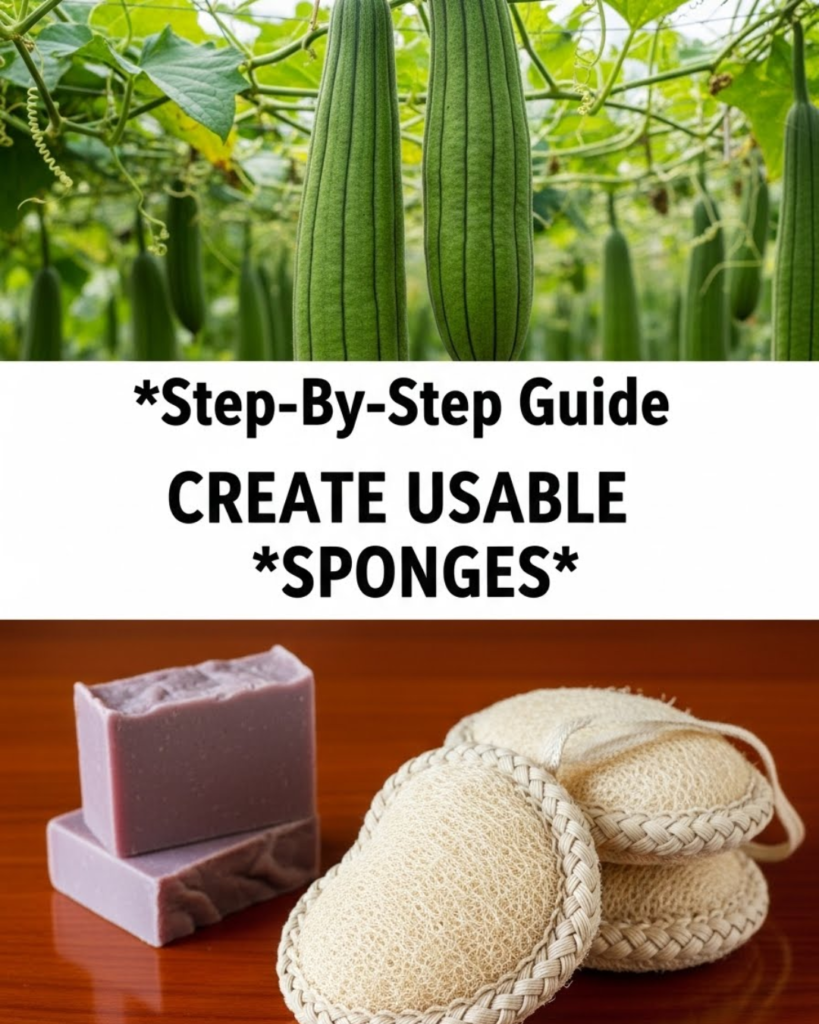
Discover how to create usable sponges from home and garden resources. This step-by-step guide helps you achieve a sustainable, plastic-free lifestyle with ease.
Have you ever looked at the plastic sponge in your kitchen and wondered where it ends up after you toss it away? Most traditional sponges are made from synthetic materials that shed microplastics into our water systems and linger in landfills for centuries. But what if you could grow your own cleaning tools or upcycle household textiles into something far more effective? You are about to discover a step-by-step guide to create usable sponges that are eco-friendly, cost-effective, and surprisingly durable.
By taking control of your household essentials, you unlock a more sustainable way of living. You have the capability to transform simple garden seeds or scrap fabric into high-performance scrubbing tools. This guide will walk you through two primary methods: growing the incredible Luffa plant and crafting “Un-sponges” from fabric. You will achieve a sense of satisfaction knowing that your cleaning routine is protecting the planet. Get ready to empower your home with natural solutions and discover the joy of zero-waste utility!
Foundation: The Natural and Upcycled Sponge
Before we dive into the assembly, let’s build your confidence by understanding the materials. Creating your own tools is a foundational step in a self-sufficient lifestyle.
The Wonder of Luffa
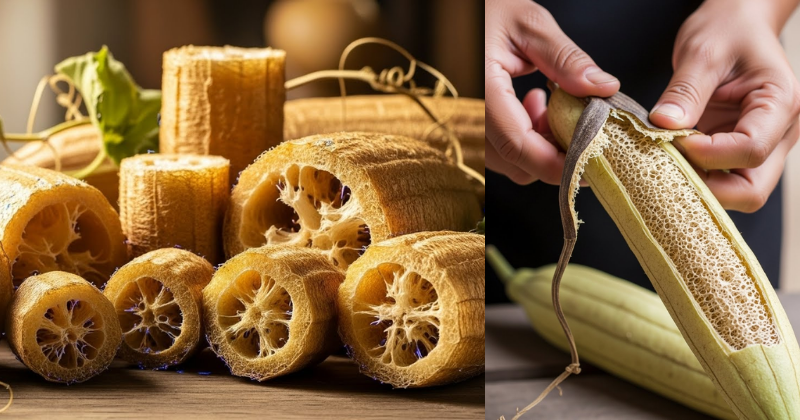
Many people are surprised to learn that “loofah” sponges aren’t from the ocean; they grow on a vine! The Luffa aegyptiaca is a member of the gourd family. When the fruit matures and dries, it leaves behind a fibrous skeleton that is perfect for scrubbing dishes or exfoliating skin. Using this guide to create usable sponges naturally connects you to the cycle of the seasons.
The Upcycled “Un-sponge”
If you aren’t a gardener, you can still achieve great results using upcycled textiles. An “Un-sponge” typically consists of a soft absorbent layer and a coarse scrubbing layer.
- Absorbent Layer: Old cotton towels or flannel.
- Scrubbing Layer: Burlap, coffee sacks, or heavy-duty mesh.
- Eco-Benefits: These are washable and reusable, saving you money every month.
Reassurance for Beginners
Whether you are planting your first seed or threading your first needle, these processes are designed to be achievable. You don’t need expert skills to produce high-quality results. Every sustainable choice you make is a victory for your home and the environment!
Step-by-Step: Two Methods to Create Usable Sponges
Depending on your preference, you can choose the gardening route or the sewing route. Both will result in fantastic cleaning tools.
Method 1: Growing and Processing Luffa
- Planting: Start seeds indoors 4–6 weeks before the last frost. They need a long, warm growing season and a sturdy trellis to climb.
- Harvesting: Wait until the gourds turn yellow or brown and feel light. The skin should feel loose.
- Peeling: Crack the outer shell and peel it away to reveal the fibrous interior.
- Cleaning: Shake out the seeds (save them for next year!) and soak the fiber in a bucket of water with a dash of vinegar to brighten it.
- Cutting: Once dry, use serrated scissors to cut the long fiber into hand-sized sponge rounds.
Method 2: Sewing an Upcycled “Un-sponge”
- Cut Your Fabric: Cut two rectangles (approx. 4″ x 6″) from an old towel and one rectangle from burlap or mesh.
- Layering: Sandwich the towel pieces between the mesh.
- Sewing: Stitch around the edges, leaving a small gap. Turn it right-side out (if using cotton) or simply zig-zag stitch the edges for a rustic look.
- Stuffing (Optional): You can stuff the center with small fabric scraps to give it more “squish.”
- Finish: Close the gap with a final topstitch.
Featured Snippet: How do you keep homemade sponges from smelling?
To prevent odors in handmade sponges, always wring them out thoroughly after use and hang them in a spot with good airflow. For fabric sponges, toss them in the washing machine once a week with your towels. For luffa sponges, soak them in a solution of one part vinegar to two parts water for 10 minutes every few weeks to kill bacteria naturally.
Advanced Strategies: Customizing Your Scrubbers
Once you’ve mastered the basics, share expert-level insights by tailoring your sponges to specific tasks around the house.
Texture Variations
You can achieve different levels of “grit” by changing your materials. For delicate glassware, use a soft flannel “Un-sponge.” For heavy-duty cast iron, use a luffa sponge that hasn’t been softened as much, or incorporate a layer of heavy-duty hemp twine into your sewn version.
Infused Sponges
Experiment with “pre-scenting” your fabric sponges. When you wash them, add a few drops of lemon or eucalyptus essential oil to the rinse cycle. This provides a subtle, natural fragrance every time you start your dishes.
Local Relevance
If you live in a shorter-growing climate, look for “Short Season Luffa” seeds. These have been bred to mature faster, allowing you to create usable sponges even if you don’t live in the tropics.
Troubleshooting: Common Challenges and Solutions
DIY home tips occasionally come with hurdles, but they are all part of the learning process.
- “My Luffa didn’t dry on the vine”: If frost is coming, harvest the gourds and let them dry in a well-ventilated garage. They may be harder to peel, but they are still usable!
- “The fabric sponge is too floppy”: Use a layer of quilt batting or multiple layers of old denim in the center to provide structure and “body.”
- “The seeds won’t come out of the luffa”: Use a high-pressure garden hose to blast them out through the fibrous network.
Preventive Measures
To ensure your sewn sponges last, always use a heavy-duty polyester or nylon thread. Cotton thread can rot over time when constantly exposed to moisture in the kitchen sink.
Maximizing Results: A Clean and Green Home
Now that you have your sponges, you can build upon your success by integrating other DIY home and wellness strategies into your routine.
Complementary Strategies
- Internal Link: Clean your surfaces before scrubbing by learning how to clean walls fast using eco-friendly solutions.
- Internal Link: After a long day of gardening or cleaning, treat your hands to a DIY face cream with rosehip oil (it works wonders on dry cuticles too!).
- Internal Link: Keep your kitchen and bathroom healthy by understanding why mold keeps coming back in bathrooms.
- Internal Link: Create a total sensory experience by pairing your clean home with DIY homemade compound butters for a post-cleaning snack.
- Internal Link: Support your joints after all that scrubbing with home remedies for knee swelling.
Long-Term Maintenance
Your luffa sponges are compostable! When they finally wear out, simply toss them in your garden or compost bin. They will break down and nourish the soil, potentially helping you grow your next crop of sponges. It is the perfect closed-loop system for a modern home.
Conclusion: Achieving a Zero-Waste Kitchen
You have now completed the step-by-step guide to create usable sponges. You have moved from relying on plastic-heavy disposables to being an empowered creator of natural and upcycled tools. By following these steps, you have achieved a more sustainable household and discovered a rewarding new hobby.
The transformation of your cleaning routine is just the beginning of your eco-friendly journey. We encourage you to start with one method—perhaps sewing an Un-sponge this weekend. You are more than capable of mastering these DIY skills and achieving a beautiful, plastic-free home!
Would you like me to help you design a “Garden Layout” specifically for growing enough luffa to last your family all year? Your journey to a greener home starts today!