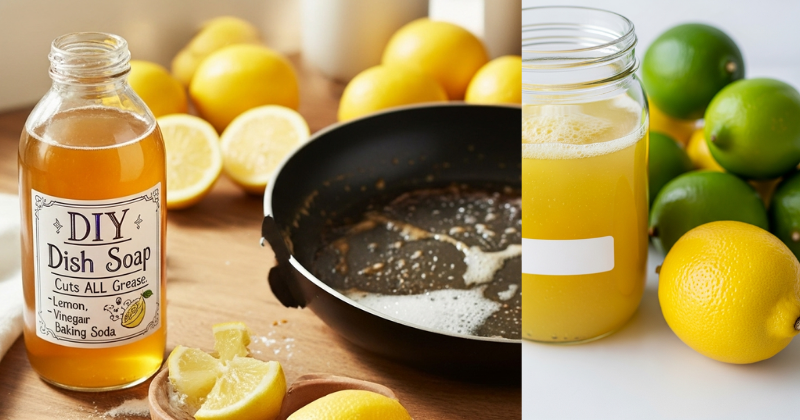
Learn how to make a DIY dish soap that cuts ALL grease using simple, non-toxic ingredients. Discover the secret to sparkling dishes without harsh chemicals today!
Important Disclaimer: This article is for informational purposes only and should not replace professional advice. For safety procedures, verify current best practices and local regulations. Individual results may vary, and personal circumstances should always be considered when implementing any suggestions.
Have you ever stared at a pile of greasy lasagna pans and wondered if those “extra-strength” blue soaps are actually doing more harm than good? You want your dishes clean, but you might also be concerned about the synthetic fragrances and sulfates that linger on your plates—and eventually end up in your family’s food. The good news is that you don’t have to choose between a clean kitchen and a healthy home. You can easily create a DIY dish soap that cuts ALL grease using just a few powerful, plant-based ingredients found in your pantry.
In this guide, you will learn how to unlock the cleaning power of nature to tackle even the most stubborn, baked-on messes. We will explore the science of how natural surfactants break down oils and provide you with an achievable, step-by-step recipe that saves money and reduces plastic waste. By the time you finish reading, you will feel empowered to ditch the store-bought bottles for good and achieve a sparkling, non-toxic kitchen sanctuary. Let’s dive in and transform your dishwashing routine!
Foundation: The Power of Natural Degreasers
Building confidence in your DIY cleaning products starts with understanding why they work. Many people hesitate to try natural alternatives because they fear a “weak” lather won’t get the job done. However, nature provides some of the most potent grease-cutting agents available.
Why Commercial Soaps Can Be Problematic
Traditional dish soaps often rely on Sodium Lauryl Sulfate (SLS) to create excessive bubbles. While bubbles look nice, they aren’t actually what cleans the grease. Furthermore, synthetic dyes and fragrances can irritate sensitive skin and contribute to indoor air pollution. By switching to a DIY dish soap that cuts ALL grease, you are opting for a [sustainable lifestyle change] that prioritizes your family’s well-being.
Key Components of Our Recipe
- Sal Suds or Liquid Castile Soap: These provide the base cleaning power. Sal Suds is specifically formulated for tough grease, while Castile soap is a gentler, vegetable-based option.
- Washing Soda: Also known as sodium carbonate, this is a heavy-hitter that raises the pH of your soap to dissolve fats and proteins.
- Vegetable Glycerin: This ingredient is what gives your soap that “smooth” feel and keeps it from drying out your hands.
- Essential Oils: Lemon and Orange oils aren’t just for scent; they contain d-limonene, a powerful natural solvent for oils.
Encouragement for Beginners
If you are new to making your own cleaners, this is the perfect starting point! This recipe is straightforward, requires no heating, and uses tools you already have. You are about to discover how satisfying it is to wash dishes with something you made yourself.
Step-by-Step: Crafting Your Grease-Cutting Soap
Follow these steps to create a high-performance dish soap that rivals any professional brand. This process takes less than ten minutes and creates enough soap to last for weeks.
1. Gather Your Supplies
To get started, you will need:
- A clean 16 oz glass or BPA-free plastic dispenser.
- 1 1/2 cups Distilled Water (this prevents the soap from going cloudy).
- 1/2 cup Liquid Sal Suds (preferred for grease) or Liquid Castile Soap.
- 1 tablespoon Washing Soda.
- 1 teaspoon Vegetable Glycerin.
- 20 drops Lemon Essential Oil.
2. The Mixing Process
Start by pouring the distilled water into your container. It is vital to add the water first! Adding the soap first will cause the bottle to overflow with foam when you try to add the water later.
Actionable Tip: Slowly stir in the washing soda until it is completely dissolved. This ensures your soap doesn’t have a “gritty” texture.
3. Adding the Active Ingredients
Once the soda is dissolved, add the Sal Suds or Castile soap, followed by the glycerin and essential oils. Instead of shaking the bottle vigorously, gently roll it between your hands to combine. This keeps the bubbles inside the soap rather than filling up the bottle.
Advanced Strategies: Pro Tips for Tough Messes
Once you’ve mastered the basic DIY dish soap that cuts ALL grease, you can share expert-level insights by tweaking the formula for specific culinary challenges.
The “Overnight Soak” Variation
For pans with burnt-on sugar or proteins, add a teaspoon of baking soda directly to the pan along with a squirt of your DIY soap and hot water. Let it sit for 30 minutes. The alkalinity of the baking soda works in tandem with the citrus oils to lift the debris without scrubbing.
Customizing for Hard Water
If you live in an area with hard water, you might notice a film on your dishes. To solve this, add 1 tablespoon of white vinegar to your rinse water. While you shouldn’t mix vinegar directly into the soap (as it can “unsaponify” the oils and make the soap less effective), using it as a rinse agent will leave your glasses streak-free.
Sensory Adaptation
While lemon is the standard for kitchens, you can customize the scent to improve your mood. Eucalyptus and Rosemary oils add an earthy, fresh aroma that can help with [sinus problems] if you are washing dishes in a steamy kitchen. It turns a chore into a mini-aromatherapy session!
Troubleshooting: Common Challenges and Solutions
Even with the best recipes, you might encounter a few hiccups. Here is how to handle them with ease.
“My soap is too watery.”
- The Solution: Natural soaps are naturally thinner than commercial ones because they lack chemical thickening agents. If the consistency bothers you, you can add a small amount of dissolved sea salt to the mixture, which can act as a natural thickener for Sal Suds.
“It isn’t sudsing as much as I expected.”
- Reassurance: Remember that suds do not equal cleaning power. Your DIY soap is working at a molecular level to lift grease. If you truly miss the bubbles, ensure you are using a sponge or a [handmade dish cloth] to agitate the water more effectively.
“The washing soda settled at the bottom.”
- Preventive Measures: This usually happens if the water was too cold when you mixed it. Next time, use slightly warm distilled water to help the soda dissolve completely before adding the soap base.
Maximizing Results: A Total Clean Kitchen
To build upon your success, consider integrating your new soap into a broader [non-toxic kitchen] strategy.
Complementary Strategies
- Surface Cleaning: Use a [homemade bleach alternative] for your countertops to ensure your prep area is as clean as your plates.
- Hand Care: Since you’ve added glycerin to your soap, your hands will already be softer. Follow up with a [handmade Mason jar spa gift] like a sugar scrub once a week to keep your skin healthy despite the dishwater.
- Eco-Friendly Scrubbers: Replace plastic sponges with natural luffas or walnut-shell scrubbers. These work beautifully with your DIY soap and are fully compostable.
Long-Term Considerations
Because this recipe contains water, it is best to make it in small batches that you can use within a month or two. Storing your soap in a cool, dark place will preserve the potency of the essential oils, ensuring that every drop remains effective against grease.
Featured Snippet: Does DIY dish soap actually cut grease?
Yes, DIY dish soap can cut grease effectively if it contains high-quality surfactants like Sal Suds or Castile soap combined with alkaline agents like washing soda. Essential oils such as lemon or orange further enhance grease-cutting abilities by acting as natural solvents, breaking down fats at the molecular level without the need for synthetic chemicals.
Conclusion
Mastering a DIY dish soap that cuts ALL grease is a rewarding way to reclaim your kitchen’s health and efficiency. You have discovered that you have the capability to succeed in creating professional-grade cleaners with simple, safe ingredients. By taking this step, you achieve a cleaner home, a smaller environmental footprint, and the satisfaction of knowing exactly what is touching your family’s dinnerware.
You’ve got this! Start tonight by mixing up a small batch and tackling that one pan you’ve been avoiding. You’ll be amazed at how easily the grease disappears.