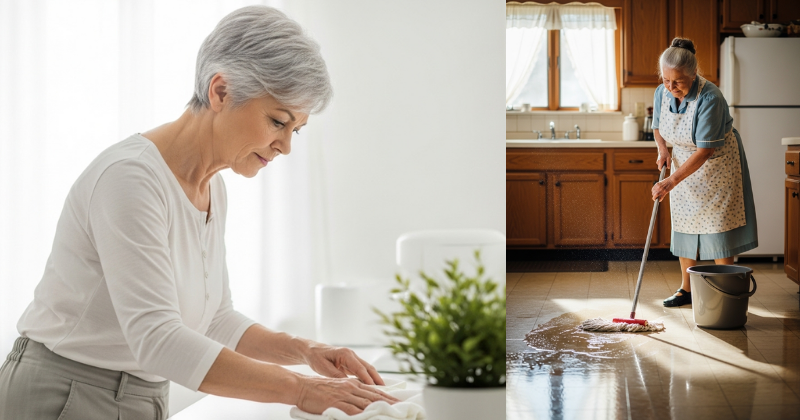
Discover Grandma´s mop secret to achieve sparkling, streak-free floors using natural ingredients. Transform your cleaning routine with this time-tested, eco-friendly method today.
Have you ever spent hours scrubbing your floors only to be left with dull streaks, sticky residue, or a chemical smell that lingers for days? You aren’t alone. Many modern floor cleaners are packed with synthetic waxes and surfactants that actually build up over time, trapping dirt instead of removing it. But what if the answer to a spotless home wasn’t in a colorful plastic bottle from the supermarket? It’s time to unlock Grandma´s mop secret, a legendary cleaning technique that uses simple, natural ingredients to deliver a mirror-like finish on almost any surface.
In this guide, we are going to rediscover the wisdom of past generations. You will learn how to create a powerful, non-toxic floor solution that is safe for your pets, your children, and your wallet. We will walk you through the precise steps to achieve a professional-grade clean while embracing a more [sustainable lifestyle change] for your household. You have the capability to transform your home into a sanctuary of cleanliness—let’s dive into the secret that has kept family homes sparkling for decades!
Foundation: Why Grandma’s Method Still Wins
Building confidence in your cleaning routine starts with understanding why older methods often outperform modern, high-tech gadgets. Grandma´s mop secret isn’t about working harder; it’s about using the right chemistry.
The Problem with Modern Cleaners
Most commercial floor cleaners are designed to smell “fresh,” but they often leave behind a film. This film is a magnet for dust and pet hair. When you walk on it, you leave “invisible” footprints that eventually turn into visible smudges. Grandma knew that the goal of mopping isn’t just to add a scent, but to completely strip away oils and grime.
The Hero Ingredients
The core of Grandma´s mop secret usually involves three staple items you likely already have in your pantry:
- White Vinegar: A natural acetic acid that cuts through grease and kills mild bacteria.
- Essential Oils: Specifically lemon or eucalyptus, which provide antimicrobial properties and a [natural home scent that calms the mind].
- Hot Water: Heat is the ultimate solvent; it expands the dirt particles, making them easier to lift.
Addressing Beginner Concerns
You might be worried that the vinegar smell will be overwhelming. I want to reassure you that as the floor dries, the vinegar scent evaporates completely, leaving behind only the crisp aroma of your chosen essential oils. If you have already experimented with [DIY non-toxic cleaning recipes], you know how empowering it feels to use ingredients you can actually pronounce. You are fully capable of achieving better results than any store-bought chemical!
Step-by-Step: Implementing the Mop Secret
Ready to achieve those legendary sparkling floors? Follow these manageable steps to master Grandma´s mop secret and see the difference for yourself.
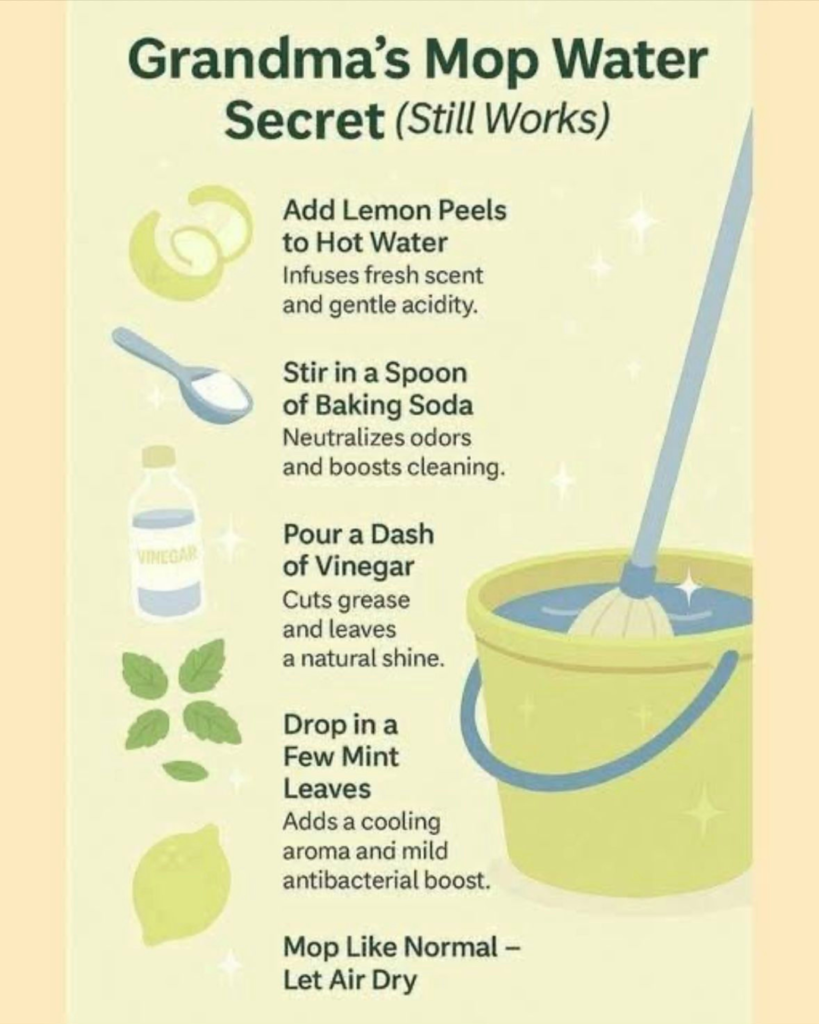
1. The Perfect Solution Ratio
The “secret sauce” is all in the balance. Too much vinegar can dull certain finishes, while too little won’t cut the grime.
- The Base: Fill a gallon bucket with very hot (but not boiling) water.
- The Acid: Add 1/2 cup of distilled white vinegar.
- The Booster: Add 10-15 drops of high-quality lemon or pine essential oil.
- The Secret Addition: Add one tiny drop of natural dish soap (this acts as a surfactant to break surface tension).
2. The “Two-Bucket” Technique
Grandma never put a dirty mop back into her clean water. This is the most crucial part of Grandma´s mop secret.
- Bucket A: Contains your hot cleaning solution.
- Bucket B: Contains plain hot water for rinsing.
- The Process: Dip the mop in Bucket A, mop a small section, then rinse the dirt off in Bucket B before going back to the cleaning solution. This ensures you are always cleaning with pure water.
3. The “Figure Eight” Motion
Don’t just push the dirt around! Use the traditional figure-eight motion. This technique keeps the leading edge of the mop moving forward, trapping debris in the fibers rather than spreading it across the room. It’s a simple shift that leads to a massive improvement in clarity.
Advanced Strategies: Pro Tips for Every Floor Type
Once you have the basics down, you can customize your approach. Different materials require different care to stay in peak condition.
Hardwood and Laminate Care
For real wood, moisture is the enemy. Grandma’s secret for wood was to use a “damp” mop, never a “wet” one. Wring your mop out until it feels almost dry to the touch. To add an extra glow to wood, you can add 1/4 cup of black tea to your water phase. The tannins in the tea enhance the wood’s natural grain and add a deep, rich shine.
Tile and Grout Deep Cleaning
If you have stubborn grout lines, use the “Suds Scrub.” Take a small amount of your solution and add a teaspoon of baking soda to create a paste. Apply it to the grout, let it sit for 5 minutes, then mop over it. This is a great way to [freshen a musty room naturally] while removing deep-seated dirt.
Seasonal Adjustments
Just as you adapt your [seasonal gardening considerations], you should adapt your cleaning. In winter, when salt and slush are tracked in, increase the vinegar slightly to neutralize the alkaline salt. In summer, focus on the antimicrobial power of tea tree oil to keep floors hygienic during “barefoot season.”
Troubleshooting: Common Mopping Challenges
Even with Grandma´s mop secret, you might run into a few obstacles. Here is how to handle them with encouraging, practical solutions.
“My floors look cloudy after mopping.”
- The Solution: This usually means there was a build-up of old commercial cleaner on the floor. It might take 2 or 3 rounds of Grandma’s vinegar solution to completely “strip” the old wax and chemicals away. Keep going—the shine is underneath!
“The mop leaves streaks.”
- Alternative Approach: Your water might be too dirty. If your rinse bucket looks grey, change it immediately. Also, ensure you are mopping toward the exit of the room so you aren’t walking over your damp work.
“I have natural stone floors.”
- Preventive Measures: Important! Do not use vinegar on natural stone like marble or granite. For these surfaces, Grandma’s secret was to swap the vinegar for a “neutral pH” cleaner or a small amount of rubbing alcohol to ensure a streak-free finish without etching the stone.
Maximizing Results: Beyond the Bucket
To build upon your success, think about how to maintain your floors long-term with minimal effort.
The “No-Shoes” Sanctuary
The best way to keep your floors clean is to stop dirt at the door. Create a cozy “shoe station” at your entry. If you’ve been looking into [9 everyday items you can turn into beautiful home decor], you can upcycle a vintage crate into a stylish shoe rack. This simple habit reduces floor cleaning time by 70%.
Routine Maintenance
Don’t wait for a “deep clean” day. A quick 2-minute sweep every evening prevents grit from scratching your floor’s finish. Use this time as a “mindful moment” to decompress before starting your [simple evening rituals that help your body heal while you sleep]. A clean floor leads to a clear mind!
Featured Snippet: What is the secret to mopping floors without streaks?
The secret to mopping floors without streaks is the two-bucket method combined with a vinegar and hot water solution. By using one bucket for clean soapy water and a second bucket for rinsing the dirty mop, you ensure that dirt is never redistributed. Adding a small amount of white vinegar helps dissolve mineral deposits in the water, resulting in a crystal-clear, streak-free finish.
Conclusion
Mastering Grandma´s mop secret is a beautiful way to honor the past while protecting your home’s future. You have discovered that you have the capability to succeed in creating a professional-level clean using the most basic, natural tools. By stepping away from harsh chemicals and embracing these time-tested techniques, you achieve a home that isn’t just “clean-looking,” but truly, deeply purified.
You’ve got this! Start by grabbing your vinegar and a second bucket for your next cleaning session. You will be amazed at how much brighter your home feels when the “secret” is finally out on your floors.