Learn how to make bioplastic from potato starch with this easy, eco-friendly DIY guide. Transform simple kitchen ingredients into sustainable, biodegradable plastic today!
Have you ever looked at a plastic water bottle and felt a pang of guilt knowing it might stick around for hundreds of years? You aren’t alone. Many of us are looking for ways to reduce our environmental footprint, but it’s hard to know where to start. What if the solution was sitting right in your pantry next to the snacks? Imagine being able to create your own biodegradable material using a humble potato!
By learning how to make bioplastic from potato starch, you can transform a simple root vegetable into a versatile, Earth-friendly substance. This project is more than just a cool science experiment; it is a way to reclaim your power as a consumer and a creator. You will gain a hands-on understanding of polymer science while producing a material that breaks down naturally in a compost bin rather than clogging a landfill. Let’s unlock the secrets of sustainable chemistry and build a greener future, one potato at a time.
The Foundation: Understanding Bioplastics
Before we start cooking, let’s build your confidence by understanding exactly what we are making. Most traditional plastics are made from petroleum—a fossil fuel. Bioplastics, on the other hand, come from renewable biological sources like plants. When you learn how to make bioplastic from potato starch, you are essentially rearranging plant molecules to mimic the properties of traditional synthetic polymers.
Why Potato Starch?
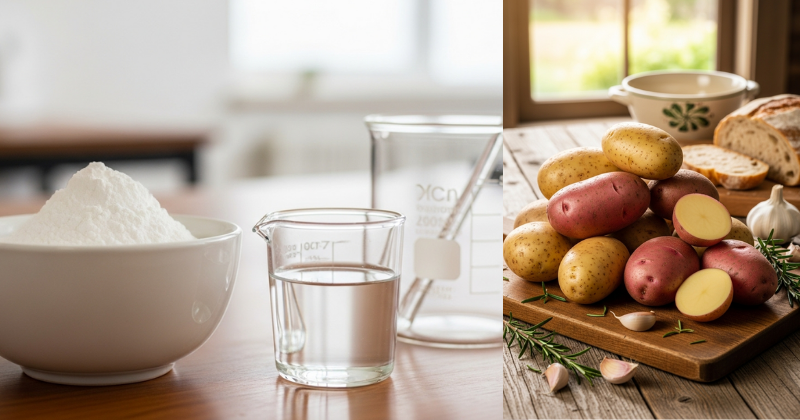
Potatoes are a fantastic source of starch, which is a natural polymer made of long chains of glucose molecules. These chains are perfect for creating structural materials. Unlike corn or sugarcane, which are also used for industrial bioplastics, potatoes are easy for home-based creators to work with because the starch is readily accessible and highly reactive to simple household chemicals.
The Role of Each Ingredient
To create a successful bioplastic, you need a few key components:
- Starch: The backbone of your plastic.
- Water: The solvent that helps the molecules move and mix.
- Glycerin (Glycerol): This acts as a plasticizer. Without it, your plastic would be as brittle as a dried leaf. Glycerin makes the final product flexible and durable.
- Vinegar: A mild acid that helps break down the branched starch molecules (amylopectin) into straight chains (amylose), which makes the material easier to mold.
Step-by-Step: Crafting Your Potato Bioplastic
Ready to get your hands dirty? This process is straightforward, but it requires your full attention. Follow these actionable steps to achieve a smooth, professional-grade bioplastic.
1. Gather Your Supplies
You will need:
- 1 tablespoon (approx. 10g) of potato starch
- 4 tablespoons (60ml) of water
- 1 teaspoon (5ml) of glycerin
- 1 teaspoon (5ml) of white vinegar
- A non-stick pan and a spatula
- A stove or hot plate
- A silicone mat or aluminum foil for drying
2. The Mixing Phase
In your cold pan, combine the water, potato starch, vinegar, and glycerin. Whisk them together until the mixture looks like thin, milky water. Ensure there are no lumps left, as these will create weak spots in your finished plastic.
3. The Cooking Phase
Turn the heat to medium-low. This is where the magic happens! Stir the mixture constantly. After a few minutes, you will notice it starts to thicken and turn from opaque white to translucent. Keep stirring until it becomes a thick, gel-like substance that resembles heavy petroleum jelly.
Pro Tip: Don’t stop too early! The mixture needs to be uniform and clear to ensure the molecules have fully bonded.
4. Spreading and Shaping
Once the gel is ready, pour it onto your silicone mat or foil. Use your spatula to spread it as thinly and evenly as possible. If you want to make a specific shape, you can pour the gel into a shallow mold.
5. The Drying Process
This is the hardest part: waiting! Place your sheet in a cool, dry place. Depending on the humidity in your area, it will take 24 to 48 hours to fully cure. As the water evaporates, the material will harden into a flexible, plastic-like sheet.
Advanced Strategies: Customizing Your Creation
Once you have mastered the basic method of how to make bioplastic from potato starch, you can start to experiment. This is where you can truly adapt the process to suit your creative vision.
Adding Natural Colorants
Who says plastic has to be clear? You can add a few drops of food coloring or natural dyes like beet juice or turmeric during the mixing phase. This is a great way to create colorful, sustainable jewelry or decorative items.
Strengthening the Matrix
If you want a stronger material, you can experiment with “reinforcements.” Try mixing in a small amount of finely ground coffee grounds or cellulose fibers (from blended paper scraps) before cooking. These additives act like rebar in concrete, giving your bioplastic more tensile strength.
Adjusting Flexibility
You have total control over the texture. If you want a hard, rigid plastic, reduce the amount of glycerin. If you want something soft and rubbery—like a homemade phone case or a flexible wrap—increase the glycerin slightly. Discovering your perfect “recipe” is half the fun!
Troubleshooting: Common Challenges
Don’t worry if your first batch isn’t perfect; science is all about trial and error! Here are the most frequent obstacles and how to solve them.
- “My plastic is too sticky!” This usually means it hasn’t finished drying, or you used too much glycerin. Give it another 24 hours. If it’s still sticky, try reducing the glycerin in your next batch.
- “It’s cracking as it dries.” This happens when the material dries too fast or is too thick. Try drying it away from direct sunlight and spreading the gel thinner.
- “The mixture burned in the pan.” Your heat was likely too high. Bioplastic requires a gentle, gradual heat. Keep the burner on low and never stop stirring!
- “Mold grew on my plastic.” Since this is an organic material, it can biodegrade if left in a damp environment. Ensure your drying area is well-ventilated.
Maximizing Results: Practical Uses and Care
Now that you know how to make bioplastic from potato starch, what can you actually do with it? The possibilities are limited only by your imagination.
Practical Applications
- Sustainable Packaging: Use thin sheets to create small pouches for dry goods or seeds.
- Biodegradable Garden Markers: Mold the plastic into tags to label your plants. They will slowly break down into the soil over time!
- Art and Jewelry: Cut the dried sheets into geometric shapes to make unique earrings or ornaments.
Long-Term Considerations
Remember that this material is not waterproof. If you leave it in water for an extended period, it will begin to soften and dissolve. This is actually a benefit—it proves the material is truly biodegradable! To make it last longer, keep it in a cool, dry place. You might also consider exploring related topics like natural resin coatings or homemade beeswax wraps to complement your sustainable toolkit.
Conclusion: You are the Scientist
Learning how to make bioplastic from potato starch is a transformative experience. It takes you from being a passive consumer to an active innovator. You’ve learned how to harness the power of polymers, troubleshoot common DIY hurdles, and customize a sustainable material that reflects your values.
The journey toward a plastic-free world starts with small, curious steps like this one. You have the capability to create, experiment, and inspire others with your eco-friendly discoveries. So, grab a bag of potatoes and start cooking—your contribution to a cleaner planet is just one experiment away!