Learn how to brighten your white socks with this easy DIY method. Discover natural whitening hacks that remove stains and keep your laundry looking brand new!
Have you ever pulled your favorite pair of white socks out of the dryer only to realize they look more like a dingy shade of “sidewalk gray”? It is a frustrating experience that many of us face. Whether it’s from gym sessions, walking around the house, or just general wear and tear, white fabric seems to attract stubborn stains like a magnet. You might feel tempted to just toss them out and buy new ones, but wait! There is a better, more sustainable way to handle your laundry woes.
By using a specialized DIY method to brighten your white socks, you can restore that crisp, “just-bought” glow without relying on harsh industrial bleaches. This guide will transform your laundry routine from a chore into a rewarding project. You will discover how simple household items can achieve professional-level results, saving you money and extending the life of your wardrobe. Get ready to feel empowered as we unlock the secrets to brilliant whites and tackle those tough stains head-on!

Foundation: Why White Socks Lose Their Luster
Before we dive into the scrubbing and soaking, it is important to build your confidence by understanding why socks get so dirty in the first place. Socks are unique because they deal with two types of “grime”: external dirt from the floor and internal moisture from your skin. Over time, these particles become trapped deep within the fibers, especially in cotton and synthetic blends.
Many people hesitate to try DIY whitening because they believe only chlorine bleach can do the job. However, bleach can actually weaken fabric fibers over time and even cause some synthetic materials to turn a strange yellow hue. The DIY method to brighten your white socks that we are focusing on uses natural chemistry to break down organic stains and lift dirt gently.
H3: The Science of “Dinginess”
Dinginess is often the result of “soil redeposition.” This happens when dirt from one item in the wash settles onto another. By using a pre-soak method, you ensure the dirt is loosened before it ever hits the washing machine. This is a key part of ZERO-WASTE DIY IDEAS because it keeps your clothes in circulation longer and reduces the need for chemical-heavy detergents.
H3: Your Natural Whitening Arsenal
You don’t need a chemistry degree to succeed. Most of the best whitening agents are already in your pantry:
- Baking Soda: A natural deodorizer and gentle abrasive.
- Lemon Juice: Contains citric acid, a natural bleaching agent.
- White Vinegar: Softens water and breaks down mineral deposits.
- Hydrogen Peroxide: A safe alternative to chlorine bleach that kills bacteria.
Step-by-Step Process: The Ultimate Whitening Soak
Ready to see some magic? This core method is designed to be achievable and highly effective. Follow these manageable steps to see a visible transformation in your laundry.
Step 1: The Pre-Rinse
Start by rinsing your socks in lukewarm water. This removes any loose surface debris. If the socks are particularly muddy, a quick hit with a soft brush can help open up the fibers.
Step 2: The Boiling Lemon Soak
This is the most powerful DIY method to brighten your white socks.
- Prepare the Pot: Fill a large pot with water and add 2-3 sliced lemons (or half a cup of lemon juice).
- Heat it Up: Bring the water to a boil.
- Add the Socks: Turn off the heat and carefully submerge your dingy socks in the lemon water.
- Wait: Let them soak for at least an hour. As the water cools, the citric acid works deep into the fabric to lift stains.
Step 3: The Baking Soda Paste (For Stubborn Spots)
If you still see dark spots on the heels or toes:
- Mix 3 parts baking soda with 1 part water to create a thick paste.
- Rub the paste directly onto the stained areas.
- Let it sit for 15 minutes before tossing them into the regular wash.
Step 4: The Final Wash
Wash your socks on the hottest setting recommended on the care label. Add half a cup of white vinegar to the fabric softener compartment to ensure all soap residue—which can attract more dirt later—is completely rinsed away.
Advanced Strategies: Pro Tips for Pristine Whites
If you’ve mastered the basic soak and want to take your laundry game to the expert level, these creative variations will help you customize your approach.
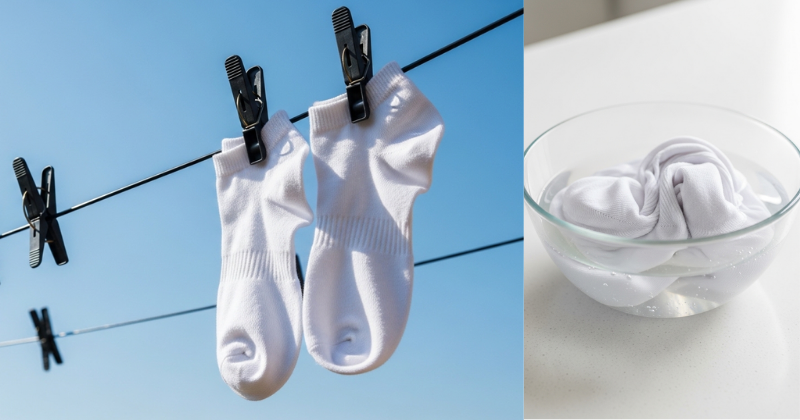
H3: The Power of the Sun
Grandmothers have known this secret for centuries: UV rays are a natural whitener. After using your DIY method to brighten your white socks, hang them outside to dry in direct sunlight. The sun acts as a final, free bleaching step that leaves your laundry smelling incredibly fresh.
H3: Hydrogen Peroxide Boost
For socks that have a lingering odor or yellowing from sweat, add one cup of 3% hydrogen peroxide to your washing machine’s bleach dispenser. It’s much gentler than chlorine but effectively targets the proteins found in sweat and skin cells.
H3: Specialized Fabric Care
If you are dealing with wool or delicate “dress” socks, skip the boiling water. Instead, use a lukewarm soak with mild Castile soap and a quarter cup of baking soda. This protects the delicate fibers while still providing a deep clean. This approach mirrors the care found in strange grandma tricks that still work today, where patience and gentle ingredients win over aggressive chemicals.
Troubleshooting: Common Laundry Challenges
Even with the best methods, you might run into a few obstacles. Don’t worry—setbacks are just opportunities to refine your technique!
- Problem: My socks are still gray after the soak.
- Solution: This often happens in areas with “hard water” (high mineral content). Add a half-cup of borax or a water softener to your soak to help the cleaning agents work more effectively.
- Problem: The lemon soak left a yellow tint.
- Solution: This is rare, but it can happen if you leave the peels in too long. Simply re-wash the socks with a cup of white vinegar to neutralize the tint and restore the white balance.
- Prevention: Use filtered lemon juice instead of whole slices if you are worried about the oils in the peel.
- Problem: The socks feel “crunchy” after air-drying.
- Solution: This is usually a sign of soap buildup. Ensure you are using vinegar in the rinse cycle, or give them a 5-minute tumble in the dryer on a “no heat” setting to fluff the fibers back up.
Maximizing Results: Maintenance and Long-Term Success
To keep your socks looking bright for the long haul, you need to think about maintenance. Building upon your initial success ensures you won’t have to do “heavy-duty” soaking every single week.
Preventive Measures
The best way to keep socks white is to prevent dirt from grounding in.
- No Shoes Indoors: Encourage a “shoes-off” policy at home to keep floors cleaner.
- Wash Inside Out: Turning socks inside out allows the detergent to reach the skin cells and sweat trapped on the interior.
- Separate Your Loads: Never wash your whites with colored items. Even “colorfast” clothes can bleed tiny amounts of dye that make whites look dull over time.
Inspiring Continued Learning
Laundry is just the beginning of a sustainable home! Once you see how well this DIY method to brighten your white socks works, you might feel inspired to try making your own natural homemade mouthwash or other eco-friendly household swaps. Each small victory builds your confidence to live a more intentional, chemical-free life.
Conclusion: Step Into the Bright Side
You now have a comprehensive, effective DIY method to brighten your white socks at your fingertips. By moving away from harsh bleaches and embracing natural ingredients like lemon, baking soda, and vinegar, you are doing something great for your wardrobe and the planet.
The transformation from dingy gray to brilliant white is incredibly satisfying. Remember, you don’t need a pantry full of expensive chemicals to achieve a clean home; you just need a bit of knowledge and the willingness to try something new. Your socks will look better, feel softer, and last much longer. Give this method a try during your next laundry day and rediscover the joy of crisp, clean whites!