Master the art of nourishing tinted lip balm with the science of essentials and essential oil DIY recipes. Unlock natural lip care secrets for a healthy glow.
Have you ever scanned the ingredient label of your favorite lip gloss only to find a list of unpronounceable chemicals and synthetic waxes? It is a common frustration to feel like you must choose between a beautiful pop of color and the actual health of your skin. We often settle for products that provide a temporary “slick” feeling but leave our lips even drier an hour later. But what if you could have it all? By understanding the nourishing tinted lip balm, science of essentials, essential oil DIY recipes, and natural lip care methods, you can transform your beauty routine into a wellness ritual.
In this guide, you will discover how to create high-performance lip treatments that rival luxury brands using simple, plant-based ingredients. We are going to explore the chemistry of carrier oils, the aromatic power of botanicals, and the joy of crafting your own custom tints. You have the capability to achieve a perfect, healthy pout while embracing a more [Sustainable Beauty Lifestyle]. Get ready to unlock your inner formulator and discover why making your own lip care is the ultimate empowering self-care hack!

Important Disclaimer: This article is for informational purposes only and should not replace professional advice. For health-related topics, consult healthcare providers. For financial or legal matters, seek qualified professional guidance. For safety procedures, verify current best practices and local regulations. Individual results may vary, and personal circumstances should always be considered when implementing any suggestions.
Foundation: The Science of Essentials and Natural Lip Care (H2)
To build a product that actually works, we must first build confidence in the basic biology of your lips. Unlike the rest of your skin, your lips do not have sebaceous (oil) glands. This means they cannot produce their own moisture and are incredibly vulnerable to environmental stressors like wind, sun, and dry air. This is why natural lip care is so vital—it provides the protective barrier that nature left out.
When we talk about the science of essentials, we are looking at how different fats and waxes interact with your skin cells. A truly nourishing tinted lip balm requires a balance of three key components: humectants (to draw moisture in), emollients (to smooth the surface), and occlusives (to seal it all in). By choosing plant-based versions of these, like shea butter and beeswax, you provide your skin with fatty acids that it recognizes and can actually use for repair. This is a supportive, non-judgmental way to approach beauty—focusing on what your body needs to thrive rather than just what it looks like on the surface.
H3: Why Essential Oils Matter
Essential oils aren’t just for scent; they are the “immune system” of the plant. When used correctly in essential oil DIY recipes, oils like Lavender can soothe irritation, while Peppermint can naturally increase circulation for a subtle plumping effect.
H3: The Problem with Petroleum
Many store-bought balms use petrolatum or mineral oil. While these are great occlusives, they offer zero nutritional value to your skin. Transitioning to [Plant-Based Occlusives] ensures you are feeding your skin vitamins E and A with every application.
Step-by-Step: Crafting Your Nourishing Tinted Lip Balm (H2)
Ready to start your first batch? This process is manageable, cost-effective, and incredibly satisfying. Think of this as a “kitchen chemistry” project that ends with a professional-grade beauty product. Follow these clear steps to achieve a perfect finish.
1. Prepare Your “Master Base”
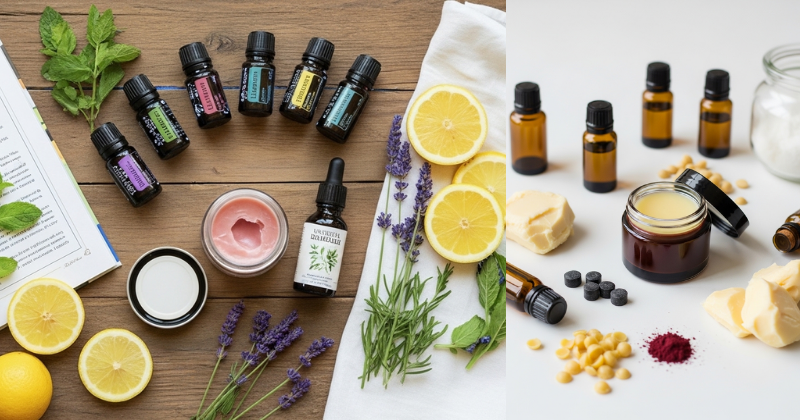
The golden ratio for a perfect balm is 1 part wax, 1 part brittle butter (like cocoa or shea), and 2 parts liquid oil (like jojoba or sweet almond).
- Action: Melt 1 tablespoon of beeswax pellets and 1 tablespoon of shea butter in a double boiler over low heat. Once liquid, stir in 2 tablespoons of jojoba oil.
2. Infuse the Tint
To turn a clear balm into a nourishing tinted lip balm, you need natural pigments.
- The Natural Way: Stir in 1/4 teaspoon of beetroot powder for a soft pink or a pinch of hibiscus powder for a berry hue.
- The Shortcut: You can also melt in a small sliver of your favorite natural lipstick to customize the shade perfectly.
3. Add the “Essentials”
Once the mixture is off the heat but still liquid, add your essential oils.
- Action: Add 5–8 drops of your chosen oil. For beginners, Sweet Orange or Lavender are safe and smell divine.
4. Pour and Set
Carefully pour the liquid into small tin containers or lip balm tubes. Let them sit undisturbed for at least 2 hours. Do not put them in the fridge immediately, as rapid cooling can cause the balm to crack!
Advanced Strategies: Pro Essential Oil DIY Recipes (H2)
Once you have mastered the basic formula, you can share expert-level insights by creating specialized treatments. These variations allow you to customize your approach to [Metabolic Skin Support] and environmental protection.
- The Overnight Repair Mask: Swap jojoba oil for heavier castor oil and add 2 drops of Frankincense essential oil. Castor oil provides a glossy, thick barrier that stays on all night, while Frankincense supports cellular turnover.
- The Sun Protection Blend: Incorporate Red Raspberry Seed Oil into your liquid oil portion. This oil has a natural, albeit low, SPF profile that adds an extra layer of defense for outdoor enthusiasts.
- The “Cooling Mint” Plumper: Use Peppermint and Rosemary essential oils. The menthol provides a refreshing tingle that brings blood flow to the surface, making lips appear naturally fuller without harsh chemicals.
H3: How do you make a natural lip balm stay smooth?
The secret to a smooth, non-gritty balm is the “Cooling Control” method. If you use shea butter, it can sometimes form tiny crystals if it cools too slowly. To prevent this, once your balm has sat at room temperature for about 20 minutes and is starting to turn opaque, move it to a cool (but not freezing) area to finish setting. This ensures the fatty acids bond tightly for a “butter-soft” texture.
Troubleshooting: Common DIY Challenges (H2)
Even with an essential oil DIY recipe, nature can be unpredictable. Address these frequent obstacles with solutions to keep your natural lip care journey on track.
- Obstacle: “My balm is too hard to get out of the tin.”
- Solution: You likely used too much beeswax. Melt it back down and add another teaspoon of liquid carrier oil (like almond oil).
- Obstacle: “The color is grainy or settled at the bottom.”
- Solution: Powders like beetroot don’t always dissolve; they “suspend.” Make sure to whisk the mixture constantly as it starts to cool and thicken before you pour it into the final container.
- Obstacle: “The scent faded quickly.”
- Solution: Essential oils are “volatile,” meaning they evaporate. Always add them at the very last second before pouring to ensure the heat doesn’t burn off the aromatic compounds.
Maximizing Results: The Holistic Lip Care Routine (H2)
To achieve the best results with your nourishing tinted lip balm, you should look at your routine as a whole. Healthy lips are a reflection of [Optimal Internal Hydration] and consistent care.
- Exfoliate Weekly: Your balm will work better if it doesn’t have to fight through dead skin cells. Mix a little sugar with honey for a 30-second lip scrub before applying your balm.
- Hydrate from Within: No balm can fix a body that is dehydrated. Ensure you are drinking enough water throughout the day to keep your skin cells plump from the inside out.
- Mindful Ingredient Sourcing: As you grow in your DIY journey, start looking for “fair trade” and “organic” labels for your butters and oils. This ensures your beauty routine supports a healthy planet too.
- Batch Consistency: Once you find a tint and scent you love, write down the exact drops and grams. This turns your DIY into a repeatable, professional-standard [Natural Beauty Protocol].
Conclusion
You have now discovered the transformative power of nourishing tinted lip balm, the science of essentials, and essential oil DIY recipes. By taking control of your ingredients, you are not just painting your lips; you are nourishing your body and embracing a more authentic form of beauty. This shift toward natural lip care is a journey of gradual progress and self-empowerment that pays dividends in both your health and your confidence.
Remember the key takeaways: balance your waxes and oils, use essential oils for functional benefits, and always have fun with your natural pigments. You have the capability to create something beautiful, safe, and effective. Go ahead—melt that first batch, discover your signature shade, and achieve the healthy, glowing smile you deserve. You’ve got this!