Make your own DIY bath bombs at home with this easy step-by-step guide. Learn simple ingredients, pro tips, and creative ideas for perfect fizz every time.
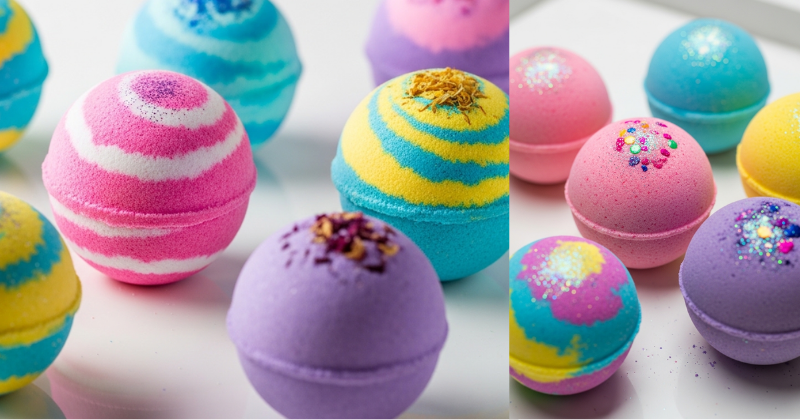
Have you ever dropped a colorful bath bomb into warm water and watched it fizz, swirl, and release the most relaxing scent? Now imagine creating that exact experience yourself—custom colors, favorite fragrances, and skin-loving ingredients—without paying boutique prices.
With this DIY bath bombs – easy step-by-step guide, you’ll discover how simple it is to make professional-looking bath bombs right in your kitchen. No complicated tools. No chemistry degree. Just a few affordable ingredients and a little creativity.
By the end of this guide, you’ll feel confident mixing, molding, and customizing bath bombs that fizz beautifully and turn every bath into a spa moment. Let’s get started.
Getting Started: What You Need to Make DIY Bath Bombs
Before you begin, it helps to understand why bath bombs work in the first place. The magic fizz comes from a chemical reaction between baking soda (a base) and citric acid (an acid). When they hit water, they react and release carbon dioxide bubbles—that satisfying fizz you love.
The good news? Making DIY bath bombs is beginner-friendly and budget-conscious.
Essential Ingredients
You’ll need:
- 1 cup baking soda
- ½ cup citric acid
- ½ cup Epsom salt
- ½ cup cornstarch
- 2½ tablespoons carrier oil (like coconut, almond, or grapeseed oil)
- 1 tablespoon water (added carefully)
- 10–15 drops essential oil (optional)
- Natural or cosmetic colorant (optional)
These ingredients are easy to find at grocery stores or online. Many people already have baking soda and cornstarch at home.
Tools You’ll Need
- Mixing bowls
- Whisk
- Spray bottle
- Measuring cups
- Bath bomb molds (or silicone molds)
If you don’t have special molds, don’t worry. Muffin tins, ice cube trays, or even clean Christmas ornament shells work beautifully.
Step-by-Step Process: How to Make DIY Bath Bombs
Now let’s break the process down into simple, manageable steps. This is where your DIY bath bombs come to life.
Step 1: Mix the Dry Ingredients
In a large bowl, whisk together:
- Baking soda
- Citric acid
- Epsom salt
- Cornstarch
Make sure there are no clumps. Smooth texture ensures even fizz and a professional finish.
Step 2: Combine the Wet Ingredients
In a separate small bowl, mix:
- Carrier oil
- Essential oils (if using)
- A few drops of colorant
If using powdered color, mix it with dry ingredients instead.
Step 3: Slowly Combine Wet and Dry
This step is key.
Pour the wet mixture into the dry ingredients slowly while whisking continuously. If you pour too fast, the mixture may start fizzing early.
After mixing, lightly spray the mixture with water—one spray at a time—while stirring. The texture should feel like damp sand.
Pro Tip: When you squeeze a handful, it should hold its shape without crumbling.
Step 4: Pack Into Molds
Fill each half of your mold slightly over the top. Press both halves together firmly. If using a single-sided mold, press the mixture down tightly with your fingers.
Let your DIY bath bombs sit in the mold for at least 10–15 minutes before gently removing.
Step 5: Dry Completely
Place them on parchment paper and allow them to dry for 24 hours.
Humidity affects drying time. If you live in a humid climate, consider running a dehumidifier or air conditioner during drying.
Advanced Strategies: Customize Your DIY Bath Bombs Like a Pro
Once you’ve mastered the basics, you can start experimenting. This is where creativity transforms a simple bath bomb into a spa-level experience.
Add Dried Flowers (Carefully)
Lavender buds or rose petals look beautiful—but use sparingly to avoid clogging drains.
For easier cleanup, place flowers inside a small muslin bag within the bath bomb.
Create Color Layers
Divide your mixture into separate bowls. Add different colors to each. Layer them into the mold for a stunning striped effect.
Make Moisturizing Bath Bombs
To increase skin softness:
- Add 1 tablespoon cocoa butter (melted)
- Or include a small piece of shea butter in the center
These create a nourishing, skin-conditioning bath experience.
Fun Add-Ins
- Biodegradable glitter
- Hidden color embeds
- Mini toys (for kids’ bath bombs)
Customization makes DIY bath bombs perfect for gifts, holidays, and party favors.
Troubleshooting Common DIY Bath Bomb Problems
Even experienced makers run into issues. The good news? Most problems have easy fixes.
Why Are My Bath Bombs Cracking?
Cracks usually mean they’re expanding while drying.
Solution:
- Use less water.
- Pack molds more tightly.
- Avoid humid environments.
Why Aren’t They Fizzing?
If your DIY bath bombs don’t fizz well:
- Check that your citric acid is fresh.
- Ensure the mixture didn’t activate early from too much moisture.
Why Are They Crumbly?
This means the mixture is too dry.
Fix:
- Lightly spritz once more with water and remix.
- Press more firmly into molds.
Why Did They Expand Out of the Mold?
Too much moisture triggers early reaction.
Next time:
- Add liquids more slowly.
- Reduce water amount slightly.
Remember—every batch teaches you something. Don’t get discouraged.
Featured Snippet: How Do You Make DIY Bath Bombs at Home?
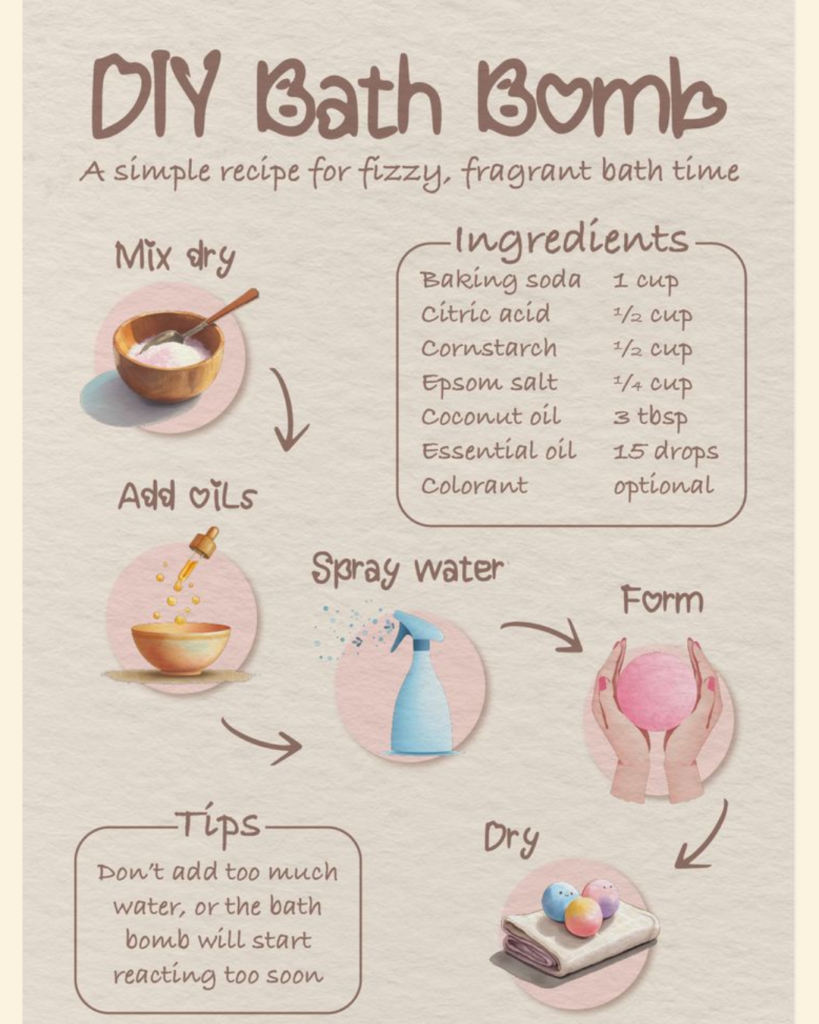
To make DIY bath bombs at home, mix baking soda, citric acid, Epsom salt, and cornstarch in a bowl. Combine carrier oil and essential oils separately, then slowly mix into the dry ingredients. Lightly spray with water until the texture resembles damp sand. Press firmly into molds and allow to dry for 24 hours before use.
Maximizing Results: Take Your DIY Bath Bombs to the Next Level
Now that you can make bath bombs confidently, let’s talk about elevating your results.
Improve Shelf Life
Store your DIY bath bombs in:
- Airtight containers
- Glass jars
- Vacuum-sealed bags
Keep them away from humidity to preserve fizz.
Turn It Into a Gift Business
Handmade bath bombs are popular at:
- Farmers’ markets
- Craft fairs
- Online shops
You can create themed collections:
- Relaxation blends
- Energizing citrus sets
- Holiday gift boxes
Pair this skill with related DIY projects like:
- Homemade sugar scrubs
- Natural body butters
- DIY candles
- Handmade soap recipes
This opens endless creative possibilities.
Make It a Self-Care Ritual
Set aside one evening a week as your “home spa night.” Pair your bath bomb with:
- Soft music
- Herbal tea
- A face mask
- A calming book
You’re not just making bath bombs—you’re creating experiences.
Why DIY Bath Bombs Are Worth It
Store-bought bath bombs can cost $5–10 each. Making them at home costs a fraction of that.
Beyond savings, you gain:
- Ingredient control
- Custom fragrance blends
- Creative expression
- Gift-making opportunities
- A relaxing hobby
Research shows creative activities reduce stress and improve mood. Crafting your own bath products adds therapeutic value even before you step into the bath.
Conclusion: Your Spa Experience Starts at Home
DIY bath bombs aren’t complicated. They’re fun, affordable, and incredibly satisfying to make. With just a few simple ingredients and this easy step-by-step guide, you can transform ordinary baths into colorful, fragrant escapes.
Start with one basic batch. Experiment with scents you love. Adjust as you learn. Each batch will get better and more beautiful.
You don’t need fancy tools or expert skills. You just need a bowl, a whisk, and the confidence to begin.
Go ahead—mix your first batch today and drop your handmade creation into warm water. Watch it fizz. Smile at what you made.
You’ve officially unlocked your at-home spa magic.