Create your own DIY aroma stones to naturally scent your home. Discover how these simple, porous diffusers can transform your space into a fragrant sanctuary today!
Have you ever wanted to enjoy the benefits of essential oils without the need for a noisy electric diffuser or the safety concerns of an open candle flame? You aren’t alone! Many people are turning to passive diffusion as a way to create a calm, inviting atmosphere in their homes. DIY aroma stones are the perfect solution. These handcrafted, porous stones absorb essential oils and slowly release their scent into the air, making them ideal for small spaces like bathrooms, desks, or bedside tables.
In this comprehensive guide, you will learn exactly how to make your own aroma stones using simple, budget-friendly ingredients like plaster or clay. We will explore the science behind how they work, the best essential oil blends to use, and creative ways to customize their appearance. By making these yourself, you avoid synthetic air fresheners and gain a beautiful piece of functional decor. Let’s dive into the world of handmade aromatherapy and unlock a fresher, more balanced home environment!
Foundation: What Are Aroma Stones and Why Make Them?
Before you start mixing ingredients, it is helpful to understand the basic concept. DIY aroma stones (sometimes called plaster diffusers or scent stones) are made from porous materials. Unlike a smooth river rock, these stones have tiny, microscopic holes that act as a “reservoir” for liquids. When you drop essential oil onto the stone, it sinks in and evaporates slowly over several hours or days.
The Benefits of Passive Diffusion
Passive diffusion is the most gentle way to enjoy aromatherapy. It doesn’t use heat, which can sometimes alter the chemical composition of sensitive essential oils. Because there is no water involved, you also don’t have to worry about mold or mineral buildup that often plagues ultrasonic diffusers. It is a set-it-and-forget-it method that is perfect for a busy lifestyle.
Choosing Your Material: Plaster vs. Salt Dough vs. Clay
There are several ways to achieve a porous finish:
- Plaster of Paris: This is the “gold standard” for aroma stones. It dries quickly, takes on the fine detail of molds, and is highly absorbent.
- Air-Dry Clay: A great option for those who want to “sculpt” their stones by hand rather than using molds.
- Salt Dough: A pantry-staple alternative that is fun for kids, though it is slightly less durable than plaster.
Essential Supplies for Beginners
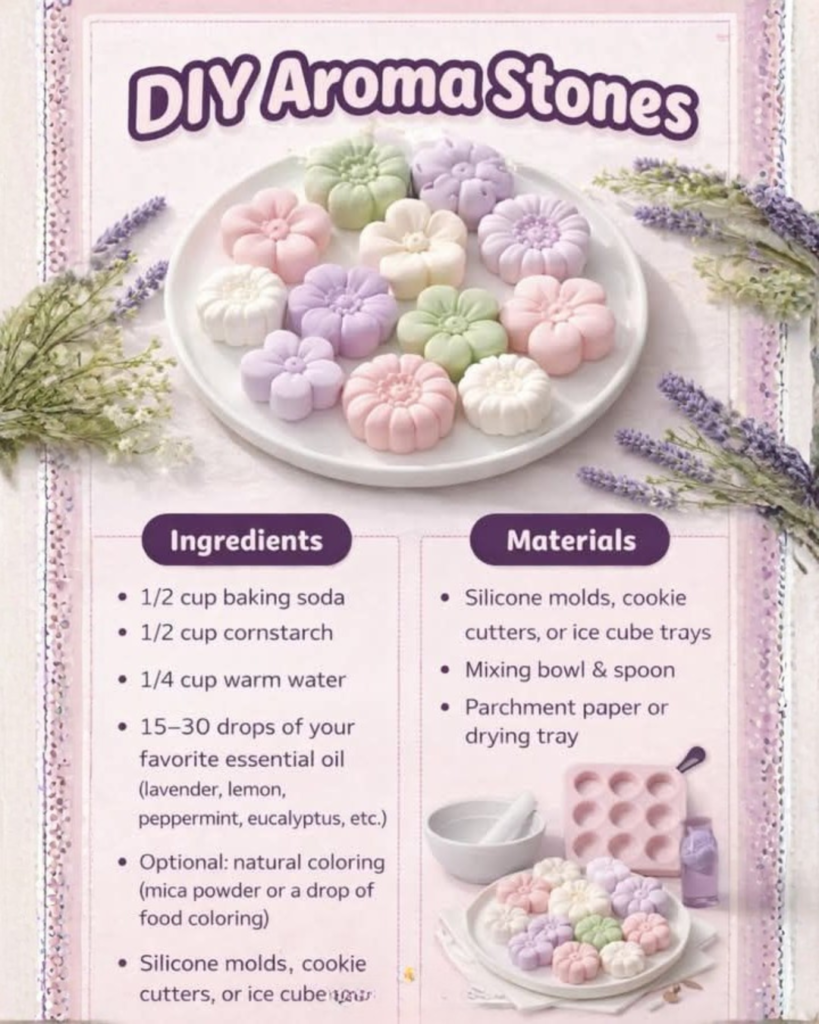
To get started with the plaster method, you will need:
- Plaster of Paris.
- Water.
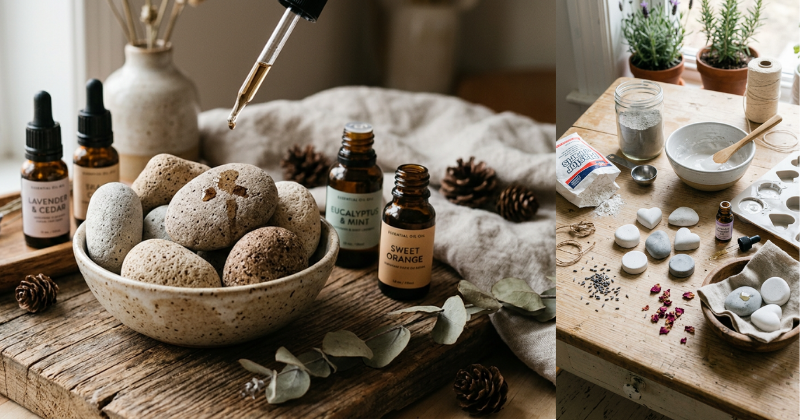
- Silicone molds (floral, geometric, or simple disc shapes).
- A mixing bowl and spatula you don’t mind getting messy.
- High-quality essential oils.
Step-by-Step Process: Crafting the Perfect Aroma Stone
Ready to get your hands dirty? Creating DIY aroma stones is a fast and satisfying process. The key is getting the ratio of plaster to water just right to ensure a strong, absorbent finished product.
1. Prepare Your Workspace
Plaster sets quickly, so you need to be ready. Lay down some newspaper or a silicone mat. Place your molds on a flat, level surface. Ensure you have your water and plaster measured out according to the package instructions (usually 2 parts plaster to 1 part water).
2. Mix the Plaster
Slowly sift the plaster into the water. Let it sit for a minute to “wet out,” then stir gently. Avoid vigorous whipping, as this introduces air bubbles that can weaken the stone and ruin the smooth finish. The consistency should be like thick pancake batter.
3. The Pouring Technique
Carefully pour the mixture into your molds. Give the molds a gentle “tap-tap” on the table to encourage any trapped air bubbles to rise to the surface.
- Pro Tip: If you want to hang your stones, insert a straw or a small piece of tubing near the top of the mold now to create a hole for a ribbon later.
4. Drying and Unmolding
Let the stones sit undisturbed for at least 30 to 60 minutes. They will actually feel warm to the touch as the chemical reaction happens! Once they are cool and feel solid, gently pop them out of the silicone molds. For the best results, let them “cure” for a full 24 hours before adding any essential oils.
Advanced Strategies: Customization and Expert Blending
Once you have mastered the basic white stone, you can start to experiment. DIY aroma stones are highly customizable, allowing you to match them to your home’s aesthetic.
Adding Color and Texture
You can “marble” your stones by adding a drop of acrylic paint or liquid pigment to the plaster mixture and giving it a very slight swirl before pouring. Alternatively, you can press dried botanicals like lavender buds or rose petals into the back of the stones while they are still wet for a beautiful, organic look.
Selecting Your Aromatherapy Blend
Since these stones provide a localized scent, you can tailor the oils to the room:
- For the Office: Use Peppermint and Rosemary to boost focus and mental clarity.
- For the Bedroom: Use Lavender and Bergomile to encourage deep relaxation and better sleep.
- For the Bathroom: Use Eucalyptus and Lemon for a “clean” and refreshing spa-like aroma.
How Many Drops Do You Need?
A common question is: How many drops of essential oil do you put on an aroma stone? For a standard 2-inch stone, start with 3–5 drops. The porous material will absorb it instantly. You can add more once the scent starts to fade, which usually happens after 2 to 4 days depending on the oil’s “note” (citrus fades faster than woodsy oils).
Troubleshooting: Common Challenges and Solutions
DIY projects don’t always go perfectly on the first try! Here is how to handle the most frequent issues when making DIY aroma stones.
- The stone is crumbly or soft: This usually means there was too much water in the mix. Re-melt (if using wax-based) or re-pour using more plaster. Accuracy in measuring is vital for structural integrity.
- There are lots of tiny holes on the surface: These are air bubbles. Next time, tap the mold more firmly or use a toothpick to “pop” bubbles on the surface immediately after pouring.
- The oil is leaving a stain: Some essential oils (like Patchouli or Sweet Orange) have a natural tint. If you want to keep your stones pristine white, apply the oil to the back or the side of the stone rather than the decorative front.
- The scent isn’t strong enough: Passive diffusion is subtle. If you can’t smell it, try moving the stone closer to where you sit, or place it in a small, enclosed area like a drawer or a closet.
Maximizing Results: Maintenance and Longevity
To ensure your stones continue to work effectively for years, follow these maintenance and “next level” tips.
Cleaning Your Stones Over time, the pores of the stone can become “clogged” with old oil residue. If you notice the stone isn’t absorbing new oil as well as it used to, you can gently sand the surface with fine-grit sandpaper. This opens up “fresh” pores and makes the stone look brand new again.
Creative Display Ideas
- Aroma Bowls: Make a dozen small “pebble” shaped stones and place them in a beautiful glass bowl.
- Car Diffusers: Use a small aroma stone with a clip to attach to your car’s air vent for a natural alternative to “hanging tree” air fresheners.
- Gift Sets: Pair a handmade stone with a 5ml bottle of essential oil for a thoughtful, handcrafted gift that shows you care about the recipient’s well-being.
Long-Term Sustainability By choosing DIY aroma stones, you are significantly reducing your household waste. You are no longer buying plastic plug-in refills or aerosol cans. It is a small but meaningful step toward a more sustainable and eco-friendly lifestyle.
Conclusion
Creating DIY aroma stones is a delightful way to merge the worlds of craft and wellness. You have learned how to mix the perfect plaster, pour beautiful shapes, and choose essential oils that enhance your daily life. These stones are more than just diffusers; they are a testament to your capability to create a beautiful, healthy home with your own two hands.
Whether you are looking to de-stress after a long day or simply want your guest bathroom to smell like a high-end spa, these stones are up to the task. The transformation of your space is just a pour away. So, grab your molds and your favorite oils—it’s time to start crafting!
Would you like me to help you create a specific “Essential Oil Blend Menu” for your new aroma stones?
Important Disclaimer: This article is for informational purposes only and should not replace professional advice. For health-related topics, consult healthcare providers. For safety procedures, verify current best practices and local regulations. Individual results may vary, and personal circumstances should always be considered when implementing any suggestions.