Create your own DIY SOOTHING ECZEMA CREAM to calm itchy, inflamed skin naturally. Discover how simple, organic ingredients can provide instant relief today!
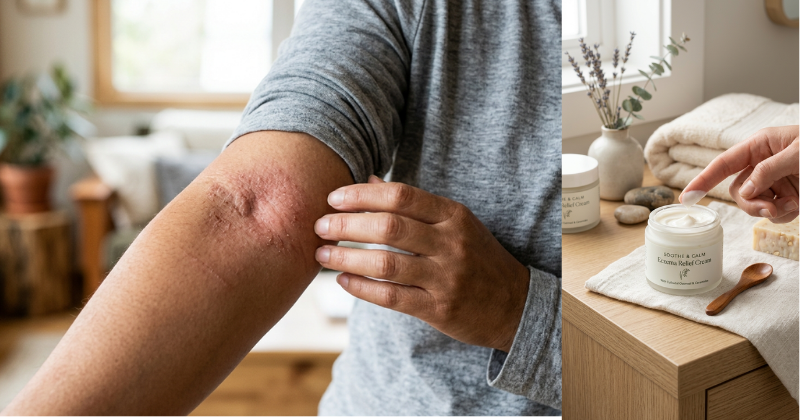
Have you ever spent a night unable to sleep because your skin felt like it was on fire, itching with a persistence that no store-bought lotion could quench? We have all been there, feeling frustrated by expensive creams that are filled with mysterious chemicals and synthetic fragrances. The good news is that you can take control of your skin’s health by making your own DIY SOOTHING ECZEMA CREAM. This natural, whipped balm is designed to lock in moisture, repair the skin barrier, and cool inflammation using ingredients that are safe enough to eat.
In this comprehensive guide, you will discover the power of botanical fats and anti-inflammatory extracts. We will show you exactly how to blend these components to achieve a professional-grade consistency that rivals luxury spa products. Whether you are dealing with chronic flares or occasional dry patches, this homemade remedy offers a gentle, sustainable path to comfort. Get ready to unlock the secret to calm skin and feel empowered by the simplicity of natural healing. You have the capability to transform your daily skincare routine into a ritual of self-care!
Foundation: Understanding the Eczema Barrier
Before you start mixing, it is vital to build confidence in why these specific ingredients work. Eczema is essentially a breakdown of the skin’s natural barrier. When this barrier is “leaky,” moisture escapes and irritants get in. A great DIY SOOTHING ECZEMA CREAM acts as a physical shield while providing the lipids your skin is craving.
The Power of Natural Lipids
The foundation of our cream relies on shea butter and coconut oil. Shea butter is rich in fatty acids and vitamins A and E, which are essential for skin repair. Coconut oil provides antimicrobial properties that help prevent infections in cracked skin. If you have already explored [Better Sleep Naturally: 8 Habits That Actually Work], you know that a calm body starts with a calm nervous system; soothing your skin is a massive step toward that goal.
Addressing Common Hesitations
Many beginners worry that a DIY cream will be too greasy or won’t last long. Reassurance lies in the technique! By whipping the oils, we create a light, “mousse-like” texture that absorbs much faster than raw oils. Furthermore, because you are making this yourself, you can ensure it is 100% fragrance-free—a common trigger for eczema sufferers.
Key Components for Skin Relief
- Colloidal Oatmeal: A “featured snippet” favorite! It creates a protective film and has been used for centuries to stop itching.
- Beeswax: Provides a breathable barrier to lock in hydration.
- Vitamin E Oil: Acts as a natural preservative and skin regenerator.
Step-by-Step: Crafting Your Whipped Soothing Balm
Creating your DIY SOOTHING ECZEMA CREAM is an achievable project that takes about 15 minutes of active time. Follow these steps to ensure a perfect, silky finish.
1. The Gentle Melt
What is the best way to melt oils for DIY skincare?
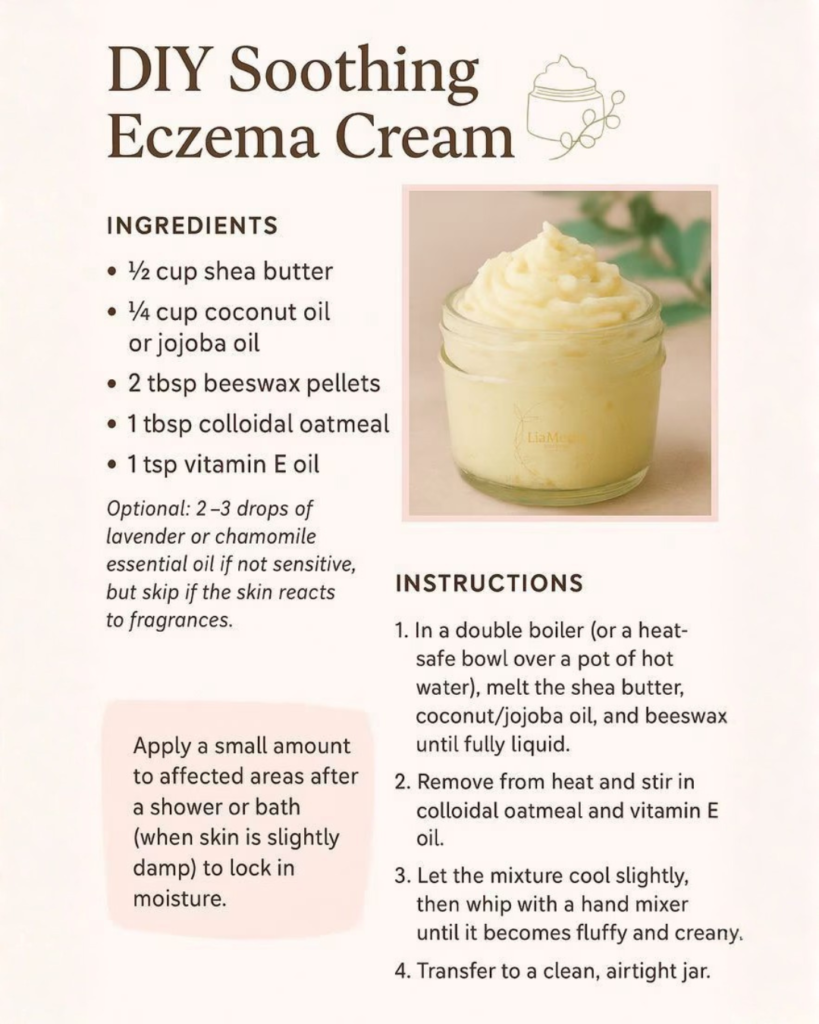
Always use a “double boiler” method to protect the nutrients in your oils. Place a glass bowl over a pot of simmering water. Add 1/2 cup of raw shea butter and 1/4 cup of organic coconut oil.
- Actionable Tip: Add 1 tablespoon of beeswax pellets here if you want a firmer cream that stays on the skin longer during the summer months.
2. Infusing the Actives
Once melted, remove from heat. Stir in 2 tablespoons of finely ground colloidal oatmeal and 1 teaspoon of Vitamin E oil. If you are also interested in internal health, like the [PINK GINGER METABOLISM BOOSTER], you will appreciate how these external “superfoods” work on your skin’s surface.
3. The Cooling Phase
Place the bowl in the refrigerator for about 20–30 minutes. You want the mixture to start firming up around the edges but still be soft in the middle. This timing is crucial for the whipping process.
4. The Magic Whip
Use a hand mixer to whip the mixture on high speed for 5 minutes. Watch as it transforms from a yellow oil into a bright white, fluffy cream. Transfer it to a clean glass jar. This satisfying completion is just as rewarding as finishing [8 YOGA POSES TO STRENGTHEN YOUR CORE].
Advanced Strategies: Customizing for Your Skin Type
Once you have mastered the basic recipe, you can share in expert-level insights to customize your approach. Every person’s eczema is different, and your cream should reflect that.
The Essential Oil Edge
If your skin isn’t highly reactive to scents, you can add 5 drops of Lavender or Helichrysum essential oil. Helichrysum is often called “Everlasting” because of its incredible ability to heal tissue. For a cooling sensation, a single drop of Peppermint oil can help “distract” the nerves from the itch.
For Weeping or “Wet” Eczema
If your patches are prone to being damp, add a teaspoon of Zinc Oxide powder to your mix. This is the same ingredient used in diaper creams; it creates a powerful moisture barrier and helps dry out weeping skin while the shea butter heals from underneath.
Seasonal Variations
In the winter, increase the amount of coconut oil for a softer, more spreadable cream. In the summer, increase the shea butter or beeswax to prevent the cream from melting in your bathroom. This adaptation is similar to how you might adjust your habits for [Better Sleep Naturally].
Troubleshooting: Common DIY Challenges
Even the best DIY projects can hit a snag. Here is how to handle frequent obstacles with solutions that keep you moving forward.
“My cream turned out grainy.”
- The Solution: This usually happens if the shea butter cools too slowly. Simply melt it down again and put it in the freezer instead of the fridge for the cooling phase. The rapid temperature drop prevents the fat crystals from clumping.
“The oatmeal makes the cream feel gritty.”
- The Solution: Ensure you are using “colloidal” oatmeal, which is a micro-fine powder. If you only have regular oats, pulse them in a high-speed blender and then sift them through a fine-mesh strainer before adding them to your melt.
“It’s too greasy for daytime use.”
- The Tip: A little goes a long way! Apply the cream immediately after a bath or shower while your skin is still slightly damp. This helps the cream absorb deeper and reduces the oily residue on the surface.
Maximizing Results: The Holistic Skin Plan
To build upon the success of your DIY SOOTHING ECZEMA CREAM, you should consider a “top-down and bottom-up” approach to wellness.
Complementary Routines
Your skin is an organ that reacts to your internal environment. Pair your topical cream with a [DETOXIFY YOUR BODY THROUGH YOUR FEET] soak once a week to help reduce the overall inflammatory load on your system. Additionally, remember that [red, green, and yellow apples support your bones] and provide antioxidants that help skin cells stay resilient.
Maintenance and Storage
Since this cream contains no water, it has a long shelf life—usually 6 to 9 months. However, always use clean hands to scoop it out to prevent bacteria from growing. Store it in a cool, dark place to keep the oils from going rancid.
Next-Level Hydration
For the ultimate relief, apply your DIY cream and then wrap the area in damp cotton bandages (a technique known as “Wet Wrapping”). This forces the moisture into the skin and can stop a flare-up in its tracks. It’s an empowering way to take control when things get tough!
Conclusion
Making your own DIY SOOTHING ECZEMA CREAM is a transformative step toward sustainable, chemical-free living. You have learned how to select healing fats, infuse them with soothing oatmeal, and whip them into a luxurious balm that truly protects your skin. By choosing to nurture your body with organic ingredients, you are not just treating a symptom—you are achieving a higher level of self-care and autonomy.
You have the capability to succeed and find relief. Start with a small batch today and discover the difference that pure ingredients can make. Your skin is your largest organ; treat it with the kindness and purity it deserves. Calm skin, a calm mind, and a vibrant life are all within your reach!
Would you like me to create a “Skin Trigger Tracker” to help you identify what causes your eczema flares?
Important Disclaimer: This article is for informational purposes only and should not replace professional advice. For health-related topics, consult healthcare providers. For financial or legal matters, seek qualified professional guidance. For safety procedures, verify current best practices and local regulations. Individual results may vary, and personal circumstances should always be considered when implementing any suggestions.