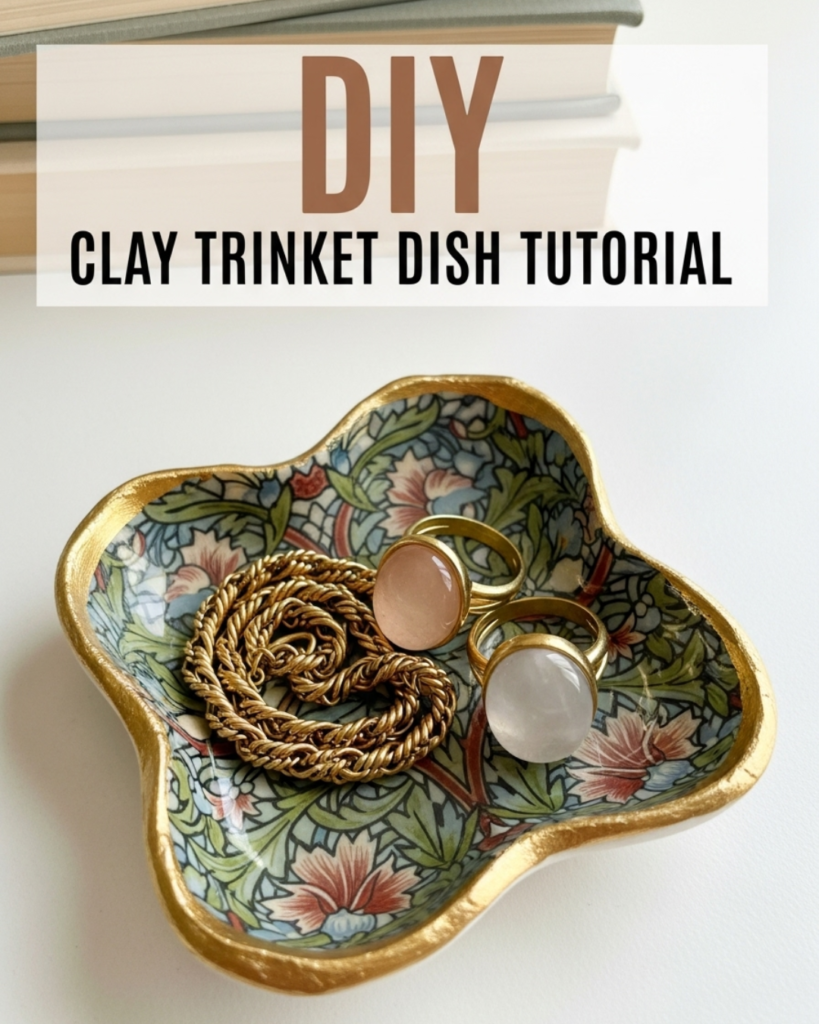
Create stunning Anthropologie-inspired DIY trinket dishes with air-dry clay, decoupage, and gold accents. This easy craft tutorial transforms your home decor today!
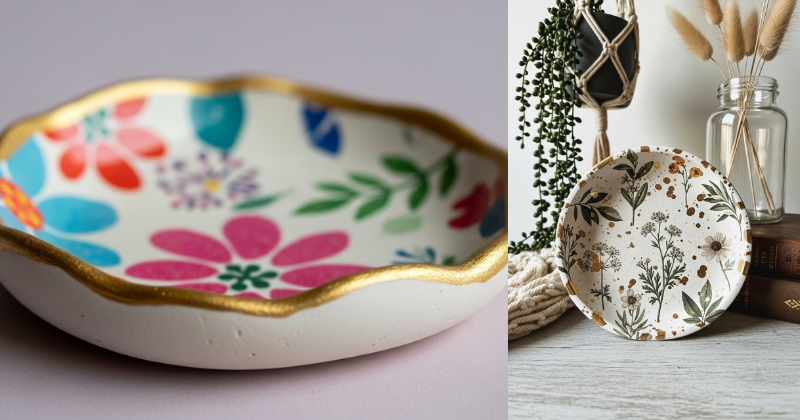
Have you ever wandered through a high-end home decor store, spotted a delicate, gold-rimmed ceramic dish with a vintage botanical print, and winced at the thirty-dollar price tag? You are not alone. We all love that curated, artisanal aesthetic, but our budgets don’t always align with boutique prices. What if I told you that you could recreate that exact look for just a few dollars using simple materials from the craft store? This Anthropologie inspired DIY trinket dish tutorial is designed to show you how to blend the earthy texture of air-dry clay with the elegance of decoupage.
In this guide, you will learn how to mold, decorate, and finish your own custom jewelry dishes. Whether you want to organize your rings by the sink or create a thoughtful gift for a friend, this project offers a high-end transformation with minimal effort. You have the creative power to unlock your inner artist and achieve a professional-looking result without ever firing up a kiln. Let’s get our hands a little messy and discover how rewarding DIY home decor can truly be!
Foundation: Getting Started with Air-Dry Clay
Before we dive into the molding process, let’s build your confidence with the basics. Air-dry clay is a fantastic medium for beginners because it requires no heat and is incredibly forgiving.
Why Air-Dry Clay is the Ultimate DIY Material
Unlike traditional ceramic clay, air-dry clay hardens at room temperature. It is cost-effective, easy to store, and serves as a blank canvas for various finishes. When you follow this Anthropologie inspired DIY trinket dish tutorial, you are opting for a craft that is as accessible as it is beautiful. It’s perfect for those who want the satisfaction of completion without the technical barriers of professional pottery.
Addressing Common Concerns
A common worry is that the final product will be too fragile or “homemade” looking. The secret to a high-end finish lies in the sanding and sealing process. By using fine-grit sandpaper after the clay dries, you can achieve a smoothness that rivals store-bought porcelain. Furthermore, adding a gloss sealer at the end provides that “fired” look we all crave.
Key Components for Success
- Air-Dry Clay: High-quality white clay provides the best base for decoupage.
- Paper Napkins: Choose ones with delicate florals or vintage patterns to capture that Anthropologie vibe.
- Gold Gilding: Liquid gold leaf or a metallic paint pen for those iconic “gold accents.”
- Sealer: Glossy Mod Podge or a spray varnish to protect your work.
Step-by-Step: Crafting Your Trinket Dish
Ready to start? Break down the process into these manageable steps to ensure your first batch of dishes turns out perfectly.
1. Rolling and Cutting the Clay
- Prepare: Knead a palm-sized piece of clay until it’s soft and pliable.
- Roll: Using a rolling pin (or a smooth glass bottle), roll the clay to a consistent thickness of about 1/4 inch.
- Cut: Use a small bowl as a template and cut around it with a craft knife to create a perfect circle.
2. Shaping the Dish
- Molding: Place your clay circle inside a slightly larger bowl to give it a curved shape.
- Smoothing: Dip your finger in a tiny bit of water and run it along the edges to erase any cracks or knife marks.
- Drying: Leave the clay in the bowl for 24–48 hours. Pro Tip: Flip the dish halfway through the drying time to ensure the bottom dries evenly and doesn’t warp.
3. Decoupage and Gold Accents
Once the dish is bone-dry and sanded smooth:
- Apply Patterns: Separate the layers of your napkin so you only have the top printed layer. Cut out a small floral design. Apply a thin layer of Mod Podge to the dish, press the napkin down gently, and seal with another layer of Mod Podge.
- Add Luxury: Use a small brush to apply gold liquid leaf to the rim. This is the “magic” step that makes the dish look like a designer find!
Advanced Strategies: Expert Design Tips
Once you have mastered the basic Anthropologie inspired DIY trinket dish tutorial, it’s time to experiment and personalize your approach.
Creative Solutions and Variations
- Pressed Botanicals: If you enjoy [gardening topics], you can press real dried lavender or small pansies into the wet clay before it dries. This creates a literal connection with nature.
- Marbling: Take two different colors of air-dry clay, twist them together, and roll them out. This produces a stunning marble effect that looks like expensive stone.
- Texture Stamping: Use a piece of lace or a textured stamp to press patterns into the clay while it’s still wet. This adds a tactile element that looks incredibly sophisticated under a layer of gold.
Customizing Your Aesthetic
You don’t have to stick to circles! Try cutting leaf shapes, hexagons, or even organic, “wabi-sabi” irregular shapes. These variations allow you to customize your decor to match any room in your house, from a [refreshed bedroom] to a chic home office.
Troubleshooting: Common Challenges and Solutions
Even the most experienced crafters face obstacles. Here is how to handle them with encouragement.
“My clay cracked while drying.”
- The Solution: Cracking often happens if the clay dries too fast or if you used too much water while smoothing. If a crack appears, you can “fill” it with a small paste made of clay and water. Sand it down once dry, and it will be virtually invisible under the decoupage.
“The napkin is wrinkling during decoupage.”
- Alternative Approach: The “plastic wrap” trick is a life-saver. Place your napkin piece onto the Mod Podge, then place a piece of plastic wrap over it. Use your fingers to smooth out wrinkles through the plastic wrap. This prevents the delicate paper from tearing.
“The gold paint is smudging.”
- Preventive Measures: Ensure your Mod Podge is 100% dry before applying gold accents. If you are using liquid leaf, remember it is oil-based; work in a well-ventilated area and give it at least an hour to set before handling.
Maximizing Results: Styling and Care
To build upon your basic success, think about how these dishes can complement your broader [sustainable lifestyle changes] and home organization.
Long-Term Maintenance
Air-dry clay is not waterproof or food-safe. To keep your dishes looking beautiful:
- Cleaning: Never submerge them in water. Use a damp cloth to wipe them down. If you need to deep clean your vanity, check out our [DIY non-toxic cleaning recipes] for safe surface care.
- Organization: Use these dishes to hold your [natural DIY lip balm] or the [DIY aroma stones] you made last week. They provide a designated home for small items that usually get lost.
Gift Giving and Beyond
These dishes make the ultimate [handmade Mason jar spa gifts] addition. Place a small dish at the top of a gift basket filled with homemade soaps and scrubs. It adds a touch of artisanal luxury that reminds the recipient of your capability and thoughtfulness.
Featured Snippet: How do you seal air-dry clay to look like ceramic?
To make air-dry clay look like ceramic, you must sand the dry piece with fine-grit sandpaper until perfectly smooth, then apply 2–3 thin coats of a high-gloss sealer like Mod Podge or a glossy acrylic varnish. For a professional finish, add gold gilding to the edges and ensure each layer of sealer is completely dry before applying the next.
Conclusion
Completing this Anthropologie inspired DIY trinket dish tutorial is an empowering step toward creating a home you love on your own terms. You have discovered that you have the capability to succeed in crafting high-end decor with simple, non-toxic materials. By combining air-dry clay with your personal artistic touch, you achieve a level of style that is both achievable and deeply satisfying.
You’ve got this! Start by picking up a small pack of clay this weekend and see where your creativity takes you. Your nightstand is waiting for its new, beautiful companion.