Discover the ultimate anti aging soap recipe to rejuvenate your skin naturally. Learn how to craft luxurious, youth-boosting bars that transform your daily routine today!
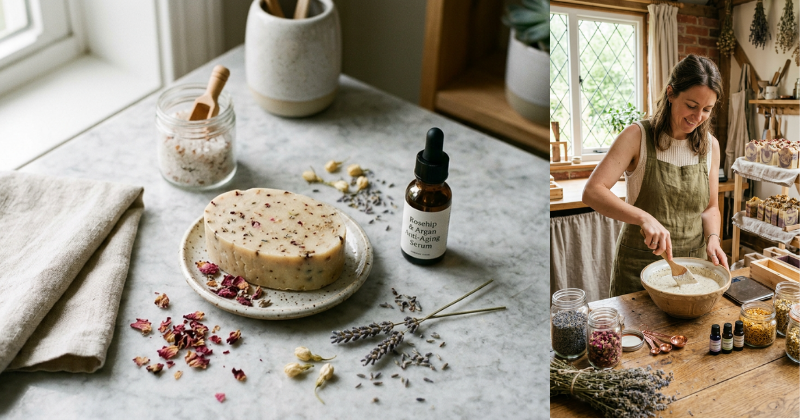
Have you ever looked at the back of a high-end beauty bar only to find a list of chemicals you can’t pronounce? It is frustrating to spend a fortune on skincare that doesn’t feel personal or truly natural. But what if you could unlock the secret to youthful skin right in your own kitchen? Crafting your own soap allows you to control every single ingredient, ensuring that your skin receives only the most potent, age-defying nutrients. This anti aging soap recipe isn’t just a cleaning product; it is a specialized treatment designed to hydrate, firm, and brighten your complexion.
In this comprehensive guide, we are going to walk you through the rewarding process of making natural soap from scratch. You will learn about the “holy grail” oils for mature skin, the power of antioxidants, and how to achieve a professional-quality bar every time. Whether you are a total beginner or a seasoned DIYer, this roadmap will empower you to take charge of your beauty regimen. Get ready to transform your skin’s texture and enjoy the confidence that comes with a healthy, natural glow. Your journey to timeless beauty begins now!
Foundation: Understanding Anti-Aging Ingredients
Before we dive into the bubbles, let’s build your confidence with the basic concepts of skincare soap. The goal of an anti aging soap recipe is twofold: to gently cleanse without stripping away natural oils and to deposit ingredients that support skin elasticity. As we age, our skin produces less sebum, making hydration the most critical factor in any recipe.
The Science of Mature Skin Care
Mature skin requires specific fatty acids to maintain its barrier. Oils like Rosehip and Argan are legendary in the wellness world because they are packed with Vitamin A and Vitamin E. These nutrients help speed up cell turnover and protect against environmental damage. If you are already looking into [15 FOODS THA BOOST YOUR IMMUNITY SYSTEME], you’ll recognize that the antioxidants we eat are just as important when applied topically!
Addressing Common Hesitations
Many beginners worry about working with lye (sodium hydroxide). It is a natural concern! However, once you understand the safety protocols—like wearing gloves and eye protection—the process becomes as predictable as baking a cake. Saponification is the magical chemical reaction that turns oils and lye into soap; by the time the bars are cured, no lye remains. You can achieve professional results safely by following our step-by-step guidance.
Key Components for Ageless Skin
- Rosehip Seed Oil: Known for its “natural retinol” effect.
- Shea Butter: Provides a creamy lather and deep moisture.
- Frankincense Essential Oil: Traditionally used to tighten and tone skin.
- Vitamin E Oil: A powerful antioxidant that also acts as a natural preservative for the oils.
Step-by-Step Process: Crafting Your Ageless Bar
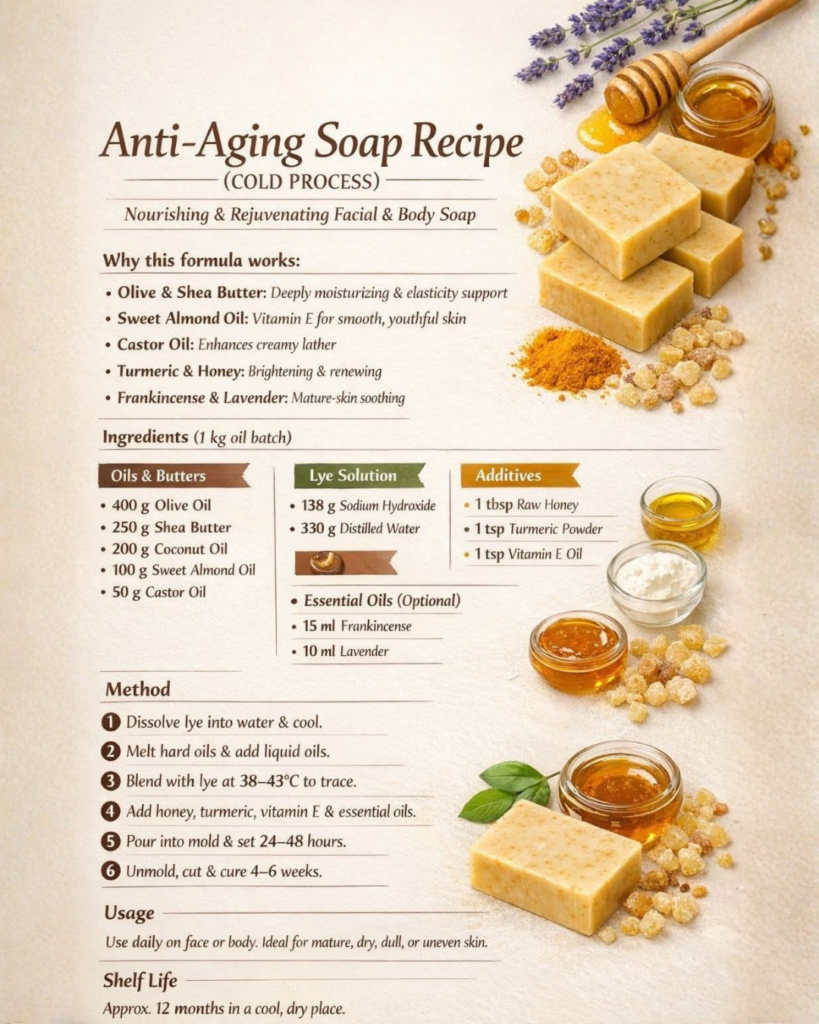
We will use the “Cold Process” method for this recipe. This allows us to keep the temperatures low enough to preserve the delicate properties of our anti-aging oils.
1. Preparation and Safety
Clear your workspace and ensure you have your safety gear on. Use stainless steel or heat-safe plastic tools.
- The Method: Always add lye to water, never water to lye (remember: “The snow falls on the lake”).
- Pro Tip: Work in a well-ventilated area to avoid breathing in the initial lye fumes.
2. Measuring Your Ingredients
For a standard batch, you will need:
- 10 oz Olive Oil (infused with calendula if possible)
- 8 oz Coconut Oil (for cleansing)
- 6 oz Shea Butter (for luxury moisture)
- 4 oz Rosehip Seed Oil (our star anti-aging ingredient)
- 4.1 oz Lye
- 9 oz Distilled Water
3. Mixing and Emulsifying
- Step A: Melt your solid butters and oils together.
- Step B: Slowly pour the lye-water solution into the oils.
- Step C: Use a stick blender to reach “trace”—this is when the mixture looks like thick pudding.
- Step D: Stir in 1 oz of Frankincense or Geranium essential oil for that final youth-boosting punch.
4. Pouring and Curing
Pour the mixture into your silicone mold. Tap it on the counter to release air bubbles. You must let the soap sit for 24–48 hours before cutting. Once cut, the bars need to “cure” in a cool, dry place for 4 to 6 weeks. This patience is what creates a long-lasting, gentle bar of soap.
Advanced Strategies: Customizing Your Recipe
Once you’ve mastered the basic anti aging soap recipe, you can start to experiment. Just like learning [how to make coffee logs without wax], soap making is an art form that allows for endless creativity and personal adaptation.
Herbal Infusions
Instead of using plain distilled water, try using a strong-brewed Green Tea. Green tea is loaded with polyphenols that can help reduce skin inflammation. You can also infuse your olive oil with dried hibiscus flowers, often called the “Botox plant” for its ability to increase skin elasticity naturally.
Adding Natural Colorants
Avoid synthetic dyes. Instead, use French Pink Clay. It not only provides a beautiful dusty-rose color but also gently draws out impurities without drying the skin. This is particularly helpful if you are also following a routine like the [TURMERIC GLOW SHEA BUTTER BODY SCRUB] for a full-body radiance.
Specialized Additives
Consider adding Silk Amino Acids or Goat Milk powder at trace. These additives create a “silky” feel on the skin and provide extra proteins that support the skin’s structure. This expert-level insight will make your bars feel like they came from a high-end apothecary.
Troubleshooting: Common Challenges
Don’t let setbacks discourage you! Even master soap makers encounter “oops” moments.
“My soap turned brown!”
- The Solution: This is usually caused by essential oils with high vanillin content. For an anti-aging bar, stick to floral or resinous oils like Rose, Frankincense, or Neroli to keep the color light and fresh.
“The soap feels too soft.”
- The Solution: Mature skin recipes are high in conditioning oils, which take longer to harden. Ensure you aren’t using too much water. You can also add a teaspoon of sodium lactate to your lye water to help the bars unmold more easily.
“I see white powder on top.”
- The Solution: This is called “Soda Ash.” It is harmless and happens when the lye reacts with carbon dioxide in the air. You can prevent this by spraying the top of your fresh pour with 99% isopropyl alcohol or simply steam it off after the soap has cured.
Maximizing Results: A Holistic Approach
To see the best results from your anti aging soap recipe, you should view it as part of a larger self-care ecosystem. Soap stays on your skin for a short time, so use it as the first step in a “layering” routine.
How often should I use anti-aging soap?
You can use this natural soap daily. Because it is high in shea butter and rosehip oil, it won’t disrupt your skin’s pH balance like commercial detergents. For best results, follow your wash with a high-quality serum while your skin is still slightly damp.
Complementary Strategies
- Internal Health: Your skin reflects your internal state. Check out [12 signs of low estrogen] to see if hormonal changes are affecting your skin’s elasticity.
- Targeted Care: If you have specific skin growths or stubborn patches, remember that [castor oil is known to help dissolve growths] and can be used as a nighttime spot treatment.
- Relaxation: Stress is a major contributor to premature aging. Try integrating [Still in Bed? Try These Gentle Morning Stretches] to lower your cortisol levels and keep your skin looking rested.
Conclusion
Mastering this anti aging soap recipe is a powerful step toward sustainable, effective self-care. You have learned how to select premium oils, handle the soap-making process safely, and troubleshoot common issues. By creating your own beauty bars, you are not just saving money—you are investing in the long-term health and vitality of your skin.
You have the capability to succeed and create something truly beautiful. Start with a small batch, enjoy the creative process, and feel the transformation every time you step into the shower. Your skin will thank you for the extra love and the chemical-free glow!
Would you like me to help you calculate the exact lye-to-oil ratio for a custom-sized batch of this soap?
Important Disclaimer: This article is for informational purposes only and should not replace professional advice. For health-related topics, consult healthcare providers. For financial or legal matters, seek qualified professional guidance. For safety procedures, verify current best practices and local regulations. Individual results may vary, and personal circumstances should always be considered when implementing any suggestions.