Learn how to make DIY bath bombs with this easy step-by-step guide. Discover the secrets to perfect fizz, vibrant colors, and soothing scents for your home spa!
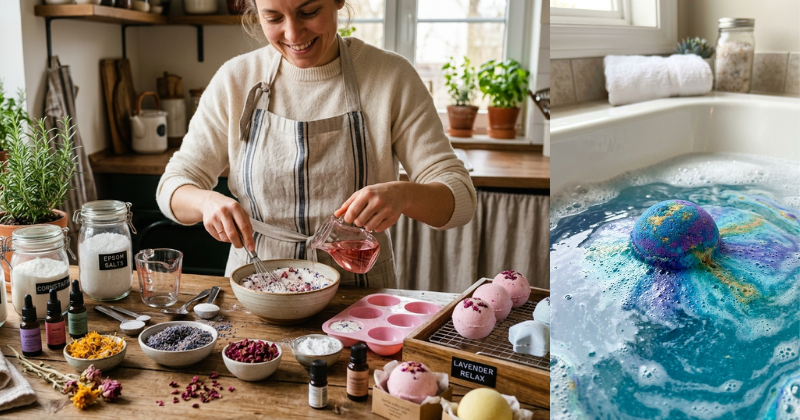
Have you ever walked past a luxury bath shop and felt instantly drawn in by the kaleidoscope of colors and the intoxicating aroma of essential oils? We have all been there, tempted to fill a basket with those fizzy delights, only to realize that a single relaxing evening could cost a small fortune. But what if you could unlock the secret to spa-quality relaxation right in your own kitchen? Creating your own bath treats is an incredibly rewarding DIY project that allows you to control every ingredient, ensuring your soak is as natural as it is luxurious. This DIY bath bombs – easy step-by-step guide is designed to take the mystery out of the fizz and put the power of pampering back into your hands.
In the following sections, you will learn exactly how to balance simple household ingredients to create the perfect effervescent reaction. We will cover everything from choosing the right molds to mastering the “wet sand” consistency that ensures your creations don’t crumble. Whether you are looking to save money, create personalized gifts, or simply enjoy a chemical-free soak, this guide provides the roadmap to success. Get ready to transform your bathroom into a sanctuary and discover just how easy it is to achieve professional results at home. You have the capability to create something beautiful today!
Foundation: Understanding the Science of the Fizz
To build your confidence as a maker, it helps to understand the basic concepts behind the “magic” of a bath bomb. At its core, a bath bomb is a simple chemical reaction waiting to happen. By understanding the foundation, you can troubleshoot any issues and begin to experiment with your own unique variations.
The Dynamic Duo: Citric Acid and Baking Soda
The fizzing action occurs because of an acid-base reaction. Baking soda (sodium bicarbonate) is the base, and citric acid is the acid. When they are dry, they are stable. However, the moment they hit water, they react to create carbon dioxide gas—this is what produces those delightful bubbles! To ensure a gentle and skin-soothing experience, we balance these with “fillers” like cornstarch and Epsom salts.
Why DIY is Better for Your Wellness
Many store-bought options contain synthetic fragrances and “glitter” that can irritate sensitive skin or even impact your hormonal balance. If you are already looking into topics like [12 signs of low estrogen], you know how important it is to be mindful of endocrine disruptors in beauty products. By making your own, you can use high-quality carrier oils and pure essential oils that actually support your skin’s health.
Key Components for Success
- Binder: Usually a light oil (like coconut or almond) to hold the powder together.
- Liquid: A tiny amount of witch hazel or water to activate the “stickiness” without starting the fizz too early.
- Scent & Color: Essential oils for aromatherapy and natural micas or clays for visual appeal.
Step-by-Step Process: Your First Batch
Ready to dive in? This core method is designed to be manageable for beginners while producing high-quality results. Follow these steps carefully, and you will achieve a perfect fizz every time.
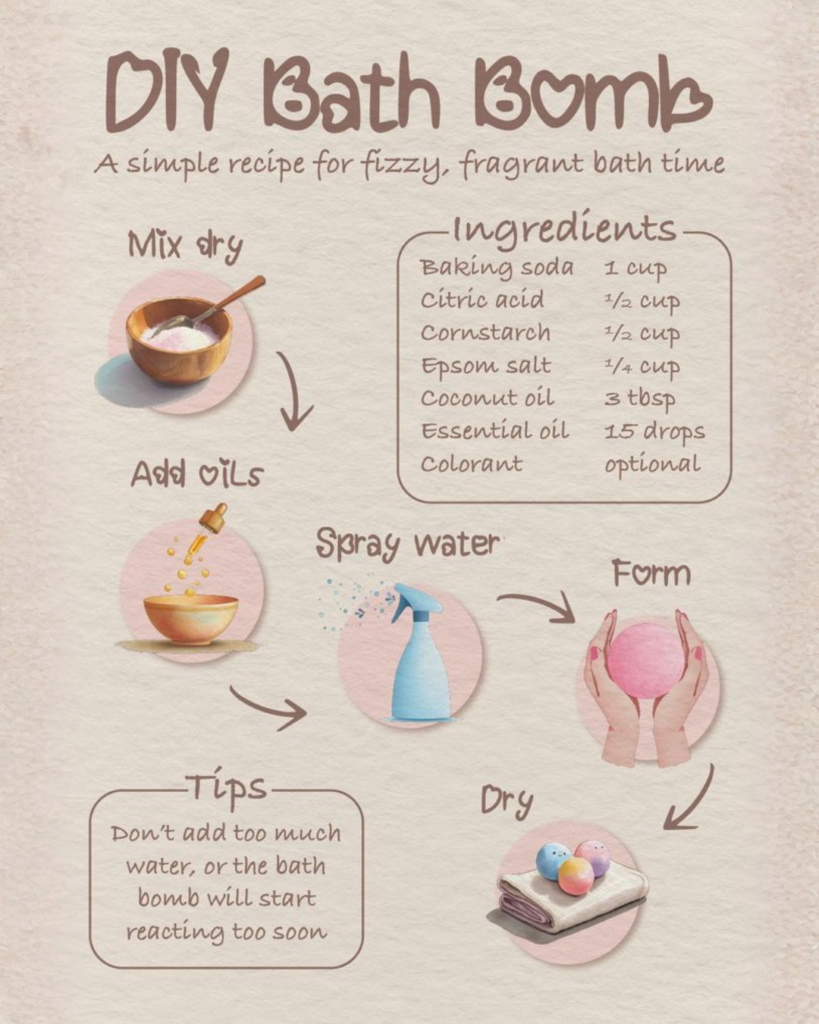
1. Gather Your Ingredients and Tools
- 1 cup Baking Soda
- 1/2 cup Citric Acid
- 1/2 cup Epsom Salt
- 1/2 cup Cornstarch
- 2 tbsp Carrier Oil (Melted Coconut Oil or Jojoba Oil)
- 1 tsp Witch Hazel (in a spray bottle)
- 15-20 drops Essential Oil (Lavender or Eucalyptus are great starters)
- Bath bomb molds (or even a muffin tin!)
2. Mix the Dry Ingredients
In a large glass bowl, whisk together the baking soda, citric acid, Epsom salt, and cornstarch. Ensure there are no lumps. This creates the “canvas” for your bath bomb. If you’ve ever made a [Homemade Lemon and Lilac Sugar Scrub], you’ll find this mixing process very familiar and satisfying!
3. Add the Wet Ingredients
In a separate small jar, mix your carrier oil and essential oils. Slowly add the oil mixture to the dry ingredients, a few drops at a time. Whisk constantly. The goal is to avoid triggering the citric acid.
4. The “Squeeze Test”
How do you know if bath bomb mixture is the right consistency?
This is the most important part of the process. Use your spray bottle of witch hazel to lightly spritz the mixture. Mix with your hands. The consistency should feel like damp sand. When you squeeze a handful, it should hold its shape without crumbling. If it falls apart, add one more spritz of witch hazel.
5. Mold and Dry
Pack the mixture tightly into both halves of your mold, piling it slightly high in the middle. Press the halves together firmly. Do not twist! Let them sit in the mold for about a minute, then gently tap and remove. Let your bath bombs dry on a soft towel for at least 24 hours.
Advanced Strategies: Pro Tips for Customization
Once you have mastered the basic DIY bath bombs – easy step-by-step guide, you can begin to share in expert-level insights to elevate your creations.
Incorporating Botanicals
For a true spa experience, add dried rose petals, lavender buds, or calendula flowers to the bottom of the mold before packing in the mixture. This adds a beautiful, high-end look. If you enjoy a connection with nature, you might even use dried herbs from your own garden.
Layering and Colors
You can divide your mixture into three bowls and add a different natural clay or mica powder to each. By layering these colors in the mold, you can create a “hidden” color center or a beautiful striped effect. This allows for endless experimentation and personal adaptation.
Skin-Boosting Additives
Want to make your bath even more moisturizing? Add a tablespoon of melted shea butter to your oil mix. This is a great way to complement a routine that includes a [TURMERIC GLOW SHEA BUTTER BODY SCRUB] for total skin rejuvenation. The warm bath water helps the butter melt into your skin, leaving you feeling velvety smooth.
Troubleshooting: Common Challenges and Solutions
DIY projects can sometimes be tricky, but don’t let setbacks discourage you! Most bath bomb “fails” can still be used as “bath fizz” powder.
“My bath bombs are expanding or ‘growing’ out of the mold.”
- The Cause: You likely added too much liquid or the humidity in your house is too high.
- The Solution: Use a dehumidifier if you live in a damp climate, and always use a spray bottle for witch hazel rather than pouring it in.
“The bath bombs are crumbling when I take them out.”
- The Cause: The mixture was too dry.
- The Solution: Add one or two more spritzes of witch hazel during the mixing phase. Remember the “wet sand” rule!
“They aren’t fizzing very much.”
- The Cause: Your citric acid might be old, or you used too much cornstarch.
- The Solution: Check expiration dates and ensure your ratio of baking soda to citric acid is roughly 2:1.
Maximizing Results: Next Level Tips for Relaxation
To truly build upon your basic success, think about how your bath bombs fit into your overall wellness routine. A bath is more than just washing; it is a ritual.
The Ultimate Nighttime Routine
If you struggle with restlessness, use lavender and cedarwood in your bath bombs. Combine this with knowing [What to Eat Before Bed for Better Sleep] to create a holistic approach to rest. The magnesium in the Epsom salts in your bath bomb will help relax your muscles, while the warm water prepares your body for deep sleep.
Maintenance and Long-term Storage
Store your bath bombs in an airtight glass jar or wrap them tightly in plastic wrap. Exposure to air and moisture will cause them to lose their fizz over time. Properly stored, they can last up to six months, making them perfect for building a “self-care stash.”
Complementary Strategies
While you soak, why not treat your face too? You could use a gentle cleanser or even a small batch of an [ANTI AGING SOAP RECIPE] to wash away the day’s stress. If you find that stress is affecting your health, remember that [Emotions always had a bad affect on your body], so taking this time for yourself isn’t just a luxury—it’s a necessity for your long-term health.
Conclusion
Mastering this DIY bath bombs – easy step-by-step guide is an empowering step toward a more sustainable and personalized self-care routine. You have learned the science of the fizz, the importance of the “squeeze test,” and how to troubleshoot common obstacles. By creating these fizzy delights yourself, you are not only saving money but also ensuring that your body is treated to the very best natural ingredients.
You have the capability to succeed in this creative journey. Whether you make a batch for yourself tonight or prepare a dozen for friends, the satisfaction of completion is a reward in itself. So, grab your baking soda and your favorite oils, and start creating your own home spa experience!
Would you like me to help you create a custom essential oil blend recipe for “Deep Sleep” or “Morning Energy” bath bombs?
Important Disclaimer: This article is for informational purposes only and should not replace professional advice. For health-related topics, consult healthcare providers. For financial or legal matters, seek qualified professional guidance. For safety procedures, verify current best practices and local regulations. Individual results may vary, and personal circumstances should always be considered when implementing any suggestions.