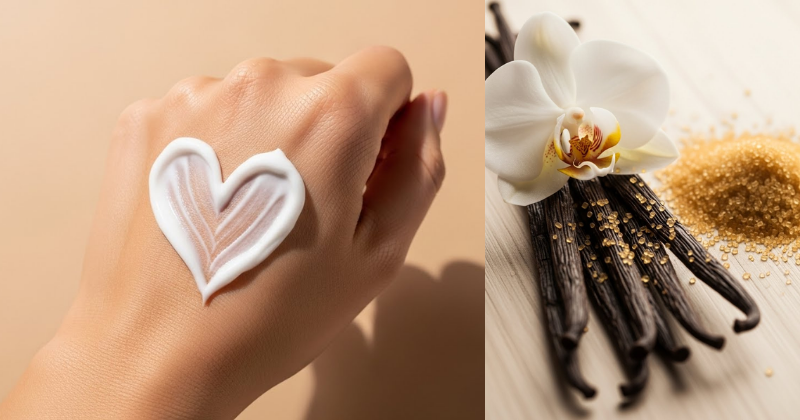
Are your hands feeling dry, cracked, and crying out for deep moisture, especially during the harsh winter months? Store-bought creams often contain fillers or synthetic fragrances that irritate sensitive skin. It’s time to take control of your self-care routine! Learning to make DIY CINNAMON AND VANILLA HAND CREAM is an achievable Home Tips & DIY project that not only saves you money but also ensures you’re putting only pure, nourishing ingredients on your skin. This recipe emphasizes wellness topics and sustainable lifestyle changes, delivering luxurious, long-lasting hydration. Get ready to discover how to transform your skincare routine with this potent, aromatic, and all-natural balm.
🛑 Important Disclaimer
Important Disclaimer: This article is for informational purposes only and should not replace professional advice. For health-related topics, consult healthcare providers. For financial or legal matters, seek qualified professional guidance. For safety procedures, verify current best practices and local regulations. Individual results may vary, and personal circumstances should always be considered when implementing any suggestions.
🌿 Section 1: Foundation First: Understanding Emollients and Oils
Before mixing your first batch of DIY CINNAMON AND VANILLA HAND CREAM, it’s helpful to build confidence with basic concepts regarding the ingredients’ functions. This cream is based on the synergy between butters (emollients) and oils (occlusives).
H3: Building Confidence with Basic Concepts: The Role of Butters and Oils
The effectiveness of this hand cream relies on two key structural components:
- Butters (Emollients): Ingredients like Shea Butter and Cocoa Butter are excellent emollients, meaning they soften and smooth the skin. They are rich in fatty acids and penetrate the outer layers of the skin barrier, adding moisture and flexibility.
- Oils (Occlusives): Oils like Coconut Oil and Almond Oil are occlusive, meaning they form a protective barrier on the skin’s surface. This barrier seals in moisture, preventing transepidermal water loss ($\text{TEWL}$), which is vital for healing dry hands.
- Waxes (Stabilizers): Beeswax provides structure, creating a stable cream that won’t melt instantly and gives a protective, non-greasy coating.
H3: Addressing Common Concerns: Why Natural Ingredients Work Best
Many commercial creams rely on water and synthetic waxes, which can provide temporary relief but require high levels of preservatives.
- Non-Judgmental Language: You don’t need a science degree to make effective skincare! You just need pure ingredients. This DIY CINNAMON AND VANILLA HAND CREAM uses only oil-based components, eliminating the need for strong chemical preservatives and maximizing the cost-saving benefits.
- Encouraging Reassurance for Beginners: The process is straightforward: melt, mix, and cool. Even if you’ve never made a Home Tips & DIY product before, you will achieve a professional-quality balm.
🥣 Section 2: Step-by-Step Process: Core Methods for the Cream
This section provides the clear, actionable language and step-by-step guidance to create your luxurious DIY CINNAMON AND VANILLA HAND CREAM. We will use the double boiler method for safety considerations and controlled melting.
Ingredients and Tool Requirements
| Ingredient | Quantity | Purpose | Tool Requirement |
| Shea Butter (Unrefined) | $1/2 \text{ cup}$ | Emollient, deep moisturizing base | Double Boiler setup or Heat-safe Bowl |
| Coconut Oil (Solid) | $1/4 \text{ cup}$ | Occlusive, aids absorption | Whisk or hand mixer |
| Beeswax Pellets | $2 \text{ Tablespoons}$ | Stabilizer, protective barrier | Sterilized Jars/Tins for storage |
| Vanilla Extract (Pure) | $1 \text{ teaspoon}$ | Aromatic, soothing scent | Measuring spoons/cups |
| Cinnamon Essential Oil | $3 \text{-} 5 \text{ drops}$ | Aromatic, circulatory boost (Use sparingly!) |
Step-by-Step Guidance (Core Methods)
- Prepare the Setup: Set up a double boiler by placing a heat-safe glass bowl over a pot of simmering water. The water should not touch the bottom of the bowl. This is a crucial safety consideration to prevent scorching the butters.
- Melt the Base (Actionable Language): Add the Shea Butter, Coconut Oil, and Beeswax Pellets to the glass bowl. Stir frequently until all three ingredients are completely melted and clear. Practical Tips and Shortcuts: Beeswax melts last; ensure all pellets are fully dissolved to prevent grittiness in the final cream.
- Cooling and Infusion: Remove the bowl from the heat and allow the mixture to cool for $10 \text{-} 15 \text{ minutes}$. It should start to thicken slightly around the edges but still be liquid in the center. Stir in the Vanilla Extract and $3 \text{-} 5 \text{ drops}$ of Cinnamon Essential Oil.
- Safety Warning (H4): Cinnamon Essential Oil is potent and can be a skin irritant. Do not exceed 5 drops total for this recipe. If you have sensitive skin, start with just $1 \text{ drop}$.
- Whip to Perfection (The Transformation): Place the bowl into a larger bowl filled with ice water to speed up the cooling. Use a whisk or hand mixer to whip the mixture vigorously. The cream will change from a clear liquid to an opaque, fluffy, and light cream consistency, much like frosting. This takes about $3 \text{-} 5 \text{ minutes}$.
- Transfer and Set (Timing and Planning Considerations): Immediately spoon the whipped cream into your pre-sterilized glass jars or metal tins. Allow the cream to sit uncovered at room temperature for $1 \text{ hour}$ to fully set. Seal tightly afterward.
🌰 Section 3: Advanced Strategies: Customizing Texture and Potency
For true wellness topics enthusiasts, you can adjust the base oils and butters to match your skin’s specific needs, incorporating expert-level insights for maximum absorption.
H3: Creative Solutions: Tailoring the Oil Blend
You can customize your approach by swapping out the standard oils for specialized alternatives based on skin type.
| Skin Concern | Recommended Swap | Adjustment Ratio | Key Benefit |
| Very Dry/Mature Skin | Replace Coconut Oil with Avocado Oil | Keep ratio 1:1 | Higher vitamin E and deeper penetration |
| Sensitive/Eczema-Prone | Replace Shea Butter with Mango Butter | Keep ratio 1:1 | Mango butter is lighter and highly soothing |
| Non-Greasy Finish | Reduce Beeswax to $1.5 \text{ Tablespoons}$ | $1.5 \text{ Tbsp}$ wax | Creates a lighter, faster-absorbing balm |
H3: Encouraging Experimentation: Beyond the Vanilla
While the DIY CINNAMON AND VANILLA HAND CREAM is wonderful, you can encourage experimentation by adjusting the fragrance blend to suit the season or mood, while maintaining the same base recipe.
- Winter Warming: Swap vanilla for $5 \text{ drops}$ of Sweet Orange Essential Oil. The citrus brightens the cinnamon, creating a classic holiday blend.
- Calming Bedtime Cream: Swap cinnamon and vanilla for $8 \text{ drops}$ of Lavender Essential Oil. Lavender promotes self-care and relaxation before bed.
🌡️ Section 4: Troubleshooting and Common Challenges
Making an emulsification-free cream is easier than lotion, but texture issues can still arise. Here are practical troubleshooting tips for common issues with your DIY CINNAMON AND VANILLA HAND CREAM.
Featured Snippet Potential: “Why is my homemade whipped hand cream gritty or grainy?”
Homemade whipped hand cream often becomes gritty or grainy when butters like Shea Butter are cooled too slowly, causing the fatty acid crystals to reform. To prevent this, ensure the butters are melted completely and then cooled very rapidly, often by placing the bowl into an ice bath, before whipping. If your cream is already gritty, you can fix it by re-melting the entire batch completely, letting it cool faster, and then whipping again aggressively.
Practical Troubleshooting Tips (Home Tips & DIY)
- Problem: The cream won’t whip, staying liquid or gooey.
- Obstacle: The mixture is too warm. The butters need to solidify slightly to trap air.
- Solution: Encouragement for Setbacks: Put the bowl back into the ice bath for $5 \text{-} 10 \text{ minutes}$ more. The edges should look opaque and opaque before attempting to whip again. Patience is key!
- Problem: The cream feels too greasy after application.
- Obstacle: You may be using too much, or the ratio of heavy oil (Coconut/Shea) to wax is too high.
- Solution: Alternative Approaches: The cream is highly concentrated, so start by using only a pea-sized amount. For the next batch, reduce the Coconut Oil by $1 \text{ Tablespoon}$ and increase the Beeswax by $1/2 \text{ Tablespoon}$ to create a lighter formula.
- Problem: The scent fades quickly after a few weeks.
- Obstacle: Essential oils and extracts are volatile and naturally dissipate.
- Solution: Preventive Measures: Store the finished cream in an opaque, airtight jar, away from direct sunlight and extreme heat, which degrade the volatile compounds. Make the DIY CINNAMON AND VANILLA HAND CREAM in smaller batches (e.g., $4 \text{ oz}$) to ensure freshness.
💖 Section 5: Maximizing Results: Next Level Care
Once you are successfully using your DIY CINNAMON AND VANILLA HAND CREAM, focus on next level tips for holistic hand care and maintenance and long-term considerations.
- Show How to Build Upon Basic Success: Overnight Deep Treatment. Apply a generous layer of your cream just before bed and cover your hands with soft cotton gloves. This creates an occlusive barrier that forces the oils and butters to penetrate deeply overnight, offering maximum repair and softness.
- Maintenance and Long-Term Considerations: Exfoliation. To maximize the absorption of your rich cream, gently exfoliate your hands $1 \text{-} 2 \text{ times per week}$ using a simple sugar scrub. Removing dead skin cells allows the beneficial emollients in the DIY CINNAMON AND VANILLA HAND CREAM to reach the deeper skin layers more effectively. (Internal Linking Opportunity: Check out our guide on “Simple DIY Sugar Scrub Recipes for Smooth Skin.”)
- Suggest Complementary Strategies: Waterless Washing. Frequent hand washing, especially with harsh soaps, strips natural oils. Use an alcohol-free hand sanitizer or simple warm water when possible, and reapply your DIY CINNAMON AND VANILLA HAND CREAM immediately after washing to replenish lost moisture.
✅ Conclusion: Your Capability to Nurture Your Skin
You have now mastered the art of creating a high-quality, deeply nourishing DIY CINNAMON AND VANILLA HAND CREAM. By understanding the science of butters and oils and implementing these achievable Home Tips & DIY steps, you have successfully produced a product that is superior to many store-bought alternatives. This commitment to pure ingredients reinforces your dedication to wellness topics and proves your capability to succeed in self-sufficient self-care.
Ready to give your hands the comforting, luxurious moisture they deserve? Will you try the overnight glove treatment tonight, or customize your next batch with Mango Butter?