Diy clay diffuser stones recipe Simple recipe helps you create natural, reusable fragrance stones at home using basic ingredients and essential oils.
Have you ever walked into a room and wished it smelled fresh, calm, and inviting—without using synthetic sprays? A diy clay diffuser stones recipe simple recipe allows you to naturally scent your space in a clean, beautiful way. These small, handmade stones absorb essential oils and gently release fragrance for days.
In this complete guide, you’ll learn exactly how to make clay diffuser stones step by step, how to customize them, and how to troubleshoot common issues. Whether you want to refresh your bedroom, upgrade your workspace, or create thoughtful handmade gifts, this simple recipe will help you transform your home atmosphere naturally and affordably.
Let’s get started.
What Are Clay Diffuser Stones and Why Make Them?
Before jumping into the diy clay diffuser stones recipe simple recipe, it helps to understand how they work.
Clay diffuser stones are small pieces of air-dry clay that absorb essential oils. Once the oil is added, the clay slowly releases scent into the air through natural evaporation.
Unlike electric diffusers, they:
- Require no electricity
- Produce no heat
- Are portable
- Are budget-friendly
- Last for months
If you love natural home fragrance ideas, you may also enjoy related topics like DIY room sprays, homemade linen sprays, natural closet fresheners, essential oil blends for home, or beeswax sachets for drawers.
Why Choose a Simple Recipe?
You don’t need special tools or advanced crafting skills. A simple recipe keeps it accessible and stress-free. If you can mix dough and roll it out, you can make these.
This diy clay diffuser stones recipe simple recipe is perfect for beginners.
Ingredients and Supplies You’ll Need
Let’s build confidence first. Everything here is easy to find online or at craft stores.
Basic Ingredients
For this diy clay diffuser stones recipe simple recipe, you’ll need:
- 1 cup air-dry clay
- 10–20 drops essential oil (for scenting after drying)
- Small amount of water (if clay feels dry)
Tools Required
- Rolling pin
- Cookie cutters (optional)
- Straw or skewer (to make holes if hanging)
- Baking sheet or tray
- Parchment paper
Optional Add-Ons (H4)
- Dried lavender buds
- Natural mica powder for color
- Twine or ribbon
- Silicone molds
These additions allow you to customize your diffuser stones for different rooms or seasons.
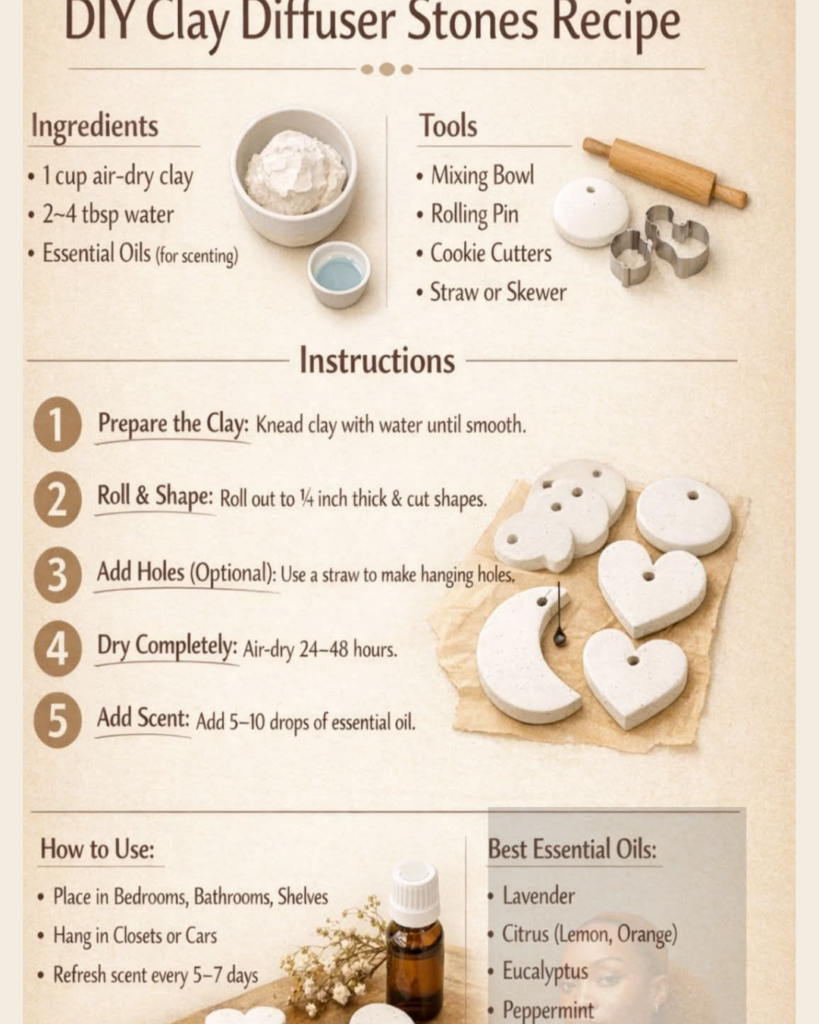
Step-by-Step Diy Clay Diffuser Stones Recipe Simple Recipe
Now let’s break this down into manageable, achievable steps.
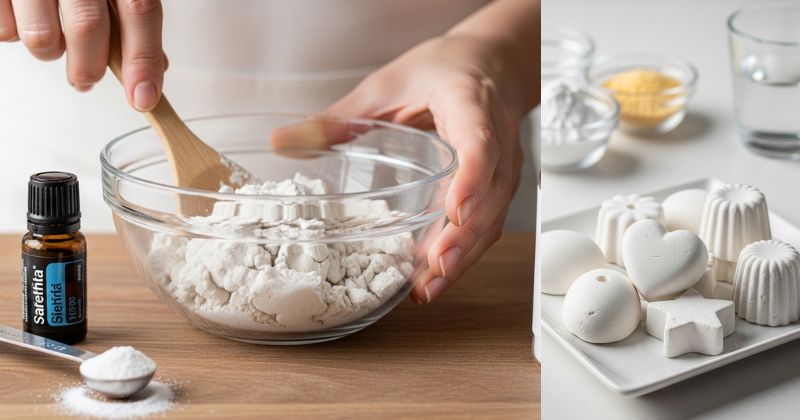
Step 1: Prepare the Clay
Take 1 cup of air-dry clay and knead it for 2–3 minutes. This softens the clay and removes air bubbles.
If it feels crumbly, lightly wet your fingers and knead again. Don’t add too much water—just enough to make it smooth.
Step 2: Roll and Shape
Place parchment paper on your surface. Roll the clay to about ¼ inch thick.
Use cookie cutters to create shapes like:
- Circles
- Hearts
- Leaves
- Simple rectangles
If you want to hang them in closets or cars, use a straw to make a small hole near the top.
Step 3: Let Them Dry
Place your shapes on a flat tray and let them air dry for 24–48 hours.
Turn them halfway through drying to prevent curling.
Important tip: Do not bake air-dry clay unless the packaging specifically says it is oven-safe.
Step 4: Add Essential Oils
Once fully dry, add 5–10 drops of essential oil directly onto each stone.
Let the oil absorb fully before placing them in your space.
That’s it. Your diy clay diffuser stones recipe simple recipe is complete.
Best Essential Oils for Clay Diffuser Stones
Choosing the right essential oil can completely transform your space.
For Relaxation
- Lavender
- Chamomile
- Cedarwood
Perfect for bedrooms or meditation corners.
For Energy and Focus
- Peppermint
- Lemon
- Rosemary
Ideal for workspaces or study desks.
For Cozy Comfort
- Sweet orange
- Clove
- Cinnamon (use sparingly)
Great for living rooms during fall or winter.
You can also create custom essential oil blends, such as lavender + orange for a calming but uplifting effect.
Common Questions About Diy Clay Diffuser Stones Recipe Simple Recipe
How Long Do Clay Diffuser Stones Last?
The clay itself lasts indefinitely if handled carefully. The scent typically lasts 3–7 days depending on room airflow and oil type.
You can refresh them anytime by adding more drops.
Where Should I Place Them?
You can place clay diffuser stones:
- On bedside tables
- Inside drawers
- In closets
- In bathrooms
- In your car
Avoid placing directly on finished wood surfaces, as essential oils may stain.
Do They Work as Well as Electric Diffusers?
They release scent more subtly. They’re best for small areas rather than large open spaces.
If you want a gentle background fragrance instead of strong diffusion, this simple recipe is ideal.
Pro Tips to Upgrade Your Clay Diffuser Stones
Once you master the basic diy clay diffuser stones recipe simple recipe, you can level up.
Add Natural Texture
Press:
- Leaves
- Lace
- Fabric
into the clay before drying to create beautiful patterns.
Create Layered Designs
You can mix small amounts of natural clay pigment or mica powder for soft, aesthetic tones.
Keep colors light to maintain a natural look.
Turn Them Into Gifts
Package 3–4 stones in a small kraft box with a mini essential oil bottle.
Add a simple instruction card:
“Add 5 drops of oil when scent fades.”
Handmade gifts feel thoughtful and luxurious without costing much.
Troubleshooting Common Issues
Even simple DIY projects can have small challenges. Don’t worry—you can fix them.
If the Clay Cracks
- The clay may have dried too fast.
- Next time, knead longer before shaping.
- Avoid placing near heaters while drying.
Small cracks often don’t affect performance.
If the Stones Warp
- Turn them during drying.
- Ensure even thickness when rolling.
If the Scent Fades Quickly
- Add more oil drops.
- Use stronger essential oils like eucalyptus or peppermint.
- Place in smaller spaces for better scent concentration.
Remember, clay diffuser stones are designed for subtle fragrance—not overpowering aroma.
Maximizing Results and Long-Term Use
To truly benefit from your diy clay diffuser stones recipe simple recipe, consistency matters.
Refresh Regularly
Add fresh essential oils once per week for steady fragrance.
Rotate Scents by Season
- Spring: Floral and citrus
- Summer: Mint and eucalyptus
- Fall: Orange and spice
- Winter: Pine and cedarwood
Seasonal changes keep your home feeling fresh and intentional.
Combine with Other Natural Fragrance Methods
For stronger scent layering, pair your diffuser stones with:
- Homemade room spray
- Simmer pot recipes
- Natural beeswax candles
This creates a cohesive scent experience throughout your home.
Cost-Saving Benefits of Making Your Own
Store-bought aroma stones or decorative diffusers can cost $15–$40 per set.
This diy clay diffuser stones recipe simple recipe costs only a few dollars, especially if you already own essential oils.
Beyond savings, you gain:
- Full ingredient control
- Eco-friendly fragrance
- Reduced plastic waste
- Creative satisfaction
You’re not just making decor—you’re building a healthier home environment.
Conclusion: Transform Your Space Naturally
With this diy clay diffuser stones recipe simple recipe, you now have everything you need to create natural, reusable home fragrance pieces. The process is simple. The ingredients are affordable. The results are beautiful.
You can customize shapes, scents, and designs to match your style and mood. And the best part? You made them yourself.
Start small. Experiment confidently. Refresh your favorite oils. Let your creativity guide you.
Your home deserves a scent that feels calm, natural, and uniquely yours—and now you know exactly how to achieve it.