Learn how to make a DIY fabric softener spray with this easy refreshing hack. Transform your laundry and home with a cost-effective, non-toxic scented spray today.
Have you ever pulled a favorite sweater out of the closet only to realize it smells a bit stale, or felt frustrated by the static cling on your freshly dried curtains? We all want that “just-laundered” freshness to last forever, but commercial sprays can be expensive and filled with mysterious chemicals. It is a common challenge to keep a home smelling wonderful without breaking the bank. Fortunately, you are about to discover a game-changing solution. A DIY fabric softener spray is a brilliant, budget-friendly way to refresh your textiles, eliminate static, and infuse your space with your favorite scents.
In this guide, you will learn how to create your own professional-grade refreshing mist using simple household ingredients. We are going to break down the process into easy, manageable steps so you can achieve high-end results in your own laundry room. You have the capability to transform your home’s atmosphere while moving toward a more [Eco-Friendly Household Routine]. Get ready to unlock the secret to a perpetually fresh home and discover why this easy refreshing hack is a must-have for every modern DIYer!
Foundation: Why Go DIY for Fabric Care? (H2)
Before we start mixing, it is essential to build confidence in why making your own DIY fabric softener spray is a superior choice. Many people hesitate to move away from store-bought brands because they worry a homemade version won’t be as effective. However, the science behind this hack is quite simple. Most commercial softeners work by coating fibers in a thin layer of chemicals. Our DIY version uses natural ingredients like vinegar and essential oils to soften fibers and neutralize odors at the source.
By choosing to make your own spray, you are taking control of what enters your living environment. This is especially important for those with sensitive skin or allergies to synthetic fragrances. Reassure yourself that this process is incredibly forgiving; you don’t need to be a chemist to succeed. You are simply combining well-known [Natural Cleaning Agents] to create a tool that is as safe as it is effective.
H3: The Cost-Saving Benefit
On average, a bottle of high-end fabric refresher can cost five to ten times more than the ingredients required for a DIY batch. By mastering this hack, you are essentially “unlocking” a permanent discount on your home maintenance supplies.
H3: Environmental Impact
Reducing your reliance on single-use plastic bottles is a major win for the planet. By reusing a high-quality glass spray bottle for your DIY fabric softener spray, you are contributing to a more sustainable, low-waste lifestyle.
Step-by-Step: The Core Refreshing Method (H2)
Ready to get started? This process is fast, achievable, and satisfying. You likely already have the “tools” in your pantry. Follow these clear steps to create your first bottle of refreshing mist.
1. Gather Your Supplies
You will need a 16-ounce spray bottle (preferably glass), a small funnel, and your three core ingredients:
- Distilled Water: To ensure a long shelf life and prevent mineral buildup.
- Fabric Softener Liquid: Choose a brand you love the scent of, or a “free and clear” version if you prefer to add your own oils.
- Rubbing Alcohol or Vodka: This helps the spray dry quickly and acts as a preservative.
2. The Mixing Process
Using your funnel, pour 1.5 cups of distilled water into the bottle. Add 2 tablespoons of your chosen liquid fabric softener. Finally, add 1 tablespoon of rubbing alcohol.
Pro Tip: Don’t shake the bottle vigorously, as it will create too many bubbles. Instead, gently swirl the bottle to combine the ingredients.
3. Scent Customization (Optional)
If you want to [Optimize Your Home Aroma], add 5-10 drops of essential oils like Lavender, Lemon, or Eucalyptus. This adds a “pro-level” touch that makes your linens smell like a high-end spa.
4. Labeling and Storage
Always label your bottle clearly. Store it in a cool, dark place, like a laundry cupboard, to maintain the potency of the essential oils.
Advanced Strategies: Creative Variations (H2)
Once you’ve mastered the basic DIY fabric softener spray, you can share expert-level insights by tailoring the formula for specific needs. These variations allow you to customize your approach and achieve the best results for different areas of your home.
- The Wrinkle-Release Variation: Add a teaspoon of vegetable glycerin to your mix. The glycerin helps “relax” the fibers of the fabric, making it a perfect quick-fix for shirts that have been sitting in the laundry basket too long.
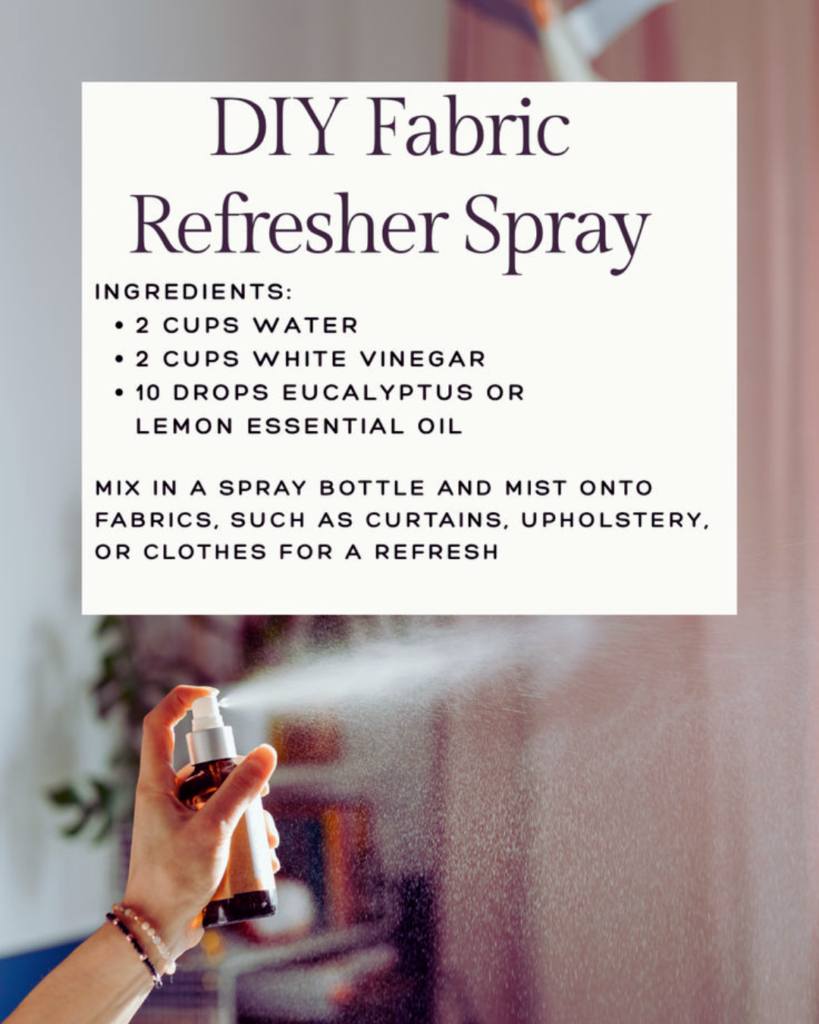
- The Pet-Safe Refresh: If you have furry friends, swap the standard fabric softener for white vinegar and use pet-safe essential oils like Cedarwood. This neutralizes pet odors without irritating their sensitive noses.
- The Seasonal Swap: Change your scents with the seasons! Use Pine and Orange in the winter for a cozy feel, and Peppermint and Lime in the summer for a crisp, cooling atmosphere.
How do you make fabric softener spray for clothes? (H3)
The most effective way to make a fabric softener spray for clothes is to mix 1 part liquid fabric softener with 2 parts distilled water and a splash of rubbing alcohol in a spray bottle. This ratio ensures that the fabric becomes soft and static-free without leaving a heavy, waxy residue on your garments.
Troubleshooting: Common DIY Challenges (H2)
Even with an easy refreshing hack, you might encounter a few hiccups. Address these frequent obstacles with solutions to keep your DIY journey on track.
- Obstacle: “The spray is leaving spots on my silk or delicate fabrics.”
- Solution: Some fabrics are prone to water spotting. Always perform a “spot test” on an inconspicuous corner first. If spotting occurs, increase the ratio of rubbing alcohol to help the spray evaporate faster.
- Obstacle: “The scent isn’t strong enough.”
- Solution: Fabric softeners vary in concentration. You can safely add an extra tablespoon of softener or a few more drops of essential oils. Remember that the scent will often “bloom” as the fabric dries.
- Obstacle: “The nozzle keeps clogging.”
- Solution: This usually happens if the mixture is too thick. Simply add a bit more distilled water to the bottle and give it a gentle swirl to thin it out.
Maximizing Results: Next Level Refreshing (H2)
To truly transform your home, you should look at how this spray fits into a larger [Holistic Home Care Strategy]. This isn’t just for clothes; it’s a versatile tool for your entire living space.
- Upholstery Refresh: Mist your sofa and accent chairs every morning while making the bed. This keeps the living room smelling fresh even between deep cleanings.
- Car Interior Hack: Keep a small travel-sized bottle of your DIY fabric softener spray in your glove box. It’s perfect for refreshing floor mats and seats after a long road trip or a grocery run.
- Static Elimination: During the dry winter months, spray a light mist over your rugs and carpets to stop the “static zap” before it happens.
- Curtain Call: Spray your curtains and then open the windows. The breeze will catch the scent and distribute it throughout the entire house.
Conclusion
You have now discovered that creating a DIY fabric softener spray is a simple, achievable, and empowering way to enhance your home. By following this easy refreshing hack, you are not only saving money but also ensuring that your living space remains a non-toxic sanctuary of freshness. This journey of DIY home care is one of gradual progress and satisfaction, and you have the capability to succeed with every batch you mix.
Remember the key takeaways: use distilled water for longevity, swirl rather than shake, and don’t be afraid to experiment with your own signature scents. You deserve a home that feels and smells incredible every single day. Go ahead—mix up your first bottle, refresh those linens, and achieve the clean-scented paradise you’ve been dreaming of. You’ve got this!