Learn how to make DIY Shower Steamers for Aromatherapy Support. Transform your daily routine with these easy, spa-like scents for relaxation and energy!
Important Disclaimer: This article is for informational purposes only and should not replace professional advice. For health-related topics, consult healthcare providers. For financial or legal matters, seek qualified professional guidance. For safety procedures, verify current best practices and local regulations. Individual results may vary, and personal circumstances should always be considered when implementing any suggestions.
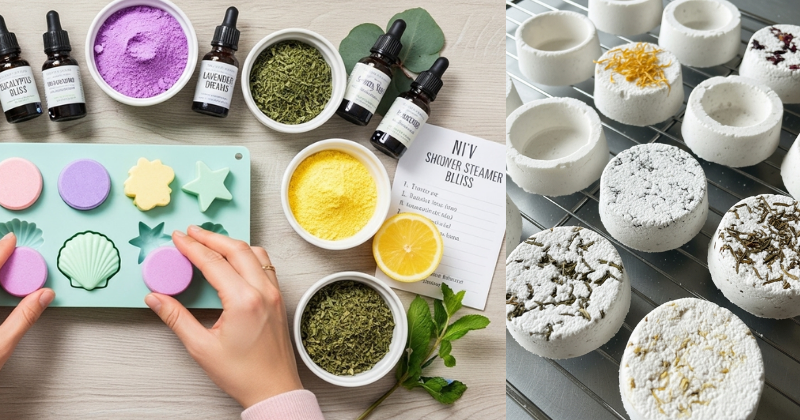
Imagine stepping into your bathroom after a long, draining day. The air is cold, and you feel the weight of a dozen different responsibilities on your shoulders. Now, imagine turning on the hot water and being immediately enveloped in a cloud of invigorating eucalyptus or soothing lavender. You don’t need a high-end spa or an expensive bathtub to experience this transformation. With DIY Shower Steamers for Aromatherapy Support, you can turn every shower into a powerful wellness ritual.
These little “fizzy” powerhouses are essentially bath bombs for your shower. They release essential oils into the steam, allowing you to breathe in therapeutic scents that can help clear your head, boost your mood, or prepare you for a deep sleep. In this guide, you will discover how easy and cost-effective it is to craft these luxury items at home. Get ready to unlock a new level of self-care that fits perfectly into your busy lifestyle!
Foundation: Understanding Aromatherapy and Shower Steamers
If you have ever felt instantly calmer while walking through a pine forest or more alert after smelling a fresh lemon, you have experienced aromatherapy. Using DIY Shower Steamers for Aromatherapy Support is a practical way to harness these natural benefits. For beginners, the concept is simple: we combine a fizzing base with concentrated plant extracts. When water hits the steamer, it triggers a chemical reaction that carries the scent upward with the steam.
One of the most common hesitations people have is worrying that the process is too complex or “scientific.” Rest assured, if you can measure flour for cookies, you can make shower steamers! Unlike bath bombs, which require skin-safe oils and careful pH balancing for prolonged soaking, shower steamers are much more forgiving. Since they sit on the floor of the shower and aren’t meant for direct skin contact, you can focus entirely on the aromatic experience.
H3: The Key Components
To get started, you only need a few basic household items. Understanding these will give you the confidence to start mixing today:
- Baking Soda (Sodium Bicarbonate): This acts as the main structure and volume of your steamer.
- Citric Acid: This provides the “fizz.” When it meets water and baking soda, it creates the reaction that releases the oils.
- Essential Oils: These are the soul of the steamer, providing the aromatherapy benefits you desire.
- Witch Hazel or Water: This acts as the binder to hold everything together.
Step-by-Step Process: Crafting Your First Batch
Ready to create your own spa experience? This core method is designed to be achievable and satisfying. By following these manageable steps, you will produce a professional-grade product right in your kitchen.
1. Measure and Mix Dry Ingredients
In a large glass bowl, combine 2 cups of baking soda and 1 cup of citric acid. Use a whisk to break up any clumps. This is a great time to ensure your workspace is dry; even a drop of water can start the reaction too early!
2. Add Your Aromatherapy Blend
Add about 40–60 drops of your chosen essential oils. For a “Wake Up” blend, try Peppermint and Wild Orange. For “Stress Relief,” Lavender and Bergamot work wonders. Distribute the drops across the powder and whisk again.
3. The “Wet Sand” Consistency
This is the most important part of the DIY Shower Steamers for Aromatherapy Support process. Using a spray bottle filled with witch hazel, lightly mist the powder while stirring. You want the mixture to feel like damp sand. If you squeeze a handful, it should hold its shape without crumbling. If it’s too dry, it will fall apart later; if it’s too wet, it will start fizzing now.
4. Mold and Dry
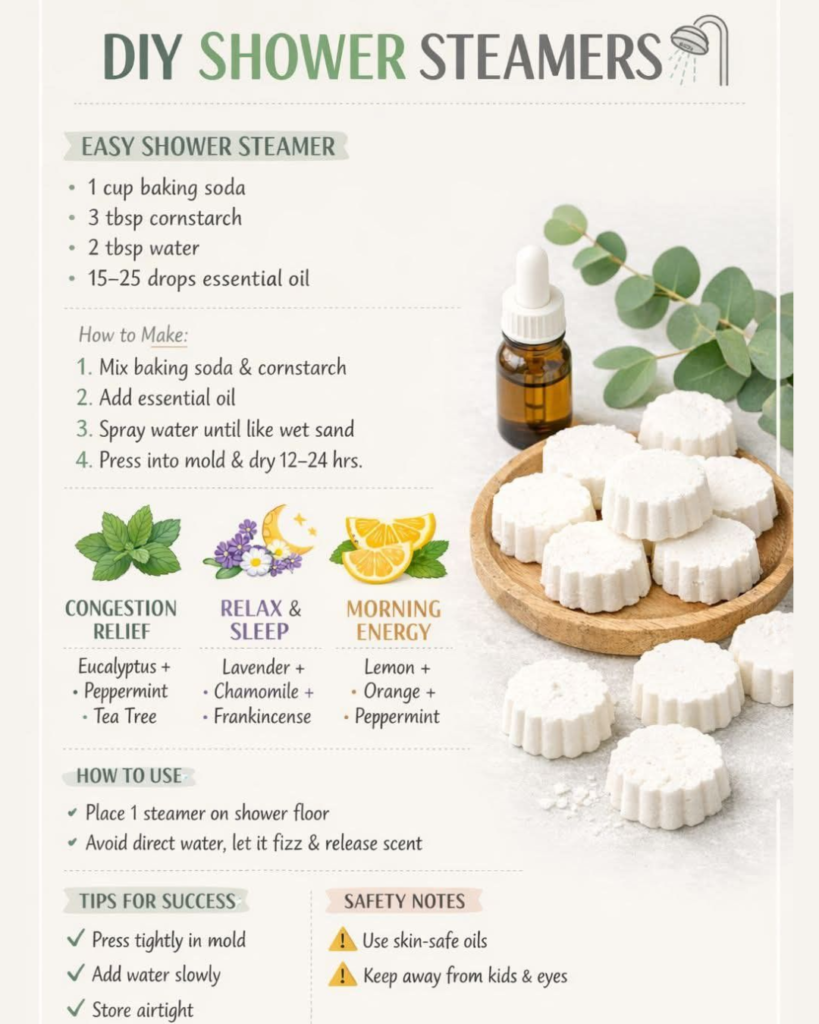
Pack the mixture tightly into silicone molds. You can use muffin tins or decorative soap molds. Press down firmly to remove air pockets. Let them dry in a cool, dark place for at least 24 hours. Once they are hard to the touch, pop them out and store them in an airtight jar.
Advanced Strategies: Expert Tips for Potent Steamers
Once you have the basics down, you can start experimenting with variations that make your steamers even more effective. Pro-level insights can help you customize the longevity and intensity of the scent.
Extending the Scent Life
If you find that your scent disappears too quickly, try adding a tablespoon of kaolin clay or cornstarch to your dry mix. these ingredients act as “fixatives,” holding onto the essential oil molecules so they release more slowly throughout your shower. This is a fantastic way to build upon your basic success and create a more premium product.
Layering for Visual Appeal
Who says wellness can’t be beautiful? You can add natural colorants like mica powder or dried botanicals. Placing a few dried rose petals or a sprig of dried rosemary at the bottom of the mold before packing in the mixture creates a stunning, gift-worthy look. You can even find inspiration from a Healthy Home Guide to see which colors evoke the mood you are trying to achieve.
H3: Customizing Your Wellness Blends
- Congestion Support: Combine Eucalyptus, Tea Tree, and Lemon. This is perfect for the winter months.
- Deep Sleep: Use a blend of Valerian, Cedarwood, and Roman Chamomile.
- Focus and Clarity: Try Rosemary and Lemon to sharpen the mind during your morning routine.
Troubleshooting: Solving Common Steamer Challenges
Sometimes things don’t go perfectly on the first try, but don’t let that stop you! Setbacks are just opportunities to learn more about the craft.
- “My steamers are crumbling!” This is usually caused by not using enough binder (witch hazel) or not packing the mold tightly enough. You can actually crumble the failed steamers back into a bowl, add a bit more mist, and re-mold them!
- “They started fizzing and ‘growing’ in the mold.” This means you added too much liquid too fast. The reaction triggered early. Next time, use a finer mist and stir constantly. They are still perfectly fine to use; they just might look a bit puffy!
- “I can barely smell the oils.” Make sure you aren’t placing the steamer directly under the heavy stream of water. It should be placed in the corner of the shower where it gets just enough splash to fizz slowly.
Preventive Measures
To keep your DIY Shower Steamers for Aromatherapy Support fresh, always store them in glass jars with a tight seal. Humidity in the bathroom can ruin a batch of steamers, so keep them in a cabinet or a different room until you are ready to use one.
Maximizing Results: Integrating Wellness into Daily Life
Now that you have your steamers, how do you make the most of them? Sustainable lifestyle changes are all about consistency and enjoying the process.
The Shower Ritual
To maximize the aromatherapy benefits, start your shower with hot water to build up steam before placing the steamer on the floor. Take deep, slow breaths. This simple act of mindfulness can significantly enhance the stress-relief benefits of the oils.
Gift-Giving and Connection
These steamers make incredible, thoughtful gifts. Since they are relatively inexpensive to make, you can create “Wellness Kits” for friends and family. Include a small note explaining the benefits of the specific oils you used. It’s a wonderful way to encourage others to take a moment for themselves.
H3: Long-term Considerations
- Drain Safety: Because these are made of baking soda and citric acid, they are generally safe for plumbing and even help deodorize drains.
- Storage: A batch of 12 steamers can last up to 3 months if kept dry.
- Variety: Don’t get stuck in a rut! Change your scents seasonally—citrus for summer and spice blends for winter.
Conclusion: Empower Your Wellness Journey
Creating your own DIY Shower Steamers for Aromatherapy Support is a rewarding way to take control of your daily environment. You have discovered that you don’t need a lot of money or professional equipment to achieve a transformative, spa-like experience. By mastering the “wet sand” consistency and experimenting with expert blends, you have unlocked a tool that supports both your physical and mental well-being.
Remember, you are capable of creating a home that nurtures you. These small additions to your routine can lead to significant changes in how you handle stress and energy levels. So, gather your ingredients, choose your favorite scents, and start crafting today. Your future, more relaxed self will thank you!