Learn how to create beautiful DIY wax melts with essential oils to freshen your home naturally. Master the art of scent-making and unlock a fragrant, toxin-free sanctuary today!
Have you ever walked into a room and felt instantly relaxed by a calming lavender scent or energized by a burst of citrus? Scents have a powerful way of shifting our moods and making a house feel like a home. However, many store-bought options are filled with synthetic fragrances and paraffin wax that can irritate the senses. That is where the magic of DIY wax melts with essential oils comes in!
By making your own wax tarts, you take full control over what goes into your air. You can choose eco-friendly waxes, pure plant extracts, and creative designs that match your decor perfectly. Whether you want to save money, find a new creative outlet, or simply live a more natural lifestyle, this project is for you. In this guide, we will walk you through everything you need to know to achieve professional-looking and amazing-smelling results. Get ready to discover your new favorite hobby and transform your living space into a fragrant paradise!
Foundation: Understanding the Basics of Wax and Scent
Before we start melting, it is important to build your confidence with the right materials. Making DIY wax melts with essential oils is half science and half art. Understanding how these ingredients interact ensures your melts don’t just look pretty, but actually fill the room with scent.
Choosing the Right Wax
Not all waxes are created equal. For wax melts, you want a wax that holds a high “scent load” and pops out of molds easily.
- Soy Wax: A popular, eco-friendly choice that burns clean. Look for “pillar soy wax” or “melt blend” as these are harder than container wax.
- Beeswax: Naturally sweet-smelling and very hard. It’s great for a slower melt but can be harder to scent because of its natural aroma.
- Coconut Wax: Often blended with soy, this wax has a fantastic scent throw but can be very soft.
Why Essential Oils Over Fragrance Oils?
Essential oils are distilled from plants, offering therapeutic benefits alongside their aroma. While synthetic fragrance oils are often cheaper and stronger, essential oils provide a more sophisticated, natural experience. When you make natural wax melts, you are avoiding phthalates and parabens commonly found in commercial products.
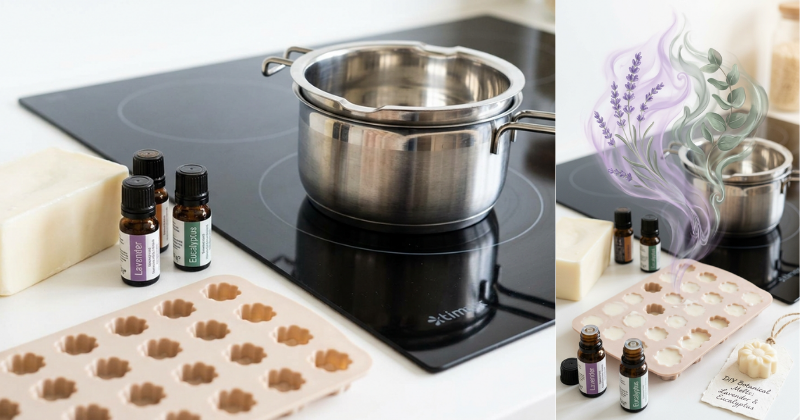
Essential Tools for Success
To get started, you will need a few basic kitchen items. You likely already have most of these!
- A double boiler (or a heat-safe bowl over a pot of water).
- A digital kitchen scale for precise measurements.
- A thermometer (this is the secret to a great scent throw!).
- Silicone molds in fun shapes like hearts, stars, or simple cubes.
Step-by-Step Process: Crafting Your First Batch
Making your own melts is an achievable weekend project. Follow these steps to ensure your DIY wax melts with essential oils turn out perfectly every time.
Step 1: Measure Your Ingredients
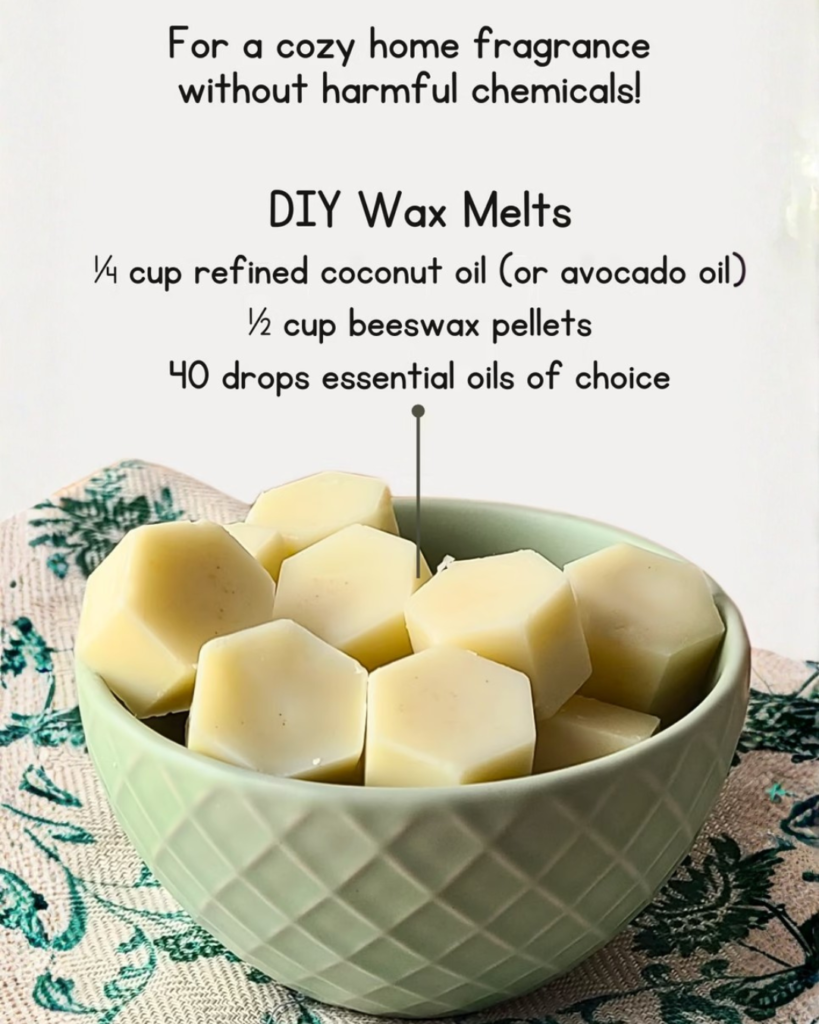
Precision is key. A standard ratio is about 1 ounce (30ml) of essential oil for every 1 pound (450g) of wax. If you are making a smaller batch, aim for about 30–40 drops per 1/2 cup of melted wax.
Step 2: Melt the Wax Gently
Place your wax in the double boiler. Heat it slowly until it reaches approximately 180°F (82°C). Never melt wax directly on a burner, as it is flammable and can overheat quickly. Using a thermometer here helps you stay within the safe “goldilocks” zone.
Step 3: Cool and Scent
This is the most important step! If you add essential oils to boiling hot wax, the scent will “flash off” (evaporate) before the wax even sets. Wait for the wax to cool to about 140°F–150°F (60°C–65°C) before stirring in your essential oils. Stir gently for at least two minutes to ensure the oil is fully incorporated into the wax molecules.
Step 4: Pour and Set
Carefully pour the mixture into your silicone molds. If you see any bubbles, give the mold a tiny tap on the counter. Let them sit undisturbed at room temperature for at least 24 hours. While it is tempting to pop them out early, letting them “cure” allows the scent to bond properly.
Advanced Strategies: Expert Scent Blending
Once you have mastered the basic pour, you can start experimenting with advanced scent profiles. Like a professional perfumer, you can build “notes” into your DIY wax melts with essential oils.
The Three-Note Rule
To create a complex aroma that lingers, try blending oils based on their evaporation rates:
- Top Notes: The first scent you smell (Lemon, Peppermint, Eucalyptus).
- Middle Notes: The heart of the fragrance (Lavender, Rosemary, Geranium).
- Base Notes: The scents that last the longest (Cedarwood, Patchouli, Frankincense).
Custom Recipes to Try
- The Sleepy Sanctuary: 15 drops Lavender, 10 drops Cedarwood, 5 drops Roman Chamomile.
- The Kitchen Refresher: 15 drops Lemon, 10 drops Rosemary, 5 drops Spearmint.
- The Cozy Cabin: 10 drops Orange, 10 drops Cinnamon Leaf, 10 drops Clove.
Creative Variations
Want to take your aesthetics to the next level? Try adding dried botanicals like rose petals or lavender buds to the bottom of your molds before pouring. You can also use natural micas or a tiny shaving of a non-toxic crayon to add vibrant colors to your creations.
Troubleshooting: Common Challenges and Solutions
Even experts run into hiccups! If your melts aren’t coming out as expected, don’t be discouraged. Here is how to fix frequent issues.
Problem: There is no smell when I melt them.
- Solution: You likely added the oils when the wax was too hot, or you didn’t use enough oil. Ensure you are using the thermometer and check the “scent throw” of your specific oils. Citrus oils, for example, are much lighter than woodsy oils.
Problem: The wax melts are “frosting” (white crystalline patches).
- Solution: This is very common with 100% soy wax. It doesn’t affect the scent! To prevent it, try cooling your wax even more before pouring, or slightly warm your molds with a hair dryer before you pour.
Problem: The melts are too soft and won’t come out of the mold.
- Solution: Your room might be too warm, or your wax blend is too soft. Try popping the mold into the freezer for 10 minutes; they should snap right out!
Problem: The essential oils are pooling at the bottom.
- Solution: This means the oil didn’t bond. Next time, stir for a full two minutes and ensure you aren’t exceeding a 10% fragrance load.
Maximizing Results: Storage and Long-Term Use
To keep your DIY wax melts with essential oils smelling fresh for months, proper maintenance is essential.
Storage is Everything Essential oils are volatile, meaning they evaporate when exposed to air. Store your finished melts in an airtight glass jar or a sealed tin. Keep them in a cool, dark place. Heat and sunlight will degrade the oils and fade the colors.
Complementary Home Tips To build upon your success, consider using your melts in different ways. You can place a few un-melted tarts in a sachet bag and tuck them into your sock drawer or linen closet. They act as a natural deodorizer even without a wax warmer!
Curing Time While you can use them after 24 hours, soy wax melts often benefit from a “cure time” of 1–2 weeks. This allows the essential oils to fully saturate the wax, resulting in a much stronger scent when you finally put them in your warmer.
Conclusion
Creating your own DIY wax melts with essential oils is a rewarding way to nurture your home and your well-being. You have learned how to select the best wax, blend complex scents, and troubleshoot like a pro. By choosing natural ingredients, you’ve unlocked a way to enjoy a beautiful-smelling home without the worry of harsh chemicals.
Remember, every batch is an opportunity to experiment and discover something new. You are now equipped with the knowledge to achieve amazing results that rival any boutique store. So, clear off a spot on your counter, pick your favorite oils, and start pouring! Your home is about to smell incredible.