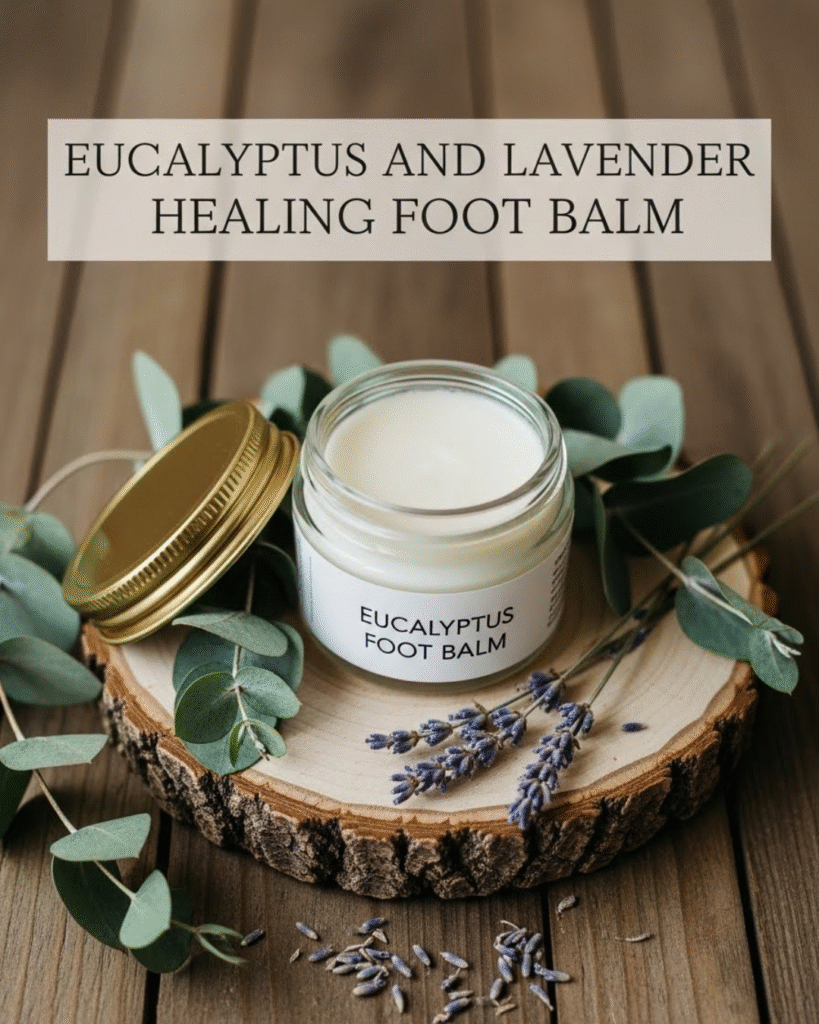
Are your feet sore, tired, or plagued by persistent dryness and discomfort? You deserve a moment of pure, restorative self-care. This guide will teach you the simple, achievable steps to creating a luxurious Eucalyptus and Lavender Healing Foot Balm right in your own kitchen. This Home Tips & DIY project focuses on sustainable lifestyle changes and offers immense cost-saving benefits compared to store-bought remedies. Get ready to discover how to transform your nighttime routine and give your feet the nourishing attention they need using the power of natural essential oils.
🛑 Important Disclaimer
Important Disclaimer: This article is for informational purposes only and should not replace professional advice. For health-related topics, consult healthcare providers. For financial or legal matters, seek qualified professional guidance. For safety procedures, verify current best practices and local regulations. Individual results may vary, and personal circumstances should always be considered when implementing any suggestions.
🌿 Section 1: Foundation First: The Power of Botanicals
To understand the efficacy of the Eucalyptus and Lavender Healing Foot Balm, we must first build confidence with basic concepts regarding the key botanical ingredients in this wellness topics recipe.
H3: Building Confidence with Basic Concepts: Why Eucalyptus and Lavender?
The synergy between these two essential oils provides powerful, complementary benefits crucial for foot health.
- Eucalyptus (The Refresher): Rich in cineole, eucalyptus oil has a cooling, analgesic effect that helps soothe tired, aching feet. Its known antiseptic and antifungal properties are particularly beneficial for common foot concerns.
- Lavender (The Healer): Renowned for its calming scent and skin-healing properties. Scientific backing shows lavender promotes tissue regeneration and reduces inflammation, making it perfect for cracked heels and stressed skin. Its aroma also supports relaxation, enhancing the balm’s use as a nightly self-care ritual.
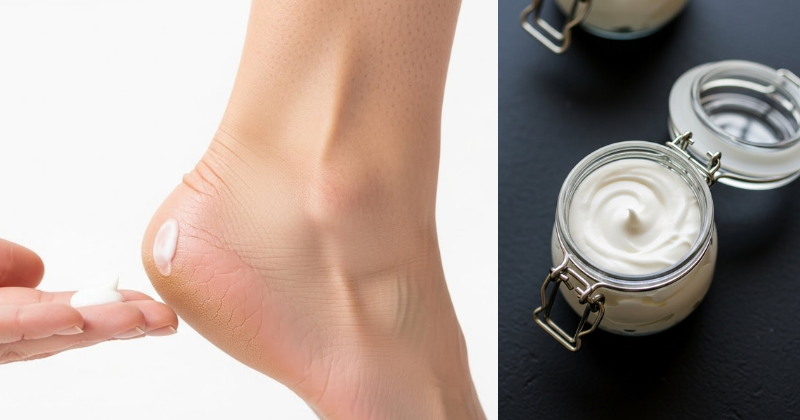
H3: Addressing Common Concerns: Balm vs. Lotion
The base of the Eucalyptus and Lavender Healing Foot Balm is designed to lock in moisture and deliver concentrated essential oils.
- Balm Consistency: Unlike lotions, balms contain no water, making them extremely concentrated and shelf-stable. They rely on a combination of waxes and butters to create a thick, protective barrier that prevents moisture loss—ideal for the thick, dry skin of the feet.
- Encouraging Reassurance for Beginners: This is a simple melt-and-pour project. As long as you follow the ratios, achieving a perfect, luxurious texture is highly achievable.
🍯 Section 2: Step-by-Step Process: The DIY Foot Balm Recipe
This section provides the achievable, step-by-step guidance and actionable language for creating your own Eucalyptus and Lavender Healing Foot Balm.
Ingredients and Tool Requirements
| Ingredient (By Weight) | Quantity | Purpose | Tool Requirement |
| Carrier Oil (Olive/Sweet Almond) | $1/2 \text{ cup}$ ($4 \text{ oz}$) | Nourishing base oil, infuses herbs | Digital Kitchen Scale |
| Beeswax Pellets | $1 \text{ oz}$ | Provides structure and thickness | Glass Measuring Cup/Beaker |
| Shea Butter (Unrefined) | $1 \text{ oz}$ | Deep moisturizing, creamy texture | Small Saucepan/Double Boiler |
| Eucalyptus Essential Oil | $25 \text{ drops}$ | Cooling, analgesic, antifungal | Whisk or Glass Stirring Rod |
| Lavender Essential Oil | $25 \text{ drops}$ | Calming, anti-inflammatory, healing | Small tins or jars for storage |
Step-by-Step Process (Core Methods)
- Preparation (Safety Considerations): Set up a double boiler. If you don’t have one, place a glass measuring cup inside a saucepan filled with $1 \text{-} 2$ inches of water. The water should simmer, not boil, to ensure the oils melt gently.
- Melt the Base (Timing and Planning Considerations): Add the Carrier Oil, Beeswax Pellets, and Shea Butter to the glass measuring cup. Stir constantly until the beeswax and butter are completely melted and the mixture is clear. This should take about $10 \text{-} 15 \text{ minutes}$.
- Cooling (Practical Tips): Once melted, immediately remove the glass cup from the heat. This is a critical step! The mixture must cool slightly before adding the essential oils to prevent their volatile compounds from evaporating. Let it sit for $3 \text{-} 5 \text{ minutes}$, stirring occasionally. The mixture will begin to cloud slightly around the edges.
- Incorporate Essential Oils (Actionable Language): Add the $25 \text{ drops}$ of Eucalyptus Essential Oil and the $25 \text{ drops}$ of Lavender Essential Oil. Stir thoroughly for $1 \text{ minute}$ to ensure the oils are fully dispersed throughout the balm base.
- Pour and Cure: Immediately pour the liquid balm into your clean, sterilized storage containers (tins or jars). Let the Eucalyptus and Lavender Healing Foot Balm sit uncovered at room temperature for $2 \text{-} 4 \text{ hours}$ until it has solidified into a firm, creamy balm.
💡 Section 3: Advanced Strategies: Customizing Your Balm
Move beyond the basic Eucalyptus and Lavender Healing Foot Balm recipe by employing expert-level insights to customize your balm for specific needs.
H3: Creative Solutions: The Athletes’ and Travelers’ Balm
By adjusting the essential oil blend, you can create a targeted remedy for different types of foot stress.
| Essential Oil Blend (Added in Step 4) | Target Use | Wellness Benefit |
| Eucalyptus ($20 \text{ drops}$) + Peppermint ($15 \text{ drops}$) + Rosemary ($10 \text{ drops}$) | Post-Workout/Muscle Fatigue | Intense cooling sensation, deep muscle relief |
| Lavender ($30 \text{ drops}$) + Tea Tree ($15 \text{ drops}$) | Antifungal/Itch Relief | Strong antiseptic properties, helps combat odor and irritation |
H3: Ways to Customize Approach: Adjusting Consistency
Depending on the climate or personal preference, you may want a softer or firmer balm.
- Softer Balm (For Dry Climates): Reduce the beeswax slightly to $0.75 \text{ oz}$ and increase the Shea Butter slightly to $1.25 \text{ oz}$. This will result in a balm that melts faster on contact.
- Firmer Balm (For Hot Climates): Increase the beeswax to $1.25 \text{ oz}$ and slightly reduce the Shea Butter to $0.75 \text{ oz}$. This ensures the Eucalyptus and Lavender Healing Foot Balm maintains its shape even on warmer days. This is a crucial maintenance and long-term consideration for warmer regions.
🌡️ Section 4: Troubleshooting and Common Challenges
Even simple Home Tips & DIY projects can present challenges. Here are practical troubleshooting tips for common balm-making issues.
Featured Snippet Potential: “Why is my homemade foot balm grainy or lumpy after cooling?”
Your homemade foot balm is grainy or lumpy after cooling, typically due to the Shea Butter solidifying too slowly. When Shea Butter cools slowly, its fatty acids separate and crystalize, leading to a grainy texture. To prevent this, use a rapid cooling method: place the poured balm containers in the refrigerator or freezer immediately after pouring (Step 5) to force quick solidification, which results in a smooth, creamy texture.
Practical Troubleshooting Tips (DIY Focus)
- Problem: The finished balm is too soft and runny.
- Obstacle: Too little beeswax relative to the oil/butter content.
- Solution: Alternative Approaches: Gently re-melt the balm using the double boiler. Add an extra $1/4 \text{ oz}$ of beeswax pellets and stir until fully dissolved. Re-pour and quick-cool immediately.
- Problem: The essential oil scent is weak.
- Obstacle: The essential oils evaporated because they were added when the balm mixture was too hot (above $160^{\circ} \text{F}$).
- Solution: Encouragement for Setbacks: While the current balm is still effective, next time, ensure you wait $3 \text{-} 5 \text{ minutes}$ after removing the mixture from the heat before adding the oils. You can also re-melt the current batch and carefully add $10 \text{-} 15 \text{ more drops}$ of each oil, ensuring minimal heat exposure.
- Problem: The balm separates after cooling.
- Obstacle: Inconsistent temperature or poor mixing.
- Solution: Preventive Measures: Ensure all ingredients are fully integrated and clear before removing them from the heat (Step 2). If separation occurs, re-melt the entire batch and stir vigorously until pouring into the final container.
📈 Section 5: Maximizing Results: Next Level Foot Care
Having successfully created your Eucalyptus and Lavender Healing Foot Balm, let’s look at how to build upon basic success and integrate it into a comprehensive foot care ritual.
- Show How to Build Upon Basic Success: The Sock Method. Apply a generous layer of the balm just before bed, focusing on the heels and balls of the feet. Immediately cover your feet with clean cotton socks. The socks trap the heat and moisture, driving the balm deeper into the skin overnight for intensive, gradual progress in healing dryness and cracks.
- Maintenance and Long-Term Considerations: The balm should be stored in a cool, dark place to maintain the potency of the essential oils. Use it nightly, not just when your feet hurt. Consistent application is key to preventing dryness and maintaining soft, pliable skin, supporting a sustainable lifestyle change in foot health.
- Suggest Complementary Strategies: DIY Epsom Salt Soak: Before applying your Eucalyptus and Lavender Healing Foot Balm, treat your feet to a $15 \text{-minute}$ soak in warm water mixed with $1/2 \text{ cup}$ of Epsom salts. The magnesium in the salts helps draw toxins and reduce muscle tension, setting the stage for the balm’s deep absorption. (Internal Linking Opportunity: Find our guide on “The Best Forms of Magnesium for Sleep,” linking back to Wellness Topics.)
✅ Conclusion: Your Capability to Nurture Your Feet
You have now unlocked the simple, effective secret to creating your own Eucalyptus and Lavender Healing Foot Balm. By following this achievable DIY recipe, you have successfully transformed basic ingredients into a powerful, therapeutic self-care product. This project reinforces your capability to succeed in prioritizing your wellness topics and finding natural, effective solutions for everyday comfort.
Ready to treat your tired feet? Will you start with the basic recipe tonight, or jump straight to the stronger Athlete’s Blend for maximum relief?