Salut les gourmands!
Have you ever found yourself staring longingly at the candy aisle, specifically that perfect bar of chocolate, caramel, and peanut nougat? That intense craving hits me every autumn, right when the leaves turn golden. That’s why I created Fall’s Favorite Snickers Cups—a no-bake dream that captures the essence of that classic candy bar but with a homemade, luxurious twist. The best part? This recipe is ridiculously simple and takes less than $20 \text{ minutes}$ of active work! It’s the perfect treat to share at a cozy bonfire or to sneak from the fridge while curled up with a good book. I promise these little cups deliver maximum textural satisfaction: a crisp chocolate shell, a creamy peanut butter layer, and that sticky, salty caramel core. Get ready to ditch the wrapper and embrace this easy, decadent no-bake Snickers cups recipe! They are guaranteed to be your new go-to fall dessert.

🍂 Presentation of Fall’s Favorite Snickers Cups
These no-bake Snickers cups are a fantastic way to enjoy the rich, layered flavors of a classic candy bar without the hassle of baking. They are customizable, easy to store, and perfect for portion control (if you can manage to eat just one!).
| Category | Detail |
| Active Prep Time | 15 – 20 minutes |
| Total Chill Time | 1 hour (Minimum) |
| Servings | 12 – 14 cups |
| Difficulty | Easy |
| Key Keyword | No-Bake Snickers Cups |
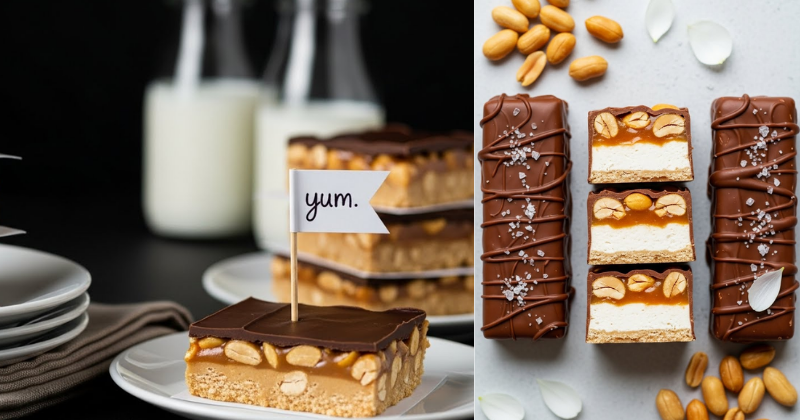
The structure is simple: a triple layer of chocolate, peanut butter filling, and soft caramel, all nestled in a mini cupcake liner. The resulting flavor is rich, salty, and incredibly satisfying—a true fall’s favorite Snickers cups upgrade!
🍫 Essential Ingredients for Layered Indulgence
The magic of these no-bake Snickers cups lies in the simplicity and quality of the three distinct layers. For best results, use good quality chocolate chips and creamy peanut butter.
Layer 1: The Chocolate Shell and Garnish
- $12 \text{ ounces}$ milk chocolate chips (or semi-sweet, depending on your preference)
- $1/3 \text{ cup}$ chopped peanuts (salted, if possible, for flavor balance)
- $1 \text{ teaspoon}$ coconut oil or shortening (optional, to help the chocolate melt smoothly)
Layer 2: The Peanut Butter Nougat
- $1/3 \text{ cup}$ creamy peanut butter
- $1/3 \text{ cup}$ powdered sugar (sifted, if lumpy)
Layer 3: The Caramel Core
- $1 \text{ cup}$ caramel bits (or soft, individually wrapped caramels)
- $2 \text{ tablespoons}$ water
Related Keywords for SEO:
- Homemade snickers recipe
- Easy candy bar cups
- Peanut butter caramel treats
- No-bake fall desserts
🥄 Preparation: Layer by Layer Guide
You will need a standard $12 \text{-cup}$ muffin tin lined with paper or foil liners. This process involves quick chilling steps to keep the layers distinct and clean.
Step 1: Making the Chocolate Base and Shell
- Melt Chocolate: Place the $12 \text{ ounces}$ of milk chocolate chips (and $1 \text{ teaspoon}$ of coconut oil, if using) in a microwave-safe bowl. Microwave in $30 \text{-second}$ intervals, stirring well between each, until the chocolate is smooth and fully melted.
- Coat Liners: Spoon approximately $1 \text{ teaspoon}$ of the melted chocolate into the bottom of each prepared muffin liner. Use the back of the spoon to gently push the chocolate up the sides of the liner, creating a shell. Don’t worry about perfect coverage; the final layer will cover any gaps.
- Chill: Place the muffin tin in the refrigerator for $10 \text{ minutes}$ to allow the chocolate shell to set completely.
Step 2: Preparing and Adding the Peanut Butter Layer
- Mix Filling: In a small bowl, combine the $1/3 \text{ cup}$ of creamy peanut butter and the $1/3 \text{ cup}$ of powdered sugar. Stir well until a thick, uniform “dough” forms. If it seems too dry, add a tiny splash of milk or extra peanut butter; if too sticky, add a little more powdered sugar.
- Add to Cups: Divide the peanut butter mixture evenly among the chilled chocolate shells. The easiest way is to roll small, flattened discs and gently press them into the bottom of the chocolate shell, ensuring they create a flat, even layer.
- Chill Again: Return the tin to the refrigerator for another $10 \text{ minutes}$ while you prepare the caramel.
Step 3: Creating the Sticky Caramel Core
- Melt Caramel: Combine the $1 \text{ cup}$ of caramel bits and the $2 \text{ tablespoons}$ of water in a small saucepan over low heat. Stir continuously until the caramel is completely melted, smooth, and runny. Be careful not to scorch the caramel.
- Stir in Peanuts: Remove the caramel from the heat and immediately stir in the $1/3 \text{ cup}$ of chopped peanuts. This creates that fantastic salty-crunchy contrast that makes these no-bake Snickers cups so irresistible.
- Layer Caramel: Spoon the warm caramel-peanut mixture evenly over the peanut butter layer in each cup.
- Final Chill: Place the cups back in the refrigerator for at least $30 \text{ minutes}$ to firm up the caramel.
Step 4: The Finishing Touch
- Seal the Tops: Reheat any remaining melted chocolate if necessary (or melt a few extra chips). Spoon a thin layer of chocolate over the set caramel-peanut layer in each cup, sealing the candy inside.
- Garnish: While the top layer of chocolate is still wet, sprinkle a few extra chopped peanuts on top for visual appeal and a final crunch.
- Final Set: Return the cups to the refrigerator for $20 \text{ minutes}$ until the top layer is completely set. Then, they are ready to peel and enjoy!
💡 Petit conseil pro: Achieving the Perfect Caramel Consistency
The caramel layer is the heart of fall’s favorite Snickers cups. Here’s how to ensure it’s gooey, not rock hard.
- Petit conseil pro: When melting the caramel bits and water, the goal is a thick, but pourable syrup consistency. If your caramel seems too thick, add water one teaspoon at a time until it reaches the desired flow. If it’s too thin, let it cool slightly and stir continuously; it will thicken as the temperature drops.
- The Salty Factor: Use salted chopped peanuts. The balance between sweet milk chocolate, sugary peanut butter filling, and the salty peanuts is what truly elevates this to a premium candy bar upgrade. I sometimes even sprinkle a few grains of flaky sea salt directly onto the caramel layer before adding the final chocolate cap!
- Easy Unmolding: Once fully chilled, the cups should pop easily out of the muffin tin. If you used paper liners, the cups are best stored in the liners and peeled off just before serving.
☕ Accompagnements Suggérés: Serving Your Sweet Treat
These decadent no-bake Snickers cups pair wonderfully with simple, warm beverages that balance their richness, making them the perfect centerpiece for your fall entertaining.
- Beverage Pairing: Serve them alongside a piping hot cup of black coffee (the bitterness cuts the sweetness beautifully) or a warm mug of spiced cider. A classic pairing, however, is a cold glass of milk, especially if you’re feeling nostalgic!
- Presentation: Arrange them on a platter dusted lightly with cocoa powder or placed on a bed of fresh, colorful autumn leaves (purely for decor, of course!). Because they are bite-sized, they make excellent additions to a dessert bar.
- Warm Weather Variation: In warmer weather, keep these cups chilled right up until serving, as the coconut oil in the chocolate shell and the caramel can soften quickly at room temperature.
🎁 Sharing the Snickers Joy
These fall’s favorite Snickers cups are so easy and impressive, they make the perfect edible gift. Who wouldn’t love a homemade candy bar?
- Gifting: Package them in a small, festive box lined with parchment paper. Because they are individually lined, they stack well and travel beautifully, especially if kept cool.
- Batch Making: This recipe is easy to double or triple. Make a large batch and store them in the freezer! They actually taste fantastic straight from the freezer—a quick, instant-fix dessert.
- Engagement Question: What’s your favorite occasion to share a homemade treat? Tell me in the comments below!
💡 Variations and Next-Level Tips
Once you’ve mastered the classic no-bake Snickers cups, you can start experimenting with other layers and coatings!
- Dark Chocolate Swap: Replace the milk chocolate chips with high-quality dark chocolate (around $70\%$ cocoa) for a richer, less sweet profile that lets the salty caramel and peanuts shine even brighter. This is a common General Lifestyle/Casual Tip for elevating simple treats.
- Crispy Rice Base: For an extra layer of crunch, mix $1 \text{ cup}$ of puffed rice cereal (like Rice Krispies) with $1/4 \text{ cup}$ of melted milk chocolate. Press this mixture into the bottom of the liner before adding the peanut butter layer.
- Adding Coconut: If you love texture, add $1/4 \text{ cup}$ of shredded, unsweetened coconut flakes to the peanut butter filling mixture. This creates a slightly different but equally addictive flavor profile. This allows you to encourage experimentation.
🥜 Detailed Breakdown of Peanut Butter Filling Alternatives
The peanut butter filling is essentially a simple nougat. If you have nut allergies, or simply want a different flavor, here are alternatives to customize your no-bake Snickers cups.
- Nut-Free: Substitute the peanut butter with SunButter (sunflower seed butter). The color will be slightly darker, but the texture and savory balance remain excellent.
- Almond Joy Style: Replace the peanut butter layer entirely with a mixture of cream cheese, powdered sugar, and shredded coconut. Replace the peanuts in the caramel with sliced almonds.
- Creamy Base: For a creamier, softer center, add $1 \text{ ounce}$ of softened cream cheese to the peanut butter and powdered sugar mixture. This makes the filling incredibly smooth and closer to a truffle center.
This level of customization ensures everyone can enjoy their own version of fall’s favorite Snickers cups.
À vos tabliers! Go ahead, grab that chocolate and caramel. You’re just minutes away from creating a dessert that is creamy, crunchy, salty, and utterly unforgettable.
Bon appétit!