Salut les gourmands!
I still remember that rainy afternoon in my grandmother’s kitchen in Normandy, watching her transform simple milk and sugar into liquid gold. She stood at the stove, wooden spoon in hand, stirring patiently as steam rose in soft clouds around her face. “La patience,” she whispered, “c’est le secret.” That day, I learned that homemade condensed milk isn’t just an ingredient—it’s an act of culinary alchemy, a meditation in transformation where time and heat conspire to create something infinitely more precious than its humble origins suggest.
Making your own condensed milk at home connects you to a centuries-old preservation technique while giving you complete control over ingredients, sweetness levels, and quality. No more metallic-tasting canned versions with mysterious additives. Just pure, creamy sweetness that elevates everything it touches—from Vietnamese coffee to Brazilian brigadeiros, from key lime pie to Thai tea. This recipe will teach you not only the technical steps but the sensory landmarks that guide you toward perfection. You’ll learn to read the subtle signs—the way bubbles change character, how the spoon leaves trails that speak of readiness, the precise moment when simple milk becomes something transcendent.
Présentation de la recette
Homemade condensed milk represents one of those rare culinary achievements where simplicity meets sophistication. With just two ingredients and approximately 45 minutes of active attention, you’ll create a staple that transforms countless desserts while costing a fraction of commercial alternatives.
This recipe yields approximately 300 milliliters (1¼ cups) of condensed milk—equivalent to one standard can—though the quantities scale beautifully if you’re preparing larger batches for holiday baking or gift-giving. The preparation difficulty hovers at beginner-to-intermediate level; while the technique requires no advanced skills, it demands your presence, your attention, your willingness to observe and respond to the milk’s transformation.
Time breakdown:
- Active preparation: 5 minutes
- Cooking time: 35-45 minutes (depending on desired thickness)
- Cooling time: 2-3 hours
- Total time: Approximately 1 hour active, 3-4 hours total
The beauty of this recipe lies in its meditative quality. Unlike rushed modern cooking, making condensed milk cannot be hurried. You become a witness to transformation, watching as heat and time work their magic, concentrating flavors, deepening colors, creating complexity from simplicity.
This traditional preservation method originated in the 19th century when refrigeration remained unavailable. By reducing milk’s water content and adding sugar—a natural preservative—cooks created a shelf-stable product that traveled well, lasted months, and provided concentrated nutrition. Today, we make it not from necessity but from choice, seeking quality, purity, and the profound satisfaction of creating something extraordinary with our own hands.
Ingrédients pour le lait concentré sucré parfait
The ingredient list for homemade condensed milk embodies minimalist perfection—just two components, yet their quality determines everything:
Essential ingredients:
- 4 cups (1 liter) whole milk—preferably organic, grass-fed if available
- 1 cup (200 grams) granulated sugar (or adjust to taste: 150g for less sweet, 250g for extra sweet)
- Optional: 1 vanilla bean, split lengthwise, or ½ teaspoon pure vanilla extract
- Optional: Tiny pinch of sea salt (enhances sweetness perception)
The milk selection matters profoundly. Whole milk, with its full fat content of 3.5-4%, creates the richest, most velvety condensed milk. The fat molecules carry flavor compounds while contributing luxurious mouthfeel that lower-fat alternatives cannot replicate. I’ve experimented with 2% milk—it works but produces thinner, less satisfying results. Skim milk I cannot recommend; without fat, you lose the soul of condensed milk.
Seek organic, grass-fed milk when possible. Beyond ethical considerations, such milk contains higher concentrations of omega-3 fatty acids, conjugated linoleic acid, and fat-soluble vitamins. The flavor difference, while subtle in fresh milk, becomes pronounced during reduction—grass-fed milk develops sweeter, more complex caramel notes as it concentrates.
Sugar selection offers creative possibilities. Standard white granulated sugar produces clean, neutral sweetness—the classic profile most recognize. However, consider these variations:
- Organic cane sugar: Retains trace minerals and subtle molasses notes that add complexity
- Coconut sugar: Creates deeper caramel flavors with slight coconut undertones—extraordinary in Southeast Asian applications
- Light brown sugar: Introduces gentle molasses warmth, perfect for coffee drinks and caramel-forward desserts
- Honey or maple syrup: Can replace up to half the sugar, though they alter final consistency and require adjusted cooking times
The optional vanilla bean transforms good condensed milk into something ethereal. Those tiny black specks scattered throughout signal quality and care. Split the bean lengthwise, scrape the caviar-like seeds into the milk, then add the scraped pod itself—both seeds and pod infuse the milk during reduction. The pod can be rinsed, dried, and buried in sugar to create vanilla sugar, extending its value beyond this single application.
That pinch of salt might seem counterintuitive when creating something sweet, yet it performs crucial flavor enhancement. Salt molecules suppress bitter taste receptors while amplifying sweet and umami perceptions—the same principle that makes salted caramel so compelling. Use fine sea salt or fleur de sel, adding just enough to disappear on the tongue while heightening overall flavor complexity.
Préparation détaillée – L’alchimie de la réduction
The transformation of milk into condensed milk unfolds through patient reduction—a process where time, heat, and constant attention converge to create magic. Each stage possesses distinct characteristics; learning to recognize them elevates you from recipe-follower to intuitive cook.
1. Initial setup and heating (5 minutes)
Select a heavy-bottomed saucepan—ideally stainless steel or enameled cast iron—with at least 3-quart (3-liter) capacity. The generous size prevents boil-overs while providing ample surface area for evaporation. Pour the milk into the pan, add the sugar, and if using vanilla, add both the scraped seeds and the split pod.
Place the pan over medium heat—not high, never high. Patience begins here. As the milk warms, stir gently with a wooden spoon or heat-resistant silicone spatula, dissolving the sugar completely before the milk reaches a simmer. Watch the crystals disappear, swirling in the gentle currents you create. This dissolution matters—undissolved sugar can crystallize during reduction, creating grainy texture instead of silken smoothness.
2. The first simmer – Establishing rhythm (5-10 minutes)
When the milk reaches approximately 85°C (185°F)—not quite boiling but actively steaming—you’ll notice small bubbles forming around the pan’s perimeter. This marks your baseline. Reduce heat to medium-low, finding that sweet spot where the milk maintains a gentle, steady simmer without violent bubbling.
Here begins your meditation. The milk needs constant awareness, though not necessarily constant stirring. Every 3-5 minutes, stir the milk thoroughly, scraping the bottom and sides where proteins tend to accumulate. Between stirring sessions, simply be present. Listen to the gentle susurration of simmering liquid. Watch steam rise and dissipate. Observe how light plays through the translucent liquid.
The color remains pure white during this phase, the consistency still thin and watery. You’re establishing patterns, learning your stove’s personality, creating the foundation for transformation that lies ahead.
3. The active reduction – Witnessing transformation (20-30 minutes)
As water evaporates, the milk begins its metamorphosis. After about 15 minutes, you’ll notice the first subtle changes—the liquid develops slight viscosity, coating the spoon more substantially when lifted. The color shifts almost imperceptibly toward cream, a whisper of yellow emerging.
Increase your stirring frequency to every 2-3 minutes now. Milk proteins concentrate as water departs, and these proteins love to adhere to hot metal surfaces. Scraping the bottom becomes essential, preventing scorching that would introduce burnt flavors and dark specks into your otherwise pristine condensed milk.
Watch the bubbles—they tell stories. Initially large and sparse, they gradually become smaller, more numerous, more persistent. The bubble sound changes too, from occasional pops to a gentle, continuous murmur. These sensory shifts signal progress more reliably than any clock.
Around the 25-minute mark, a remarkable transformation becomes obvious. The milk has reduced by roughly one-third, the color now distinctly ivory with golden undertones. Lift your spoon and let milk drip back into the pan—it falls in distinct drops rather than streaming, each drop holding its shape momentarily before merging with the mass.
4. The crucial final stage – Precision and intuition (10-15 minutes)
The last phase demands your fullest attention. The milk thickens rapidly now, the margin between perfect and scorched narrowing with each passing minute. Stir constantly, scraping every surface, moving the liquid in sweeping motions that prevent any portion from dwelling too long against hot metal.
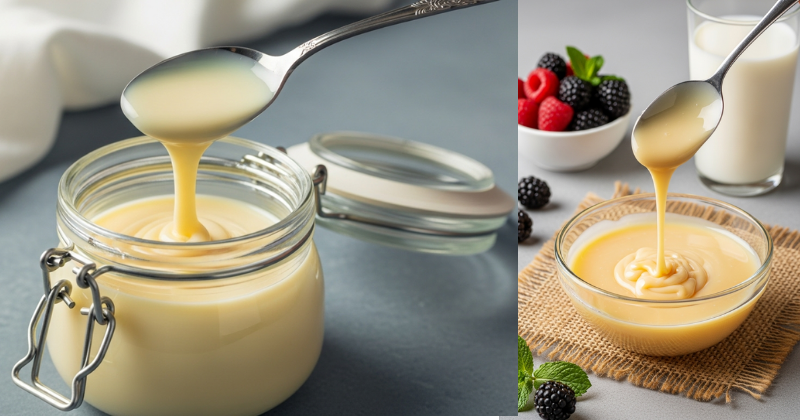
The color deepens to pale caramel—beautiful, warm, inviting. Steam becomes more aromatic, carrying sweet, slightly nutty notes reminiscent of dulce de leche. The consistency transforms from cream-like to syrupy, coating the spoon in an opaque layer that clings stubbornly.
The readiness test: Draw a line across the spoon’s back with your finger. If the path remains clear for 2-3 seconds before milk flows back together, you’ve achieved proper condensation. Alternatively, drop a small amount onto a cold plate—if it holds its shape without spreading instantly, you’re done.
Remember: the mixture thickens substantially as it cools. What seems slightly thin at cooking temperature becomes perfectly thick when refrigerated. Better to err on the side of slightly under-reduced than to push too far and risk scorching.
5. Cooling and storage (2-3 hours)
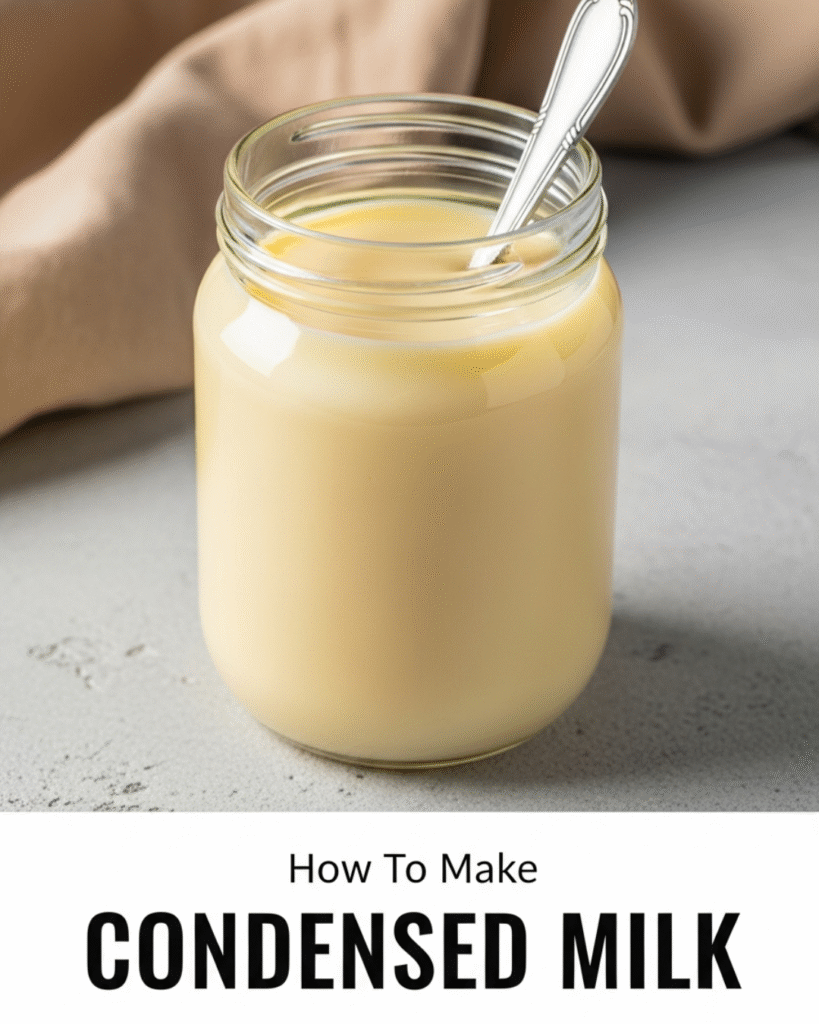
Remove the pan from heat immediately upon reaching desired consistency. If you’ve used a vanilla pod, fish it out now (rinse, dry, and save it for vanilla sugar). Pour the hot condensed milk into a sterilized glass jar or heat-resistant container. Do not cover immediately—condensation from trapped steam could promote bacterial growth.
As the condensed milk cools, you’ll witness its final transformation. The color deepens slightly, the consistency firms considerably. What appeared too thin while hot becomes gorgeously thick and pourable when cold. A skin may form on the surface during cooling—simply stir it back in, or remove it if texture bothers you.
Once completely cool, cover tightly and refrigerate. Properly prepared condensed milk keeps for 2-3 weeks refrigerated, though in practice, it rarely lasts that long. The high sugar concentration acts as preservative, inhibiting bacterial growth while the refrigeration provides additional safety margin.
Petit conseil pro: Mastering the nuances
After years of making condensed milk, I’ve discovered tricks that elevate results from good to extraordinary. These insights come not from cookbooks but from observation, experimentation, and the occasional spectacular failure that taught important lessons.
Temperature control is everything. Your goal is gentle, persistent heat—not aggressive boiling. High heat might reduce the milk faster, but it also causes proteins to coagulate unevenly, creating grainy texture. It increases scorching risk exponentially. It drives off volatile flavor compounds that contribute to condensed milk’s characteristic sweetness. Medium-low heat, requiring more time, produces incomparably smoother, more delicious results.
The baking soda trick for ultra-smooth texture: Add ⅛ teaspoon of baking soda to the milk at the beginning. This tiny amount—barely measurable—slightly alkalinizes the milk, preventing excessive protein coagulation. The result? Impossibly silky condensed milk without any graininess. The baking soda doesn’t affect flavor detectably but dramatically improves mouthfeel.
Preventing skin formation: That annoying skin that forms during cooling results from denatured proteins collecting at the air-liquid interface. Prevent it by placing plastic wrap directly on the hot condensed milk’s surface, eliminating air contact. The wrap conforms to the liquid’s contours, creating a seal that prevents skin formation entirely.
Flavor infusions beyond vanilla: The gentle reduction process provides perfect opportunity for infusion. Try adding: a strip of orange or lemon zest (removed before bottling), a cinnamon stick, star anise for exotic warmth, or even a split cardamom pod for Indian-inspired applications. These aromatics infuse gradually as the milk reduces, creating subtly complex flavors impossible to achieve through post-production additions.
The caramel option – Dulce de leche: For an incredible variation, continue cooking your condensed milk beyond the standard endpoint. As it reduces further and the temperature creeps higher, Maillard reactions accelerate—sugars and proteins interact, creating hundreds of new flavor compounds. The color deepens from pale caramel to rich amber, the flavor intensifies dramatically, and you’ve created dulce de leche—essentially ultra-caramelized condensed milk. This transformation requires an additional 20-30 minutes of cooking, constant stirring, and vigilant attention, but the results prove absolutely worth the effort.
Storage wisdom: Condensed milk absorbs refrigerator odors readily because of its high sugar and fat content. Store it in an airtight container, away from strong-smelling foods like onions or fish. Glass jars with rubber-sealed lids work perfectly. Label with the preparation date to track freshness.
Consistency adjustments: If your finished condensed milk seems too thick (it happens—every stove behaves differently), simply warm it gently and whisk in milk, one tablespoon at a time, until reaching desired consistency. Too thin? Return it to the stove and reduce further, or use it anyway—slightly thin condensed milk still functions beautifully in most applications.
Accompagnements et utilisations – L’inspiration culinaire
Homemade condensed milk transcends its role as mere ingredient to become a versatile culinary tool that elevates countless preparations. Understanding its applications helps you appreciate why making it from scratch matters so profoundly.
In beverages – Liquid luxury:
Vietnamese iced coffee (cà phê sữa đá) achieves its legendary richness from generous condensed milk additions. Brew strong dark-roast coffee, pour it over a few tablespoons of condensed milk, stir briefly, then pour over ice. The condensed milk creates layered sweetness, remaining concentrated at the bottom until you stir, creating a drink that evolves with each sip.
Thai iced tea follows similar principles—strong black tea infused with star anise and tamarind, sweetened with condensed milk, poured over crushed ice. The orange color and complex flavor profile make it unforgettable.
Hot chocolate transforms when you whisk condensed milk into dark cocoa powder and hot milk. The texture becomes impossibly creamy, the sweetness perfectly balanced, far superior to commercial mixes.
In desserts – The foundation of indulgence:
Key lime pie depends utterly on condensed milk’s specific chemistry. The citrus acid reacts with milk proteins, causing the filling to thicken without eggs or additional cooking—pure culinary science.
Brazilian brigadeiros—those beloved chocolate truffles—combine condensed milk with cocoa powder and butter, cooked until thick, then rolled into balls and coated in sprinkles. Simple ingredients, profound results.
Fudge achieves its characteristic texture through condensed milk’s sugar concentration and protein structure. Heat condensed milk with chocolate and butter, cool, and you’ve created confectionery perfection.
In breakfast applications:
Drizzle condensed milk over warm oatmeal or porridge for sweetness that melts into the grain’s warmth, creating pockets of caramel-like richness.
French toast gains extraordinary custard-like quality when you add condensed milk to the egg mixture—the proteins and sugars create beautiful browning while keeping the interior luxuriously moist.
Pancakes become cloud-like when you replace some of the milk in your batter with condensed milk, the extra sugar promoting gorgeous caramelization.
In ice cream making:
No-churn ice cream relies entirely on condensed milk for sweetness and texture. Whip heavy cream to stiff peaks, fold in condensed milk and flavorings, freeze—you’ve created ice cream without any special equipment. The condensed milk prevents ice crystal formation while providing the sweetness typically supplied by separately made custard bases.
In cultural applications:
Filipino halo-halo layers shaved ice, beans, jellies, fruits, and sweet preserves, crowned with condensed milk that melts down through the layers, uniting disparate elements into harmonious whole.
Indian sweets like gulab jamun often incorporate condensed milk into the dough, creating texture and sweetness that withstand soaking in sugar syrup.
Mexican tres leches cake soaks sponge in a mixture containing condensed milk, achieving that impossibly moist yet structured texture that defines the dessert.
As a simple indulgence:
Sometimes the best application is the simplest—warm toast, slathered with butter, drizzled with condensed milk. Or fresh strawberries, macerated briefly, topped with a generous pour of condensed milk. These uncomplicated preparations showcase the ingredient itself rather than hiding it within complex recipes.
Keep your homemade condensed milk visible in the refrigerator, ready for spontaneous inspiration. You’ll find yourself reaching for it constantly, discovering applications you never imagined, transforming ordinary moments into small celebrations of sweetness and care.
La science derrière la transformation
Understanding the chemistry and physics underlying condensed milk production deepens appreciation while improving your intuitive feel for the process. This isn’t merely cooking—it’s applied food science, demonstrating principles that govern countless culinary transformations.
The physics of evaporation and concentration:
When you heat milk, you provide energy that breaks hydrogen bonds holding water molecules to dissolved components. These liberated water molecules escape as steam, leaving behind everything else—proteins, fats, sugars, minerals—in progressively higher concentrations.
The rate of evaporation depends on surface area, temperature, and vapor pressure. A wider pan exposes more liquid to air, accelerating evaporation. Higher temperatures increase molecular kinetic energy, promoting faster evaporation. Lower humidity in your kitchen means lower vapor pressure in the surrounding air, creating steeper concentration gradients that drive more rapid moisture loss.
This explains why condensed milk can never be rushed successfully. If you increase heat too much, you create two problems: the milk’s bottom layers heat far above evaporation temperature, causing protein coagulation and scorching, while insufficient time at proper temperature prevents uniform concentration throughout the liquid.
The chemistry of Maillard reactions:
As milk reduces and temperature rises, Maillard reactions begin—non-enzymatic browning where amino acids react with reducing sugars. These reactions create hundreds of new flavor compounds: nutty notes, caramel aromas, savory undertones that balance sweetness.
The slight color change from white to ivory to pale caramel reflects Maillard reaction progress. Early stages produce subtle flavor complexity. Extended cooking (as in dulce de leche) drives reactions further, creating increasingly intense flavors and darker colors.
Temperature critically affects Maillard rates—they accelerate dramatically above 140°C but proceed more slowly at the 100-105°C range where milk reduction typically occurs. This explains why gentle, prolonged reduction produces more nuanced flavors than aggressive boiling.
Protein behavior under heat and concentration:
Milk proteins—primarily caseins and whey proteins—undergo denaturation when heated. Their carefully folded structures unfold, exposing previously buried amino acid residues. These denatured proteins can then interact with each other, forming networks that affect texture.
In condensed milk, we want minimal protein aggregation—we’re aiming for smooth liquid, not cheese. Gentle heat prevents excessive denaturation. Constant stirring prevents localized hot spots where proteins might coagulate. The sugar’s presence actually helps stabilize proteins, inhibiting aggregation through molecular crowding effects.
Sugar’s preservative properties:
Why does condensed milk keep for weeks while fresh milk spoils within days? Sugar concentration. At approximately 55-60% sugar by weight in finished condensed milk, water activity drops below levels most bacteria require for growth.
Water activity (aw) measures water availability for biological processes. Pure water has aw of 1.0. Most bacteria need aw above 0.90 to grow. The high sugar concentration in condensed milk binds water molecules through hydrogen bonding, reducing available water to levels hostile to microbial growth—typically aw around 0.85-0.90.
This natural preservation allows room-temperature storage of unopened commercial condensed milk and extended refrigerated storage of homemade versions.
The role of fat in texture and flavor:
Milk fat contributes substantially to condensed milk’s luxurious mouthfeel. Fat molecules coat the tongue, creating perceived creaminess while carrying fat-soluble flavor compounds. During reduction, fat concentration increases proportionally with other components.
Fat also affects heat transfer—it slows it slightly, creating more uniform heating throughout the liquid. This subtle effect contributes to scorching prevention in whole milk versus skim milk versions.
Caramelization versus Maillard reactions:
Often confused, these are distinct processes. Caramelization involves direct sugar breakdown at high temperatures (typically above 160°C), producing characteristic caramel flavor and brown color. Maillard reactions involve amino acid-sugar interactions at lower temperatures.
In condensed milk, we primarily see Maillard reactions since temperatures rarely exceed 105°C during standard preparation. If you continue to dulce de leche, temperatures rise further, and true caramelization begins contributing to flavor complexity alongside Maillard products.
This scientific understanding transforms you from recipe-follower to thoughtful practitioner, capable of troubleshooting problems, adapting to different conditions, and even developing variations based on principles rather than memorized instructions.
À vos tabliers!
The journey from simple milk to condensed gold teaches patience, observation, and the profound satisfaction of transformation achieved through your own hands. Each batch you make connects you to generations of cooks who understood that some things cannot be rushed, that quality emerges from attention, that the best ingredients are those you create yourself with care and intention.
I encourage you to make your first batch this weekend. Experience the meditation of stirring, the gradual color change, the evolving aromas, the moment when you realize the thin liquid has become thick, sweet perfection. Once you’ve tasted homemade condensed milk—pure, fresh, without metallic undertones or chemical aftertastes—you’ll understand why this traditional technique endures.
Share your experiences in the comments below. Did you add vanilla or experiment with other flavors? What desserts did you create with your homemade condensed milk? Did you discover the magic of drizzling it over fresh fruit? I love hearing how this recipe travels to your kitchens, what variations you discover, what memories you create.
Tag your condensed milk creations on social media so we can celebrate together this return to traditional food preparation. Every jar you make represents a small rebellion against industrial food systems, a declaration that quality, purity, and craftsmanship still matter in our fast-paced world.
Bon appétit!