Learn how to make homemade shower melts for colds and sinus relief using essential oils like eucalyptus and peppermint to clear congestion and soothe your airways.
Important Disclaimer: This article is for informational purposes only and should not replace professional advice. For health-related topics, consult healthcare providers. For safety procedures, verify current best practices and local regulations. Individual results may vary, and personal circumstances should always be considered when implementing any suggestions.
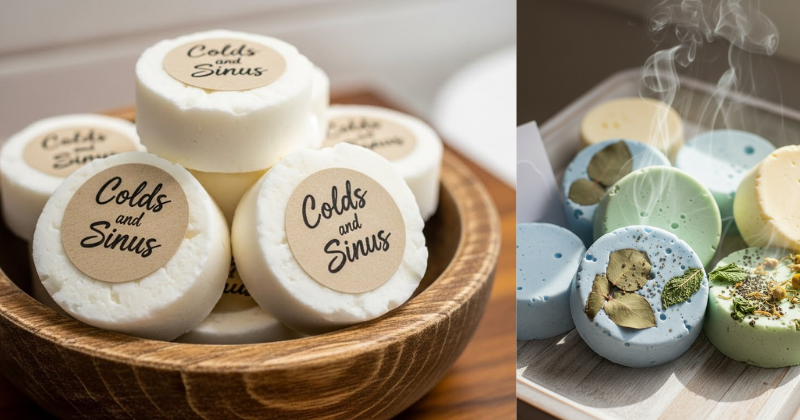
Nothing feels quite as draining as a stubborn cold that leaves your head feeling heavy and your sinuses completely blocked. When you are struggling to breathe clearly, even the simplest daily tasks can feel like a mountain to climb. But what if your morning shower could be transformed into a powerful, spa-like steam room? By creating your own Homemade Shower Melts for Colds and Sinus, you can unlock the aromatic power of nature to help open up your airways and refresh your senses.
In this guide, you will discover how to craft these soothing “shower bombs” using simple ingredients found in your kitchen. We will walk you through the process of blending essential oils for maximum respiratory support, ensuring you feel empowered to manage your wellness naturally. This transition to DIY home remedies isn’t just about saving money; it is about taking control of your environment and providing your body with the gentle support it needs during a rough season. Get ready to breathe deep and achieve the instant relief you’ve been searching for!
Foundation: The Science of Steam and Aromatherapy
Before we start mixing, it is important to build confidence in why these melts work so effectively. The concept is based on two pillars: steam inhalation and the therapeutic properties of plant extracts.
How do shower melts help with sinus congestion?
When a shower melt is placed on the floor of your shower, the hot water causes it to slowly dissolve, releasing concentrated essential oils into the steam. As you breathe in this medicated vapor, the steam thins the mucus in your sinuses while the oils work to reduce inflammation in the nasal passages. This dual-action approach provides much faster relief than steam alone.
Reassurance for Beginners
If you have never made a DIY wellness product before, don’t worry! Making Homemade Shower Melts for Colds and Sinus is essentially like making “playdough” for adults. It is a very forgiving process that requires no special equipment. You are simply creating a carrier for the oils, and even if your first batch looks a little crumbly, they will still work perfectly in the shower.
Key Components for Respiratory Support
- Baking Soda: This serves as the base of your melt, providing a stable structure that dissolves slowly.
- Eucalyptus Essential Oil: Contains cineole, which research suggests has anti-inflammatory and decongestant properties.
- Peppermint Essential Oil: Known for its cooling menthol sensation that makes breathing feel easier.
- Water: The binding agent that turns the powder into a moldable paste.
Step-by-Step: Crafting Your Relief Melts
Ready to transform your shower? This process is broken down into manageable steps so you can achieve success on your very first try.
Step 1: Prepare Your Workspace and Ingredients
You will need:
- 1 cup of Baking Soda
- 2-3 tablespoons of Water
- 15 drops of Eucalyptus Essential Oil
- 10 drops of Peppermint Essential Oil
- 5 drops of Rosemary or Lemon Essential Oil (for added freshness)
- A silicone mold or a muffin tin
Step 2: The Mixing Process
- Combine the Base: Place the baking soda in a glass bowl.
- Add the Scent: Drop your essential oils directly into the dry baking soda and stir well with a fork to distribute the aroma.
- Slowly Add Water: Add water half a tablespoon at a time. Stir constantly.
- Test the Consistency: You are looking for a “wet sand” texture. If you squeeze a handful, it should hold its shape without crumbling. If it is too dry, add a few more drops of water.
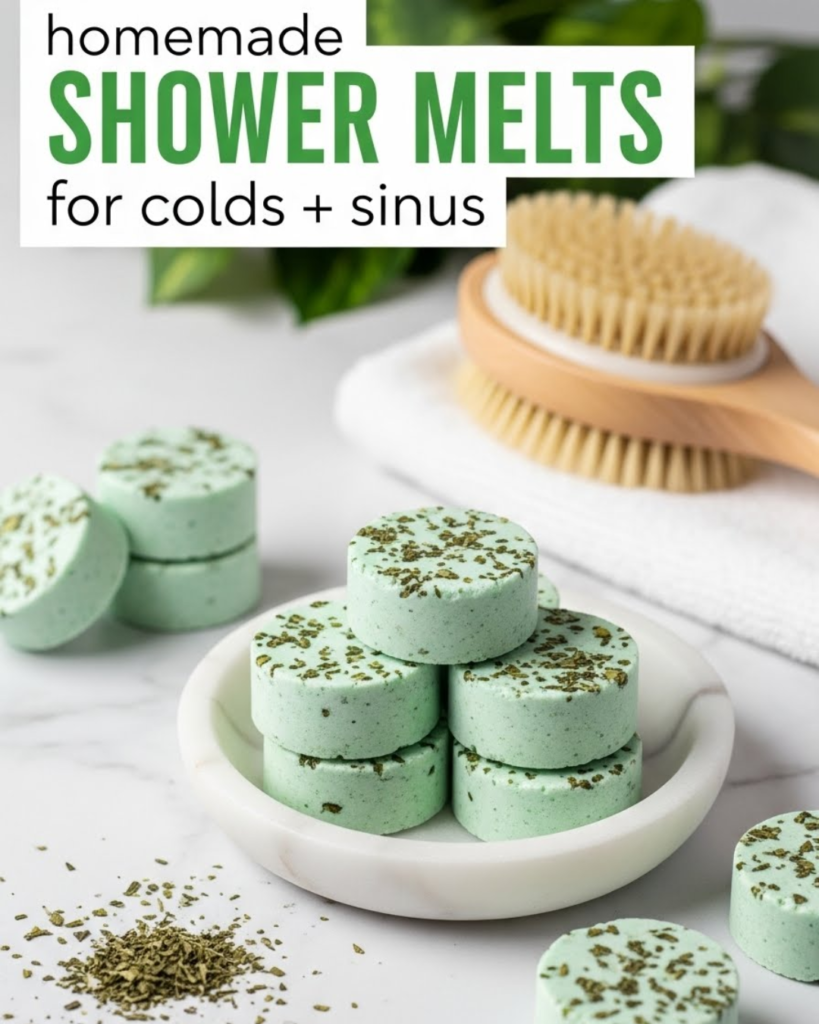
Step 3: Molding and Drying
Press the mixture firmly into your silicone molds. The firmer you pack them, the longer they will last in the shower! Let them dry for at least 24 to 48 hours. Once they are hard to the touch, “pop” them out and store them in an airtight glass jar to keep the oils from evaporating.
Advanced Strategies: Pro Tips for Customization
Once you have mastered the basic recipe, you can share expert-level insights by tailoring your melts to different needs.
The “Nighttime Relief” Variation
If your cold is keeping you awake at night, try a “Sleepy Sinus” blend. Replace the peppermint with 10 drops of Lavender essential oil. Lavender helps relax the nervous system, making it easier to drift off after your steam treatment.
Maximizing the Scent Throw
For a more intense experience, you can add a teaspoon of menthol crystals to your dry mix. Menthol crystals provide that “extra-strength” punch found in commercial vapor rubs, making them ideal for the most stubborn sinus blockages.
Creating a Non-Toxic Environment
Pair your shower melts with other [simple swaps for a non-toxic kitchen] and bathroom routine. Using natural cleaning agents like vinegar and baking soda ensures that while you are trying to heal your respiratory system, you aren’t breathing in harsh chemical fumes from a freshly cleaned shower.
Troubleshooting: Common Challenges and Solutions
DIY projects can sometimes have minor hiccups. Here is how to handle frequent obstacles with encouragement.
“My melts are expanding and puffing up!”
This usually happens if you add too much water too quickly.
- The Solution: If they start to “grow” in the mold, simply press them back down firmly. Next time, try using a spray bottle to mist the water onto the baking soda; this prevents a localized reaction.
“They dissolve too fast in the shower”
- Alternative Approach: Move the melt further away from the direct stream of water. It should be in a spot where it gets “splashed” but not “drowned.” You can also add a tablespoon of cornstarch to your next batch to make the melt harder and more durable.
“I can’t smell the oils”
- Preventive Measures: Ensure your essential oils are fresh and stored in dark glass bottles. To “unlock” more scent, wait until the shower is already steamy before placing the melt on the floor.
Maximizing Results: Next Level Wellness Tips
To build upon the success of your Homemade Shower Melts for Colds and Sinus, consider a holistic approach to your recovery.
Complementary Strategies
- Hydration from Within: While the steam helps your nose, your body needs internal moisture. Pair your shower with a [turmeric and ginger tea] or a [Nature’s Flu Shot] drink to boost your immune system.
- Post-Shower Care: After your steam session, apply a [DIY homemade under-eye treatment] if the sinus pressure has left you with dark circles or puffiness.
- Evening Wind-down: Follow up your shower with a [clove-infused foot soak] to help ground your body and improve circulation before bed.
Featured Snippet: Where do you put shower melts?
For the best results, place your shower melt on the floor of the shower, away from the direct drain and the heavy stream of water. It should be in a spot where it gets light splashes, allowing it to fizz and release essential oils slowly throughout your shower rather than washing away instantly.
Conclusion
Creating Homemade Shower Melts for Colds and Sinus is a beautiful way to embrace self-care during the winter months. You have discovered that you have the capability to succeed in making your own natural remedies with items you already have at home. By choosing these aromatic steams over synthetic fragrances, you achieve a level of comfort that supports your body’s natural healing process.
You’ve got this! The next time you feel a sniffle coming on, head to the kitchen and whip up a batch. The transformation from a congested, tired state to a refreshed, clear-headed one is just one shower away. Breathe deep and enjoy the relief you created!