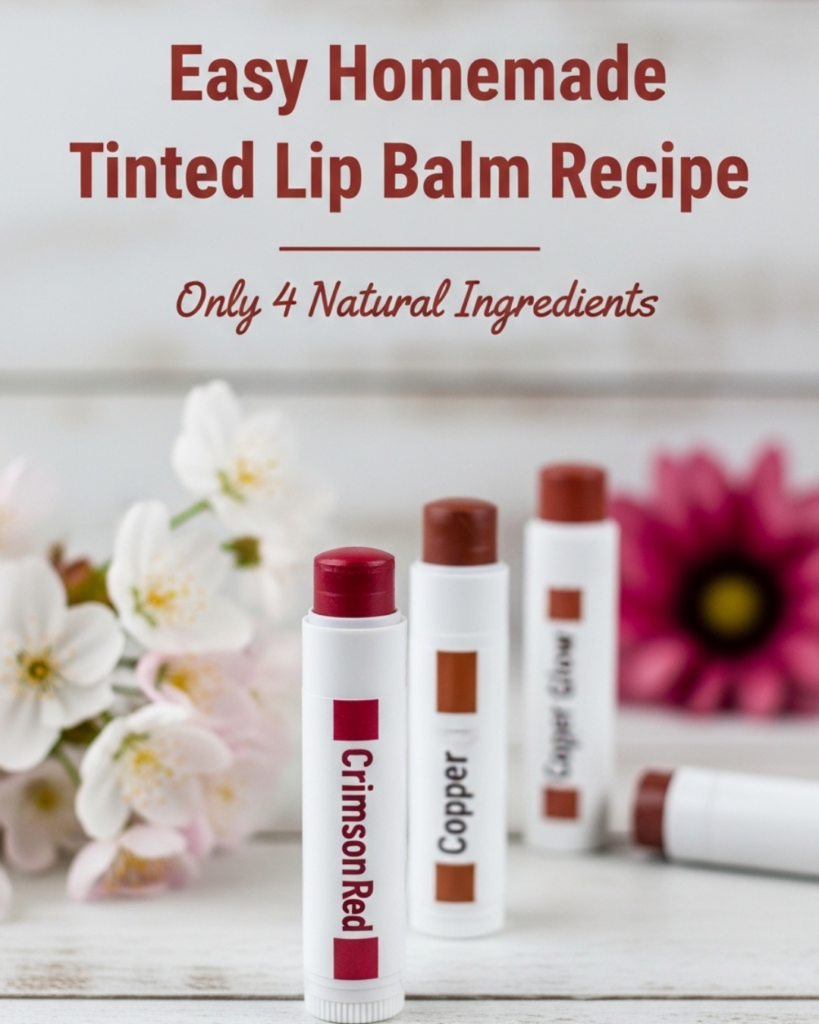
Create your own stunning homemade tinted lip balm recipe- easy DIY 4 ingredients only! Learn to craft moisturizing, natural lip care that adds a perfect pop of color.
Have you ever stared at the long list of unpronounceable chemicals on the back of your favorite lipstick and wondered if there was a better way? We use lip products every single day, which means we inevitably ingest a small amount of whatever we apply. If you are looking for a way to simplify your beauty routine while ensuring your skin stays hydrated and glowing, you are in the perfect place! Mastering a homemade tinted lip balm recipe- easy DIY 4 ingredients only is a total game-changer for your self-care ritual.
By crafting your own cosmetics, you transform your vanity into a laboratory of natural beauty. You’ll gain the peace of mind that comes from knowing exactly what is touching your lips, all while saving money and reducing plastic waste. This guide will walk you through an achievable, step-by-step process that feels more like a fun afternoon craft than a complex chore. Whether you want a subtle rose blush or a deep berry hue, you have the power to customize your look perfectly. Let’s unlock your inner maker and discover how easy it is to achieve a professional-quality tint at home!
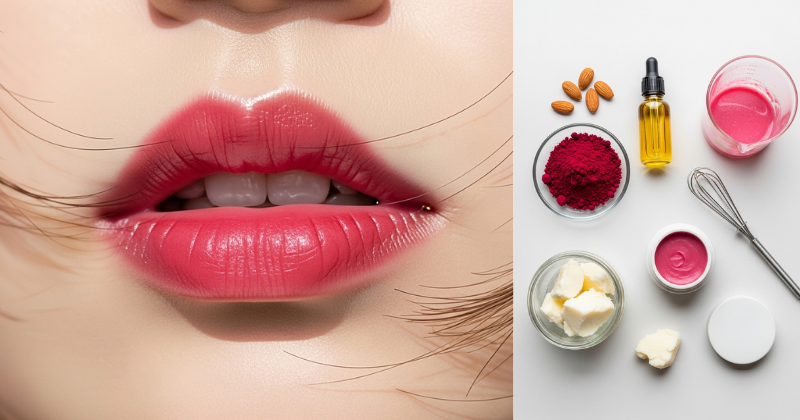
Foundation: The Magic of Four Simple Ingredients
Before we start melting and mixing, it is vital to build your confidence with the basic concepts of natural skincare. Many people hesitate to try a homemade tinted lip balm recipe- easy DIY 4 ingredients only because they assume “natural” means “less effective.” However, the truth is quite the opposite. Nature provides powerful emollients and pigments that often outperform synthetic alternatives.
The foundation of a great lip balm is the “Golden Ratio” of oils to waxes. When you understand how these four components interact, you can stop relying on petroleum-based store brands and start trusting the healing power of plants. This foundation is about reclaiming your beauty routine from industrial manufacturers and bringing it back to your kitchen counter.
H3: The Structured Base: Beeswax or Candelilla
The “skeleton” of your lip balm is the wax. It provides the structure and prevents the balm from melting in your pocket. Beeswax is a classic choice, but if you are looking for a vegan option, Candelilla wax works beautifully. Both create a protective barrier that locks in moisture.
H3: The Deep Moisturizer: Shea Butter or Cocoa Butter
Butters provide the “creaminess” and deeply hydrate the delicate skin of your lips. They are rich in vitamins and fatty acids that help heal chapped skin. Shea butter offers a softer finish, while cocoa butter adds a delicious, subtle chocolate scent.
H3: The Liquid Carrier: Coconut Oil or Almond Oil
The oil is what makes the balm glide on smoothly. Coconut oil is a favorite for its antimicrobial properties, while sweet almond oil is incredibly lightweight and packed with Vitamin E. This is the ingredient that gives your lips that healthy, dewy look.
H3: The Natural Pigment: Mica or Beetroot Powder
This is where the “tinted” part of our homemade tinted lip balm recipe- easy DIY 4 ingredients only comes into play. Natural mica powders provide a shimmering, consistent color, while beetroot powder offers a completely plant-based, earthy pink tone.
Step-by-Step Process: Mixing Your Custom Tint
Ready to get started? This process is designed to be manageable and fun. You don’t need specialized equipment; a simple makeshift double boiler will do the trick!
Step 1: Prep Your Tools and Containers
Before you heat anything, have your lip balm tubes or small tins ready. Once the mixture is off the heat, it sets quickly!
- Safety Tip: Ensure all containers are clean and completely dry. Even a drop of water can cause your balm to spoil prematurely.
Step 2: The Melting Phase
In a heat-safe glass bowl over a pot of simmering water (the double boiler method), combine:
- 1 tablespoon of beeswax pellets.
- 1 tablespoon of shea butter.
- 1 tablespoon of coconut oil. Gently stir until everything is a clear, golden liquid. Avoid high heat; a slow melt preserves the nutrients in the oils.
Step 3: Infusing the Color
Once melted, remove the bowl from the heat. Now, stir in your 4th ingredient: 1/4 to 1/2 teaspoon of your chosen pigment.
- Pro Tip: Start with a small amount! You can always add more to deepen the shade, but you can’t take it out. Stir vigorously to ensure there are no clumps of powder.
Step 4: The Pour
Carefully pour the liquid into your tubes or tins. Let them sit undisturbed for at least 30 minutes. Resist the urge to touch the tops; letting them cool naturally ensures a smooth, professional finish without any “sinkholes” in the center.
Advanced Strategies: Pro Tips for Customization
Now that you’ve mastered the basic homemade tinted lip balm recipe- easy DIY 4 ingredients only, you can experiment to make it your own. Expert-level DIY-ers know that small tweaks can lead to wildly different results.
- Adjusting Texture: If you prefer a firmer balm (better for hot summers), add an extra 1/2 teaspoon of beeswax. If you love a glossy, soft finish, increase the coconut oil slightly.
- Creating “Flavor” Profiles: While we are sticking to 4 main ingredients for the base, you can “unlock” a new experience by adding 2-3 drops of essential oil. Peppermint is refreshing, while Sweet Orange feels like a summer treat.
- The “Liner” Trick: If you want a more intense color payoff, you can melt a small piece of a non-toxic natural crayon into the mix. This provides a bolder tint that acts almost like a lip stain.
H3: Layering for Depth
You can create ombre effects or custom shades by layering different batches. Pour a dark berry batch halfway up a tube, let it set for 5 minutes, and then top it off with a light pink batch. It looks beautiful and allows for a customizable color as you use the product!
Troubleshooting: Common Challenges and Solutions
Even with a simple 4-ingredient recipe, things can sometimes go sideways. Don’t worry—most mistakes are easily fixed!
- Problem: “My balm is too grainy.”
- Solution: This usually happens with shea butter if it cools too slowly. To fix it, simply re-melt the balm and then place the finished tubes in the refrigerator immediately after pouring to “flash-cool” them.
- Problem: “The color is all at the bottom.”
- Solution: Some pigments are heavier than the oil. To prevent settling, wait until the mixture starts to thicken slightly (but is still pourable) before filling your containers. Give it one last stir right before the pour!
- Problem: “It feels too greasy on my lips.”
- Solution: You likely used a bit too much oil. Re-melt the mixture and add a small pinch of beeswax to increase the “grip” of the balm.
Preventive Measures
Always store your finished balms in a cool, dry place. Since this recipe doesn’t use chemical preservatives, keeping it out of direct sunlight will help the natural oils stay fresh for 6–9 months.
Maximizing Results: Holistic Beauty Integration
To build upon your success with your homemade tinted lip balm recipe- easy DIY 4 ingredients only, think about how it fits into your overall wellness routine. Beauty is an ecosystem, and your lips will look best when your whole body is nourished.
- The Inside-Out Glow: Remember that topical balms work best on healthy skin. If your lips are constantly peeling, you might be dehydrated or dealing with a nutrient gap. Exploring topics like [You Are Not Tired, You Are Suffering from Poor Nutrition] can help you identify if you need more B-vitamins for skin health.
- Prep with a Scrub: Before applying your new tint, use a simple sugar scrub (sugar + olive oil) to exfoliate. This ensures the color goes on evenly and doesn’t settle into dry patches.
- Eco-Friendly Clean Up: While you’re in the DIY spirit, use your [Homemade Dish Soap Recipe (From Scratch)] to easily clean your oily stirring spoons and glass bowls once you’re done!
- Immune Support: Healthy skin is a reflection of a healthy immune system. Consider how a [Body Detox] or a [DIY Immunity Booster Powder] can improve your overall complexion, giving you a natural radiance that your lip balm will only enhance.
Conclusion: Empower Your Beauty Routine
Crafting your own homemade tinted lip balm recipe- easy DIY 4 ingredients only is an empowering act of self-sufficiency. You have proven that you don’t need a massive budget or a complicated chemical lab to look and feel your best. By choosing pure, simple ingredients, you are nurturing your body and the planet simultaneously.
Take pride in the fact that you’ve created something beautiful and functional with your own two hands. The transformation from “consumer” to “creator” is one of the most rewarding journeys you can take. Whether you keep these balms for yourself or give them as heartfelt gifts, you are spreading the message that natural is powerful. You’ve achieved something wonderful today—enjoy that perfect, healthy glow!