Transform a forgotten grocery store garlic bulb into living alchemy—where papery cloves planted in autumn darkness emerge as verdant spears, then swell underground into pungent treasures that connect you to cultivation traditions stretching back seven thousand years across Mesopotamian plains and Egyptian temple gardens.
Growing garlic in pots from store-bought bulbs represents more than frugal gardening or space-saving strategy—it embodies a radical act of participation in botanical cycles that commercial agriculture has rendered invisible. That bulb sitting in your kitchen, purchased without ceremony alongside onions and potatoes, carries within its segmented architecture the complete blueprint for regeneration. Each clove, a compressed universe of potential, waits only for soil contact, moisture, and your patient attention to awaken into growth that mirrors the seasons themselves: dormancy yielding to emergence, vegetative abundance preparing for underground transformation, green death signaling harvest readiness.
This comprehensive guide illuminates the path from supermarket shelf to container harvest, addressing the botanical peculiarities that make garlic (Allium sativum) both forgiving and particular, both accessible to beginners and endlessly fascinating to experienced growers. Whether you’re a balcony gardener seeking self-sufficiency, an apartment dweller craving connection to growing things, or simply someone who has gazed at sprouting garlic and wondered about possibility, understanding garlic’s vernalization requirements, its photosensitive bulbing response, and its modest yet specific cultural needs unlocks success in containers far from traditional garden beds.

The Botanical Soul of Garlic: Understanding What You’re Growing
Before pressing cloves into potting mix, comprehending garlic’s evolutionary biology and growth architecture establishes the foundation for successful cultivation that works with rather than against this ancient allium’s nature.
Garlic’s Evolutionary Wisdom and Vernalization Requirements
Garlic evolved in Central Asian highlands—regions experiencing pronounced seasonal contrasts with cold winters and warm, dry summers. This environmental history encoded specific growing requirements into garlic’s genetic programming, requirements that persist even in store-bought bulbs grown continents away from their ancestral homeland.
The Vernalization Imperative: Most garlic varieties require vernalization—extended cold exposure (32-50°F/0-10°C) for 4-8 weeks—to trigger proper bulb formation. Without this cold period, plants produce vigorous foliage but fail to divide into multiple cloves, creating single-clove “rounds” instead of proper segmented bulbs.
This explains garlic’s traditional autumn planting schedule: fall-planted cloves experience winter’s cold naturally, satisfying vernalization requirements before spring warmth initiates bulb development. For container growers in mild climates or those planting in spring, refrigeration can substitute for natural cold—a technique we’ll explore in detail.
Hardneck vs. Softneck: Understanding Cultivar Differences
Garlic divides into two primary subspecies, each exhibiting distinct characteristics affecting container cultivation success:
Hardneck Garlic (Allium sativum var. ophioscorodon):
- Produces stiff central flower stalk (scape) in late spring
- Typically 4-8 large cloves per bulb arranged around central stalk
- More pronounced flavor, often preferred by chefs
- Requires stronger vernalization (6-8 weeks cold)
- Shorter storage life (4-6 months)
- Better suited to cold winter regions
Softneck Garlic (Allium sativum var. sativum):
- No central stalk; flexible, braidable necks
- 12-20 smaller cloves per bulb in multiple layers
- Milder flavor, excellent storage (8-12 months)
- More flexible vernalization requirements
- The type typically sold in grocery stores
- Adapts better to container culture and varied climates
Most store-bought garlic is softneck—its flexibility and storage longevity make it commercially preferable. This works to container growers’ advantage: softneck varieties tolerate the temperature fluctuations and somewhat restricted root zones that container culture imposes.
The Architecture of Garlic Growth: From Clove to Bulb
Understanding garlic’s developmental stages allows you to provide appropriate care at critical transition points:
Phase 1: Root Establishment (Weeks 1-4 post-planting) The planted clove sends roots downward while remaining dormant above ground. During autumn’s lengthening darkness, extensive root systems develop—the invisible foundation supporting future growth.
Phase 2: Shoot Emergence (Late winter/early spring) As temperatures warm and day length increases, green shoots pierce soil surface. These narrow, blade-like leaves unfurl sequentially, each emerging from the sheath of its predecessor.
Phase 3: Vegetative Growth (Spring) Rapid foliage production fuels photosynthesis. Garlic develops 8-12 leaves typically, each representing future clove-wrapping layers. More leaves generally correlate with larger final bulbs—the plant is literally building its own packaging.
Phase 4: Bulbing (Late spring/early summer) Triggered by combination of day length (12-14+ hours) and warm temperatures (60-70°F/15-21°C), the plant redirects energy from foliage to underground bulb formation. The clove you planted swells, then divides into multiple cloves around the central growing point.
Phase 5: Maturation and Senescence (Early-mid summer) Lower leaves yellow and brown progressively upward. This die-back signals bulb maturation—the plant is preparing for dormancy, concentrating sugars and sulfur compounds that create garlic’s characteristic flavor and pungency.
Container Advantages: Why Pots Excel for Garlic Cultivation
While garlic grows magnificently in traditional garden beds, containers offer specific advantages that make them not merely acceptable but sometimes superior:
Soil Control: You dictate exact soil composition—drainage, fertility, pH—without amending existing earth or battling clay, sand, or compaction issues.
Pest Protection: Elevation above ground level deters some soil-dwelling pests. Containers can be moved away from problematic areas or protected more easily than in-ground plantings.
Space Efficiency: Balconies, patios, rooftops, even sunny windowsills become productive garlic gardens. No yard required.
Extended Season Control: Containers can be moved to optimize temperature and light exposure—into shade during excessive heat, near walls for cold protection, under cover during damaging weather.
Harvest Convenience: No digging required—simply tip container and empty, revealing every bulb intact and clean.
I discovered container garlic growing accidentally—a forgotten clove sprouted in a pot of spent summer annuals. Rather than discarding it, I left it through winter. That single experimental bulb, harvested the following July, convinced me that garlic not only tolerates but thrives in containers when provided appropriate conditions.
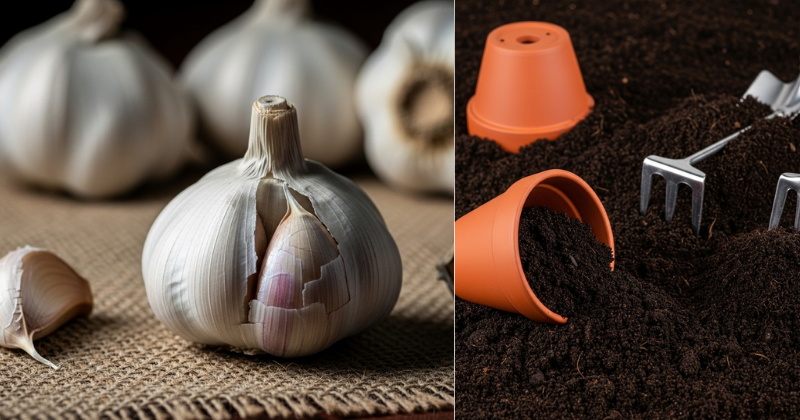
Essential Materials and Container Selection
Success begins with gathering appropriate materials—the physical infrastructure supporting your garlic through its months-long transformation from clove to bulb.
Selecting the Ideal Container
Size Specifications: Garlic’s root system extends 12-18 inches deep while spreading 6-8 inches laterally per plant. Optimal containers provide:
- Depth: Minimum 10 inches; 12-14 inches preferred
- Width: Depends on planting density—12-inch diameter accommodates 4-6 cloves; 18-24 inch containers hold 12-20 cloves
Material Considerations:
Terracotta/Clay: Beautiful, traditional, allows soil breathing through porous walls. However, porous walls also mean faster moisture loss requiring more frequent watering. In harsh climates, terracotta may crack through freeze-thaw cycles.
Plastic: Lightweight, moisture-retentive, affordable. Choose UV-resistant types that won’t degrade in sunlight. Dark colors absorb heat—beneficial in cool climates, potentially problematic in hot regions.
Fabric Grow Bags: Increasingly popular, these breathable containers promote excellent drainage and root health through air pruning. They’re portable, collapsible for storage, and generally inexpensive. My personal favorite for garlic—the root zone stays cooler than dark plastic in summer, yet warms adequately in spring.
Wood: Cedar or redwood planters offer aesthetic appeal and good insulation properties. Ensure untreated wood (chemicals can leach into soil).
Drainage Non-Negotiable: Whatever container you choose, adequate drainage holes are absolutely essential. Garlic tolerates brief dryness but dies in waterlogged soil. Containers should have multiple holes (at least one per square foot of base area) allowing water to exit freely.
Crafting the Perfect Growing Medium
Store-bought potting soil provides starting point, but garlic’s specific needs benefit from amendments:
Base Formula:
- 60% quality potting soil or compost
- 30% perlite or coarse sand (drainage enhancement)
- 10% worm castings or aged compost (slow-release fertility)
Optional Enhancements:
- Bone meal (1 tablespoon per gallon of mix): provides phosphorus supporting root development
- Kelp meal (1 tablespoon per gallon): trace minerals and growth hormones
- Wood ash (1 teaspoon per gallon): potassium and pH adjustment—garlic prefers slightly alkaline conditions (pH 6.0-7.0)
Mix thoroughly, moistening until the medium feels like a wrung-out sponge. Garlic planted into bone-dry mix struggles to establish roots, while excessively wet soil promotes rot.
Selecting Viable Store-Bought Garlic
Not all grocery store garlic succeeds equally in cultivation—selection matters:
Look For:
- Organic garlic (conventional is often treated with sprout inhibitors)
- Large, firm bulbs with tight, papery skins
- Visible clove distinctions (you should feel individual segments)
- Any signs of green sprouting (indicates untreated bulbs ready to grow)
Avoid:
- Soft, squishy bulbs (rot has started internally)
- Bulbs with black, powdery areas (fungal disease)
- Excessively dried, lightweight bulbs (too desiccated to regenerate)
- Chinese garlic (often irradiated for import—less viable)
Timing Your Purchase: Autumn-purchased garlic has the highest viability as it’s recently harvested. Spring garlic may have been in storage for months, potentially treated more aggressively to prevent sprouting during that extended period.
I once experimented with garlic from three sources: organic farmers’ market garlic, conventional supermarket garlic, and garlic from an Asian grocery. The organic farmers’ market garlic showed 95% germination with vigorous growth. The conventional supermarket garlic achieved about 60% germination with slower initial development. The Asian grocery garlic (likely Chinese import) produced zero growth—complete failure suggesting irradiation treatment.
Step-by-Step Planting Protocol: From Clove to Container
The ritual of planting garlic—separating bulbs, preparing cloves, establishing them in darkness—represents the beginning of your partnership with these ancient alliums.
Optimal Planting Timing
Fall Planting (Recommended): Plant 4-6 weeks before your first expected hard freeze. This allows root establishment before winter dormancy, with shoots emerging as spring arrives. In most temperate climates, this means October or November planting.
Spring Planting (Possible with Vernalization): If you miss autumn planting or live in very mild climates, spring planting succeeds if you artificially vernalize cloves first. Place separated cloves in refrigerator (not freezer) for 6-8 weeks before planting. This cold treatment mimics winter, satisfying garlic’s biological requirements.
Clove Separation and Selection
Carefully peel away the bulb’s outer papery layers, exposing individual cloves. Gently separate cloves without removing their individual protective skins—that thin, papery sheath protects against rot and disease.
Selection Criteria: Choose the largest, firmest cloves for planting. Each clove’s size directly correlates with the plant’s initial vigor and ultimately affects final bulb size. Small cloves produce small bulbs; large cloves generate larger plants and more substantial harvests.
The smallest cloves needn’t be wasted—use them immediately in cooking, or plant them densely for “garlic greens” (immature shoots harvested for salads and garnishes).
The Planting Ceremony
Step 1: Fill containers with prepared growing medium to within 2 inches of rim. Water thoroughly, allowing excess to drain completely.
Step 2: Mark planting positions. Space cloves 4-6 inches apart in all directions. Closer spacing produces smaller but numerous bulbs; wider spacing allows larger individual bulbs.
Step 3: Plant each clove pointed end upward, flat basal plate downward (roots emerge from this flat base). This orientation matters enormously—upside-down cloves waste energy correcting themselves, producing weaker plants.
Step 4: Press cloves into soil until the pointed tip sits 2 inches below soil surface. Garlic planted too shallowly may heave from freezing/thawing cycles; too deeply delays emergence and can reduce vigor.
Step 5: Cover with soil, gently firming to eliminate air pockets. Water again lightly—soil should feel uniformly moist throughout but not saturated.
Step 6: Mulch the surface with 2-3 inches of organic material—straw, shredded leaves, or wood chips. Mulch moderates temperature fluctuations, suppresses weeds, and conserves moisture. In cold climates, mulch provides crucial insulation preventing freeze damage.
Step 7: Position containers in location receiving full sun (6-8 hours minimum). Initially, containers can sit anywhere, but when growth begins in spring, abundant sunlight becomes essential.
I’ve developed a ritual around garlic planting—an autumn afternoon ceremony where I separate cloves while contemplating the months ahead, pressing each into soil like planting small promises. There’s something deeply satisfying about tucking these living capsules into earth, knowing they’ll rest through winter’s darkness before emerging into spring light.
Ongoing Care Through the Growing Season
Once planted, garlic requires consistent but not intensive attention—a rhythm of watering, feeding, and observation that connects you to seasonal cycles.
Watering Wisdom: The Moisture Balance
Autumn through Winter: After initial post-planting watering, containers require minimal moisture. Check weekly; water only if top 2 inches of soil feels dry. Overwatering dormant cloves causes rot—garlic’s primary killer in container culture.
Spring (Active Growth): As shoots emerge and develop, water needs increase dramatically. Soil should remain consistently moist (not soggy) to 4-6 inches depth. Check every 2-3 days; container plants dry faster than ground plantings. Water thoroughly when needed—light, frequent sprinklings encourage shallow rooting.
Late Spring/Early Summer (Bulbing): Maintain consistent moisture while bulbs form. Inconsistent watering—feast and famine cycles—can cause bulbs to split prematurely or develop unevenly.
Final 2-3 Weeks Before Harvest: Reduce watering significantly. This drying period allows bulb skins to toughen, improving storage quality. Stop watering entirely about 10 days before intended harvest.
The Finger Test: Insert your finger 2-3 inches into soil. If it feels dry at this depth, water deeply. If moist, wait another day or two.
Feeding Your Growing Garlic
Garlic isn’t a heavy feeder compared to fruiting vegetables, but strategic fertilization enhances development.
Initial Fertility: If you mixed compost and slow-release amendments into your growing medium, this may suffice for the entire season. Garlic is remarkably efficient at extracting nutrients from modest fertility.
Optional Supplementation:
- Early Spring (when shoots reach 6 inches): Side-dress with compost or apply diluted fish emulsion (half strength)—nitrogen supports vigorous foliage development
- Mid-Spring (when plants have 6-8 leaves): Switch to lower-nitrogen, higher-potassium fertilizer—supports bulb formation over excessive leaf production
- Cease Feeding by Late Spring: As bulbing begins, stop fertilizing. Late-season nitrogen delays maturation and reduces storage quality.
Scape Removal: The Hardneck Consideration
If you’re growing hardneck varieties, stiff flower stalks (scapes) emerge in late spring, curling dramatically as they lengthen. These scapes drain energy from bulb development if left to mature.
Harvesting Scapes: When scapes form one complete curl, cut them at ground level using sharp scissors or knife. This redirects plant energy into underground bulb enlargement.
Culinary Bonus: Scapes are delicious—milder than cloves with vegetal freshness. Use them in stir-fries, pesto, or grilled until caramelized. Your garlic plants provide two harvests: scapes in early summer, bulbs several weeks later.
Temperature Management and Seasonal Transitions
Winter Protection: In regions with harsh winters (below 10°F/-12°C), additional protection helps. Move containers against walls or under eaves where they receive some thermal mass benefit. Extra mulch insulation (4-6 inches) protects against freeze damage.
Spring Frost Protection: Late spring frosts occasionally occur after shoots emerge. Garlic tolerates light frost well (actually benefits from some cold), but hard freezes can damage tender foliage. If severe frost threatens emerged shoots, cover containers overnight with fabric row cover or even cardboard boxes.
Summer Heat Management: In very hot climates (above 90°F/32°C consistently), container garlic may stress. Provide afternoon shade and increase watering frequency. Light-colored containers reflect heat better than dark ones.
Recognizing Harvest Readiness and Proper Curing
The culmination of your garlic journey—the moment of harvest—requires careful timing. Too early and bulbs haven’t fully developed; too late and they split, compromising storage quality.
Visual Harvest Indicators
The Lower Leaf Signal: Garlic’s lower leaves yellow and brown progressively upward as maturation approaches. Harvest when the lowest 3-4 leaves have died back but 5-6 green leaves remain. This typically occurs in early to mid-summer, 8-9 months after planting.
The Papery Wrapper Check: Gently brush away soil from one bulb without removing it. The outer papery wrapper should feel substantial—multiple layers protecting cloves. If it’s still quite thin, give plants another week or two.
Timing Nuances: Softneck varieties mature slightly later than hardneck. Different climates create variable maturation schedules—monitor your plants rather than rigidly following calendar dates.
The Harvest Process
When ready, water containers lightly 2 days before harvest—slight moisture makes soil easier to work with.
Container Method: Simply tip container on its side and slide out entire root mass, or reach in and gently loosen soil while pulling bulbs. The restricted environment makes harvest remarkably clean—no digging, no searching for wayward bulbs.
Brush away clinging soil gently. Don’t wash bulbs—moisture invites rot. Don’t remove roots or foliage yet; they’ll protect bulbs during curing.
Curing for Optimal Storage
Proper curing transforms fresh, mild bulbs into the pungent, long-storing garlic you seek.
The Process: Hang bundles of whole plants (roots, foliage, bulbs intact) or lay in single layers on screens in a location that’s:
- Warm (75-85°F/24-29°C)
- Dry (humidity below 60%)
- Well-ventilated (air circulation prevents mold)
- Shaded (direct sun can cook bulbs)
Duration: 2-3 weeks typically, until foliage completely dries and outer bulb wrappers become papery crisp.
Post-Cure Processing: Once fully cured, trim roots to 1/4 inch and cut stems to 1-2 inches above bulbs (or leave longer for braiding softneck varieties). Brush away any remaining dirt and loose papery layers.
Storage: Keep cured garlic in mesh bags, baskets, or hanging in braids in cool (50-65°F/10-18°C), dark, dry locations. Properly cured and stored, hardneck garlic keeps 4-6 months; softneck varieties last 8-12 months.
Troubleshooting Common Challenges
Even attentive cultivation encounters obstacles. Understanding common problems and their solutions prevents small issues from becoming harvest-destroying failures.
Cloves Fail to Sprout
Causes: Growth inhibitors on conventional garlic, insufficient cold period (spring-planted without vernalization), planted upside-down, or cloves were already dead before planting.
Solutions: Always choose organic garlic when possible. If spring planting, refrigerate cloves 6-8 weeks first. Double-check orientation—pointed end up. Accept that some duds occur; plant 20% more than you ultimately need to account for failures.
Yellowing Foliage (Beyond Normal Maturation)
Early Season Yellowing: Usually indicates insufficient nitrogen. Apply diluted fish emulsion or compost tea.
Persistent Yellowing Despite Feeding: May signal root rot from overwatering, pest damage (rare in containers), or disease. Reduce watering dramatically, improve drainage if needed.
Small Bulbs at Harvest
Causes: Inadequate sunlight (6+ hours essential), insufficient water during growth phase, overcrowding (cloves planted too densely), poor soil fertility, or harvesting too early.
Prevention: Ensure full sun exposure. Maintain consistent moisture during spring and early summer. Space cloves adequately. Enrich soil with compost. Allow plants to fully mature before harvest.
Bulbs Split or Separate
Causes: Delayed harvest (bulbs overmature and split their wrappers), excessive moisture during final maturation, or sometimes genetic tendency in certain varieties.
Prevention: Monitor maturation carefully and harvest at optimal time. Reduce watering in final 2-3 weeks before harvest. Split bulbs store poorly—use them first.
Fungal Diseases
White Rot: Most serious garlic disease. Causes yellowing foliage and white, fluffy fungal growth on bulb and roots. No cure exists; discard affected plants and soil. Sterilize containers before reuse.
Prevention: Use sterile potting mix, avoid overwatering, ensure excellent drainage, provide good air circulation around plants.
Maximizing Success: Advanced Techniques and Variations
Once you’ve successfully grown garlic in pots, various refinements and experiments expand your garlic-growing repertoire.
Selecting and Saving Your Best Bulbs
Rather than purchasing garlic annually, save your largest, most vigorous bulbs for replanting. This practice—selecting for traits performing well in your specific conditions—gradually develops garlic strains optimized for your microclimate and growing methods.
I’ve been replanting my best container-grown garlic for five years now. The bulbs have noticeably adapted—they mature slightly earlier than the original stock, they’re more uniform in size, and they seem more tolerant of the temperature fluctuations inherent in container culture.
Succession Planting for Extended Harvest
Plant containers at different times—some in early autumn, others in late autumn, perhaps a spring-planted batch. This staggers maturation, providing fresh garlic over an extended period rather than a single massive harvest requiring immediate processing.
Growing Garlic Greens
Plant cloves very densely (1-2 inches apart) in shallow containers. Harvest shoots when 6-8 inches tall, cutting 1 inch above soil level. Shoots often regrow several times before bulbs exhaust stored energy. These “garlic chives” add mild garlic flavor to salads, omelets, and garnishes.
Exploring Heirloom and Specialty Varieties
Once confident in your container-growing skills, explore specialty garlic varieties available through seed catalogs and garlic festivals:
- Purple Stripe Hardneck: Beautiful purple-streaked wrappers, complex flavor
- Rocambole: Considered by many to offer superior flavor, though with shorter storage life
- Elephant Garlic: Actually a leek relative (Allium ampeloprasum), produces enormous mild cloves—novelty for container growers
Conclusion: The Gift of Time and Attention
Growing garlic in pots from store-bought bulbs represents one of gardening’s most rewarding exercises in patience and seasonal attunement. The months between autumn planting and summer harvest span half a year—time in which you witness not just garlic’s transformation but your own deepening relationship with botanical rhythms that industrial agriculture has rendered invisible.
Your first harvest—however modest—will taste different from any garlic you’ve purchased. Not because it’s chemically distinct (though freshness affects flavor), but because it carries the weight of your attention, the satisfaction of your successful stewardship, and the knowledge that you’ve participated in a cycle connecting you to countless humans across millennia who have similarly pressed cloves into earth and waited for their multiplication.
The bulbs you harvest become both food and seed—some consumed immediately, others cured for storage, the largest reserved for replanting in autumn’s cooling days. This perpetual cycle—harvest becoming next season’s planting stock—embodies gardening’s essential gift: the recognition that endings and beginnings exist not as opposites but as continuous transformation.
Begin today with a single bulb from your kitchen. Separate its cloves with intention. Press them into prepared containers with care. Then practice the gardener’s most essential skill: patient observation as invisible processes unfold in darkness, eventually emerging into light as green shoots that will, in time, swell underground into the pungent treasures you seek.
Your garlic awaits planting. The seasons stand ready to work their ancient magic. The only remaining element is your commitment—not to daily intensive labor but to consistent small attentions across months of change. This is growing’s true teaching: transformation requires not force but presence, not urgency but rhythm, not control but partnership with processes larger and older than any individual life.