Are you dreaming of luminous, plump skin without the luxury price tag of high-end department store serums? It’s time to take control of your skincare routine! Learning How to Make a DIY Hyaluronic Acid & Vitamin C Serum is the ultimate Home Tips & DIY project that offers incredible cost-saving benefits and a powerful boost to your Wellness Topics goals. This potent serum combines the best skincare ingredients—Vitamin C for brightness and Hyaluronic Acid for deep hydration—in one bottle. This guide provides the achievable, step-by-step guidance you need to transform your complexion. Get ready to discover how to craft a fresh, effective serum at home and achieve a radiant, youthful glow.
🛑 Important Disclaimer
Important Disclaimer: This article is for informational purposes only and should not replace professional advice. For health-related topics, consult healthcare providers. For financial or legal matters, seek qualified professional guidance. For safety procedures, verify current best practices and local regulations. Individual results may vary, and personal circumstances should always be considered when implementing any suggestions.
✨ Section 1: Foundation First: The Science of High-Potency Serums
To successfully create an effective DIY Hyaluronic Acid & Vitamin C Serum, you must first build confidence with basic concepts regarding the key ingredients’ chemistry and stability.
H3: Building Confidence with Basic Concepts: The Power Couple
Vitamin C and Hyaluronic Acid (HA) are powerhouse ingredients that work synergistically for maximum skin benefit.
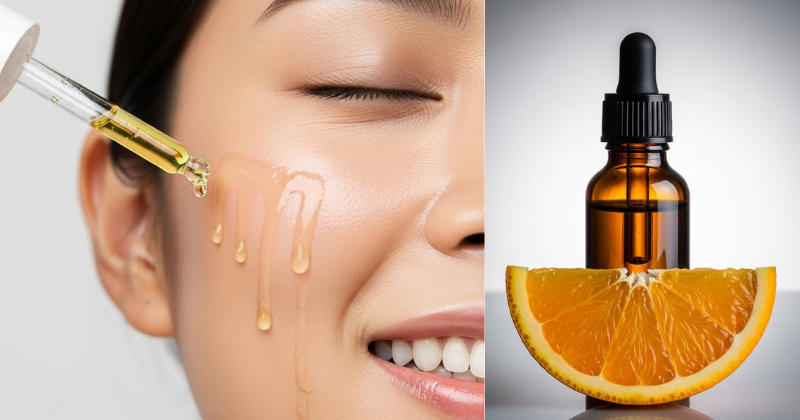
- Vitamin C (L-Ascorbic Acid – LAA): This potent antioxidant fights free radicals, supports collagen synthesis, and brightens the skin by inhibiting melanin production. The challenge with LAA is its instability; it degrades rapidly when mixed with water and exposed to light and air. We must address this instability to achieve potency.
- Hyaluronic Acid (HA): A magnificent humectant, HA can hold up to $1000$ times its weight in water, pulling moisture into the skin to provide that highly desired plumping and hydrating effect. It also acts as an excellent base for carrying the Vitamin C into the skin.
- Encouraging Reassurance for Beginners: While we are dealing with active ingredients, this recipe uses simple household tools and focuses on low-concentration batches to ensure safety and freshness. You can succeed in formulating your own high-quality serum!
H3: Addressing Common Concerns: The Importance of $\text{pH}$ and Stability
For Vitamin C to be effective, it must penetrate the skin barrier, which requires a specific $\text{pH}$ level.
- The Critical $\text{pH}$ Level: Vitamin C (LAA) is best absorbed at a $\text{pH}$ between $2.5$ and $3.5$. Below $2.5$, the serum can become irritating; above $3.5$, its absorption dramatically decreases. Measuring and adjusting the $\text{pH}$ is essential for both effectiveness and gentleness.
- Tool Requirements: You will need a reliable digital scale (to weigh powders precisely), $\text{pH}$ testing strips or a digital $\text{pH}$ meter, and small, dark, airtight dropper bottles (to protect the finished serum from light).
🧪 Section 2: Step-by-Step Process: Core Methods for the Serum Recipe
This is the essential, achievable, step-by-step guidance for creating a fresh, $10\%$ DIY Hyaluronic Acid & Vitamin C Serum batch (approximately $50 \text{ ml}$).
Essential Ingredients (By Weight for Accuracy)
| Ingredient | Quantity (for 50 ml batch) | Purpose |
| Distilled Water | $44 \text{g}$ ($\approx 88\%$) | Base for the serum (must be distilled) |
| L-Ascorbic Acid (LAA) Powder | $5 \text{g}$ ($\approx 10\%$) | Active antioxidant (Vitamin C) |
| Low-Molecular Weight (LMW) HA Powder | $0.5 \text{g}$ ($\approx 1\%$) | Humectant/Hydrating agent |
| Baking Soda (Sodium Bicarbonate) | Pinches (Adjustable) | $\text{pH}$ adjuster |
Step-by-Step Guidance (Core Methods)
- Prep the Water (Safety and Planning Considerations): Measure $44 \text{g}$ of cold distilled water into a clean, sanitized glass container. Using cold water helps reduce the initial rate of degradation for the LAA.
- Dissolve the Vitamin C (Actionable Language): Measure $5 \text{g}$ of L-Ascorbic Acid powder and slowly add it to the distilled water. Stir gently with a clean plastic or glass stirrer until the powder is fully dissolved. Avoid vigorous shaking, which introduces oxygen.
- Thicken with Hyaluronic Acid: Measure $0.5 \text{g}$ of HA powder and sprinkle it very slowly over the surface of the Vitamin C solution. Do not stir vigorously. Cover the container and place it in the refrigerator overnight ($8 \text{-} 12 \text{ hours}$). Timing and Planning Considerations: The HA needs this time to fully hydrate and form the viscous, gel-like serum texture.
- Check and Adjust $\text{pH}$: Once the serum is gelled, use a $\text{pH}$ strip. The initial $\text{pH}$ will likely be very low (acidic, maybe $2.0$). To raise the $\text{pH}$ safely to the target range of $2.5 \text{-} 3.5$, add a tiny pinch (the size of a grain of rice) of baking soda solution (pre-dissolved in a drop of water) at a time, mixing and retesting until the $\text{pH}$ is in the ideal range.
- Final Storage: Once the $\text{pH}$ is stable, pour the serum into a small, dark, airtight dropper bottle. Practical Tips and Shortcuts: Store the bottle in the refrigerator.
🔬 Section 3: Advanced Strategies: Pro Tips for Stability and Potency
Maintaining the efficacy of your DIY Hyaluronic Acid & Vitamin C Serum requires expert-level insights into stability, as LAA is notoriously fragile.
H3: Creative Solutions: Extending Shelf Life with Preservatives
Because this serum is water-based, it is highly susceptible to mold and bacterial growth. For maintenance and long-term considerations, commercial serums use preservatives.
- The Safety Factor: For short-term use, storing the serum in the refrigerator (Step 5) and making small batches (like the $50 \text{ ml}$ recipe) is the safest approach. The high acidity also acts as a mild microbial deterrent.
- The Pro-Level Addition: If you wish to extend the shelf life beyond $7 \text{-} 10 \text{ days}$, you can add a broad-spectrum, paraben-free, skin-safe preservative (like Leucidal Liquid or Geogard 221) at the manufacturer’s recommended concentration (usually $1 \text{-} 2\%$ of the total weight) in Step 4. Creative Solutions: This allows you to customize your approach for longevity.
H3: Encouraging Experimentation: Adding Synergistic Boosters
You can enhance the anti-aging benefits of your DIY Hyaluronic Acid & Vitamin C Serum with proven complementary ingredients.
- Ferulic Acid: Often paired with Vitamin $\text{C}$ in commercial serums, Ferulic Acid is an antioxidant that helps stabilize LAA and enhances its photoprotective properties. Add a very small amount (less than $1\%$) with the LAA in Step 2.
- Glycerin: Add $1 \text{g}$ of vegetable glycerin in Step 1. Glycerin is another humectant that can help the HA bind moisture and improve the texture and glide of the final serum. Encourage Experimentation: Start with small percentages to see how your skin reacts.
🚨 Section 4: Troubleshooting and Common Challenges
When you make a DIY Hyaluronic Acid & Vitamin C Serum, you may encounter textural or efficacy issues.
Featured Snippet Potential: “How do I know if my Vitamin C serum has gone bad?”
You can tell if your DIY Vitamin C serum has gone bad because the L-Ascorbic Acid has oxidized. The serum will change color from clear or very pale straw yellow to a deep, dark orange or brown. Once it reaches this point, the antioxidant benefit is lost, and the oxidized components can actually generate free radicals, potentially harming the skin. Discard the serum immediately if you notice a color change or a sour/metallic smell, regardless of the expiration date.
Practical Troubleshooting Tips (Appearance and Texture)
- Problem: The L-Ascorbic Acid powder won’t fully dissolve.
- Obstacle: The water wasn’t cold enough or the solution is oversaturated.
- Solution: Encouragement for Setbacks: Gently warm the solution slightly (lukewarm, not hot) in a water bath and continue to stir slowly. If the room is cold, the $\text{LAA}$ may need a small amount of assistance to dissolve fully.
- Problem: The serum is watery and didn’t thicken properly after $12 \text{ hours}$.
- Obstacle: The HA powder did not hydrate, or you used High-Molecular Weight (HMW) HA, which requires longer hydration time.
- Solution: Offer Alternative Approaches: Wait another $12 \text{ hours}$ in the refrigerator, checking periodically. LMW HA usually hydrates quicker, so ensure you source the correct type next time. If it still doesn’t thicken, gently stir and add a tiny amount ($0.1 \text{g}$) more HA powder and let it rest again.
- Problem: The serum stings or irritates the skin.
- Obstacle: The $\text{pH}$ is too low (too acidic).
- Solution: Preventive Measures: Use your $\text{pH}$ strip to confirm the level. If it’s below $2.5$, return to Step 4 and slowly add micro-pinches of the baking soda solution until the $\text{pH}$ rises safely into the $2.5 \text{-} 3.5$ sweet spot.
☀️ Section 5: Maximizing Results: Application and Long-Term Care
Mastering the use and storage of your DIY Hyaluronic Acid & Vitamin C Serum ensures you get the most out of your powerful creation.
- Show How to Build Upon Basic Success: Pair with $\text{SPF}$. The best way to use a Vitamin C serum is in the morning, right before applying sunscreen. Scientific Backing: Research indicates that applying an antioxidant like Vitamin C under sunscreen boosts the effectiveness of the $\text{SPF}$ and provides comprehensive environmental protection against $\text{UVA/UVB}$ and pollution.
- Maintenance and Long-Term Considerations: The Freshest Batch is the Best Batch. Because LAA is so unstable, the most effective sustainable lifestyle change is committing to making very small batches (like the $50 \text{ ml}$ recipe) every $7 \text{-} 10 \text{ days}$. This guarantees maximum potency and avoids the frustration of throwing away an oxidized, expensive serum.
- Suggest Complementary Strategies: Always Moisturize. Remember, Hyaluronic Acid is a humectant—it draws moisture to the skin. To prevent it from drawing moisture out of the deeper skin layers (especially in dry climates), you must follow up the serum application with a moisturizer to trap the hydration on the surface.
✅ Conclusion: Your Capability to Achieve Clinical-Grade Skincare
You have successfully learned How to Make a DIY Hyaluronic Acid & Vitamin C Serum, mastering the delicate balance of $\text{pH}$ and the instability of L-Ascorbic Acid. By following this detailed, achievable, step-by-step guidance, you have demonstrated your capability to succeed in creating powerful, cost-saving benefits for your skincare. This transformative knowledge empowers you to craft fresh, highly effective products tailored precisely to your needs, taking ownership of your self-care journey.
Ready to mix your first batch? Will you incorporate glycerin to improve the serum’s glide, or will you focus on getting the $\text{pH}$ absolutely perfect first?