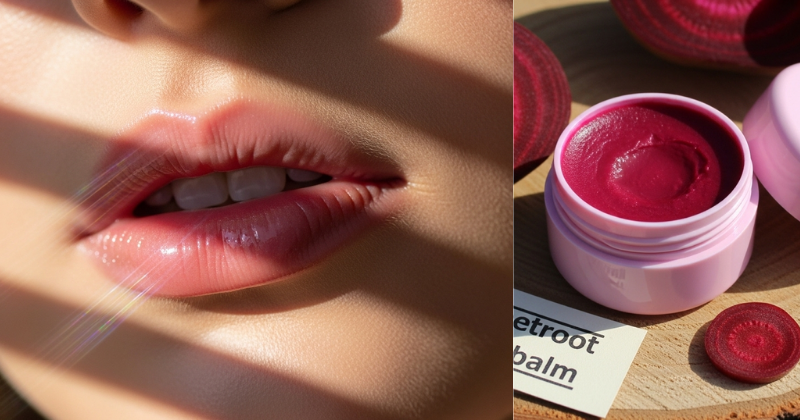
Dreaming of beautifully tinted lips without the synthetic chemicals found in most commercial lip products? You can transform your lip care routine with a simple DIY project. Learning How to Make BEETROOT LIP BALM is an achievable and immensely rewarding process that promises a moisturizing balm and a gorgeous, natural flush of color. This comprehensive guide will empower you to discover the simplicity of all-natural beauty, emphasizing the cost-saving benefits and the deep satisfaction of crafting your own personal care products. Get ready to unlock the secrets to creating this viral beauty hack!

🧪 Foundation First: The Science Behind the Beetroot Tint
The key to a vibrant BEETROOT LIP BALM is harnessing the natural color power of the beet. Understanding the base components will build confidence and ensure your balm has the perfect texture and long-lasting color.
H3: Key Components: Wax, Oil, and Color
Every great lip balm relies on a precise balance of three elements. When adding a natural colorant, the ratio needs slight adjustment to prevent crystallization or grittiness.
| Component | Role in the Balm | Example Ingredient | Function |
| Wax | Provides structure and melting point stability. | Beeswax or Candelilla Wax (vegan) | Keeps the balm solid at room temperature. |
| Butter | Adds creaminess and deep conditioning. | Shea Butter or Cocoa Butter | Provides richness and immediate moisture. |
| Oil | Adds glide, sheen, and moisture penetration. | Coconut Oil or Sweet Almond Oil | Makes the balm spreadable and absorbs the color. |
| Colorant | Provides the natural hue. | Beetroot Powder or Concentrated Juice | Imparts a beautiful, natural pink/red tint. |
Encouraging Reassurance for Beginners: The typical wax-to-oil-to-butter ratio is $1:1:1$. When incorporating beetroot color, we must ensure the colorant is fully integrated into the oil phase.
H3: Addressing Common Concerns: Beetroot Powder vs. Juice
Beginners often wonder whether to use fresh beetroot juice or dried powder.
- Beetroot Juice (Fresh): While offering intense color, fresh juice contains high water content. Adding water to a balm (which is entirely oil-based) requires the use of emulsifiers and preservatives to prevent mold and bacterial growth. For a simple, safe, and preservative-free DIY balm, avoid fresh juice.
- Beetroot Powder: This is the preferred, safe option. Dried powder is simply ground beetroot, meaning it’s water-free. It can be easily infused into the oil base, resulting in a stable product with a long shelf life. This choice adheres to crucial safety considerations for homemade cosmetics.
💖 Section 2: Step-by-Step Process for Blending and Infusion
This core section breaks down the creation of your tinted balm into clear, achievable steps using the oven or stovetop.
Core Methods: The Infusion and Double Boiler
This process is a combination of a simple oil infusion followed by the standard melting method.
- Prep the Beetroot Oil (The Infusion):
- In a clean, dry glass jar, combine your chosen liquid oil (e.g., 2 tablespoons of Coconut Oil) with 1 teaspoon of fine Beetroot Powder.
- Place the jar into a small saucepan containing 1-2 inches of water, creating a double boiler.
- Heat gently over low heat for 30 minutes, stirring occasionally. The goal is to heat the oil enough to extract maximum pigment from the powder without burning the oil.
- Strain the Colorant (Actionable Language): Remove the oil from the heat. Pour the brightly colored oil mixture through a fine-mesh tea strainer or a piece of cheesecloth into a clean glass measuring beaker. This removes the grittiness. Gently squeeze the cheesecloth to retrieve all the tinted oil. You should be left with a vibrant red liquid.
- The Melting Phase: To the strained, warm beetroot-infused oil, add your pre-measured solid ingredients:
- 1 tablespoon Beeswax (or Candelilla Wax)
- 1 tablespoon Shea Butter (or Cocoa Butter)
- Melt and Stir: Return the beaker to the double boiler and continue heating gently, stirring constantly until all the wax and butter are completely melted and the mixture is totally clear and uniform.
- Pour and Set (Timing and Planning Considerations): Remove the beaker from the heat. Immediately and carefully pour the hot liquid balm into your clean lip balm tubes or small tins. The mixture will begin to set very quickly. Fill the containers just slightly over the top, as the balm will contract slightly upon cooling.
- The Cool Down: Allow the containers to cool undisturbed at room temperature for several hours until fully solidified.
💡 Section 3: Advanced Strategies and Customization
Ready to refine your BEETROOT LIP BALM? These expert-level insights allow you to customize the color intensity, texture, and scent.
H3: Creative Solutions for Color and Scent
You can easily adjust the final look and feel of your personalized balm.
- Intensity Control (Customization Approach): If you desire a deeper red tint, increase the initial amount of Beetroot Powder used in the infusion (Step 1) to 1.5 or 2 teaspoons. For a very sheer pink, stick to $1/2$ teaspoon.
- Adding Flavor: Since beetroot has a mild, earthy scent, adding a few drops of a lip-safe essential oil (like peppermint, vanilla, or sweet orange) will dramatically improve the experience. Add 5-10 drops of the essential oil after removing the mixture from the heat (Step 5), just before pouring.
- Pro Tip for a Glossier Finish: If you prefer a balm that feels softer and more like a gloss, slightly reduce the amount of wax (use $3/4$ tablespoon instead of 1 tablespoon). This changes the firmness but maintains moisturizing properties.
H3: Seasonal Adaptations for Balm Firmness
The correct ratio depends on where you live. Consider the ambient temperature when choosing your wax.
- Hot Climates: Increase the Beeswax amount by $1/4$ teaspoon per batch. This higher wax ratio prevents the balm from melting in your pocket or car, a crucial seasonal consideration.
- Cold Climates: Increase the soft butter (like Shea or Mango Butter) by $1/4$ teaspoon. This makes the balm softer and easier to spread when the ambient temperature is low.
🛑 Section 4: Troubleshooting Common Challenges
Even simple DIY projects can encounter issues. These practical examples and real-world scenarios provide solutions for common setbacks.
Featured Snippet Potential: “Why is my homemade beetroot lip balm gritty?”
Your homemade beetroot lip balm is gritty because the beetroot powder was not strained completely from the infused oil before the melting phase, or the wax/butter mixture cooled too slowly, allowing the butter to crystallize. To fix this, re-melt the entire batch slowly using the double boiler, stir in an extra teaspoon of pure liquid oil, and ensure you strain the liquid through a second layer of cheesecloth. Then, quick-chill the finished product in the refrigerator immediately after pouring to prevent crystallization.
Practical Troubleshooting Tips (DIY Focus)
- Problem: The color is too pale or barely visible.
- Obstacle: The infusion time was too short, or the heat was too low, failing to extract enough pigment.
- Solution: Re-melt the existing balm and add another $1/2$ teaspoon of beetroot powder. Let it infuse for another 20 minutes in the warm oil before straining again. This addresses the common obstacle with direct action.
- Problem: The balm is greasy and doesn’t set firmly.
- Obstacle: Too much oil relative to the wax.
- Solution: Encouragement for setbacks: Re-melt the batch and add a small amount of extra wax (about $1/2$ teaspoon of Beeswax per batch). Melt completely, stir, and repour. This provides direct troubleshooting for common issues.
- Problem: The balm has separated into layers.
- Obstacle: The mixture wasn’t stirred enough immediately before pouring, allowing the heavier wax components to settle first.
- Solution: Re-melt the batch completely. Stir continuously until the moment you pour the liquid into the final containers. Work quickly!
🚀 Section 5: Maximizing Results: Next Level Tips
Once you master How to Make BEETROOT LIP BALM, integrate it into a comprehensive self-care regimen for maximum benefit.
- Next Level Tip (The Lip Scrub Complement): For the color to truly shine, your lips need exfoliation. Create a simple lip scrub using $1$ part granulated sugar and $1$ part coconut oil. Use the scrub gently once a week, and immediately follow up with a thick layer of your freshly made beetroot balm. This shows how to build upon basic success.
- Maintenance and Long-Term Considerations: Since this is a natural product, store your finished balms away from direct heat and sunlight. The color and oils will remain stable for 6 months to 1 year, making this a sustainable lifestyle change in your beauty routine.
- Suggest Complementary Strategies: Use the same beetroot-infused oil base to create a tinted cheek and lip stain. Instead of adding wax, just bottle the strained beetroot oil and a touch of vitamin $\text{E}$ oil. This oil-based tint is perfect for adding a sheer, natural glow to your cheeks. This inspires continued growth and learning in natural beauty crafting. (Internal Linking Opportunity: Check out our guide on “DIY Herbal Infusions for Skincare.”)
✅ Conclusion: Your Capability to Craft Natural Beauty
You have successfully learned How to Make BEETROOT LIP BALM, mastering the infusion process and achieving a naturally beautiful, deeply hydrating cosmetic. This DIY approach not only saves you money but also gives you complete control over the ingredients applied to your body, reinforcing the empowering message of self-care.
Remember, the quality of your results directly reflects the effort and care you put into the process. Your capability to succeed in crafting natural, effective products is clear!
Which customizing option—adding Peppermint Essential Oil for a cooling effect or increasing the Beeswax for a firmer summer balm—will you incorporate into your next batch?