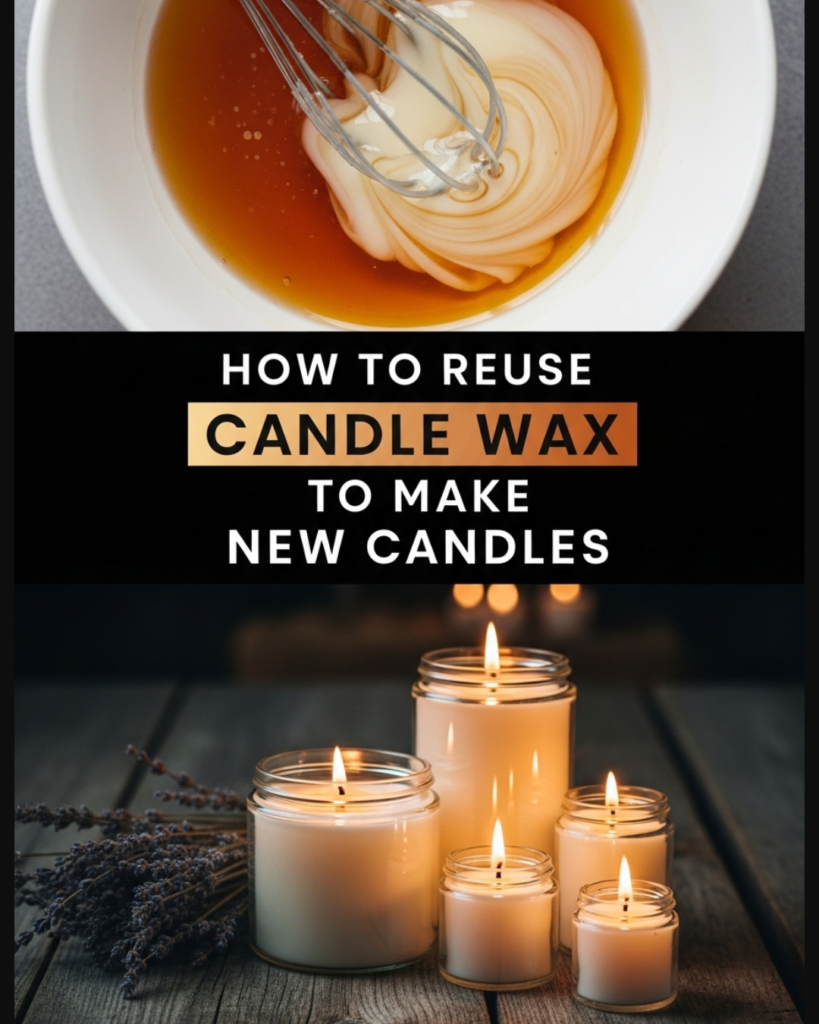
Learn how to reuse candle wax to make new candles! This sustainable DIY guide will show you how to transform leftover wax scraps into beautiful home decor easily.
Have you ever looked at the stubborn layer of wax at the bottom of a beautiful glass jar and felt a twinge of guilt about throwing it away? We have all been there—staring at that expensive candle that has finally burned down, wondering if there is a better way than simply tossing it in the trash. The good news is that you are sitting on a goldmine of creative potential! You are about to discover exactly how to reuse candle wax to make new candles, transforming your leftover scraps into stunning, aromatic treasures that breathe new life into your home.
By mastering the art of wax recycling, you will unlock a sustainable hobby that saves money and reduces waste. This journey is not just about making a product; it is about the satisfaction of creating something functional and beautiful from what others would call “waste.” Whether you are a total beginner or a seasoned DIY enthusiast, this guide will empower you with the knowledge to achieve professional-looking results right in your kitchen. Let’s get started on this glowing transformation!
Important Disclaimer: This article is for informational purposes only and should not replace professional advice. For safety procedures, verify current best practices and local regulations. Individual results may vary, and personal circumstances should always be considered when implementing any suggestions.
Foundation: Understanding the Basics of Wax Recycling
Before you start melting, it is important to build your confidence with the basic concepts of candle making. Many people hesitate because they think they need fancy equipment or a chemistry degree, but the process of how to reuse candle wax to make new candles is surprisingly straightforward. At its core, you are simply changing the state of the wax from a solid to a liquid and back again, while adding a fresh wick.
One of the most common concerns is whether you can mix different types of wax. While it is best to group similar waxes together (like soy with soy or paraffin with paraffin), most household “leftovers” can be blended successfully. You have the capability to create unique “hybrid” candles that carry the best scents from your previous favorites.
H3: Gathering Your Supplies
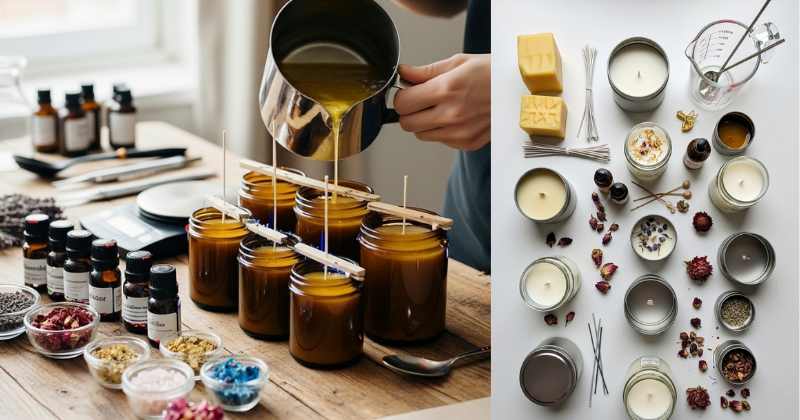
To be successful, you only need a few basic tools. Most of these can be found in your kitchen or at a local craft store:
- Old candle remnants: The star of the show!
- New wicks: Choose cotton or wood wicks with a metal base.
- A heat source: A stovetop works perfectly.
- A double boiler: You can create one using a pot of water and a heat-safe glass bowl or an old tin can.
- Containers: Old jars, teacups, or even tin containers.
H3: Why Upcycling Wax is a Game Changer
Beyond the cost-saving benefits, upcycling wax is a brilliant way to practice a sustainable lifestyle. Just as you might learn [How to Regrow Green Onions in Water] to reduce food waste, reusing wax prevents petroleum-based paraffin or organic soy from ending up in a landfill. It’s a win for your wallet and a win for the planet!
Step-by-Step Process: From Scraps to Splendor
Ready to dive in? Follow these manageable steps to ensure your first batch of recycled candles is a glowing success.
Step 1: Extracting the Wax
The first hurdle is getting the old wax out of the original jars. You have two easy options:
- The Freezer Method: Place the candle in the freezer for a few hours. The wax will shrink, allowing you to pop it out with a butter knife.
- The Boiling Water Method: Pour hot water into the jar. The wax will melt, float to the top, and harden into a puck as the water cools.
Step 2: Cleaning and Preparing
Once extracted, wipe off any charred wick bits or soot from the wax scraps. If you are reusing the original glass jar, wash it thoroughly with warm, soapy water. For a truly professional look, you can use a [Homemade Dish Soap Recipe (From Scratch)] to ensure the glass is sparkling and streak-free.
Step 3: Melting the Wax
Place your wax scraps in your double boiler. Set the heat to medium-low. Never melt wax directly on a burner, as it can reach its “flash point” and catch fire. Stir gently as it melts. If the wax is from many different candles, you might end up with a “mystery scent”—which is often surprisingly pleasant!
Step 4: Setting the Wick
While the wax melts, prepare your new container. Dip the metal base of your new wick into the melting wax and press it firmly into the center of the bottom of your jar. Use a clothespin or a pencil laid across the top of the jar to keep the wick standing perfectly straight.
Step 5: The Pour
Once the wax is fully liquid, carefully pour it into the prepared jar. Leave about a half-inch of space at the top. Let it sit undisturbed for at least 24 hours. As the wax cools, it may shrink slightly in the center; if this happens, simply melt a little more wax and “top it off.”
Advanced Strategies: Pro Tips for Customization
Now that you know the core method of how to reuse candle wax to make new candles, let’s share some expert-level insights to help you customize your creations.
- Scent Reinforcement: Sometimes the fragrance in old wax has faded. You can add a few drops of essential oils or candle fragrance oils once the wax is fully melted to “re-charge” the aroma.
- Color Layering: If you have scraps of different colors, don’t mix them all at once! Pour one color, let it harden for an hour, then pour a second color on top to create a beautiful “sand art” effect.
- Creating “Wax Melts”: If you don’t have enough wax for a full candle, pour the melted wax into a silicone ice cube tray. These make perfect wax melts for a fragrance warmer!
- The “Slow-Cool” Technique: To prevent the wax from cracking or pulling away from the glass, let the candles cool in a warm spot in your house. Rapid temperature changes are the enemy of a smooth finish.
Troubleshooting: Common DIY Challenges
Even the best crafters run into obstacles. Here is how to handle frequent wax-making hiccups with ease and encouragement.
- Problem: The wick is “tunneling” (burning down the middle).
- Solution: This usually happens if the wick is too thin for the jar’s diameter. For wider jars, consider using two wicks or a thicker cotton wick next time.
- Problem: There is a hole around the wick after cooling.
- Solution: This is called a “sinkhole,” common in soy wax. Use a hairdryer to gently melt the top layer of the candle until it levels out.
- Problem: The wax won’t stay lit.
- Solution: You might have used too much fragrance oil or there may be old soot trapped in the wax. Ensure your scraps are clean before melting.
Preventive Measures
To ensure safety, always stay in the room while melting wax. Keep a fire extinguisher or baking soda nearby—never use water on a wax fire! Much like learning [4 Easy Steps to Strengthen Weak Nails at Home 💅✨], patience and safety lead to the best results.
Maximizing Results: Maintenance and Gifting
Once you have mastered how to reuse candle wax to make new candles, you can build upon your success by thinking long-term.
- Proper Storage: Keep your new candles in a cool, dark place. Direct sunlight can fade the colors and dissipate the scent.
- Trim Your Wicks: Before every burn, trim the wick to 1/4 inch. This prevents soot and ensures your recycled wax burns as cleanly as possible.
- The Perfect Gift: Hand-poured, recycled candles make incredible gifts. Add a piece of twine and a handwritten tag to share the story of how you upcycled them.
- Explore New Containers: Look for unique vessels at thrift stores, such as vintage teacups or sturdy ceramic bowls. Just ensure they are heat-safe!
Conclusion: Ignite Your Creativity
You have now unlocked the secrets of how to reuse candle wax to make new candles! By following these steps, you have transformed old, forgotten scraps into a source of light and warmth. This process is a beautiful reminder that with a little bit of heat and creativity, almost anything can be made new again.
The empowering journey of DIY upcycling doesn’t have to stop here. Every jar you save and every wick you set is a testament to your capability to live more sustainably and beautifully. Summarize your new skills by making your first batch this weekend—your home (and the planet) will thank you.