Your kitchen sponge is the unsung hero of daily cleanup, but did you know it’s often the single dirtiest item in your entire home? Learning How to Sanitize Your Sponge correctly is an achievable, step-by-step guidance task that will significantly transform your kitchen hygiene and prevent the spread of germs. This comprehensive guide will equip you with the scientific backing and tool requirements for three core sanitizing methods—microwave, dishwasher, and bleach soak—empowering you to discover a truly clean kitchen and practice smart home tips every day.

🦠 Foundation First: Why Sponges Harbor Danger
Before diving into how to sanitize your sponge, it’s crucial to understand the environment you are trying to transform. Sponges are uniquely suited to be microbial havens due to their porous material, constant moisture, and abundant food supply (old food particles).
H3: Building Confidence with Basic Concepts: The Microbial Menace
Research has shown that sponges can harbor dangerous levels of bacteria, often containing organisms like E. coli and Salmonella, which can cause foodborne illness.
- The Perfect Petri Dish: The microscopic pores of the sponge, combined with the retained moisture and warmth from daily washing, create the ideal dark, humid environment for bacteria to multiply rapidly. Within hours of use, bacteria populations can double.
- Encouraging Reassurance for Beginners: This is a universal issue, not a reflection of your cleaning habits! The goal is not sterilization (which is nearly impossible at home), but sanitization—reducing the microbial load to safe levels. By knowing how to sanitize your sponge, you take effective control.
H3: Addressing Common Concerns: Cleaning vs. Sanitizing
Many people confuse simple cleaning (rinsing with water and soap) with true sanitizing.
- Cleaning: Removes visible soil and food particles. This is necessary, but it does not kill the microorganisms lurking deep within the sponge structure.
- Sanitizing (Scientific Backing): Requires exposure to sufficient heat or chemical agents for a specified duration to achieve a $99.9\%$ reduction in the bacterial load. This is the only way to prevent cross-contamination in your kitchen.
🔥 Section 2: Core Methods: Step-by-Step Sanitizing Processes
You have multiple reliable options for how to sanitize your sponge. Here, we break down the three most effective, evidence-based methods with clear, actionable language.
Method 1: The Microwave Power Sanitization (Heat Shock)
This method relies on high heat to rapidly eliminate bacteria.
- Tool Requirements & Safety Considerations: Use only cellulose or synthetic sponges that do not contain metal scouring pads. Never microwave steel wool or sponges with metallic threads. Safety Consideration: Always ensure the sponge is completely saturated with water before microwaving to prevent fire.
- Step-by-Step Guidance:
- Saturate: Fully wet the sponge with clean water (about $1/4$ cup of water for a standard sponge).
- Heat: Place the wet sponge on a microwave-safe dish or plate.
- Timing: Microwave on HIGH power for 1 to 2 minutes. Studies show $1$ minute effectively kills most bacteria. Two minutes ensures adequate penetration.
- The Shortcut: Carefully remove the sponge using tongs, as it will be extremely hot. Allow it to cool completely before wringing it out and storing it in a dry location.
Method 2: The Dishwasher Sterilization (High Temperature)
Using the dishwasher is the most hands-off and convenient way to sanitize your sponge.
- Step-by-Step Guidance:
- Preparation: Rinse any large food debris from the sponge.
- Placement: Secure the sponge in the top rack of your dishwasher or in the utensil basket. Do not place it in the bottom rack, where it could fall onto the heating element.
- Cycle: Run a full, heated dry cycle. The combination of hot water washing and the extremely high temperatures of the heated dry cycle provides adequate sanitization.
- Timing and Planning Considerations: This method is best done as a part of your regular dishwashing routine, turning daily cleaning into gradual progress toward better hygiene.
Method 3: The Bleach Soak (Chemical Sanitization)
Bleach is a potent, affordable sanitizer, but proper dilution is crucial for safety and effectiveness.
- Tool Requirements & Safety Considerations: Use standard household liquid chlorine bleach (sodium hypochlorite). Always wear gloves and ensure the area is well-ventilated. Safety Consideration: Never mix bleach with ammonia or acids (like vinegar).
- Step-by-Step Guidance:
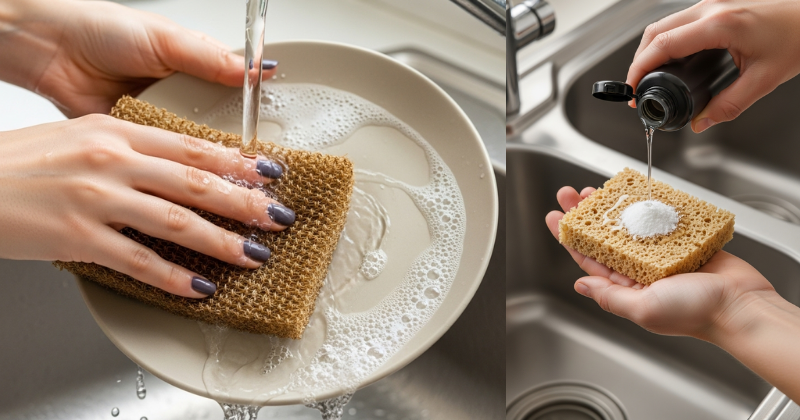
- Dilution: Mix 9 parts water with 1 part bleach (e.g., $1$ cup water to $1$ tablespoon bleach).
- Soak: Submerge the rinsed sponge completely in the solution.
- Timing: Allow the sponge to soak for a minimum of 5 minutes.
- Actionable Language: Remove the sponge, wring it out completely, and rinse it thoroughly under clean running water to remove all traces of bleach before using it again on surfaces or dishes.
🔑 Section 3: Advanced Strategies: Vinegar, Replacement, and Storage
True mastery of how to sanitize your sponge involves preventative measures and knowing when to retire the tool entirely.
H3: Creative Solutions: The Vinegar Soak
While bleach and heat are the most effective germ killers, white vinegar offers an excellent, natural, and non-toxic daily alternative for odor control and mild sanitization.
- Vinegar Soak Method: Use undiluted white vinegar. Submerge a well-rinsed sponge in a bowl of white vinegar for 5 minutes.
- Pro Tip: Vinegar is better at dissolving mineral deposits and grime and killing mold spores, but it is not as effective as bleach or microwaving at eliminating high concentrations of foodborne bacteria. Use the vinegar soak for daily refreshment and the microwave/bleach method 2-3 times per week.
H4: The Ultimate Pro Tip: Knowing When to Retire Your Sponge
No amount of sanitizing can indefinitely extend the life of a sponge. Research indicates that even sanitized sponges accumulate bacteria quickly.
- Ways to Customize Approach: Establish a strict replacement schedule. For high-use kitchen sponges, aim to replace them every one to two weeks.
- Cost-Saving Benefits: Don’t throw the old sponge directly in the trash! Designate the old, retired sponge for lower-risk cleaning tasks, such as wiping down floors or cleaning bathroom surfaces (after a final strong bleach soak). This extends the cost-saving benefits while maintaining kitchen hygiene standards.
🛠️ Section 4: Troubleshooting and Common Challenges
Even with routine sanitization, you may notice persistent odors or rapid degradation of your cleaning tool.
Featured Snippet Potential: “Can I sanitize a sponge by just boiling it on the stove?”
Yes, you can sanitize a sponge by boiling it on the stove, provided you submerge it in rolling water for at least five minutes. The extreme heat will kill most harmful bacteria. Safety Consideration: Use a designated, clean pot and tongs, and ensure the sponge remains completely submerged during the entire boiling process. Allow the sponge to cool before handling.
Practical Troubleshooting Tips (Home Tips & DIY)
- Problem: My sponge smells bad immediately after use.
- Obstacle: This usually indicates a deep-seated bacterial colony. The odor is caused by the byproducts of bacterial waste.
- Solution: Preventive Measures: Increase your sanitization frequency to every other day. If the odor persists after a microwave or bleach treatment, it’s time to retire the sponge immediately, as the bacterial load is too high to effectively reduce.
- Problem: The sponge melts or degrades quickly in the microwave.
- Obstacle: Inadequate saturation with water or the sponge material is not pure cellulose/synthetic (it may contain nylon or plastic fibers).
- Solution: Encouragement for Setbacks: Always ensure the sponge is soaking wet and check the material composition. If degradation continues, switch to the dishwasher or bleach methods, which are gentler on sponge material.
- Problem: Concerns about chemical residue from bleach.
- Obstacle: Fear of leaving residual cleaning agents on food surfaces.
- Solution: Offer Alternative Approaches: After the bleach soak (Method 3), perform a $1$-minute microwave sanitization (Method 1) without adding more bleach. Follow this with a thorough, cold-water rinse. The combination ensures maximum kill rate while minimizing chemical concerns.
🌟 Section 5: Maximizing Results: Sustainable Habits and Beyond
Successfully integrating how to sanitize your sponge into your routine should lead to a permanent improvement in kitchen health.
- Maintenance and Long-Term Considerations: The best way to maintain sponge hygiene is to ensure rapid drying. Always store your sponge vertically in a clean holder, rack, or clip after use, allowing air to circulate around all sides. Never leave it lying flat in the sink or a dish.
- Suggest Complementary Strategies: Consider integrating dishcloths or silicone scrubbers into your cleaning rotation. Dishcloths can be easily machine-washed and dried on high heat (a highly effective sanitization method), and silicone scrubbers dry quickly and are less porous, naturally harboring fewer germs.
- Inspire Continued Growth and Learning: Extend your sanitizing knowledge to other kitchen tools! Regularly run your kitchen sink stopper, scrubbing brushes, and dish racks through a bleach soak or the dishwasher’s sanitizing cycle to ensure a truly clean kitchen environment. (Internal Linking Opportunity: Discover “The Ultimate Guide to Kitchen Countertop Disinfection.”)
✅ Conclusion: Your Capability to Unlock Kitchen Cleanliness
You are now fully empowered with the knowledge of How to Sanitize Your Sponge, utilizing the quick efficiency of the microwave, the convenience of the dishwasher, and the power of a bleach soak. This small, consistent effort is a huge step toward effective home tips and superior hygiene.
Embrace the transformation of your kitchen environment. Your capability to succeed in maintaining a germ-reduced, clean kitchen is clear.
Which of the sanitizing methods—the quick Microwave Power Sanitization or the chemical-free Dishwasher Sterilization—will you implement first tonight to start your journey toward a cleaner sponge?