Salut les gourmands!
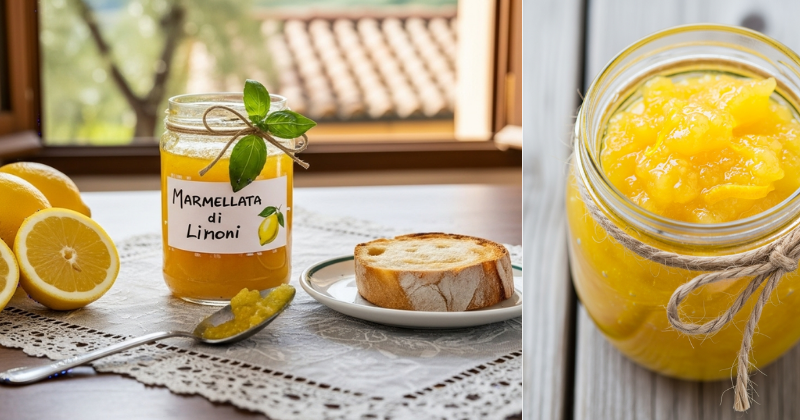
There is something absolutely magical about the scent of fresh lemons wafting through an Italian kitchen in the middle of spring. A few years ago, while I was exploring the winding coastal roads of Amalfi, I came across a tiny, family-run farm where the lemons were the size of grapevines. The grandmother there, Nonna Maria, sat me down and insisted I try her Italian Lemon Jam. One bite, and I was hooked. It wasn’t the overly sweet, gelatinous stuff you find in grocery stores; it was bright, zesty, and carried a sophisticated balance of sweetness and tartness that tasted like pure liquid sunshine.
Since that trip, I have spent countless hours in my own kitchen perfecting this Italian Lemon Jam to bring that Mediterranean warmth to your breakfast table. This recipe is more than just a spread; it’s a way to preserve the vibrant essence of citrus at its peak. Whether you are a seasoned preserver or a total beginner, I promise this process is incredibly rewarding. By making your own jam, you avoid the artificial thickeners and excessive sugars found in commercial jars, leaving you with a pure, gourmet treat. Ready to transform your morning toast? Let’s get into it!

Présentation de la recette
Before we start zesting, let’s look at what you can expect from this project. Making Italian Lemon Jam (or Marmellata di Limoni) is a slow-food process. It requires a bit of patience—mostly waiting for the fruit to soak—but the actual hands-on work is quite simple.
- Prep Time: 45 minutes (plus 24 hours soaking time)
- Cook Time: 45–60 minutes
- Portions: Approximately 4 to 5 small jars (250ml each)
- Difficulty: Medium
- Flavor Profile: Intensely citrusy, tangy, and perfectly sweet with a slight, pleasant bitterness from the peel.
Ingrédients
To achieve the best results, the quality of your fruit is everything. Since we are using the entire lemon—peel and all—I highly recommend sourcing organic, unwaxed lemons. This ensures your Italian Lemon Jam is free from pesticides and has the cleanest flavor possible.
- 2 lbs (1kg) Organic Lemons: Ideally Sorrento or Meyer lemons for their thin skins and high juice content.
- 3 cups (700g) Granulated Sugar: You can adjust this slightly depending on your preference for tartness.
- 4 cups Water: Filtered water is best to ensure no mineral aftertaste interferes with the citrus.
- 1 Granny Smith Apple (Optional): Peeled and grated. Apples are naturally high in pectin and help the jam set without store-bought additives.
- 1 Vanilla Bean (Optional): Split lengthwise to add a subtle, creamy depth to the bright citrus.
Préparation
Follow these steps carefully. The soaking process is the secret “Italian way” to remove the excess bitterness from the pith while keeping the vibrant flavor of the fruit intact.
Step 1: Preparing the Fruit
Wash your lemons thoroughly in cool water. Using a very sharp knife or a mandoline, slice the lemons into paper-thin rounds. As you slice, remove any seeds and set them aside in a small piece of cheesecloth (seeds contain natural pectin!).
Step 2: The Essential Soak
Place the lemon slices and the cheesecloth bag of seeds into a large glass bowl. Cover them with the 4 cups of water. Let this sit at room temperature for 24 hours. This softens the rinds and draws out the bitterness. Do not skip this step! It is the difference between a bitter marmalade and a sweet, balanced Italian Lemon Jam.
Step 3: The First Boil
After 24 hours, pour the lemons and their soaking water into a large, heavy-bottomed pot. Bring the mixture to a boil, then reduce the heat and simmer for about 20 minutes until the rinds are translucent and very soft.
Step 4: Adding the Sweetness
Remove the bag of seeds and discard it. Add the sugar and the grated apple (if using). If you want that gourmet touch, scrape the seeds from the vanilla bean into the pot now. Stir well until the sugar is completely dissolved.
Step 5: Reaching the Setting Point
Increase the heat to medium-high and boil the mixture, stirring frequently to prevent scorching on the bottom. You want to reach a temperature of 220°F (105°C).
The Cold Plate Test: Place a small saucer in the freezer for 10 minutes. Drop a spoonful of jam onto the cold plate, wait 30 seconds, and push it with your finger. If it wrinkles, your Italian Lemon Jam is ready!
Step 6: Jarring
Carefully ladle the hot jam into sterilized jars, leaving about a quarter-inch of headspace. Wipe the rims, seal with lids, and process in a water bath for 10 minutes for long-term storage, or simply let them cool and store them in the fridge for immediate enjoyment.
Petit conseil pro: The Secret to Perfect Texture
One common concern when making Italian Lemon Jam is the texture of the peel. If you prefer a smoother, more “spreadable” jam rather than a chunky marmalade, here is my favorite trick: After the first boil (Step 3) but before you add the sugar, use an immersion blender to pulse the mixture a few times.
This breaks down the larger slices into smaller, bite-sized confetti pieces. It gives the jam a beautiful, consistent look and ensures you get a bit of that zesty peel in every single bite without it being overwhelming. Also, remember that the jam will thicken significantly as it cools in the jar, so don’t be tempted to overcook it, or it might become too gummy!
Accompagnements suggérés
Now that you have your jars of gold, how should you serve them? While it’s delicious on a simple piece of sourdough, here are a few ways to elevate your Italian Lemon Jam experience:
- The Classic Italian Breakfast: Serve a dollop alongside fresh ricotta cheese on a crusty baguette. The creaminess of the cheese perfectly offsets the tang of the lemons.
- The Gourmet Cheese Board: Pair this jam with a sharp, aged Pecorino or a salty Parmigiano-Reggiano. The sweet-salty contrast is a total crowd-pleaser.
- The Pastry Filler: Use it as a filling for homemade Crostata (Italian tart) or thumbprint cookies.
- Glaze for Poultry: Believe it or not, whisking a spoonful of this jam with a little rosemary and olive oil makes an incredible glaze for roasted chicken or fish!
I hope this recipe brings a little bit of the Italian coast into your home. There is nothing quite like the pride of seeing those bright yellow jars lined up in your pantry, knowing exactly what went into them. I’d love to hear how your jam turned out! Did you add the vanilla, or perhaps a sprig of mint? Let me know in the comments below!
À vos tabliers!
If you enjoyed this recipe, don’t forget to share your photos on Instagram and tag me—I love seeing your kitchen creations. Happy jarring, and I’ll see you in the next recipe!
Bon appétit!