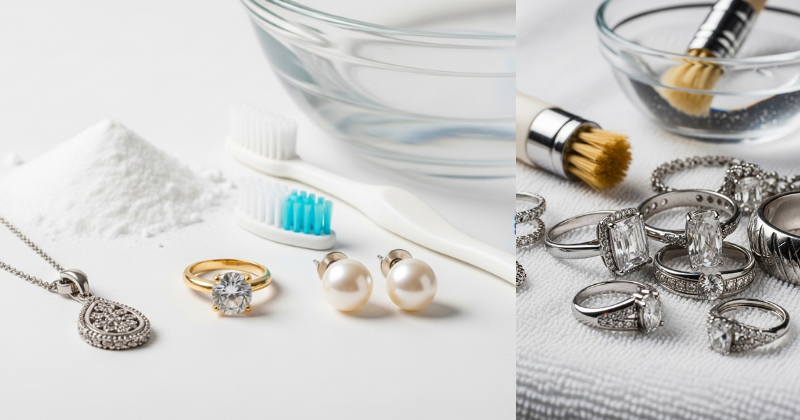
Your favorite necklace has been sitting in the back of your drawer looking dull and lifeless. Your diamond ring catches light completely differently than it did when it was new. Your silver earrings have developed that dark, dingy tarnish that makes them look decades older than they are. These aren’t signs that your jewelry needs to be replaced or professionally restored — they’re signs that it needs the right cleaning approach, and most of what you need is already sitting in your kitchen or bathroom cabinet. This guide covers the most effective jewelry cleaning hacks organized by metal and gemstone type, explains the chemistry behind why each method works, and gives you the practical knowledge to safely restore brilliance to everything from heirloom diamonds to costume pieces. You’re about to transform your entire jewelry collection with techniques that professional jewelers use alongside simple home solutions that deliver equally impressive results.
Understanding What Makes Jewelry Lose Its Sparkle
Before diving into specific cleaning techniques, understanding what you’re actually removing from jewelry surfaces helps you choose the right approach and avoid the mistakes that damage pieces.
The Chemistry of Jewelry Tarnish and Buildup
Jewelry loses its brilliance through several distinct processes depending on the material. Silver tarnishes through a chemical reaction between silver and hydrogen sulfide or sulfur dioxide in the atmosphere, producing silver sulfide — the dark black compound that accumulates on silver surfaces. This reaction accelerates in humid environments, near rubber (which off-gasses sulfur compounds), and around foods like eggs, onions, and mustard. Critically, tarnish is a surface phenomenon only — it doesn’t penetrate into the silver itself, making it completely reversible with the right approach.
Gold doesn’t tarnish in the same chemical sense, but it accumulates a remarkable amount of biological material — skin oils, hand cream, body lotion, makeup, perfume, and soap residue — that forms an invisible film reducing its reflectivity. A gold ring that looks dull isn’t oxidized; it’s coated. This distinction matters because the cleaning approach differs: gold needs emulsification and mechanical removal of surface deposits, not a chemical reduction reaction like silver requires.
Diamonds and hard gemstones lose brilliance primarily through oil accumulation on the pavilion facets (the bottom of the stone) rather than the top table. When oil coats the pavilion, light can no longer internally reflect within the stone — it passes through instead, reducing the “fire” and brilliance that makes diamonds spectacular. A properly cleaned diamond captures and returns light dramatically differently than a grimy one.
Knowing Your Materials Before You Clean
The most important jewelry cleaning knowledge isn’t technique — it’s material identification. The wrong cleaning method applied to the wrong material can permanently damage jewelry in ways that no amount of subsequent care can reverse. Porous gemstones (pearls, opals, emeralds, turquoise, malachite, amber, coral) require completely different approaches than hard, non-porous stones (diamonds, sapphires, rubies, topaz). Plated jewelry (gold-filled, gold-plated, silver-plated) requires gentler methods than solid metal pieces, because abrasives or excessive soaking can wear through the plating layer. Antique and vintage pieces may have foil-backed stones, glued settings, or surface treatments that respond poorly to water or chemicals.
When in doubt about a piece’s composition, start with the mildest possible cleaning method and observe the results before progressing to stronger approaches. A 30-second test on an inconspicuous area with mild soapy water reveals whether a piece is colorfast and structurally sound before committing to a full cleaning.
The Core Jewelry Cleaning Hacks: Method by Material
Silver: The Aluminum Foil Electrochemical Miracle
This is legitimately the most impressive home jewelry cleaning hack in existence — and it works through genuine electrochemical science rather than abrasion. Line a glass or ceramic bowl with a sheet of aluminum foil, shiny side up. Add boiling water, then add 1 tablespoon of baking soda and 1 tablespoon of salt. Stir to dissolve, then place your tarnished silver jewelry directly on the aluminum foil, ensuring each piece contacts the foil. Watch the tarnish disappear in 1-5 minutes — literally transforming before your eyes.
The mechanism is electrochemical reduction: aluminum is more electrochemically reactive than silver, so it preferentially oxidizes (gives up electrons) when both metals are present in an electrolyte solution (the salt and baking soda dissolved in water). The electrons released by the oxidizing aluminum flow through the electrolyte to the silver sulfide tarnish, reducing the silver sulfide back to silver metal. The sulfur transfers to the aluminum — you’ll often see yellow tarnish appearing on the foil as silver tarnish simultaneously disappears from your jewelry. This method is remarkable because it genuinely restores silver chemically rather than removing a surface layer mechanically. It works most dramatically for pieces with intricate detailing where abrasive polishing would be difficult.
Important limitation: this method isn’t appropriate for jewelry with stones (the boiling water and electrolyte solution can damage some settings and certain gemstones), pieces with intentional oxidation detailing (common in some artisan silver jewelry where the dark areas are deliberately created), or antique pieces with fragile construction. For plain silver chains, silverware, and simple silver jewelry, it’s transformative.
Diamonds and Hard Gemstones: The Dish Soap Soak Method
For diamonds, sapphires, rubies, and other hard non-porous gemstones set in gold or platinum, the most effective cleaning approach combines mild surfactant action with mechanical removal of oil deposits from the critical pavilion facets. Add a few drops of gentle dish soap (Dawn or equivalent) to a small bowl of warm water — not hot, which can thermally shock some settings. Place your jewelry in the solution and allow it to soak for 15-20 minutes. This soaking period allows the surfactant molecules to penetrate and begin emulsifying the oil deposits on the metal and stone surfaces.
After soaking, use a soft toothbrush (a child’s toothbrush has particularly gentle bristles) to gently scrub all surfaces of the piece — paying particular attention to the areas behind and beneath the stones where oil and debris accumulate most heavily. Use gentle circular motions rather than aggressive back-and-forth scrubbing that could loosen settings. Rinse thoroughly under warm running water, ensuring all soap residue is removed (soap film is itself a brilliance reducer). Dry with a lint-free cloth and optionally finish with a quick breath of air directed at the stone — the humidity from your breath briefly fogs the surface, making any remaining deposits visible as the fogging clears, revealing areas that need additional attention.
Gold: The Ammonia Flash Method for Serious Buildup
For severely dull gold jewelry where the dish soap method produces insufficient results, a dilute ammonia solution provides significantly more powerful degreasing through its strongly alkaline chemistry. Mix one part household ammonia (clear, unscented) with six parts water in a small glass container. Soak gold jewelry for no more than 1 minute — ammonia is effective but requires brief contact time only. Remove, immediately brush gently with a soft toothbrush, and rinse thoroughly with water. The dramatic improvement in brilliance from this quick treatment often surprises people who’ve never tried it.
Important caveats: ammonia is appropriate for solid gold with diamonds, sapphires, rubies, and hard non-porous stones only. Never use ammonia on gold-plated jewelry, pearls, opals, emeralds, turquoise, or any organic gemstone — it will damage or destroy these materials. Never mix ammonia with bleach (this creates toxic chloramine gas). Ensure adequate ventilation when working with ammonia solutions. The 1-minute contact time limit is a genuine recommendation, not overcaution — prolonged exposure to ammonia can dull gold’s polish over repeated treatments.
Pearls: The Gentlest Possible Approach
Pearls require more careful handling than virtually any other jewelry material because their surface is composed of aragonite platelets (calcium carbonate) in a protein matrix — a structure that is damaged by acids, abrasives, ultrasonic cleaners, and even many commercial jewelry cleaners. The classic pearl cleaning method is intentionally minimal: wipe each pearl individually with a soft, slightly damp cloth after wearing. For deeper cleaning, use a cloth barely dampened with very dilute mild soap solution (one small drop of dish soap in a cup of water), wipe each pearl, then wipe with a clean damp cloth to remove all soap residue, then allow to dry completely before storing.
Never submerge pearl strands in water — the silk or nylon thread that strings pearls absorbs moisture and weakens, potentially stretching or breaking. The clasp hardware may corrode if repeatedly submerged. Never use ultrasonic cleaners, steam cleaners, or any acidic solution on pearls. The “tooth test” (rubbing a pearl gently against the edge of your front tooth — real pearls feel slightly gritty, fake ones feel smooth) is a useful authenticity indicator but shouldn’t be done routinely as even gentle friction removes microscopic surface material from genuine pearls over time.
Advanced Jewelry Cleaning Strategies
The Ultrasonic Cleaner for Hard Stones
A home ultrasonic jewelry cleaner (widely available for $30-60) uses high-frequency sound waves propagated through water to create microscopic cavitation bubbles that collapse against jewelry surfaces with enough force to dislodge deposits from areas no brush can reach — including inside intricate filigree, beneath gemstone settings, and within chain links. For appropriate pieces (diamonds, rubies, sapphires in secure settings, solid gold and platinum), ultrasonic cleaners produce professional-quality results in minutes.
The critical knowledge about ultrasonic cleaners is which pieces are absolutely incompatible with them: opals (thermal and mechanical shock causes cracking), emeralds (almost always have filled fractures that ultrasonic action removes), turquoise and other porous stones, pearls, coral, amber, any stone that has been treated with oils or resins, pieces with foil-backed settings, antique pieces with thin pavings, and any jewelry where you’re uncertain of stone treatment or setting security. When an emerald loses its clarity immediately after ultrasonic cleaning, it’s because the resin or oil filling its fractures has been removed — a difficult or impossible condition to reverse at home.
Baking Soda Paste for Stubborn Tarnish
For silver pieces with localized heavy tarnish that the electrochemical method doesn’t fully address, a mild baking soda paste provides gentle mechanical and chemical action. Mix baking soda with enough water to form a spreadable paste, apply with a soft cloth or cotton swab to the tarnished area, and rub gently with circular motions. Rinse thoroughly and dry immediately. The baking soda functions as a very mild abrasive (approximately 2.5 on the Mohs hardness scale — gentle enough for silver at 2.5-3) while its mild alkalinity aids in breaking down sulfide compounds.
This method is not appropriate for gold (baking soda is mildly abrasive enough to micro-scratch gold’s relatively soft surface over repeated applications), plated jewelry, or any jewelry with stones — the grit can scratch softer gemstones and accumulate in settings. Reserve it for solid silver pieces only.
The Toothpaste Myth and Why to Avoid It
Toothpaste appears frequently in jewelry cleaning hack compilations, but professional jewelers consistently advise against it for good reason. Modern toothpaste contains silica abrasives designed for tooth enamel (Mohs hardness 5) — abrasive enough to scratch gold (Mohs 2.5-3), platinum (Mohs 3.5-4.5 depending on alloy), and many gemstones. The short-term brilliance improvement from toothpaste is real but comes at the cost of microscopic surface scratches that accumulate over repeated applications, progressively dulling polished surfaces in ways that eventually require professional re-polishing to correct. The dish soap method works just as effectively for surface oil removal without this risk.
Troubleshooting Common Jewelry Cleaning Problems
Pieces That Remain Dull Despite Cleaning
If jewelry remains dull after thorough cleaning, the issue may not be dirt at all. Fine scratches in the metal surface — which accumulate from normal wear — scatter light rather than reflecting it directionally, creating an overall matte appearance even on clean metal. This condition cannot be resolved by cleaning; it requires polishing (removing a microscopic layer of metal to restore a flat, mirror surface). Jeweler’s polishing cloths (impregnated with very fine polishing compound) can address light scratching on gold and silver at home. More significant surface scratching requires professional buffing with a rotary polishing machine — a service most jewelers provide inexpensively.
For gemstones that appear dull despite cleaning, the stone itself may have developed surface abrasions from wear, or the stone may be of a type (like opal) that naturally loses its polish over time. Surface-abrasion dulling in gems typically requires professional re-polishing from a lapidary specialist.
Loosened Settings After Cleaning
If a stone moves or rattles slightly after cleaning — even gentle cleaning — the prongs or bezel holding it have been compromised, and the piece should be taken to a jeweler immediately before the stone is lost. Regular cleaning actually reveals pre-existing setting looseness that was previously obscured by accumulated debris — this is a genuinely useful outcome because catching a loose setting before the stone falls out is far preferable to the alternative. Make it a habit to test each stone for movement after cleaning by gently pressing each stone from multiple directions with a fingertip.
Maintaining Jewelry Long-Term: Building a Care System
The most efficient jewelry maintenance involves preventing buildup rather than periodically cleaning heavy accumulations. Remove jewelry before swimming (chlorine in pools causes chemical changes in gold alloys, and saltwater is corrosive to many metals), before applying lotions, perfumes, and hairsprays (these products are primary sources of the film that dulls gold and gemstones), and before household cleaning (cleaning products contain chemicals incompatible with many jewelry materials). These three behavioral modifications dramatically reduce cleaning frequency and intensity.
Store silver in anti-tarnish cloth pouches or sealed zip-lock bags with anti-tarnish strips — these absorb the sulfur compounds that cause tarnishing, extending the interval between cleanings from weeks to months. Store pieces individually rather than together to prevent harder materials from scratching softer ones. A regular 5-minute monthly cleaning routine for actively worn pieces maintains continuous brilliance more effectively than occasional intensive cleaning sessions.
Conclusion
Restoring your jewelry’s brilliance requires only a few minutes and ingredients you already own — once you understand which method matches each material. The aluminum foil electrochemical hack transforms tarnished silver dramatically. The dish soap soak method unlocks the fire in diamonds and hard gemstones. Dilute ammonia cuts through years of oil accumulation on solid gold. And the gentle damp-cloth approach protects your pearls without the damage that more aggressive methods cause. Start with your most frequently worn pieces and the correct method for their materials, then work through your collection systematically. Every piece deserves to look its best, and with the knowledge you now have, achieving that is genuinely within your reach.