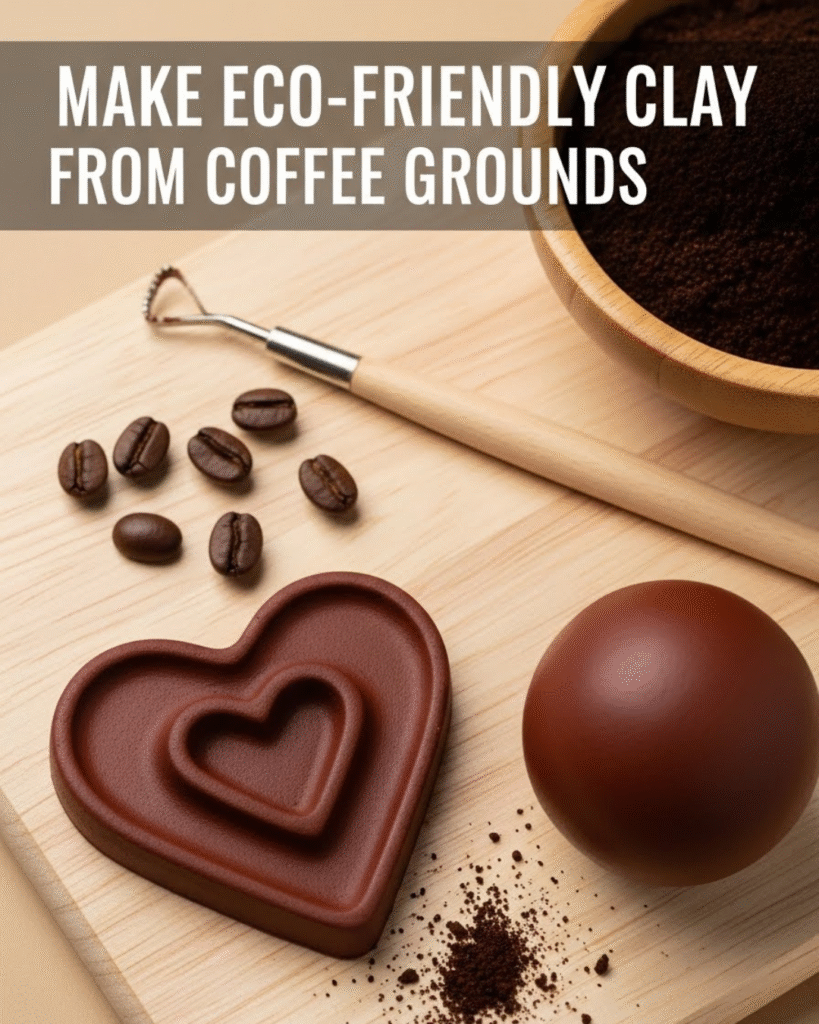
Are you searching for an engaging, sustainable crafting project that reduces waste and unleashes your inner artist? Look no further! Learning how to MAKE ECO-FRIENDLY CLAY FROM COFFEE GROUNDS is one of the most rewarding Home Tips & DIY projects you can undertake. This innovative recipe allows you to transform everyday kitchen waste into a beautiful, workable clay substitute. This guide will provide the achievable, step-by-step guidance you need to discover this amazing crafting secret, offering incredible cost-saving benefits and the satisfaction of creating truly unique pieces.
☕ Section 1: Foundation First: The Science of Coffee Clay
To successfully MAKE ECO-FRIENDLY CLAY FROM COFFEE GROUNDS, it’s important to build confidence with basic concepts about the materials and the function of each ingredient in creating a cohesive, pliable medium.
H3: Building Confidence with Basic Concepts: Why Coffee Grounds Work
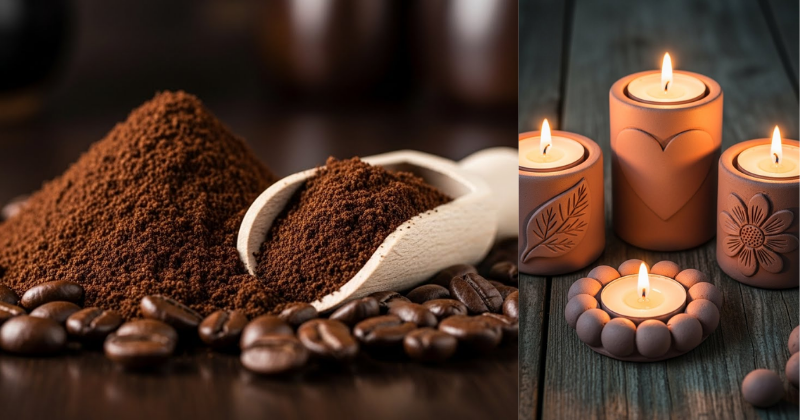
Coffee grounds are primarily cellulose and lignin, making them an excellent textural filler for clay. Their dark, rich color also eliminates the need for initial dye, providing a beautiful, earthy base.
- Zero-Waste Focus: Using spent coffee grounds directly addresses the massive waste problem associated with coffee consumption, turning trash into treasure and embodying a sustainable lifestyle change.
- The Binding Agent: Unlike natural clay (which uses water and fine particles), coffee clay relies on a binding agent to achieve its plasticity and hardness. Our recipe uses a combination of cornstarch and white glue, which create a strong, durable, air-drying bond.
H3: Addressing Common Concerns: Air-Dry Clay vs. Kiln Clay
This homemade medium is a type of air-dry modeling material, not a traditional ceramic clay.
- Air-Dry Limitations: Coffee clay is not food-safe and cannot be fired in a kiln. It is meant for decorative items, jewelry, ornaments, and small sculptures.
- Encouraging Reassurance for Beginners: This medium is much more forgiving and accessible than traditional clay. It requires no specialized tools, making it perfect for beginners who want to achieve crafting success without expensive setup costs.
🛠️ Section 2: Step-by-Step Process: The Coffee Clay Recipe
This step-by-step guidance provides the simple, actionable language needed to MAKE ECO-FRIENDLY CLAY FROM COFFEE GROUNDS.
Ingredients and Tool Requirements
| Ingredient (By Volume) | Quantity | Purpose | Tool Requirement |
| Spent Coffee Grounds | 1 cup | Filler, Texture, Color | Mixing Bowl |
| White School Glue (PVA) | 1/2 cup | Primary Binding Agent | Wooden Spoon/Spatula |
| Cornstarch or Flour | 1/2 cup | Secondary Binder, Anti-Stick Agent | Measuring Cups/Spoons |
| Warm Water | 1 tablespoon | Moisture control (use sparingly) | Non-stick surface/Parchment Paper |
Step-by-Step Guidance (Core Methods)
- Prep the Grounds (Actionable Language): Ensure your coffee grounds are fully dried out. Spread spent grounds thinly on a baking sheet and let them air dry for $24 \text{ hours}$, or bake them on the lowest oven setting for about $30 \text{ minutes}$. This is a crucial timing and planning consideration to prevent mold and achieve a consistent texture.
- Combine Wet Ingredients: In a mixing bowl, pour in the $1/2$ cup of White School Glue. Stir in $1$ tablespoon of warm water if your glue seems very thick; otherwise, skip the water.
- Incorporate Grounds: Add the $1 \text{ cup}$ of dried Coffee Grounds to the glue mixture. Mix thoroughly with a wooden spoon until the grounds are fully coated and the mixture looks like thick mud.
- Add Binder and Knead: Gradually mix in the $1/2 \text{ cup}$ of Cornstarch or Flour. Once the mixture becomes too stiff to stir, turn it out onto a non-stick surface (like a silicone mat or parchment paper). Practical tips: Knead the mixture for $5 \text{-} 7 \text{ minutes}$, adding small pinches of cornstarch if the clay sticks to your hands. The finished clay should be pliable, smooth, and easily rolled without cracking.
- Storage: Use the clay immediately. If storing, wrap it tightly in plastic wrap and place it inside an airtight container. It will keep for 3-5 days.
🎨 Section 3: Advanced Strategies: Sculpting and Finishing
Once you have mastered HOW TO MAKE ECO-FRIENDLY CLAY FROM COFFEE GROUNDS, you can move on to techniques for creating durable and attractive finished pieces.
H3: Creative Solutions: Enhancing Texture and Scent
The natural texture and rich scent of coffee grounds are a huge benefit of this medium, but you can enhance them further.
- Smoother Finish: For items like jewelry or pendants, pass the prepared coffee clay through a sieve after the kneading process to remove larger grounds, resulting in a slightly smoother, finer texture.
- Custom Scent: Creative solutions for permanent scent include adding a pinch of dried cinnamon or ground cloves into the initial dry mixture (Step 1). These spices enhance the aroma and color, offering multiple options to suit different preferences.
H3: Ways to Customize Approach: Adding Strength and Durability
While air-drying is simple, curing the clay with a gentle heat source can increase its strength.
- Low-Bake Curing: After sculpting, allow the piece to air dry for $24 \text{ hours}$. Then, place the item on a lined baking sheet in the oven at the absolute lowest temperature (around $200^{\circ} \text{F}$ or $93^{\circ} \text{C}$) for $1 \text{-} 3$ hours, depending on the thickness. This process helps evaporate lingering moisture, improving the hardness and reducing the chances of breakage. Safety Considerations: Monitor closely and ensure the temperature remains low to avoid burning the glue binder.
⚠️ Section 4: Troubleshooting and Common Challenges
Even when you follow the achievable, step-by-step guidance to MAKE ECO-FRIENDLY CLAY FROM COFFEE GROUNDS, you may encounter common issues with cracking or handling.
Featured Snippet Potential: “Why is my coffee ground clay cracking as it dries?”
Your coffee ground clay is cracking as it dries because the piece is too thick, causing the outside surface to dry and shrink faster than the wet core, or because the initial mixture was too dry. To prevent this, ensure sculpted pieces are no thicker than $1/2 \text{ inch}$ and that you always roll the clay out smoothly before assembly. For thick areas, coat them heavily with a sealant (like extra white glue) before drying to slow the rate of surface evaporation.
Practical Troubleshooting Tips (DIY Focus)
- Problem: The finished piece feels brittle and snaps easily.
- Obstacle: Too much cornstarch/flour or not enough glue was used in the initial mixture.
- Solution: Encouragement for Setbacks: This is a formula issue. When remaking the clay, decrease the dry binder by $1 \text{-} 2$ tablespoons and ensure the $1/2 \text{ cup}$ of glue is measured accurately. The binder ratio $1 \text{ part}$ glue to $2 \text{ parts}$ grounds/binder is key.
- Problem: The clay is sticky and impossible to work with.
- Obstacle: The mixture is too wet (too much water or wet grounds).
- Solution: Preventive Measures: Incorporate small amounts of additional cornstarch until the stickiness disappears. If the grounds were not thoroughly dried in Step 1, the clay will inevitably be sticky. Always dry your grounds first!
- Problem: The dried piece is developing mold spots.
- Obstacle: The coffee grounds were not completely dry, or the sculpted piece was placed in a high-humidity environment to dry.
- Solution: Alternative Approaches: The piece must be discarded. Ensure the grounds are bone dry before use. Dry the finished sculpture in a well-ventilated area, perhaps with a small fan blowing gently on it, to facilitate quick evaporation.
🌟 Section 5: Maximizing Results: Next Level Coffee Crafting
You have successfully learned HOW TO MAKE ECO-FRIENDLY CLAY FROM COFFEE GROUNDS and troubleshoot the basics. Now, let’s explore next level tips for professional-quality results.
- Show How to Build Upon Basic Success: Sealing is Essential. Once the piece is completely dry and cured, seal it with several coats of a clear, non-toxic varnish or polyurethane spray. This protects it from humidity, enhances the color, and prevents the clay from re-softening or molding over time. This is a vital maintenance and long-term consideration.
- Maintenance and Long-Term Considerations: Keep small batches of dried coffee grounds and cornstarch on hand (stored separately in airtight jars). This allows you to quickly mix small quantities of clay on demand without waiting to dry new grounds, making it easy to inspire continued growth and learning in crafting.
- Suggest Complementary Strategies: Texturing Tools (General Lifestyle/Casual Tips): The natural texture of the clay is great, but you can use household items like toothpicks, old bottle caps, or lace fabric to press patterns into the clay before drying, creating intricate, unique designs. (Internal Linking Opportunity: Check out “Creative Uses for Spent Coffee Grounds in the Garden” for additional Gardening Topics uses.)
✅ Conclusion: Your Capability to Create Sustainably
You have now unlocked the simple, elegant secret of how to MAKE ECO-FRIENDLY CLAY FROM COFFEE GROUNDS. By applying achievable, step-by-step guidance, you have successfully transformed kitchen waste into a versatile artistic medium. This DIY project reinforces your capability to succeed in sustainable, creative endeavors.
Ready to unleash your creativity? Will you use your coffee clay to craft holiday ornaments, or will you start by experimenting with natural spices for a custom scent?