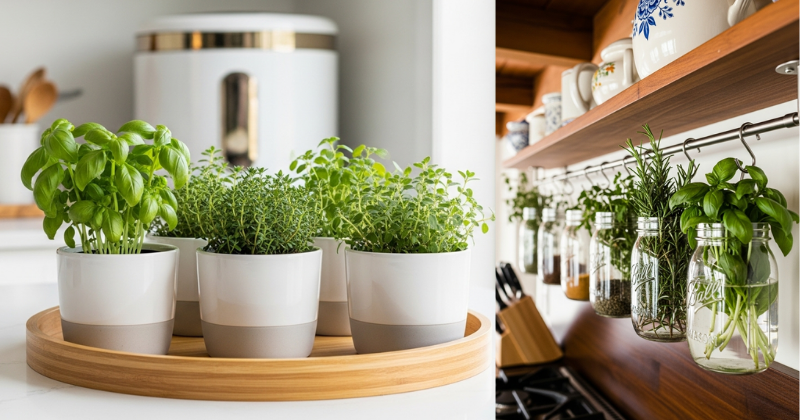
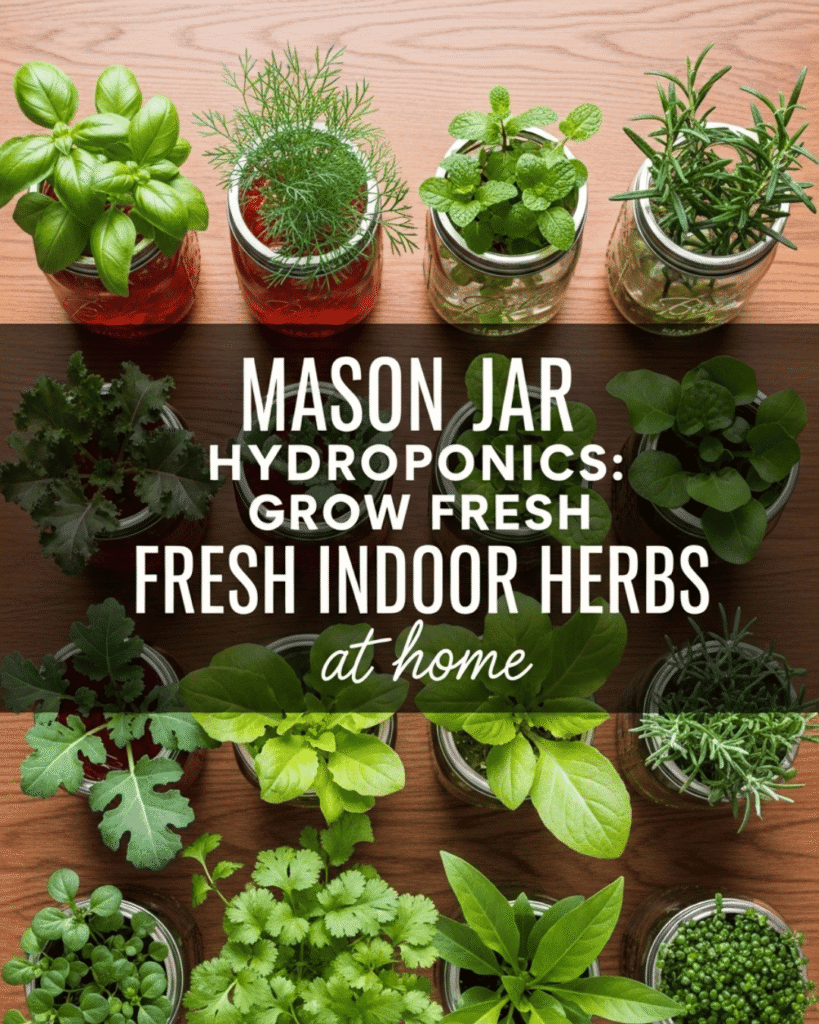
Imagine transforming simple glass jars into miniature ecosystems where basil, mint, and cilantro flourish without soil—suspended in water enriched with nutrients, their roots dancing like pale underwater forests while green abundance crowns your windowsills with fragrance and promise.
Mason jar hydroponics represents a quiet revolution occurring on kitchen counters worldwide, where ancient agricultural wisdom meets contemporary innovation. This method—growing plants in water rather than earth—demystifies cultivation for apartment dwellers, novice gardeners, and anyone who has watched supermarket herbs wilt days after purchase, wondering if there exists a better way to maintain connection with living, growing things.
What unfolds in these glass vessels transcends mere convenience. You’re witnessing biology’s elegant efficiency, observing roots reaching through liquid medium to extract precisely what they need, watching leaves unfurl in response to light and attention. The transparency of mason jars becomes a window into processes usually hidden beneath opaque soil—an education in botany occurring daily on your counter, a meditation on growth accessible to anyone with sunlight, water, and willingness to tend living systems.
This comprehensive guide illuminates the path from empty jar to thriving herb garden, addressing the science underlying hydroponic success, the practical steps for establishing your system, and the intuitive wisdom developed through observation and care. Whether seeking fresh culinary herbs year-round, exploring sustainable growing methods, or simply craving the satisfaction of nurturing plants from seed to harvest, mason jar hydroponics offers an accessible entry point into the profound practice of growing your own food.
The Philosophical and Scientific Foundation of Hydroponic Growing
Before assembling your first mason jar system, understanding the principles governing soilless cultivation establishes both practical knowledge and deeper appreciation for what you’re creating.
The Ancient Roots of Modern Hydroponics
Hydroponics—from Greek hydro (water) and ponos (labor)—possesses lineage stretching back millennia. The Hanging Gardens of Babylon, one of antiquity’s seven wonders, likely employed hydroponic principles. Aztec chinampas floating on lakes grew abundant crops using water-based systems. What seems futuristic actually represents humanity’s rediscovery of knowledge our ancestors intuited through observation and necessity.
The fundamental insight: soil serves primarily as structural support and nutrient delivery mechanism. Plants don’t require soil itself—they require the nutrients soil contains, the moisture it holds, and the oxygen available in its spaces. Hydroponics eliminates the intermediary, delivering nutrients directly to roots through water solution while ensuring adequate oxygenation.
What Plants Actually Need: The Essential Elements
Understanding plant nutrition transforms you from someone following instructions to someone comprehending the living system you’re stewarding.
Macronutrients (required in larger quantities):
- Nitrogen (N): Fuels leafy growth, chlorophyll production, the verdant abundance we seek in culinary herbs
- Phosphorus (P): Supports root development, energy transfer, flowering
- Potassium (K): Regulates water movement, strengthens cell walls, enhances disease resistance
Secondary nutrients: Calcium, magnesium, sulfur—structural components and enzymatic cofactors
Micronutrients: Iron, manganese, zinc, copper, boron, molybdenum, chlorine—required in minute amounts but essential for specific biochemical processes
In soil, these elements exist in complex forms requiring microbial conversion before plant uptake. Hydroponic nutrients provide these elements in immediately available forms, explaining hydroponics’ often faster growth rates compared to traditional cultivation.
The Oxygen Paradox: Why Roots Need to Breathe
A common misconception: plants breathe only through leaves. In reality, roots require oxygen for cellular respiration—the metabolic process generating energy for nutrient absorption and growth. Soil provides oxygen in spaces between particles. In hydroponics, ensuring root oxygenation becomes crucial.
Mason jar systems address this through several mechanisms: the portion of roots above water level accesses atmospheric oxygen directly; periodic water changes introduce dissolved oxygen; and some growers add air stones (aquarium bubblers) to continuously oxygenate the solution.
This explains why you cannot simply place plant cuttings in stagnant water indefinitely—without oxygen replenishment, roots suffocate, creating anaerobic conditions where beneficial organisms die and pathogens proliferate.
The Transparency Advantage
Mason jars’ clear glass, while aesthetically pleasing, serves functional purposes beyond visibility. You observe root health directly—white, branching roots indicate thriving systems; brown, slimy roots signal problems requiring intervention. You monitor water levels without guessing. You witness the daily incremental growth that soil cultivation hides, creating intimate connection with your plants’ development.
However, transparency creates challenges: light reaching nutrient solution promotes algae growth. We’ll address this through strategic solutions that maintain visibility while preventing photosynthetic colonization.
Essential Materials and Setup: Assembling Your Hydroponic Garden
Successful mason jar hydroponics begins with gathering appropriate materials and understanding each component’s role in your growing system.
The Core Components
Glass Mason Jars: Wide-mouth quart-size jars (32 oz) provide optimal dimensions for most herbs. The broad opening accommodates plant stems and allows easy access for maintenance. Clear glass enables root observation while vintage blue glass adds aesthetic charm (though it slightly reduces light-induced algae growth).
I prefer Ball or Kerr jars for their consistent quality and standardized sizes that accommodate various growing accessories. Recycled jars work equally well—any wide-mouth container holding at least 16 ounces suits smaller herbs like basil or cilantro.
Net Cups or DIY Alternatives: These plastic cups with slotted sides hold plants while allowing roots to grow through into water below. Standard 3-inch net cups fit wide-mouth mason jar openings perfectly. Alternatively, craft DIY holders from plastic yogurt cups by drilling multiple drainage holes.
Growing Medium: Clay pebbles (hydroton), perlite, or coconut coir provide structural support for young plants while allowing water and air circulation. Unlike soil, these inert media don’t decompose, compact, or harbor pests. I favor clay pebbles for their reusability—simply rinse and sterilize between plantings.
Hydroponic Nutrients: Liquid hydroponic fertilizers contain all essential macro and micronutrients in bioavailable forms. General Hydroponics Flora series, Masterblend, or any complete hydroponic formula works well. Follow manufacturer dilution instructions carefully—more is not better and can damage plants through nutrient burn.
Seeds or Cuttings: Start with herb seeds suited to hydroponic growing, or take cuttings from existing healthy plants. Basil, mint, cilantro, parsley, oregano, thyme, and chives all thrive in mason jar systems.
pH Testing Kit: Most herbs prefer slightly acidic to neutral pH (5.5-6.5). Inexpensive pH test strips or liquid test kits allow monitoring. pH affects nutrient availability—too high or low and plants cannot absorb nutrients even when present.
Optional Enhancements:
- Aluminum foil or black paper: Wrap jar exteriors to block light, preventing algae while maintaining top-down visibility
- Air stones and small aquarium pumps: Provide continuous oxygenation for larger systems
- Grow lights: Supplement natural light during winter or in low-light environments
- Labels: Track planting dates, varieties, nutrient schedules
Herb Selection: Understanding Compatible Species
Not all herbs thrive equally in mason jar hydroponics. Success comes from matching plant characteristics with system capabilities.
Excellent Choices (fast-growing, water-loving, compact):
- Basil: The hydroponic superstar—grows vigorously, tolerates harvesting, remains compact with regular pruning
- Mint: Perhaps too successful—grows aggressively in water, perfect for contained mason jar systems preventing invasive spread
- Cilantro: Prefers cool conditions but produces abundantly in hydroponic setups
- Oregano: Compact growth, intense flavor concentration in hydroponic cultivation
- Thyme: Slow but steady, develops complex aromatics
Moderate Success (require more attention):
- Parsley: Slower germination, benefits from pre-soaking seeds
- Chives: Grow well but require deeper containers for bulb development
- Sage: Possible but prefers more substantial systems as it matures
Challenging (better suited to larger hydroponic systems):
- Rosemary: Requires excellent drainage, larger root systems, doesn’t adapt well to high-moisture environments
- Lavender: Similar to rosemary—Mediterranean herbs evolved for dry conditions struggle in water culture
I recommend beginning with basil and mint—forgiving, fast-growing varieties that provide quick success, building confidence before attempting more finicky species.
Step-by-Step Setup: From Empty Jar to Thriving Ecosystem
The transformation from inert components to living system unfolds through methodical preparation and attentive assembly.
Phase 1: Container Preparation and Light Management
Step 1: Sterilization
Wash mason jars, lids, and net cups thoroughly with hot, soapy water. Rinse completely—soap residue harms plants. For extra sterility, submerge in boiling water for 10 minutes or run through dishwasher sanitize cycle.
This initial cleaning prevents introducing pathogens, mold spores, or contaminants that could compromise your system before it establishes.
Step 2: Light Blocking for Algae Prevention
Algae—photosynthetic organisms that colonize nutrient-rich, light-exposed water—compete with plants for nutrients while creating slimy biofilms that clog roots and reduce oxygen availability.
Wrap jar exteriors with aluminum foil from base to just below the rim where net cup will sit. This blocks light reaching water while leaving the top open for plant observation. Alternatively, use black construction paper secured with tape, or paint jar exteriors with chalkboard paint (which allows labeling directly on jars).
I prefer foil for its complete light blocking and easy removal when I want to observe root development—simply unwrap, check roots, then re-wrap.
Step 3: Preparing Growing Medium
Rinse clay pebbles or perlite thoroughly to remove dust that would cloud your water. Place medium in a large strainer and run water through until it flows clear. This tedious step prevents ongoing cloudiness that obscures root observation.
Fill net cups approximately three-quarters full with your chosen medium, leaving space for seeds or transplants.
Phase 2: Nutrient Solution Preparation
Step 4: Mixing Hydroponic Nutrients
Fill mason jars with room-temperature water—cold water shocks roots, while hot water reduces dissolved oxygen. If using tap water, let it stand uncovered for 24 hours to allow chlorine to dissipate, or use filtered water.
Add hydroponic nutrients according to package directions. Most formulas recommend starting at quarter or half strength for seedlings and young plants, gradually increasing to full strength as plants mature.
Stir thoroughly. The liquid should appear slightly cloudy or tinted (depending on nutrient formulation) but not murky.
Step 5: pH Adjustment
Test solution pH using your test kit. If pH exceeds 7.0, add pH down solution (often phosphoric acid-based) drop by drop, stirring and retesting until reaching 5.5-6.5 range. If too acidic, add pH up solution (typically potassium hydroxide-based).
This adjustment seems finicky but profoundly affects plant health. At incorrect pH levels, nutrient lockout occurs—elements present in solution become chemically unavailable for plant uptake, creating deficiencies despite abundance.
I maintain a small notebook recording pH adjustments needed for my tap water, so subsequent batches require minimal tweaking.
Phase 3: Planting and Establishment
Step 6A: Starting from Seeds
For seed starting, place net cups filled with growing medium directly into jars with solution level touching the bottom of the net cup (capillary action draws moisture upward). Plant 2-3 seeds per net cup according to seed packet depth recommendations.
Cover jars loosely with plastic wrap to maintain humidity during germination. Place in warm location (70-75°F ideal) with indirect light. Most herb seeds germinate within 7-14 days.
Once seedlings emerge, remove plastic wrap and move to bright location. Thin to strongest seedling per net cup once plants develop true leaves (the second set of leaves appearing after initial seed leaves).
Step 6B: Starting from Cuttings
For instant gratification, start with herb cuttings. Select healthy stems 4-6 inches long from established plants. Cut just below a leaf node using clean, sharp scissors. Remove lower leaves, leaving only top 2-3 leaf sets.
Place cutting through net cup so stem reaches water while leaves remain above. The clay pebbles support the cutting upright. Within 7-14 days, white roots emerge from nodes.
This method particularly suits basil and mint, which root readily in water. I often rescue supermarket herb bundles this way—using stems for cooking while rooting the remainder for ongoing production.
Step 7: Water Level Management
Initially, maintain water level so it just touches the net cup bottom. As roots develop and extend into solution, lower water level gradually, leaving upper roots exposed to atmospheric oxygen.
The ideal final state: roots extend into solution for nutrient/water access, while significant root mass remains above water level breathing air. This dual-zone system provides both hydration and oxygenation.
Monitor water level daily initially, then every few days once plants establish. Water evaporates and plants consume it, requiring periodic addition. Top off with plain water between nutrient solution changes—as water evaporates, nutrient concentration increases, so adding more nutrient solution causes nutrient buildup.
Phase 4: Placement and Light Optimization
Step 8: Selecting Growing Location
Herbs require 6-8 hours of direct sunlight daily for robust growth and essential oil production (the aromatic compounds giving herbs their characteristic flavors and fragrances).
South-facing windows provide maximum natural light in Northern Hemisphere; north-facing windows offer consistent but dimmer light. East windows give gentle morning sun, west windows provide intense afternoon light.
I arrange my mason jar herb garden on a windowsill, rotating jars 180 degrees every few days to ensure even growth and prevent plants from leaning dramatically toward light.
Step 9: Supplemental Lighting (If Needed)
Winter’s short days or low-light apartments may require supplemental lighting. LED grow lights designed for plants provide red and blue wavelengths that chlorophyll absorbs most efficiently.
Position lights 6-12 inches above plants, running 12-16 hours daily. Modern LED grow lights consume minimal electricity—leaving them on continuously costs mere pennies weekly while ensuring year-round herb production.
I use clip-on LED grow lights from online retailers, spending approximately $25 for units that have served reliably for years. This investment pays for itself within months through eliminated grocery store herb purchases.
Advanced Techniques and Optimization Strategies
Once your basic system flourishes, numerous refinements enhance productivity, aesthetics, and the depth of your horticultural practice.
Continuous Harvest Methods
The beauty of culinary herbs lies in their response to strategic harvesting—proper pruning encourages bushier, more productive growth rather than diminishing plants.
The Pinching Technique: For basil, pinch out growing tips (the top set of leaves) just above a leaf node once plants reach 6 inches tall. This removes apical dominance (the top growth’s hormonal suppression of side shoots), stimulating lateral branching. Two stems replace each one pinched, exponentially increasing productivity.
Harvest in morning after dew dries but before day’s heat intensifies—essential oils concentrate during cool night hours. Never remove more than one-third of plant material at once; overharvesting stresses plants and slows recovery.
For mint and oregano, prune stems just above leaf nodes, encouraging branching. These herbs tolerate aggressive harvesting, often growing more vigorously after heavy pruning.
Nutrient Solution Management
Complete Water Changes: Every 2-3 weeks, discard old nutrient solution completely (excellent for watering houseplants or outdoor gardens—don’t waste these nutrients). Rinse jars, removing any algae or mineral deposits. Refill with fresh nutrient solution at appropriate strength.
This prevents nutrient imbalance. As plants grow, they consume nutrients at different rates—nitrogen disappears faster than phosphorus, for example. Over time, solution composition drifts from optimal ratios despite topping off. Complete changes reset the balance.
Monitoring Plant Communication: Plants communicate needs through visual signals. Yellowing lower leaves suggest nitrogen deficiency. Purple-tinged stems indicate phosphorus insufficiency. Pale new growth points to iron deficiency. Learning this language transforms you from passive tender to active partner in your plants’ health.
Temperature and Humidity Optimization
Herbs generally prefer temperatures between 65-75°F with moderate humidity (40-60%). Windowsill gardens experience temperature fluctuations—cold at night near glass in winter, hot during summer afternoons.
Buffer temperature swings by moving jars slightly back from windows on extremely cold nights. In summer, afternoon shade prevents overheating that can stress plants or encourage algae blooms in warmed water.
Group multiple mason jars together. Plants transpire (release water vapor), creating localized humidity that benefits neighbors—a miniature plant community supporting collective wellbeing.
Aesthetic Refinement
Mason jar gardens become living art through thoughtful arrangement and styling.
Tiered Displays: Use small risers, wooden blocks, or stacked books to create height variations, allowing each jar adequate light while creating visual interest.
Decorative Elements: Add small stones, marbles, or colored glass gems to the top layer of growing medium for aesthetic polish.
Seasonal Rotation: Grow basil and cilantro during warm months, then shift to parsley and thyme for cooler periods, aligning with natural growing preferences while maintaining year-round production.
Mixed Plantings: For visual variety, create jars with multiple herb species if their requirements align. Basil and parsley share similar needs; mint and oregano pair well. Avoid mixing aggressive growers like mint with slower species that it will overwhelm.
Troubleshooting Common Challenges: Navigating the Learning Curve
Even experienced hydroponic gardeners encounter obstacles. Understanding common problems and their solutions accelerates mastery while preventing discouragement.
Algae Overgrowth
Symptoms: Green or brown slimy growth on jar interiors, coating roots, or forming mats on water surface. Water appears cloudy or greenish.
Causes: Light reaching nutrient solution promotes photosynthetic algae proliferation.
Solutions: Improve light blocking on jar exteriors. Add hydrogen peroxide (1 tablespoon per gallon of nutrient solution) to kill existing algae—this oxidizes organic matter without harming plants. Perform complete water change, scrubbing jar interior with bottle brush. Prevent recurrence through complete light exclusion.
Small algae amounts are harmless, but heavy colonization competes with plants for nutrients and oxygen while creating biofilms that clog roots.
Root Rot
Symptoms: Roots turn brown or black, develop slimy texture, emit foul odor. Plant wilts despite adequate water. Growth stalls or reverses.
Causes: Insufficient oxygen in root zone, pathogenic bacteria or fungi proliferating in anaerobic conditions, or excessively warm water temperatures (above 75°F) that reduce dissolved oxygen capacity.
Solutions: Lower water level immediately, exposing more roots to air. Add air stone for continuous oxygenation. Cool water if overheated. In severe cases, trim affected roots with sterile scissors, replace nutrient solution completely, and add beneficial bacteria products (like Hydroguard) that colonize roots and outcompete pathogens.
Prevention proves easier than cure: maintain water temperatures below 72°F, ensure adequate oxygenation, and never let water level submerge entire root mass.
Nutrient Deficiencies
Nitrogen Deficiency: Lower leaves yellow uniformly from tips downward, plant exhibits pale green overall color, slow growth
Solution: Increase nutrient solution strength slightly, ensure pH allows nitrogen uptake (below 7.0)
Iron Deficiency: New growth emerges pale yellow or white while veins remain green (interveinal chlorosis)
Solution: Check pH—iron becomes unavailable above 6.5. Adjust downward. Consider adding chelated iron supplement.
Phosphorus Deficiency: Dark green leaves with purple or red tints, stunted growth, delayed maturity
Solution: Verify pH range (5.5-6.5 optimal for phosphorus availability), increase solution strength if using reduced concentration
Calcium Deficiency: Distorted new growth, brown leaf tips, stunted development
Solution: Most complete hydroponic nutrients contain adequate calcium, but hard water contains supplemental calcium that soft or filtered water lacks. Add calcium-magnesium supplement if using soft water.
Slow or Stunted Growth
Causes: Multiple factors can limit growth—insufficient light (most common), incorrect pH locking out nutrients, water temperature extremes, inadequate nutrients, or poor genetics (weak seeds/cuttings).
Diagnostic Protocol:
- Verify 6+ hours direct sunlight or equivalent supplemental lighting
- Test and adjust pH to 5.5-6.5 range
- Confirm nutrient solution at appropriate strength
- Check water temperature (65-72°F ideal)
- Examine roots—white and branching indicates health; brown or sparse suggests problems
Address each factor systematically. Growth issues often result from multiple minor problems compounding rather than single dramatic failure.
Pests in Hydroponic Systems
Soil pests cannot survive in hydroponic systems, but occasionally aphids, whiteflies, or fungus gnats appear—usually introduced on cuttings or flying in from outdoors.
Prevention: Inspect any cuttings from outside sources carefully before introduction. Screen windows if possible during growing season.
Treatment: Remove visible pests by hand or with strong water spray. For persistent infestations, insecticidal soap (safe for food crops) controls most soft-bodied insects. Neem oil provides both pest control and mild fungicidal properties.
The enclosed indoor environment and absence of soil dramatically reduces pest pressure compared to traditional gardening—a significant advantage of hydroponic cultivation.
Maximizing Your Harvest: Long-Term Success and Expansion
Once your initial mason jar herbs thrive, numerous pathways extend and deepen your hydroponic practice.
Propagation and Succession Planting
Herbs are remarkably generous—a single plant produces dozens of cuttings over its lifetime. As plants mature, take cuttings to start new jars, maintaining continuous production while refreshing aging plants.
Create succession plantings: start new jars every 2-3 weeks. This staggers maturation, ensuring constant harvest rather than feast-or-famine cycles.
Share your abundance. Gift rooted cuttings to friends, spreading both plants and knowledge. There exists particular satisfaction in knowing multiple kitchens enjoy herbs descended from your original jars.
Culinary Integration and Preservation
Fresh herbs transform cooking from routine to inspired. With continuous windowsill production, you can:
- Add fresh basil to morning eggs
- Muddle mint into afternoon tea or evening cocktails
- Garnish soups and salads with just-picked herbs
- Create fresh pesto, chimichurri, or herb butter
- Experiment with herb combinations impossible to find commercially
When production exceeds immediate consumption, preserve surplus through:
Freezing: Chop herbs finely, pack into ice cube trays, cover with olive oil or water, freeze. Pop cubes directly into cooking.
Drying: Hang stems in warm, dark, well-ventilated location until crispy-dry. Store in airtight containers away from light.
Infusing: Create herb-infused oils, vinegars, or syrups that capture summer’s essence for winter enjoyment.
Scaling Up: From Jars to Systems
Mason jar success often inspires expansion into larger hydroponic systems:
Kratky Method at Scale: Same passive principles applied to 5-gallon buckets growing tomatoes, peppers, or lettuce
Deep Water Culture (DWC): Adding air pumps and stones for continuous oxygenation, supporting larger, faster-growing plants
Nutrient Film Technique (NFT): Shallow channels where thin nutrient film flows continuously over roots—commercial production method adaptable for home use
Ebb and Flow Systems: Periodic flooding and draining creates optimal oxygen-water balance for diverse crops
Each method builds on principles learned through mason jar gardening—the fundamental understanding of plant nutrition, pH management, and system maintenance transfers directly to more complex setups.
The Philosophical Dimension: Growing as Practice
After months of tending mason jar herbs, the practice evolves beyond vegetable production into something approaching meditation. The daily check-in—observing growth, adjusting water, harvesting leaves—creates rhythm and routine that grounds you in natural cycles despite urban environments.
You witness the miracle of metabolism made visible: sunlight transformed into green tissue, water and dissolved minerals reorganized into aromatic compounds, energy captured and stored in chemical bonds you’ll later release through cooking’s heat.
This connection to biological processes, this partnership with living systems, satisfies something deep and ancient in human nature. We are, after all, the agricultural ape—the species that learned to cultivate plants, an innovation as defining as tool use or language.
Your windowsill garden, modest though it may be, represents participation in that ten-thousand-year tradition of humans and plants growing together in mutually beneficial relationship.
Conclusion: The Living Kitchen
The mason jars lined on your windowsill, their roots suspended in nutrient-rich water like pale underwater forests, their leaves reaching toward light with green confidence—these aren’t merely herb gardens. They’re demonstrations of possibility, proofs that even in apartments far from fields and farms, we can maintain vital connections to growing things.
The journey from first setup to thriving herb garden typically spans 3-4 weeks—quick enough to maintain motivation, long enough to develop care routines that become reflexive. Your initial uncertainty gives way to confidence born of daily observation and accumulating knowledge.
The herbs you harvest didn’t travel across continents or sit in plastic clamshells for days. They grew in your presence, under your care, through your attention. That distinction—between product purchased and living companion tended—matters more than initial convenience might suggest.
Begin today. Gather jars, nutrients, seeds. Set aside space where morning light reaches. In weeks, you’ll pinch fresh basil for caprese salad, muddle mint for mojitos, scatter cilantro over tacos—all from plants you germinated, nurtured, and harvested. The satisfaction compounds with each use, each successful crop, each moment of connection with the quiet miracle of growth occurring on your kitchen counter.
Your mason jar hydroponic garden awaits. The transformation from empty glass to living ecosystem to plate-ready herbs is simpler than you imagine and more rewarding than mere production suggests. The plants are ready. The method is proven. Only your beginning remains.