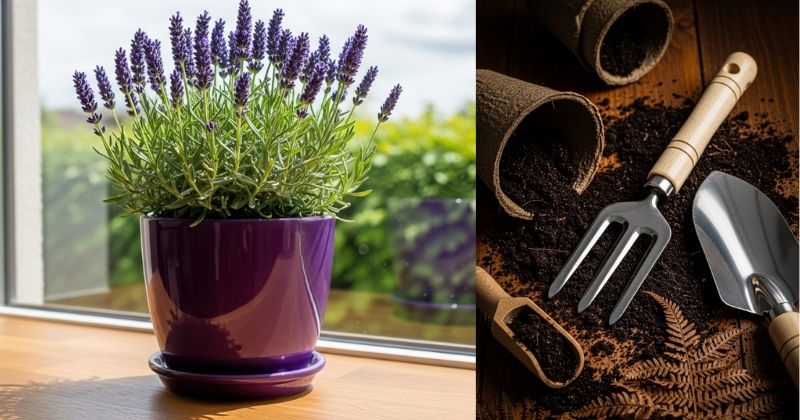
Most gardeners purchase lavender plants at nurseries, unaware that the fragrant shrub gracing their neighbor’s garden could become dozens of new plants through a propagation method so elegantly simple it seems almost too easy to be true. Growing lavender from cuttings represents not just frugal gardening but an intimate apprenticeship with botanical reproduction—a practice that transforms a single mother plant into an entire aromatic landscape while teaching profound lessons about patience, observation, and the generosity inherent in plant biology.
My own initiation into lavender propagation occurred not through deliberate study but fortunate accident—a broken stem from a prized ‘Hidcote’ plant, too beautiful to discard, tucked hopefully into sandy soil where it inexplicably rooted and thrived, eventually producing the purple-hazed hedge that now defines my garden’s southern boundary. That single successful cutting sparked an obsession with understanding why lavender propagates so readily from stem fragments, revealing secrets that most gardeners never discover despite their obvious simplicity once understood.
The Hidden Biology: Why Lavender Cuttings Root So Readily
Before we engage with practical technique, comprehending the botanical mechanisms underlying successful lavender propagation establishes a foundation that transforms mechanical rule-following into intuitive partnership with living systems.
The Cambium Layer’s Regenerative Magic
Beneath lavender’s silver-green bark lies a miraculous tissue called cambium—a thin layer of undifferentiated cells possessing extraordinary regenerative capacity. When you take a cutting and provide appropriate conditions, these cambium cells receive biochemical signals indicating severance from the parent root system. In response, they transform into root initials—specialized cells that differentiate into the complex tissues comprising functional roots.
This transformation represents one of nature’s most elegant survival strategies. In Mediterranean habitats where lavender evolved, branches frequently break under wind stress or animal browsing. Those plants whose severed stems could generate new root systems survived to reproduce; millennia of selection pressure favored genotypes with robust vegetative reproduction capabilities. We exploit this ancient adaptation when propagating lavender from cuttings.
Softwood versus Hardwood: Understanding Stem Maturity
Lavender stems exist along a maturity continuum from tender, flexible new growth (softwood) to rigid, woody older stems (hardwood). Each stage possesses distinct characteristics affecting rooting success.
Softwood cuttings—taken from current season’s growth in late spring or early summer—root most rapidly due to high cambium activity and elevated natural auxin levels (plant hormones that stimulate root formation). However, their tender nature makes them vulnerable to wilting and fungal attack, requiring careful environmental management.
Semi-hardwood cuttings—taken in late summer or early autumn from partially matured stems—offer optimal balance. These cuttings possess sufficient vigor to root reliably while displaying greater resilience than softwood, tolerating minor environmental fluctuations without catastrophic failure. This timing represents the sweet spot that most experienced propagators target.
Hardwood cuttings—taken during winter dormancy from fully mature wood—root most slowly but demonstrate superior survival rates once established, as their woody structure resists dessication and damage. This method suits patient gardeners willing to wait months for visible root development.
The Timing Alchemy: When to Take Lavender Cuttings
In temperate climates, late summer through early autumn (August through September) provides ideal conditions for lavender propagation. The mother plant has accumulated peak vigor from summer photosynthesis while cooler temperatures reduce moisture stress on cuttings. Soil remains warm from summer heat, encouraging rapid root development even as air temperatures moderate.
Spring propagation (April through May) works equally well in mild climates, capitalizing on the surge of growth hormones as plants break dormancy. Avoid midsummer when heat stress challenges both mother plants and tender cuttings, and winter when cold soil temperatures inhibit root formation regardless of cutting quality.
The Elegant Simplicity: Step-by-Step Lavender Cutting Propagation
This method strips away unnecessary complexity, focusing on the essential elements that ensure consistent success even for absolute beginners.
Materials Required: The Minimal Toolkit
The profound beauty of this technique lies in its accessibility—no specialized equipment, no expensive rooting hormones, no elaborate misting systems. You need only:
- Sharp, clean scissors or pruning shears – dull blades crush stems rather than cutting cleanly, damaging cambium tissue and increasing infection risk
- Small pots (3-4 inches diameter) – terracotta or plastic, each with drainage holes
- Well-draining rooting medium – equal parts perlite and peat moss, or coarse sand and compost
- Optional: rooting hormone powder – accelerates root formation though lavender roots reliably without it
- Clear plastic bags or a makeshift humidity dome – maintains moisture around cuttings during the critical establishment phase
Step 1: Selecting Superior Cuttings
Choose non-flowering stems from healthy, vigorous mother plants—those displaying robust growth, vibrant foliage color, and absence of pest or disease symptoms. Avoid stems showing signs of stress: yellowing, wilting, or excessive woodiness.
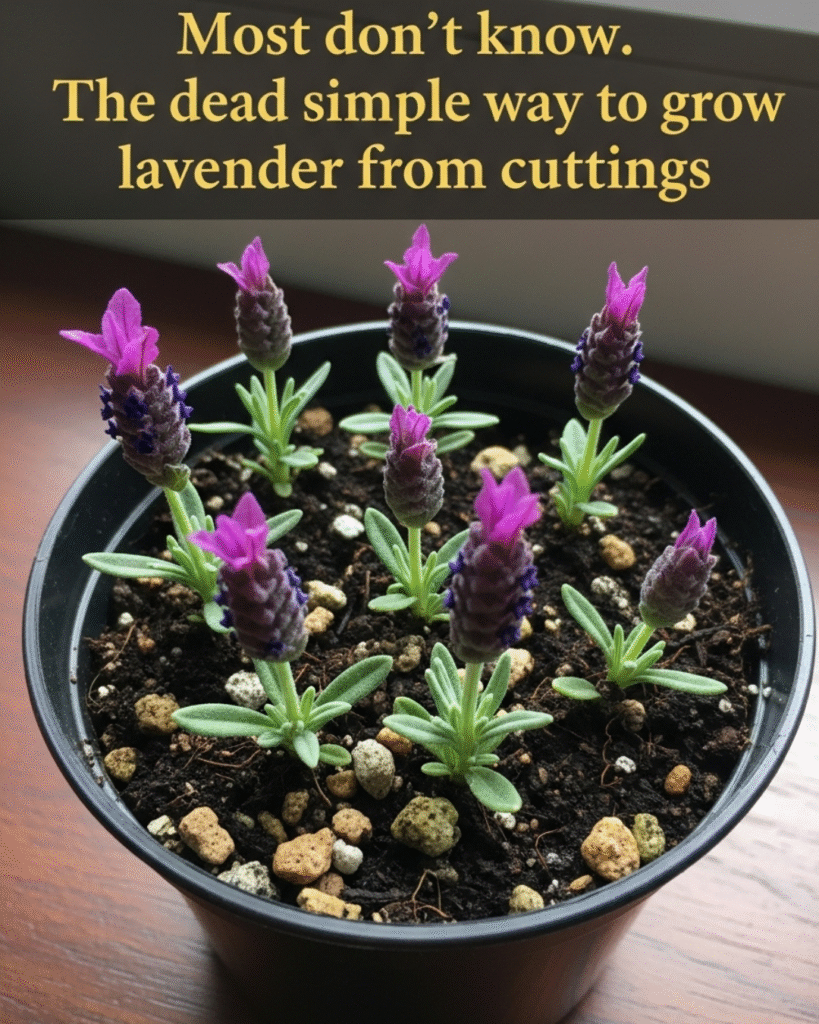
Look for stems that snap crisply when bent sharply rather than bending flexibly (too soft) or remaining rigid (too woody). This semi-hardwood stage provides optimal rooting conditions. Each cutting should measure 3-5 inches in length—long enough to insert into rooting medium while maintaining adequate foliage for photosynthesis.
Morning represents the ideal harvesting time when stems are fully hydrated from overnight moisture uptake, before afternoon heat and transpiration reduce internal water content. This hydration status improves cutting survival during the vulnerable period before new roots form.
Step 2: The Precise Cutting Technique
Using sharp, clean tools, make your cut at a 45-degree angle just below a leaf node—those small bumps on the stem where leaves emerge. This angled cut increases surface area available for root emergence while preventing the cutting from sitting flat against the pot bottom where drainage may be impaired.
The node itself contains concentrated cambium tissue and naturally elevated auxin levels, making it the optimal location for root initiation. Some propagators cut directly through the node; others cut just below it—both approaches work reliably with lavender’s forgiving biology.
Step 3: The Preparation Ritual
Strip leaves from the lower two-thirds of each cutting, leaving only the top cluster of foliage. This leaf removal serves multiple purposes: it reduces moisture loss through transpiration when the cutting lacks roots to replace lost water; it ensures buried stem portions don’t have decomposing leaf material that could harbor fungal pathogens; and it exposes additional cambium surface area for root emergence.
If using rooting hormone (optional but beneficial), dip the cut end into the powder, tapping gently to remove excess. Natural auxins in lavender make hormone treatment unnecessary for rooting success, but it does accelerate root formation by 1-2 weeks—meaningful if you’re propagating for sale or need mature plants by a specific date.
The often-overlooked secret: Many propagators wound their cuttings by scraping away a thin strip of bark from the bottom inch of stem, exposing the cambium layer directly. This wounding triggers enhanced root production through elevated auxin synthesis at the injury site—a technique that can double rooting rates though it introduces additional infection risk requiring scrupulous cleanliness.
Step 4: The Planting Meditation
Fill small pots with your rooting medium, moistening it thoroughly until water drains freely from the bottom. The medium should feel uniformly damp—like a wrung-out sponge—without being waterlogged.
Using a pencil or dibber, create a planting hole approximately 2 inches deep. Insert your prepared cutting into this hole, firming the medium gently around it to eliminate air pockets while avoiding excessive compression that restricts root growth. The cutting should stand upright without support, with approximately one-third of its length buried in medium.
Space multiple cuttings so leaves don’t touch—overlapping foliage creates humid microclimates ideal for fungal disease development. Label each pot with variety and date—seemingly unnecessary when you have only a few cuttings, but essential when propagating multiple cultivars whose distinctions blur in memory.
Step 5: Creating the Humidity Cathedral
Lavender cuttings lack roots to replace water lost through transpiration, making humidity maintenance critical during the 3-6 week rooting period. Create a simple humidity chamber by placing a clear plastic bag over the pot, supported by stakes or wire hoops that prevent plastic from contacting foliage.
Seal the bag loosely at the pot rim using a rubber band, creating a miniature greenhouse that maintains high humidity while allowing minimal air exchange. Alternatively, use clear plastic storage containers as improvised propagation boxes, housing multiple pots within a shared humid environment.
The condensation indicator: Adequate humidity produces visible condensation on the inside of your plastic covering—those tiny water droplets indicate air moisture levels that prevent cutting desiccation. If plastic remains completely clear, humidity is insufficient; if water streams down the sides, humidity is excessive and fungal disease risk increases. Adjust ventilation to maintain that ideal misty condensation.
Step 6: The Patience of Placement
Position your humidity-enclosed cuttings in bright, indirect light—never direct sun, which overheats the enclosed environment and cooks your cuttings within hours. An east-facing window providing gentle morning sun or a bright north exposure works perfectly.
Maintain moderate temperatures between 65-75°F (18-24°C). Excessive heat accelerates moisture loss and encourages fungal growth; excessive cold slows or stops root development. Room temperature in most homes falls naturally within this optimal range.
Water sparingly, only when the rooting medium approaches dryness. The humidity chamber dramatically reduces water needs—overwatering represents the primary cause of cutting failure, promoting rot rather than root development. Check moisture by inserting your finger into the medium; water only when the top inch feels dry.
Advanced Propagation Wisdom: Refinements That Elevate Success Rates
Once you’ve achieved basic success with the simple method, these sophisticated techniques further optimize results while revealing deeper understanding of plant propagation biology.
The Water Rooting Alternative
Some gardeners achieve remarkable success rooting lavender cuttings in plain water—a technique offering the profound satisfaction of watching roots emerge and develop through glass container walls, transforming the invisible into visible.
Select cuttings as described previously, but instead of planting in medium, suspend them in a glass of water so the bottom inch of stem submerges while foliage remains above the waterline. Position in bright, indirect light, changing water every 3-4 days to prevent bacterial growth.
Roots typically appear within 2-3 weeks, growing as white, hair-like structures from the submerged stem. Once roots measure 1-2 inches long, transplant carefully into potting mix, treating these water-grown roots gently as they adapt to soil conditions.
The water rooting caveat: While visually compelling and surprisingly successful, water-rooted lavender sometimes struggles during soil transition, as water roots differ structurally from soil roots. Success rates ultimately prove comparable to direct soil rooting, making this primarily an aesthetic choice for those who find beauty in observing root development.
The Mist Propagation System
Professional growers often employ automated misting systems that spray fine water droplets over cuttings at regular intervals, maintaining the humid microclimate essential for rooting while ensuring excellent air circulation that prevents fungal diseases.
Home gardeners can approximate this approach using simple hand-spray bottles, misting cuttings 2-3 times daily if growing without enclosed humidity chambers. This labor-intensive method works beautifully in humid climates where enclosed chambers risk excessive moisture, less well in arid regions where frequent misting can’t compensate for relentless dry air.
The Seasonal Timing Refinement
While late summer remains the conventional wisdom for lavender propagation, I’ve discovered that timing flexibility extends further than most guides suggest. In Mediterranean climates (zones 8-10), successful propagation occurs nearly year-round excluding only midwinter and midsummer extremes. In cold-winter regions (zones 5-7), spring and early summer cuttings establish more successfully than fall propagation, which leaves young plants vulnerable during their first winter.
Experiment with timing in your specific microclimate—every garden possesses unique characteristics that make rigid timing advice less relevant than responsive observation and willingness to adapt.
The Mother Plant Health Imperative
Cutting success depends profoundly on mother plant vigor—stressed, nutrient-deficient, or diseased parent plants produce cuttings with compromised rooting capacity regardless of technique perfection. Maintain your lavender stock plants through appropriate pruning (removing spent flowers and woody stems), adequate but not excessive water and nutrition, and vigilant pest and disease management.
Consider establishing dedicated mother plants specifically for propagation—specimen lavenders maintained in optimal conditions, never harvested aggressively for flowers or essential oils, existing solely to provide superior cutting material. This professional approach ensures consistent propagation success year after year.
Troubleshooting: When Cuttings Fail to Thrive
Even experienced propagators encounter occasional failures—learning to diagnose and correct problems transforms frustration into deepened understanding.
Cuttings Wilt Despite Humid Conditions
Diagnosis: Insufficient humidity, excessive transpiration, or fungal wilt pathogens attacking the stem.
Solution: Increase humidity by sealing plastic more completely or misting more frequently. Ensure cuttings aren’t in direct sun or excessive heat. If wilting persists despite adequate humidity and appropriate temperature, suspect fungal infection—discard affected cuttings, sterilize tools and pots, and start fresh with new material and clean supplies.
Cuttings Develop Mold or Rot
Diagnosis: Excessive moisture, inadequate air circulation, or contaminated rooting medium.
Solution: Reduce watering frequency, improve ventilation by opening plastic coverings slightly or for periodic airing, and ensure rooting medium drains freely. Preventively, dip cutting ends in cinnamon powder (natural antifungal) before planting, or use sterile, soilless rooting medium rather than garden soil which harbors pathogens.
No Root Development After Six Weeks
Diagnosis: Cutting taken from inappropriate stem maturity, cold rooting medium temperatures, or inadequate auxin levels.
Solution: Verify bottom heat—place pots on warming mats or atop refrigerators where motor warmth raises medium temperature to 70-75°F, accelerating root initiation. Try rooting hormone on your next batch. Most importantly, ensure you’re using semi-hardwood cuttings rather than either fully green or completely woody stems.
Roots Form But Cuttings Die After Transplanting
Diagnosis: Transplant shock from abrupt environmental change or damaged roots during transplanting.
Solution: Harden off rooted cuttings gradually by increasing ventilation and reducing humidity over 7-10 days before transplanting to final containers or garden locations. Handle roots extremely gently during transplant, disturbing them minimally. Water thoroughly after transplanting and maintain consistent moisture (not waterlogged) until new growth signals establishment.
From Cutting to Garden: Establishing Your Lavender Legacy
Successfully rooted cuttings represent only the beginning of your lavender journey—these young plants require thoughtful care as they mature into the aromatic shrubs you envision.
The First Winter Protection
Newly propagated lavender plants, particularly those rooted in late summer or fall, benefit from winter protection during their first season. In cold climates, overwinter rooted cuttings in a cold frame, unheated greenhouse, or bright indoor location rather than planting directly in the garden where harsh conditions might overwhelm immature root systems.
Spring planting—after all frost danger passes and soil warms—allows young lavender plants an entire growing season to establish before facing their first outdoor winter. This patient approach dramatically improves survival rates compared to rushing vulnerable young plants into challenging conditions.
Transplanting to Final Locations
When roots fill the small propagation pots (typically 3-4 months after rooting), transplant to 6-inch pots or directly into garden beds if conditions permit. Lavender demands well-drained soil—heavy clay or poorly drained sites inevitably lead to root rot and plant death regardless of how carefully you propagated.
Amend heavy soils generously with coarse sand and gravel, creating raised beds if necessary to ensure water never pools around lavender roots. Full sun exposure (minimum six hours daily, preferably eight to ten) remains non-negotiable for healthy growth and abundant flowering.
Space plants 18-24 inches apart in garden beds, allowing for mature size while ensuring adequate air circulation. Lavender planted too densely grows leggy and develops fungal diseases in the humid, stagnant air between crowded stems.
The First-Year Pruning Discipline
During their first season, newly transplanted lavender cuttings focus energy on root system development rather than flowering. Remove any flower spikes that appear during this establishment year—a difficult sacrifice that pays long-term dividends through stronger, more productive mature plants.
In late summer of the first year, lightly prune plants to encourage bushier growth, cutting stems back by one-third but never into woody older growth which doesn’t regenerate reliably. This modest pruning stimulates branching, creating the dense, mounding form characteristic of well-grown lavender.
Building Your Lavender Collection
Once you’ve mastered basic propagation, the temptation to expand your collection becomes irresistible. Explore beyond common ‘Hidcote’ and ‘Munstead’ varieties to discover the remarkable diversity within Lavandula species and cultivars:
English lavender (Lavandula angustifolia): Hardy to zone 5, with pure lavender fragrance and compact growth—ideal for cold-winter climates.
French lavender (Lavandula dentata): Tender perennial with fringed flowers and strong camphor notes—stunning but requiring zone 8+ or container culture with winter protection.
Spanish lavender (Lavandula stoechas): Distinctive topped flower spikes, heat tolerant but less cold hardy—perfect for hot-summer regions.
Lavandin (Lavandula x intermedia): Vigorous hybrid producing abundant flowers for dried arrangements and essential oil production—the commercial lavender fields of Provence.
Each variety roots readily from cuttings using the techniques described, allowing you to build a diverse lavender collection from minimal initial investment—a single plant of each variety becoming dozens through successive propagation cycles.
Conclusion: The Gift That Multiplies
Growing lavender from cuttings represents more than frugal gardening or practical propagation skills—it connects you to an ancient lineage of gardeners who understood that plants give themselves freely to those who learn their language, who observe their rhythms, who partner with rather than dominate living systems.
That single mother plant gracing your garden or balcony contains within its stems the potential for dozens, even hundreds of offspring—an aromatic hedge, a fragrant pathway, gifts for friends, contributions to community gardens, or simply the profound satisfaction of mastering a skill most gardeners never discover despite its elegant simplicity.
Begin today with a few experimental cuttings, accepting that some may fail as you calibrate technique to your specific conditions. Those that succeed will teach you more than any guide can convey, developing your intuition about moisture levels, cutting maturity, and that indefinable sense of when conditions align perfectly for root formation.
Your lavender legacy awaits—dozens of purple-hazed plants emerging from those first tentative cuttings, each one carrying forward the genetic heritage of that original mother plant while establishing its own presence in the world. The dead simple method awaits your discovery, ready to transform your relationship with lavender from grateful recipient to active propagator, from garden consumer to plant multiplier.