
Burn marks on pots and pans can make even the cleanest kitchen feel neglected. If you’ve ever stared at stubborn black stains and thought your cookware was ruined, this simple method may change everything. Using cream of tartar, a gentle yet powerful pantry ingredient, you can lift burn marks without scratching, harsh chemicals, or hours of scrubbing. This guide shows you exactly how to restore your pots safely, affordably, and with confidence.
Why Burn Marks Are So Hard to Remove
Burn marks form when food residue overheats and bonds tightly to metal surfaces. Over time, heat causes sugars and proteins to carbonize, creating that dark, stuck-on layer that regular dish soap simply can’t break down.
Many people resort to steel wool or chemical cleaners, but those methods often:
- Scratch stainless steel and aluminum
- Strip protective finishes
- Shorten the lifespan of cookware
This is where cream of tartar shines as a safer alternative.
What Is Cream of Tartar?
Cream of tartar (potassium bitartrate) is a natural acidic powder commonly used in baking. Its mild acidity helps loosen burnt residue without damaging metal.
Why It Works on Burn Marks
- Breaks down carbonized food
- Reacts gently with heat
- Lifts stains instead of grinding them away
What Types of Pots This Method Works On
This method is safe for most cookware, including:
- Stainless steel pots
- Aluminum pans
- Enamel-coated cookware
⚠️ Avoid using it on:
- Non-stick pans with damaged coating
- Cast iron (acid can strip seasoning)
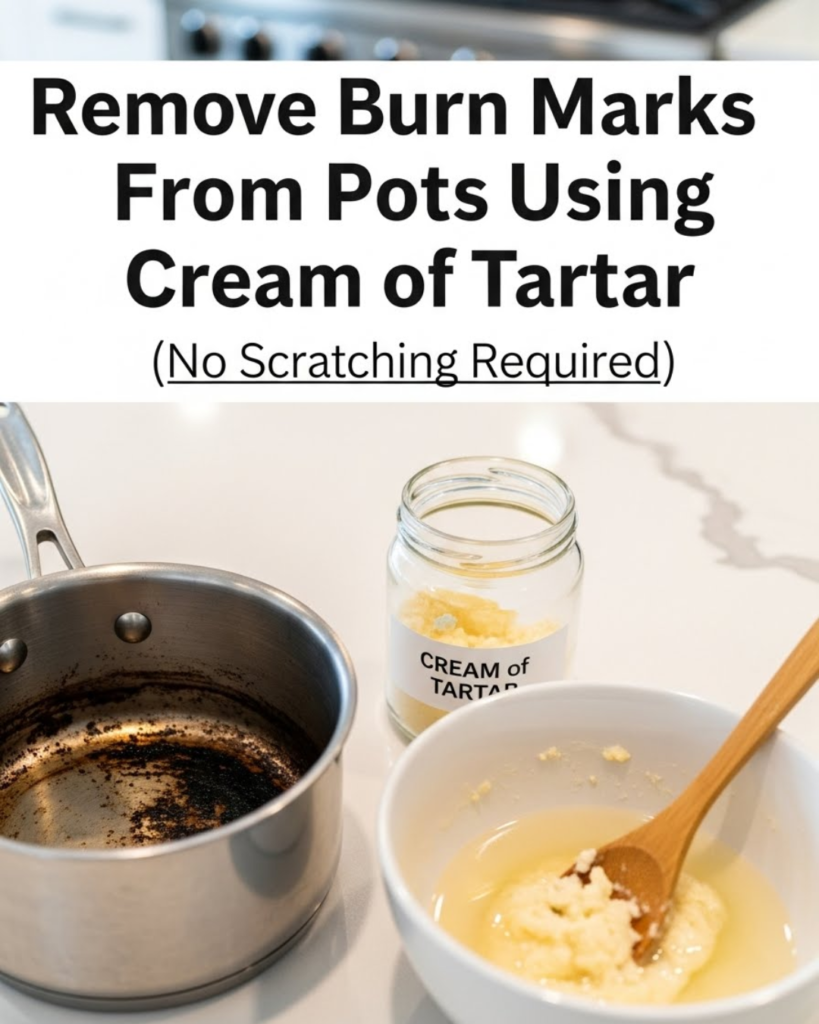
Step-by-Step: How to Remove Burn Marks Using Cream of Tartar
What You’ll Need
- 2–3 tablespoons cream of tartar
- Water
- Soft sponge or cloth
- Stove
Method 1: For Heavy Burn Marks (Best Results)
- Sprinkle cream of tartar directly over the burned area.
- Add just enough water to form a thin paste.
- Place the pot on the stove over low heat.
- Simmer gently for 5–10 minutes.
- Turn off heat and let it cool slightly.
- Wipe clean with a soft sponge.
Most burn marks lift easily without pressure.
Method 2: For Light Stains
- Make a paste with cream of tartar and water.
- Apply to the stain.
- Let sit for 20–30 minutes.
- Wipe clean.
Pro Tips for Best Results
Use Warmth, Not Force
Heat activates the cream of tartar, allowing it to loosen residue naturally.
Don’t Let It Boil Dry
Always keep liquid in the pot to avoid new burn marks.
Repeat if Needed
Old stains may need a second round — patience beats scratching.
Common Mistakes (and How to Avoid Them)
Using Abrasive Tools
Steel wool defeats the purpose. Stick to soft sponges.
Too Much Heat
High heat can bake stains deeper. Low and slow wins here.
Skipping Rinse
Always rinse thoroughly to prevent residue buildup.
How This Compares to Other Cleaning Methods
Cream of tartar is:
- ✔️ Less abrasive than baking soda
- ✔️ Safer than oven cleaner
- ✔️ Cheaper than specialty cookware products
It’s also odor-free and food-safe, making it ideal for everyday kitchens.
Extra Uses for Cream of Tartar in the Kitchen
If you keep it on hand, you can also use it to:
- Clean coffee pots
- Polish stainless steel sinks
- Remove rust stains
- Stabilize whipped egg whites
(Internal linking opportunities: natural kitchen cleaners, DIY cookware care, how to clean stainless steel, eco-friendly cleaning hacks)
How to Keep Burn Marks From Coming Back
- Avoid high heat on empty cookware
- Stir frequently when cooking sugary foods
- Clean pots soon after use
- Use low to medium heat whenever possible
Small habits protect your cookware long-term.
Conclusion
Burn marks don’t mean your pots are ruined — they just need the right treatment. With cream of tartar, you can remove stubborn stains safely, affordably, and without damaging your cookware. This simple method saves money, reduces waste, and brings your kitchen tools back to life. Try it once, and you’ll never reach for harsh cleaners again.
You’ve already got the solution in your pantry — now you know how to use it.