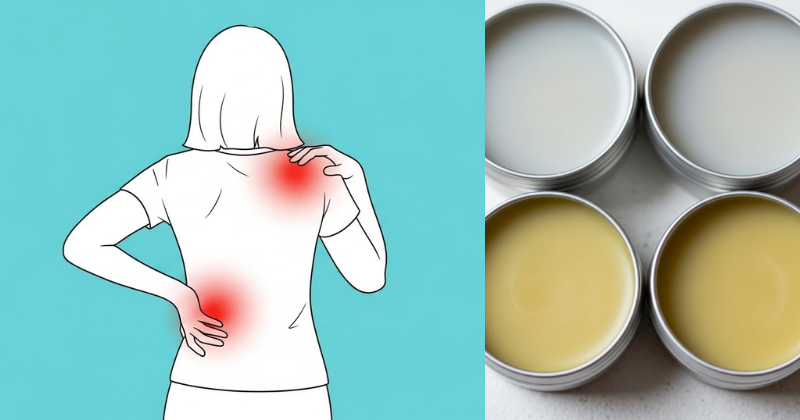
Do you often reach for costly over-the-counter creams after a tough workout or an unexpected bump? There is a powerful, natural solution that you can create right in your own kitchen! This detailed Home Tips & DIY guide provides an achievable, step-by-step guidance for making homemade arnica salve, a remedy cherished for centuries. You will discover the satisfaction and cost-saving benefits of crafting a potent topical treatment for sore muscles or bruises. Learn how to transform simple ingredients into a rich, healing balm that will help you unlock relief and soothe your body naturally.
Important Disclaimer: This article is for informational purposes only and should not replace professional advice. Arnica should never be applied to broken skin or ingested. For safety procedures, verify current best practices. Individual results may vary, and personal circumstances should always be considered when implementing any suggestions.
🌼 Section 1: Foundation First: The Power of Arnica and Salve Structure
Before beginning your DIY journey, it’s important to build confidence with basic concepts regarding Arnica and the fundamental structure of a safe, effective salve.
H3: Key Components: What is Arnica and Why Does It Help Sore Muscles or Bruises?
Arnica is a flowering perennial herb, Arnica montana, known for its anti-inflammatory and pain-relieving properties.
- Helenin: The primary active compound in Arnica is helenalin, a sesquiterpene lactone. When applied topically (and never ingested), helenalin reduces inflammation by inhibiting pro-inflammatory substances.
- Healing Bruises: For bruises, Arnica is believed to stimulate the activity of white blood cells, which help disperse trapped fluid and reduce the appearance of discoloration more quickly. It’s an incredibly potent, natural remedy for sore muscles or bruises.
- Safety Considerations: Arnica is toxic if ingested and should only be used topically on unbroken skin. If the skin is cut, abraded, or broken, the helenalin can enter the bloodstream, causing serious side effects.
H3: The Salve Structure: Oil, Wax, and Infusion
A homemade salve is a simple blend of three components, making this project achievable for beginners.
- Infused Oil (The Medicine): The carrier oil (like olive or sweet almond) acts as a solvent, drawing the medicinal compounds (helenalin) out of the dried Arnica flowers. This is the heart of your homemade arnica salve.
- Beeswax (The Thickener): Beeswax provides the necessary structure to turn the liquid oil into a semi-solid balm. It also acts as a protective occlusive barrier on the skin, sealing in the medicinal oil.
- Optional Boosters: Essential oils are added at the end for enhanced pain relief and scent.
🌿 Section 2: Step-by-Step Process: Core Methods for Making Homemade Arnica Salve
The process is broken down into two essential phases: creating the infused oil and mixing the final salve.
Phase 1: Preparing the Arnica Infused Oil (Actionable Language)
You must start with dried Arnica flowers, which can be purchased from reputable herbal suppliers.
- Gather Ingredients: $1 \text{ cup}$ of quality carrier oil (e.g., olive oil, almond oil), $1/4 \text{ cup}$ of dried Arnica flowers.
- The Double Boiler Method (Shortcut): While traditional methods take weeks, the gentle heat method is a quick practical tip. Place the dried Arnica flowers and the carrier oil in a glass jar. Place the jar in a pot with a few inches of water (a double boiler set-up). Heat on the lowest possible setting (around $100^\circ\text{F}$ to $130^\circ\text{F}$ or $40^\circ\text{C}$ to $55^\circ\text{C}$).
- Infusion: Let the oil infuse for $2 \text{ to } 3 \text{ hours}$. Timing and planning considerations: Keep the temperature low to prevent scorching the herbs or damaging the oil’s properties.
- Strain: Remove the oil from the heat. Allow it to cool slightly, then strain the oil through a fine mesh sieve lined with cheesecloth to remove all plant matter. Squeeze the cloth gently to extract every last drop of your medicinally potent oil.
Phase 2: Compounding the Salve (Core Methods)
This is the final, satisfying step where the oil transforms into a rich, thick balm.
- Measure Wax: Return the strained, Arnica-infused oil to the double boiler. Add approximately $1 \text{ ounce}$ ($2 \text{ tablespoons}$) of beeswax pellets per $1 \text{ cup}$ of oil.
- Melt and Mix: Gently heat the oil and wax together, stirring until the beeswax is completely melted and the mixture is clear.
- Test Consistency: Remove the mixture from the heat. Place a small spoon of the liquid mixture on a plate and place it in the freezer for $1 \text{ minute}$. Test the hardness. If it’s too soft, add $1/2 \text{ teaspoon}$ more beeswax. If it’s too hard, add $1/2 \text{ teaspoon}$ more infused oil.
- Add Boosters (Optional): Once the desired consistency is confirmed and the mixture is cooling (but still liquid), stir in 10-15 drops of pain-relieving essential oils like peppermint or lavender.
- Pour and Set: Pour the liquid salve mixture immediately into clean, sterilized jars or tins. Allow the salve to set completely at room temperature for several hours before capping. You have achieved your own powerful homemade arnica salve!
⚕️ Section 3: Advanced Strategies: Pro Tips for Enhanced Relief
Ready to take your homemade arnica salve to the next level? These expert-level insights and variations provide tailored relief for different types of pain.
H3: Share Expert-Level Insights: The Power of Synergistic Herbs
While Arnica is the star for sore muscles or bruises, combining it with other specific infused oils can boost the overall therapeutic effect.
- For Joint Pain: Infuse your base oil with a blend of $3/4 \text{ Arnica}$ and $1/4 \text{ St. John’s Wort}$ (Hypericum perforatum). St. John’s Wort is traditionally used for nerve pain and inflammation, providing a powerful creative solution for deep aches.
- For Deep Tissue Soreness: Use the same Arnica base but, during the melting phase, stir in $1 \text{ teaspoon}$ of Menthol Crystals (fully dissolved) before pouring. Menthol provides an intense cooling sensation that distracts from deep muscular aches.
H3: Pro Tips for Customizing the Approach
- Alternative Wax: If you prefer a vegan option, provide ways to customize approach by substituting beeswax with Candelilla wax (use about half the amount of Candelilla wax, as it has a harder set).
- Double Infusion Technique: For an extremely potent homemade arnica salve, infuse one batch of oil, strain it, and then use that already-infused oil to infuse a fresh batch of Arnica flowers. This double infusion extracts maximum helenalin, resulting in a dark, highly medicinal oil.
⚠️ Section 4: Troubleshooting: Salve Safety and Consistency
When working with medicinal herbs and heat, it’s vital to prioritize safety considerations and address potential consistency issues.
Featured Snippet Potential: “Can I use fresh arnica flowers for making salve?”
No, you should only use thoroughly dried Arnica flowers when making a homemade arnica salve. Fresh flowers contain a high amount of water, which introduces moisture into the oil. This moisture creates an environment for mold and bacterial growth, greatly reducing the salve’s shelf life and posing a safety risk. Using dried flowers is a necessary safety procedure to ensure your rich, thick formula remains stable and pure.
Practical Troubleshooting Tips
- Problem: The finished salve is too soft, like a thick oil.
- Obstacle: Not enough beeswax was used (or the wax measurement was inaccurate).
- Solution: Encouragement for Setbacks: Don’t discard it! Gently re-melt the entire batch in the double boiler and add another $1/2 \text{ teaspoon}$ of beeswax. Stir until melted, re-test the consistency in the freezer, and pour again.
- Problem: The salve feels gritty or grainy after setting.
- Obstacle: The oil cooled down too slowly after pouring, allowing the fatty acids to crystallize unevenly.
- Solution: Gently re-melt the salve until it’s fully liquid again. Place the jar in the refrigerator and stir every $5 \text{ minutes}$ until it is semi-solid, then stir one final time before letting it set completely at room temperature. The continuous stirring forces even crystallization.
- Problem: The oil appears cloudy or rancid quickly.
- Obstacle: Water contamination or improper storage.
- Solution: Ensure all tools and jars are completely dry before use. Preventive measures include storing your finished homemade arnica salve in a cool, dark cabinet or even the refrigerator to extend the potency of the infused oil.
🎯 Section 5: Maximizing Results: Next Level Pain Management
This homemade arnica salve is a phenomenal starting point. Now, let’s look at how to leverage it for the best long-term pain and injury management.
- Show How to Build Upon Basic Success: Post-Workout Recovery Protocol. Apply the salve liberally to sore muscles immediately after showering (when pores are open and receptive). Gently massage it in, focusing on large muscle groups like the quadriceps and hamstrings. This acts as preventative care against delayed onset muscle soreness (DOMS).
- Maintenance and Long-Term Considerations: The Home First Aid Kit. Keep small tins of your homemade arnica salve readily available in key areas: the bathroom cabinet for accidental bumps, your gym bag for immediate muscle strain relief, and your travel kit for minor injuries. This provides immediate, accessible language relief.
- Suggest Complementary Strategies: The R.I.C.E. Principle. Remember that topical relief is only one part of injury management. For acute injuries causing severe sore muscles or bruises, always pair the salve application with the R.I.C.E. principle: Rest, Ice, Compression, and Elevation. (Internal Linking Opportunity: See our guide on “Natural Anti-Inflammatory Foods for Quicker Recovery.”) This inspires continued growth and learning in self-care.
✅ Conclusion: Your Capability to Heal Naturally
You have successfully gained the knowledge to create your own powerful homemade arnica salve, a rich, thick formula that delivers targeted relief for sore muscles or bruises. By following this detailed, achievable, step-by-step guidance, you have harnessed the cost-saving benefits and experienced the satisfaction of completion that comes with natural DIY solutions. Always remember the crucial safety protocol: topical use only on unbroken skin! You have the capability to succeed in managing minor aches and pains with the finest ingredients from nature.
Ready to find relief? What pain-relieving essential oil will you add to your first batch of homemade arnica salve?