There is nothing more satisfying than harvesting a basket full of fragrant, fresh herbs from your garden. But what happens when you have a bumper crop of basil or sage, and you can’t use it all before it wilts? Don’t let your hard work go to waste! Mastering the different Ways to PRESERVE HERBS is the key to unlocking year-round flavor and immense cost-saving benefits. This comprehensive guide provides achievable, step-by-step guidance on the best techniques—from drying and freezing to infusing—that will transform your kitchen and maximize your garden’s potential. Get ready to discover your new favorite method for extending the life of your harvest and deepening your connection with nature.
🌿 Section 1: Foundation First: Understanding Herb Types and Timing
To achieve the best results when exploring Ways to PRESERVE HERBS, you must first build confidence with basic concepts by understanding which method works best for different types of herbs and when to harvest them.
H3: Building Confidence with Basic Concepts: Hardy vs. Tender Herbs
Different preservation methods are needed because herbs have varying water content and leaf structures.
| Herb Type | Characteristics | Recommended Preservation Methods |
| Hardy Herbs | Low water content, tough leaves, hold flavor when dried (e.g., Rosemary, Thyme, Oregano, Sage). | Drying (air or oven), Infusing in Salt/Vinegar. |
| Tender Herbs | High water content, delicate leaves, lose flavor/color when dried (e.g., Basil, Mint, Parsley, Cilantro). | Freezing (in oil or water), Infusing in Oil. |
- Encouraging Reassurance for Beginners: By matching the herb type to the correct method, you eliminate the biggest hurdle in preservation. You will quickly unlock the full potential of your garden’s output.
H3: Addressing Common Concerns: When is the Best Time to Harvest?
The flavor and potency of an herb are maximized at a specific time, and knowing this timing and planning consideration is crucial for successful preservation.
- Optimal Harvest Time: Harvest herbs just before they flower. This is when the concentration of volatile oils (which hold the flavor and aroma) is at its peak.
- The Process: Pick your herbs in the morning after the dew has evaporated but before the heat of the day has diminished the oils. Use sharp scissors or shears for a clean cut. Wash them gently only if necessary, and pat them completely dry before beginning any preservation method.
🧊 Section 2: Step-by-Step Process: Core Methods for Preservation
This section provides clear, actionable language for the three primary and most effective Ways to PRESERVE HERBS: freezing, drying, and infusing.
Step 1: Freezing (Best for Tender Herbs)
Freezing locks in the fresh flavor of tender herbs that would otherwise turn brown and tasteless if dried.
- Preparation: Wash the herbs gently (if needed) and spin or pat them completely dry. Chop the herbs finely.
- The Ice Cube Method (Actionable Language): Fill an ice cube tray about $2/3$ full with the chopped herbs.
- Choose Your Medium: Add a medium to fill the tray:
- Water: For herbs destined for soups or stews (e.g., parsley, mint).
- Olive Oil: For herbs destined for savory dishes, sauces, or sautéing (e.g., basil, cilantro).
- Practical Tips and Shortcuts: Freeze the trays overnight. Once frozen, pop the herb cubes out and transfer them to a freezer bag or airtight container. Label clearly. This saves space and prevents freezer burn.
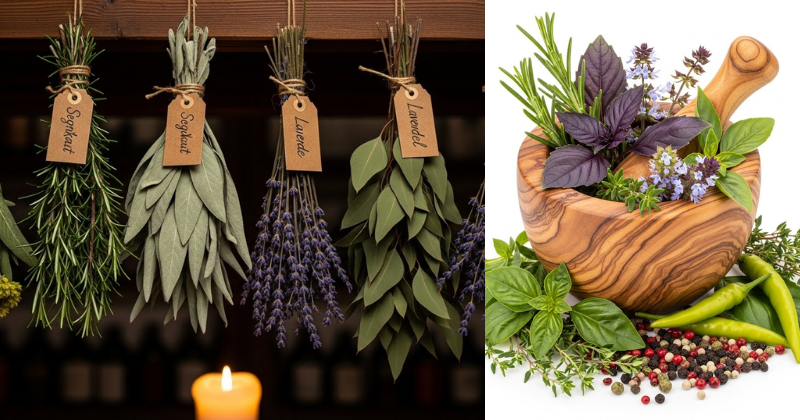
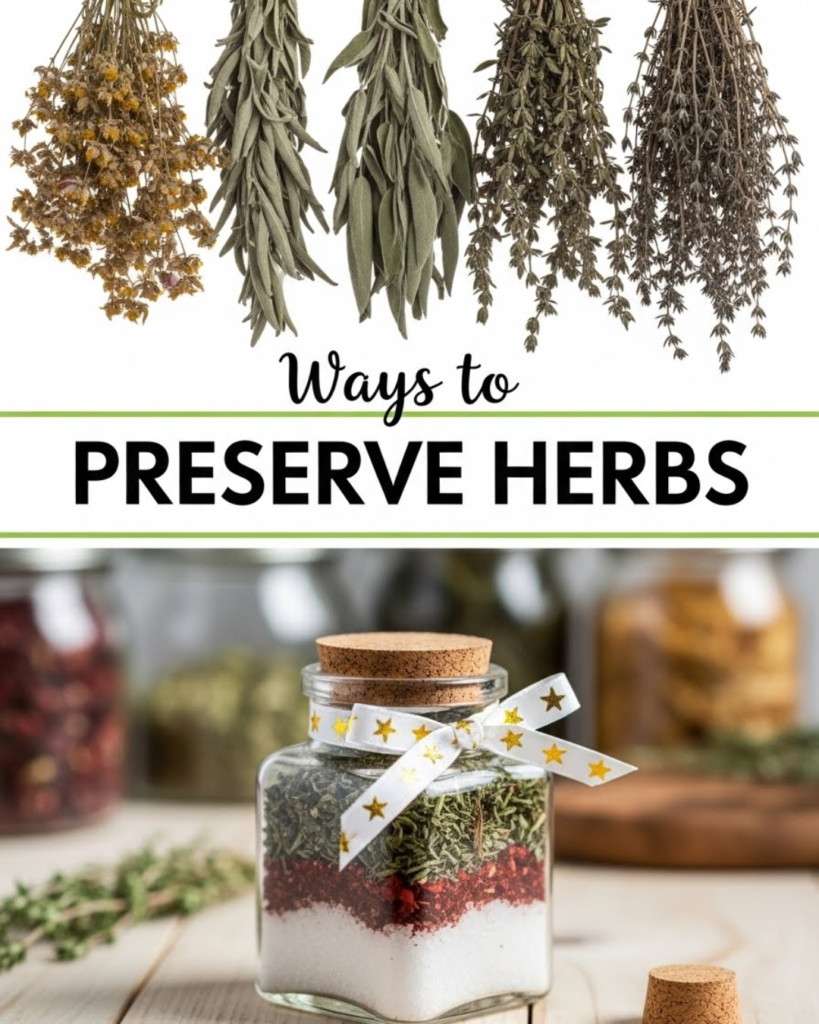
Step 2: Air Drying (Best for Hardy Herbs)
Air drying is the most traditional and simplest method for hardy herbs.
- Grouping: Gather small bunches of the stems ($4 \text{-} 6 \text{ stems}$ per bunch) and tie them together securely at the bottom with twine. (Too large a bunch traps moisture and causes mold.)
- Hanging: Hang the bunches upside down in a warm, dark, and well-ventilated area. Darkness preserves the color and flavor; ventilation prevents mold. An attic, pantry, or closet works well.
- Drying Time: Allow $1 \text{-} 2 \text{ weeks}$ for the herbs to dry completely. They are ready when the leaves crumble easily when lightly crushed.
- Storage: Remove the dried leaves from the stems, crumble them slightly, and store them in airtight glass jars away from heat and light. (Internal Linking Opportunity: Check out “DIY Spice Rack Organization Tips.”)
Step 3: Oven/Dehydrator Drying (Practical Tips and Shortcuts)
For faster results, especially if you live in a humid area where air drying is risky, use a dehydrator or a low-temperature oven.
- Oven Method: Spread the clean leaves on a baking sheet lined with parchment paper. Place in the oven at the lowest setting ($170^{\circ}\text{F}$ or less, ideally just the pilot light) and prop the oven door open slightly to allow moisture to escape. Check every $15 \text{ minutes}$; drying usually takes $1 \text{-} 2 \text{ hours}$.
🧂 Section 3: Advanced Strategies: Infusions and Compound Uses
Beyond basic drying and freezing, these expert-level insights provide luxurious and flavorful Ways to PRESERVE HERBS by infusing them into oils, salts, and sugars.
H3: Creative Solutions: Herb-Infused Oils and Vinegars
Infusing herbs into liquids is a beautiful way to customize your approach and unlock complex flavors for dressings and marinades.
- Infused Oil (Safety Considerations): Loosely fill a clean glass jar with dried hardy herbs (e.g., Rosemary, Thyme). Pour a high-quality oil (like olive oil) over the herbs until covered. Seal and place on a sunny windowsill for $2 \text{ weeks}$. Safety Consideration: Always use dried herbs for oil infusions to prevent botulism risk from residual moisture. Filter the oil through cheesecloth before storing in a cool, dark place.
- Infused Vinegar: Fill a jar with fresh, lightly bruised herbs (e.g., Dill, Tarragon). Cover with white wine or apple cider vinegar. Seal tightly and let steep for $3 \text{-} 4 \text{ weeks}$ in a cool, dark place, shaking occasionally.
H3: Encouraging Experimentation: Herb Salts and Sugars
Herb salts and sugars are fantastic cost-saving benefits and make beautiful gifts, encouraging experimentation in the kitchen.
- Herb Salt: Grind $1 \text{ part}$ dried hardy herb (Rosemary, Sage) with $4 \text{ parts}$ coarse sea salt in a food processor until the mixture is green and fragrant. Spread on a tray to air dry for $24 \text{ hours}$ to ensure no lingering moisture, then store in an airtight container.
- Herb Sugar: Best for delicate, flavorful herbs like Mint or Lavender. Blend $1 \text{ part}$ dried herb with $4 \text{ parts}$ granulated sugar. Use this in baking or for flavoring teas and lemonades.
⚠️ Section 4: Troubleshooting and Common Challenges
Even with the best intentions, preservation can face challenges like mold, loss of color, or loss of potency. Here are practical troubleshooting tips.
Featured Snippet Potential: “What is the best way to store preserved dried herbs for maximum flavor?”
The best way to store preserved dried herbs for maximum flavor is to keep them in whole leaf form until right before use. Store the whole, dried leaves in small, airtight glass jars in a cool, dark location, away from the stove or sunlight. Light, heat, and oxygen are the main enemies of potency, causing the volatile oils to degrade quickly. Properly stored dried herbs will maintain their strong flavor for six months to a year.
Practical Troubleshooting Tips (Food Safety Focus)
- Problem: Herbs are turning brown or dull after drying.
- Obstacle: Too much heat or too much direct sunlight during the drying process.
- Solution: Encouragement for Setbacks: While still usable, the flavor is diminished. Ensure your drying area is dark (using a paper bag over hanging bunches helps) or keep the oven temperature as low as possible.
- Problem: Mold appeared on the air-drying bunches.
- Obstacle: The bunches were tied too tightly, or the environment was too humid, trapping moisture.
- Solution: Preventive Measures: Use smaller bunches and ensure excellent air circulation. If humidity is high (above $60\%$), use a dehydrator or the oven method instead.
- Problem: Frozen herb cubes stick together in the freezer bag.
- Obstacle: The cubes weren’t frozen solid before being transferred to the bag.
- Solution: Ensure the cubes are completely frozen and solid (a minimum of $8 \text{ hours}$) before transferring them. A light dusting of flour on the cubes before bagging can also help prevent clumping.
📈 Section 5: Maximizing Results: Next Level Tips and Culinary Use
Once you have successfully preserved your harvest, focus on next level tips for maximizing flavor and integrating them into your sustainable lifestyle changes.
- Show How to Build Upon Basic Success: Create Custom Spice Blends. Use your individually dried herbs (Rosemary, Thyme, Oregano) to create signature blends like Italian seasoning, Herbs de Provence, or a custom poultry rub. Combining the freshest, most potent ingredients will elevate your home cooking immensely.
- Maintenance and Long-Term Considerations: Rotation and Labeling. Adopt a strict labeling system for all your preserved herbs, including the date of preservation and the method used. Dried herbs should be rotated out after one year for peak flavor; frozen herbs after $6 \text{-} 8 \text{ months}$.
- Suggest Complementary Strategies: The Herbalist’s Kitchen. Consider the wellness topics benefits of your preserved herbs. Utilize dried Mint and Lemon Balm for homemade stress-reducing teas. Use Sage for homemade cough syrups. Your preserved harvest is a potent, natural home remedy cabinet. (Internal Linking Opportunity: Read “Natural Cold and Flu Remedies You Can Make at Home.”)
✅ Conclusion: Your Capability to Master Preservation
You have successfully navigated the best Ways to PRESERVE HERBS, mastering techniques that ensure year-round flavor and minimal waste. By matching the method to the herb type and observing key safety and storage guidelines, you have proven your capability to succeed and transform your approach to your garden’s abundance. This crucial step in Gardening Topics not only saves you money but keeps the delicious, fresh tastes of summer accessible, even in the depths of winter.
Ready to start preserving your harvest? Which method—the frozen oil cubes for basil or air drying for rosemary—will you achieve first this season?