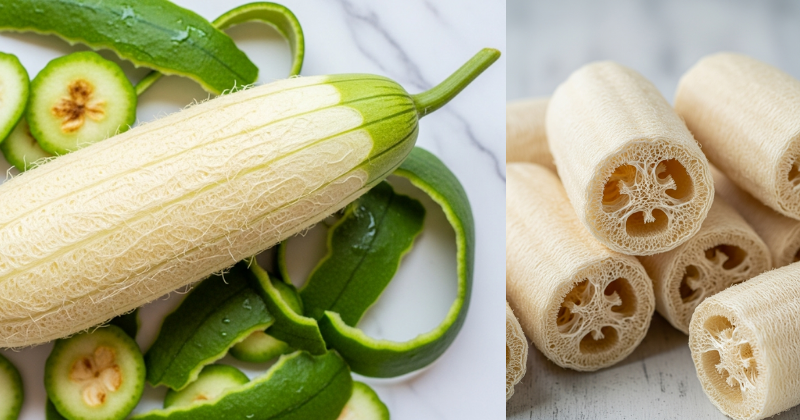
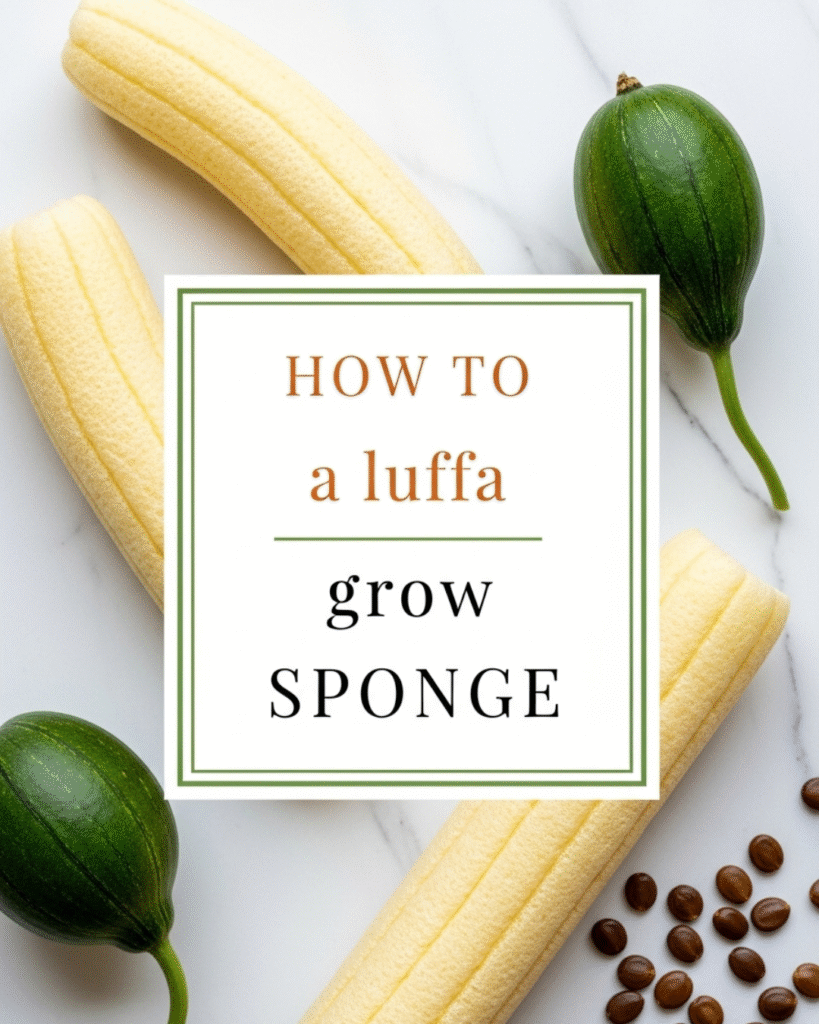
Have you ever wondered where those popular natural scrubbers come from? That soft, yet abrasive material isn’t a sea sponge—it’s actually a dried gourd! Learning how to grow a luffa sponge (Luffa aegyptiaca or Luffa acutangula) is an incredibly rewarding gardening project that merges food cultivation with sustainable home goods. Luffa, sometimes called loofah, is a vigorous annual vine that produces edible fruit when young and fiber-filled sponges when mature. This comprehensive, encouraging guide will empower you to successfully grow a luffa sponge harvest, even in shorter growing seasons. Get ready to transform your backyard into a zero-waste resource and achieve total self-sufficiency in the bath and kitchen!
☀️ Foundation First: Understanding the Luffa Gourd
Before you start planting, it’s essential to understand the life cycle of the luffa gourd. Luffa is a member of the Cucurbitaceae family, making it a close relative of cucumbers and squash. This tropical heritage is the biggest hurdle when learning how to grow a luffa sponge outside of very warm regions.
H3: The Needs of a Tropical Vine
- Long Growing Season: Luffa requires a long, hot growing season—often 150 to 200 frost-free days—to reach the mature, dried stage suitable for sponge use. This means gardeners in northern climates must start seeds early indoors.
- Vigorous Growth: Luffa is a fast and massive grower. It will quickly colonize any space you give it, emphasizing the importance of a strong vertical support system.
- Sun and Water: Like all members of the cucumber family, luffa demands full sun (at least 6-8 hours daily) and consistently moist, rich soil.
Understanding these basic concepts builds confidence. You aren’t just growing a simple plant; you’re nurturing a subtropical giant that needs space, heat, and a head start!
H3: Sourcing Seeds and Variety Selection
There are generally two types of luffa grown for sponges, and your choice can influence success in shorter seasons:
| Luffa Variety | Characteristics | Best for Gardeners |
| Smooth Luffa (L. aegyptiaca) | Longer, cylindrical fruits; softer fiber. | General purpose, easier to peel. Requires the longest season. |
| Angled Luffa (L. acutangula) | Shorter, ridge-skinned fruits; slightly firmer fiber. | Shorter season areas, often matures faster than smooth luffa. |
Always purchase fresh seeds from a reputable supplier, as seed viability drops significantly after a year or two.
🛠️ Step-by-Step Process: How to Grow a Luffa Sponge Successfully
Due to the long growing period required to grow a luffa sponge, direct sowing outdoors is only feasible in USDA Zones 9 and above. For most gardeners, starting seeds indoors is a non-negotiable step.
Core Methods: Starting and Trellising
- Start Seeds Indoors (4-6 Weeks Early): Luffa seeds have tough coats and benefit greatly from scarification and soaking.
- Scarification: Gently nick the seed coat with a nail file or sandpaper.
- Soaking: Soak the nicked seeds in warm water for 24 hours to encourage germination.
- Planting: Plant seeds 1/2 inch deep in peat pots or newspaper pots (luffa hates root disturbance) using a quality seed-starting mix. Keep the soil warm (ideally 75°F–85°F) using a heat mat if necessary.
- Harden Off: When all danger of frost is past and nighttime temperatures consistently remain above 55°F, begin hardening off your seedlings for 7-10 days before transplanting.
- Transplant and Trellis: Select the sunniest, warmest spot in your garden. Plant the seedlings carefully without disturbing the roots.
- Trellising: This is essential! Luffa vines are heavy. Install a sturdy trellis, arch, or arbor at least 6 to 8 feet tall before you transplant. Growing vertically keeps the fruit straight and prevents rot.
- Water and Fertilize: Luffa needs deep, consistent watering, especially during dry spells and when flowering. Fertilize every 4-6 weeks with a balanced organic fertilizer rich in phosphorous and potassium (the “flower and fruit” nutrients). Avoid high-nitrogen fertilizers, which only produce leaves.
✂️ Advanced Strategies: Pruning and Seasonal Harvesting
Once your luffa vine takes off, specific management techniques are required to ensure the plant directs its energy toward maturing the sponges, not just growing more vine.
H3: Pollination and Pruning for Sponge Quality
- Male vs. Female Flowers: Like squash, luffa produces separate male (appear first, short stems) and female (have a small immature fruit at the base) flowers. They rely on bees for pollination. If you notice flowers but no fruit set, you may need to hand-pollinate by gently transferring pollen from a male flower to a female flower using a small paintbrush.
- Pruning for Maturity: As the season progresses, around late summer, focus the plant’s energy on maturing the existing gourds. Pinch off all new flowers and small fruits that form late in the season. Any fruit that sets after late August in cool climates won’t have enough time to mature into a sponge before frost. You must prioritize the gourds that set earliest.
H3: Timing the Harvest for the Perfect Sponge
This is the most challenging and crucial step. You are no longer harvesting edible young fruit (which is harvested at 4-6 inches); you must wait for the gourds to completely dry out on the vine.
| Gourd Stage | Appearance | Action |
| Immature/Edible | Small, green, tender, soft skin. | You can harvest and eat these like squash! |
| Maturing | Gourd reaches full size (1-2 ft long), skin becomes tough, heavy. | Do not touch! Continue waiting for drying. |
| Sponge-Ready | Gourd turns yellow, then brown/tan. It feels lightweight and hollow. The skin is brittle. | Harvest immediately. |
In cool regions, the vine may die from frost before the luffa fully turns brown. If a hard frost is imminent and the luffa is yellow, you must cut the gourd off the vine and finish the drying process in a warm, dry, indoor location.
🛁 Processing: Peeling and Cleaning Your Homemade Luffa
The grand finale! Turning that dried gourd into a usable, beautiful sponge is the most satisfying part of the project.
Featured Snippet Potential: “How do you clean and prepare a luffa gourd into a sponge?”
To clean and prepare a luffa gourd into a sponge, first wait until the gourd is completely dry, brown, and lightweight. Next, peel the brittle outer skin off by hand (it may crackle and flake off). Shake out the seeds, then soak the fibrous sponge interior in a large bucket of water for several minutes to wash away remaining pulp. You can add a splash of bleach or vinegar to the soak water if desired, then rinse thoroughly and hang the clean sponge to dry completely before use.
Step-by-Step Processing for Zero-Waste Sponges
- Peeling the Skin: Once the gourd is fully dried (hard, brown, and hollow-sounding), gently crack and peel the outer skin, starting from the blossom end. The skin should peel away easily, revealing the fibrous network underneath.
- Seed Removal: Shake the peeled sponge vigorously to dislodge the black seeds. Keep these seeds for planting next year!
- Washing: Soak the newly exposed fiber sponge in a large bucket of water for about 15 minutes. Swish it around to remove any remaining green pulp or dried residue. You can optionally add 1/4 cup of hydrogen peroxide or white vinegar to the soaking water if you want to lighten the sponge color or ensure thorough sterilization.
- Drying: Wring out the clean sponge and hang it in a warm, airy spot (like a sunny porch or dry basement) until it is completely dry and firm, which may take 1-2 days. This is important to prevent mildew.
- Cutting and Using: Once dry, cut the long cylinder into smaller, usable pieces for bath, shower, or kitchen cleaning.
- (Internal Linking Opportunity: For more home-made cleaning supplies, see our guide on “DIY Citrus Vinegar Cleaner.”)
🐛 Troubleshooting and Maintenance
Vigorous growth also means luffa is susceptible to common cucurbit issues. Encouragement is key—setbacks happen, but solutions are always achievable!
Common Luffa Challenges
- Failure to Germinate: Luffa seeds need warmth. If they fail, your soil temperature was likely too low. Solution: Use a heat mat next time to maintain 80°F warmth, and remember to nick the seed coat before soaking.
- Powdery Mildew: This white, powdery fungus is common in late summer, especially on cucumber relatives. Prevention: Ensure good air circulation (don’t crowd the vines), and water the soil, not the leaves. Solution: Treat with a spray of 1 tablespoon of baking soda mixed with a gallon of water and a few drops of dish soap.
- Frost Risk: The biggest threat to your sponge harvest. Prevention: Start seeds early and plant in the warmest microclimate you have (against a south-facing wall). Solution: If an early frost threatens and the gourds are still green, cut them off and bring them indoors to dry in a sunny window—they may still dry out successfully.
The connection with nature emphasizes this struggle; the effort you put in to nurture and protect your vines pays off tenfold in the quality of your harvest.
💡 Conclusion: Your Sustainable Luffa Harvest
You have successfully learned how to grow a luffa sponge, turning a challenging tropical vine into a source of sustainable, zero-waste products right from your own garden. You mastered the early start, the vigorous trellising, the essential pruning, and the critical drying process.
Embrace the satisfaction of self-sufficiency. Every time you use your homegrown luffa sponge, you’ll be reminded of the capability you have to nurture life and create practical, eco-friendly goods. Unlock your garden’s potential and inspire continued growth!