
The humble sponge—that unassuming companion of sink and countertop—holds within its porous architecture a universe of possibility waiting to be reborn through your hands. Creating usable sponges transforms discarded materials into functional artistry, weaving sustainability with the deep satisfaction of crafting tools that serve your daily rituals of cleanliness and care.
This journey into sponge creation will guide you through multiple pathways of transformation, from growing your own loofah gourds to crocheting reusable kitchen companions. Each method offers its own poetry of process, its own rhythm of becoming. Whether you seek the earthy satisfaction of harvesting botanical sponges or the meditative repetition of needlework, you’ll discover that creating sponges connects you to ancient traditions of resourcefulness while honoring our planet’s fragile ecosystems.
Understanding the Soul of Natural Sponges: A Foundation in Materials
Before your hands begin their creative work, understanding the essence of what makes a sponge truly functional illuminates your path forward. A sponge exists in that liminal space between solid and void—its power lies not in what it contains, but in the negative space that allows water and air to dance through its structure.
The Architecture of Absorbency
Natural sponges derive their remarkable properties from cellulose fibers arranged in intricate networks. These plant-based structures create capillary action—the phenomenon where water travels upward through narrow spaces, defying gravity through molecular attraction. This is the secret heartbeat of every effective sponge, whether grown in a garden or crafted by hand.
Synthetic alternatives rely on polyurethane or cellulose foam, but homemade sponges embrace the honest simplicity of cotton, linen, jute, or the miraculous loofah gourd. These materials biodegrade gracefully, returning to earth rather than lingering in landfills for centuries. The choice to create your own sponges becomes an act of environmental poetry.
Three Paths to Sponge Creation
The world of DIY sponges unfolds along three distinct yet equally rewarding trajectories. Growing loofah gourds connects you to agricultural cycles and plant metamorphosis. Crocheting or knitting cotton sponges offers portable creativity and customizable texture. Upcycling old towels and fabrics transforms textile waste into scrubbing powerhouses. Each method speaks to different temperaments and resources, inviting you to choose the path that resonates with your particular rhythm of making.
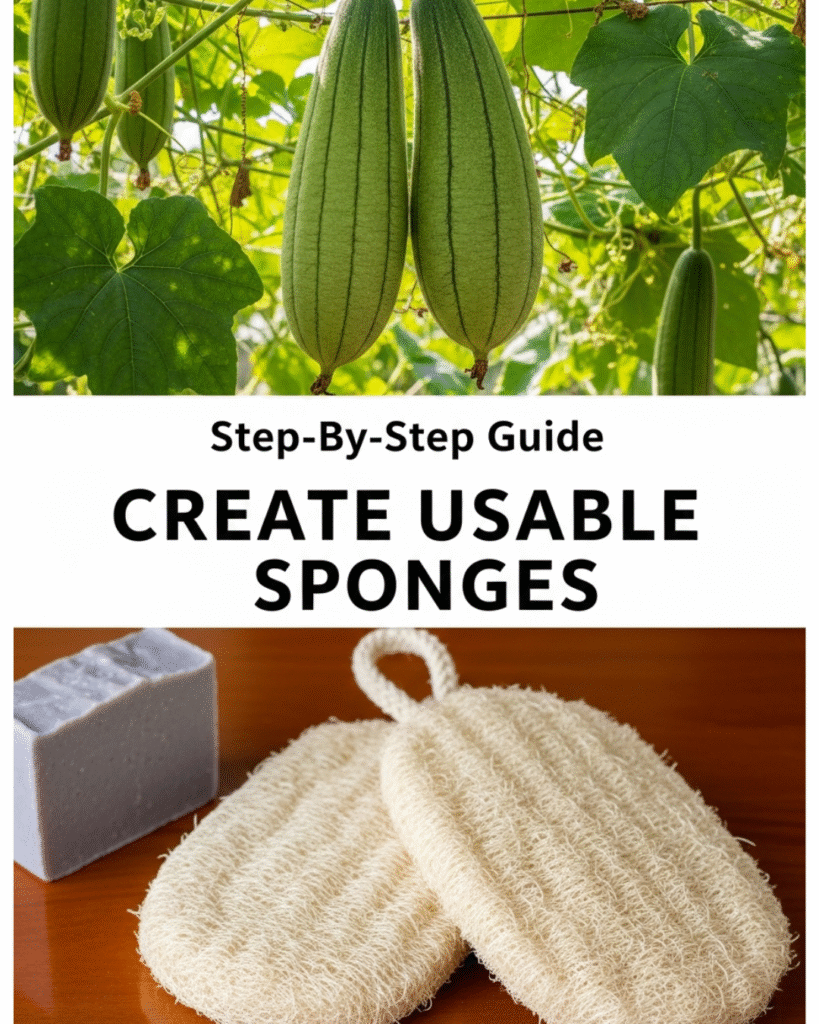
Growing Your Own Loofah Sponges: Botanical Alchemy in the Garden
The loofah sponge begins its existence as a flower—a yellow blossom reaching toward summer sun, utterly unaware of its destiny to cleanse kitchen counters and exfoliate skin. This transformation from vine to versatile tool represents one of gardening’s most magical metamorphoses.
Planting the Seeds of Future Cleanliness
Loofah gourds (Luffa aegyptiaca or Luffa acutangula) demand warmth and patience. Start seeds indoors six to eight weeks before your last frost date, planting them in biodegradable pots that can be transplanted directly into garden soil. These seeds carry ancestral memory of tropical climates—they require soil temperatures above 70°F (21°C) to awaken from dormancy.
Create a starting environment that whispers of summer: warm seed-starting mix, consistent moisture, and bright light. Cover pots with plastic domes to maintain humidity, removing them once seedlings emerge like green fingers reaching upward. Harden off seedlings gradually before transplanting, introducing them gently to outdoor conditions over ten days.
Nurturing the Vine Through Summer’s Arc
Once established in garden beds or large containers, loofah vines become ambitious climbers, seeking vertical support with determined tendrils. Provide sturdy trellises, arbors, or fence lines where vines can ascend six to ten feet toward the sky. This vertical growth pattern not only saves garden space but allows gourds to hang freely, developing straight forms perfect for sponge creation.
Water deeply and consistently throughout the growing season, maintaining evenly moist soil without waterlogging. Feed plants with compost tea or balanced organic fertilizer every three weeks during active growth. The vines will produce both male and female flowers—the females distinguished by the miniature gourd swelling at their base. Hand pollination ensures better fruit set: transfer pollen from male to female flowers using a small paintbrush during early morning hours.
Allow gourds to mature fully on the vine until they lighten in color and feel noticeably lighter in weight. This typically occurs 150 to 200 days after planting, requiring a long, warm growing season. Patience becomes your gardening virtue here—premature harvest yields immature fibers unsuitable for sponge use.
Harvesting and Processing: The Final Transformation
When gourds rattle with loose seeds and their skin turns brown and papery, the moment of harvest arrives. Cut gourds from vines with pruning shears, leaving a short stem attached. The processing ritual begins with soaking: submerge gourds in a large bucket of water for several days until the outer skin softens and begins to peel away.
Remove the loosened skin under running water, revealing the fibrous interior network—your future sponge emerging like sculpture from stone. Shake out seeds (save them for next year’s planting) and rinse thoroughly to remove any remaining pulp or plant tissue. Some growers add a small amount of bleach to the soaking water for whitening and sanitizing, though this step remains optional for those preferring completely natural processing.
Dry loofah sponges completely in a well-ventilated area, suspending them to ensure air circulation on all surfaces. Once fully dried, slice into rounds of desired thickness using a sharp serrated knife or electric knife for precision. Each gourd yields multiple sponge discs, transforming a single vine’s harvest into months of sustainable scrubbing tools.
Crocheting Cotton Kitchen Sponges: Needlecraft Meets Functionality
For those whose creativity flows through fiber arts rather than garden soil, crocheting reusable kitchen sponges offers portable satisfaction. This method transforms humble cotton yarn into textured, absorbent cleaning tools that withstand countless wash cycles while remaining gentle on surfaces.
Selecting Yarn and Understanding Gauge
100% cotton yarn forms the ideal foundation for crocheted sponges—its natural absorbency and durability outlasting synthetic blends. Worsted weight cotton provides good thickness while working up relatively quickly. Sugar and cream cotton, Lily sugar and cream, or similar dishcloth cottons in your preferred colors add personality to functional items.
A size H (5mm) or I (5.5mm) crochet hook creates appropriately dense fabric that maintains structure when wet. Tighter gauge produces firmer, more scrubby sponges, while looser gauge creates softer, more absorbent versions. Your tension becomes an instrument of customization, allowing you to craft sponges perfectly suited to their intended tasks.
Basic Crochet Sponge Pattern: The Foundation Square
Create a foundation chain of 25 stitches, or adjust for your preferred sponge size. Single crochet into the second chain from hook and across the row. Chain one, turn, and single crochet into each stitch across. Repeat this simple rhythm for approximately 25 rows, creating a square shape.
For enhanced scrubbing texture, alternate between front post and back post stitches, creating raised ridges that grip grime effectively. Or incorporate bobble stitches, popcorn stitches, or shell patterns—each variation adds dimensional texture that improves cleaning performance while transforming utilitarian objects into small textile sculptures.
Finish edges with a round of slip stitches or single crochet for clean borders. Add a hanging loop by chaining 10-15 stitches and attaching in a corner—practical detail that allows sponges to air-dry properly between uses.
Two-Layer Scrubby Sponges: Advanced Construction
Elevate your sponge game by creating dual-texture versions combining soft cotton with scrubby yarn. Work two separate squares in different materials, then crochet them together around the edges, leaving one side partially open. This pocket construction allows you to insert additional scrubbing material—a small piece of old nylon net, jute twine coiled flat, or even a thin slice of natural loofah.
The resulting hybrid sponge offers gentle cotton on one side for delicate surfaces and aggressive scrubbing texture on the reverse for stubborn stuck-on food. This duality mirrors the multifaceted nature of kitchen cleaning itself—sometimes soft persuasion, sometimes determined scrubbing.
Upcycled Fabric Sponges: Giving Textiles New Purpose
Old towels, worn T-shirts, and orphaned socks contain untapped potential as cleaning sponges. This approach requires minimal tools while addressing textile waste—a growing environmental concern as millions of tons of fabric enter landfills annually.
Material Selection and Preparation
Terry cloth towels, with their looped pile construction, transition naturally into absorbent sponges. Cut away any worn or thin areas, focusing on sections that retain structural integrity and texture. Flannel sheets and cotton T-shirts, while less textured, create softer sponges suitable for wiping surfaces or washing dishes.
Wash all fabrics thoroughly before transformation, removing any residual detergents, fabric softeners, or oils that might reduce absorbency. Cut materials into rectangles approximately 5×7 inches—this size fits comfortably in hand while providing adequate surface area for cleaning tasks.
Construction Techniques: From Fabric to Functional
Layer two to four fabric rectangles depending on desired thickness. Pin layers together, then sew around all four edges using a sewing machine or hand-stitching with durable thread. Sew additional lines through the center—crosshatch patterns, spirals, or parallel lines—creating quilted structure that prevents layers from shifting during use and washing.
For truly quick assembly, use pinking shears to cut multiple layers simultaneously, then sew a simple X pattern through the center. The pinked edges resist fraying while adding textured grip. These no-fuss versions take mere minutes to create yet provide weeks of reliable service.
Add scrubbing power by attaching a pocket of rougher material to one side. Old denim, canvas, or even the abrasive side of worn-out kitchen sponges (thoroughly cleaned) can be sewn onto your fabric base, creating specialized scrubbing zones for particularly stubborn messes.
Maintaining Your Handmade Sponges: Extending Lifespan and Hygiene
Homemade sponges deserve care that honors the intention and effort invested in their creation. Proper maintenance extends their functional life while ensuring hygienic cleaning performance.
Daily Rituals of Sponge Care
Rinse sponges thoroughly after each use, squeezing out excess water and food particles. This simple act prevents bacterial growth and odor development—the primary enemies of sponge longevity. Hang sponges to air-dry completely between uses, utilizing the hanging loops you’ve thoughtfully incorporated or a dedicated sponge holder that promotes airflow.
For crocheted and fabric sponges, weekly laundering maintains freshness. Toss them into regular laundry loads with hot water and detergent, or dedicate a small mesh bag to collecting dirty sponges for batch washing. Loofah sponges can also be machine washed or cleaned by soaking in a solution of white vinegar and water.
Deep Cleaning and Sanitizing Methods
Monthly sanitizing rituals eliminate deeper microbial buildup. Microwave damp loofah or fabric sponges for 60-90 seconds on high power (never microwave sponges containing metal scrubbers). The steam heat penetrates fiber networks, destroying bacteria and mold spores effectively.
Alternatively, soak sponges in a dilute bleach solution (one tablespoon bleach per quart of water) for five minutes, then rinse thoroughly. For those preferring natural methods, white vinegar provides antimicrobial properties—soak sponges in undiluted vinegar for 30 minutes, then rinse and air-dry.
Recognizing End-of-Life and Composting
Even well-maintained sponges eventually complete their lifecycle. When sponges develop persistent odors, lose structural integrity, or show visible mold growth despite cleaning efforts, honor their service by retiring them appropriately. Natural fiber sponges—cotton, loofah, and other plant-based materials—can be composted, returning nutrients to soil and completing the cycle of transformation.
Cut sponges into smaller pieces to accelerate decomposition in compost bins. Alternatively, use retired sponges for particularly dirty tasks like cleaning garden tools, scrubbing outdoor furniture, or wiping pet paws before composting. This graduated system of use extracts maximum value before final decomposition.
Creative Variations: Personalizing Your Sponge Collection
Once you’ve mastered basic sponge creation, the universe of customization beckons with infinite possibilities. These variations transform practical tools into expressions of creativity and specific problem-solving solutions.
Scented and Infused Sponges
Add dried lavender, crushed mint leaves, or lemon peel to crocheted pocket sponges before sealing. These botanical additions release subtle fragrance during use, transforming dishwashing from chore to aromatherapy session. For loofah sponges, store them with a few drops of essential oils between uses, allowing fibers to absorb gentle scent.
Create seasonal variations—rosemary and sage for autumn cleaning, peppermint for winter holidays, citrus for spring freshness. These small touches connect household tasks to nature’s rhythms and your own sensory preferences.
Specialized Purpose Sponges
Design sponges for specific tasks: oversized versions for washing cars or scrubbing large pots, miniature rounds perfect for delicate glassware, long narrow rectangles ideal for cleaning bottle interiors. Shape follows function in this customization approach, allowing your sponge collection to address every cleaning challenge with appropriate tools.
Create color-coded systems preventing cross-contamination—green sponges for vegetables, blue for dishes, yellow for countertops. This organizational strategy brings professional kitchen hygiene standards into home environments while adding visual interest to your handmade collection.
The Deeper Satisfaction: Philosophy of Making Useful Things
Creating your own sponges transcends mere craft project or money-saving endeavor. This practice connects you to fundamental questions about consumption, waste, and the value we assign to humble, functional objects. In a culture encouraging endless purchasing of disposable items, choosing to make rather than buy becomes quietly revolutionary.
Each handmade sponge represents hours of growth (for loofah), meditative stitching (for crocheted versions), or thoughtful repurposing (for upcycled fabric). These temporal investments change our relationship with cleaning tools—they transform from forgettable consumables into valued implements deserving proper care and eventual dignified retirement through composting.
The ripple effects extend beyond individual households. When we create reusable sponges, we reduce demand for synthetic alternatives manufactured from petroleum-based materials. We decrease plastic packaging waste. We support a economy of making and mending rather than discarding and replacing. These small domestic choices accumulate into meaningful environmental impact.
Your kitchen sink becomes a site of intersection between personal creativity, environmental ethics, and daily practical needs. The sponges resting there tell stories of garden cultivation, needlework hours, or rescued textiles—narratives infinitely richer than their mass-produced counterparts could ever offer. This enrichment of ordinary moments represents perhaps the greatest gift of making usable things with your own hands.
Begin with one method that calls to your particular skills and interests. Plant loofah seeds this spring, or pick up crochet hook and cotton yarn this evening. Transform that worn towel languishing in your linen closet. Each sponge you create becomes evidence of your capability, your creativity, and your commitment to living with greater intention and less waste. The satisfaction waiting in this simple act of making exceeds all proportion to the humble object you’ll hold in your hands.