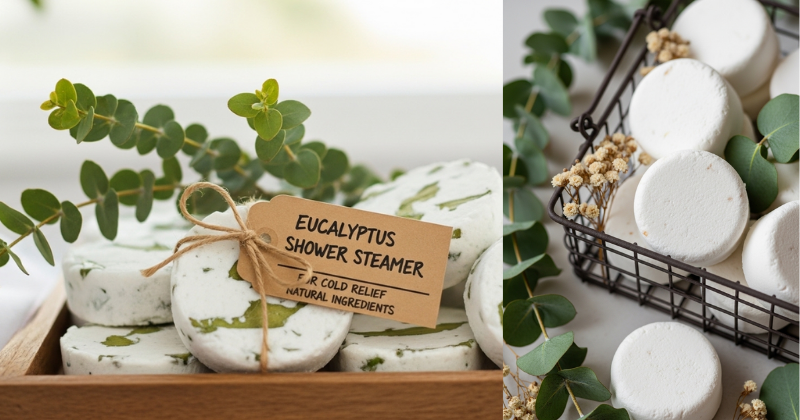
Discover how to make DIY Eucalyptus shower steamers for cold relief with natural ingredients. Transform your shower into a spa-like sanctuary and breathe easy.
Have you ever woken up with a heavy chest, a stuffy nose, and that general “under-the-weather” feeling that makes facing the day seem impossible? It is a common frustration, especially during peak cold and flu season, to feel like you are trapped in a fog of congestion. We often reach for store-bought vapor rubs, but many of those contain synthetic petroleum bases and artificial fragrances. What if you could unlock the power of a professional spa steam room right in your own bathroom? DIY Eucalyptus shower steamers for cold relief with natural ingredients are the ultimate solution for those looking to soothe their respiratory system and reclaim their energy.
In this comprehensive guide, you will discover how to craft these aromatic powerhouses using simple, non-toxic components. We are going to explore the therapeutic benefits of essential oils, the chemistry of the perfect “fizz,” and how to customize your blend for maximum relief. You have the capability to transform your morning routine into a healing ritual that supports your [Natural Immunity Support]. Get ready to achieve a clearer head and a more relaxed body as we dive into this rewarding DIY project!

Important Disclaimer: This article is for informational purposes only and should not replace professional advice. For health-related topics, consult healthcare providers. For safety procedures, verify current best practices and local regulations. Individual results may vary, and personal circumstances should always be considered when implementing any suggestions.
The Foundation: Why DIY Eucalyptus Shower Steamers Work (H2)
Before you begin mixing, it is essential to build confidence in the science behind the steam. A shower steamer is essentially a bath bomb for people who don’t have time for a bath. Instead of dissolving in the tub, it sits on the shower floor. As the hot water hits it, the steamer fizzes, releasing a concentrated cloud of essential oils into the air. This process, known as steam inhalation, allows the aromatic molecules to enter your nasal passages directly.
Many beginners worry that homemade remedies won’t be “strong enough” to tackle a real cold. Reassure yourself that DIY Eucalyptus shower steamers for cold relief are often more potent than commercial versions because you control the quality of the [High-Grade Essential Oils] used. Eucalyptus, specifically Eucalyptus globulus or radiata, contains a compound called cineole (or eucalyptol). Research suggests that cineole can help break up mucus and reduce inflammation in the airways. By making these yourself, you are ensuring a pure, effective experience without unnecessary fillers.
H3: The Power of Natural Ingredients
By using a base of baking soda and citric acid, you create a safe, biodegradable vehicle for your oils. This foundation is gentle on your pipes and your skin, making it a sustainable choice for your [Eco-Friendly Home].
H3: Encouragement for Beginners
Don’t be intimidated by the “fizz” factor. Even if your first batch isn’t perfectly round or slightly crumbles, the medicinal benefits remain the same. This is about gradual progress and self-care, not perfection!
Step-by-Step: Crafting Your Cold Relief Steamers (H2)
Breaking down the process makes it manageable and fun. You likely already have most of these tools in your kitchen. Follow these clear steps to achieve a spa-quality result.
1. Gather Your Supplies
You will need a large mixing bowl, a spray bottle filled with water (or witch hazel), and silicone molds.
- The Dry Base: 2 cups of Baking Soda and 1 cup of Citric Acid.
- The Active Ingredients: 30–40 drops of Eucalyptus essential oil.
2. Mix the Dry Ingredients
Whisk the baking soda and citric acid together until there are no lumps. If you want a visual boost, you can add a teaspoon of dried eucalyptus leaves or a pinch of spirulina powder for a natural green tint.
3. Incorporate the Essential Oils
Add the Eucalyptus oil directly to the dry mix and whisk quickly. You want the oil to be distributed evenly so every “fizz” carries the scent.
4. The “Snowball” Technique
This is the most important part. Lightly spritz the mixture with your spray bottle while whisking. You are looking for the consistency of “wet sand.” If you squeeze a handful, it should hold its shape.
Pro Tip: Do not add too much liquid at once, or the mixture will start to fizz in the bowl!
5. Mold and Dry
Pack the mixture tightly into your silicone molds. Press down firmly to remove air pockets. Let them dry in a cool, dry place for at least 24 hours. Once hard, pop them out and store them in an airtight glass jar to keep the oils fresh.
Advanced Strategies: Customizing for Maximum Relief (H2)
Once you’ve mastered the basic DIY Eucalyptus shower steamers for cold relief, you can share expert-level insights by experimenting with “Synergy Blends.” Different oils work together to target various symptoms of a cold.
- The Sinus Clearer: Mix Eucalyptus with Peppermint and Rosemary. The menthol in the peppermint provides an instant cooling sensation that helps “open” the sinuses.
- The Nighttime Soother: Combine Eucalyptus with Lavender and Tea Tree. Lavender helps calm the nervous system, which is vital when you are struggling to sleep with a cough.
- The Immune Booster: Add a few drops of Lemon and Clove to your Eucalyptus base. These oils are known for their antimicrobial properties and provide a warm, spicy scent.
How do you use a shower steamer for maximum effect? (H3)
To get the most out of your natural ingredients, place the steamer on the floor of the shower away from the direct stream of water. You want it to be lightly splashed, not drowned. Placing it on a soap dish or in a mesh bag hanging near your face can also increase the concentration of the steam you inhale.
Troubleshooting: Overcoming Common DIY Challenges (H2)
Every DIYer faces a few hiccups. Here is how to handle frequent obstacles with solutions that keep you moving forward.
- Obstacle: “My steamers are expanding and puffing out of the mold.”
- Solution: You added too much water too quickly, triggering the reaction. Next time, use witch hazel instead of water—it evaporates faster and reduces the chance of a premature fizz.
- Obstacle: “The scent disappears after a few minutes.”
- Solution: Essential oils are “volatile,” meaning they evaporate. To lock them in, ensure you are storing your steamers in a truly airtight container. You can also add a tablespoon of [Kaolin Clay] to your dry mix to help “anchor” the scent.
- Obstacle: “They are crumbling when I take them out of the mold.”
- Solution: You didn’t pack them tightly enough or they are still damp. Give them another 12 hours to dry, and next time, use the back of a spoon to really compress the mixture into the mold.
Maximizing Results: The Holistic Cold Recovery Path (H2)
To truly build upon your success, incorporate these steamers into a broader [Sustainable Wellness Routine]. Supporting your body through a cold is a multi-step process.
- Hydrate Simultaneously: The steam clears your nose, but you need internal hydration to thin mucus. Drink a glass of warm lemon water right after your “steamy” shower.
- Timing is Everything: Use your DIY Eucalyptus shower steamers first thing in the morning to clear “overnight” congestion, or right before bed to ensure easier breathing throughout the night.
- Temperature Control: Keep the bathroom door closed to trap the steam. Turn the water as hot as you can safely handle to create a thick mist before stepping in.
- Long-Term Storage: These make amazing gifts! Keep a few extra jars on hand so you can share the gift of [Natural Cold Relief] with friends and family when they are feeling down.
Conclusion
You have now discovered that making DIY Eucalyptus shower steamers for cold relief with natural ingredients is a simple, achievable, and incredibly effective way to support your health. By taking a few minutes to craft these at home, you are empowering yourself to handle cold symptoms with authority and grace. This transformation from “feeling stuck” to “breathing easy” is a testament to the power of nature and your own capability as a DIYer.
Remember the key takeaways: keep your mixture like wet sand, pack those molds tightly, and don’t be afraid to experiment with your own aromatic blends. You deserve to feel your best, even when a cold tries to slow you down. Go ahead—mix up your first batch, step into that steam, and achieve the clarity you’ve been looking for. You’ve got this!