Salut les gourmands!
There exists a particular species of chocolate cake that transcends mere dessert—a cake that speaks the language of unconditional love, that wraps you in edible nostalgia, that transforms ordinary Wednesday evenings into celebrations of homecoming. This is precisely what the Come-Home-to-Mama Chocolate Cake represents: not just layers of cocoa-rich crumb and silky frosting, but an edible embrace that welcomes you back to the warmth of childhood kitchens where the most important ingredient was always affection.
I first encountered this remarkable cake during a particularly difficult winter, when a dear friend appeared at my door carrying a dome-covered plate and the quiet wisdom that sometimes, words fail where chocolate succeeds. That first forkful—the way the tender crumb yielded effortlessly, how the frosting melted across my tongue with profound cocoa intensity tempered by subtle sweetness, the lingering warmth of vanilla that seemed to illuminate from within—fundamentally altered my understanding of what chocolate cake could communicate. This wasn’t the showy, architectural creation destined for Instagram glory. This was the cake your mother would bake on the day you came home from college, heartbroken or triumphant, needing nothing more than to be seen, accepted, and nourished.
What makes this Come-Home-to-Mama Chocolate Cake genuinely extraordinary lies in its deceptive simplicity masking sophisticated technique. The crumb achieves that elusive balance between substantial and tender—moist enough to melt on the tongue yet structured enough to support generous frosting without collapsing into sodden ruin. The chocolate flavor builds in waves: the immediate brightness of quality cocoa powder, the deeper bass notes of melted chocolate, and finally, the lingering complexity that only proper technique can coax from these humble ingredients. This is a cake that understands the difference between chocolate-flavored and genuinely chocolatey, between sweet and cloying, between impressive and comforting.
The beauty of this recipe resides in its accessibility coupled with its capacity for elevation. Using pantry staples and straightforward methods, you’ll create something that tastes unmistakably homemade—not in the apologetic sense of amateur baking, but in the profound sense of food prepared with intention, attention, and the kind of care that commercial bakeries, for all their technical prowess, can never quite replicate. Whether you’re welcoming someone home, celebrating a quiet personal victory, or simply acknowledging that some days demand chocolate cake for breakfast, this recipe stands ready to transform ordinary ingredients into extraordinary comfort.
Présentation de la Recette: The Architecture of Comfort
Preparation time: 25 minutes (including the meditative ritual of measuring and mixing)
Baking time: 30-35 minutes (while your kitchen fills with the promise of chocolate)
Cooling and assembly: 1 hour (patience rewarded exponentially)
Total time: Approximately 2 hours from impulse to indulgence
Yield: One 9-inch two-layer cake serving 10-12 people (or 6-8 if eating feelings)
Difficulty level: Intermediate—achievable with attention and care
Origin: American home baking tradition, refined through generations of comfort-seeking
The Come-Home-to-Mama Chocolate Cake belongs to that venerable lineage of American layer cakes that emerged from home kitchens rather than professional bakeries—cakes that prioritize soul-satisfying texture and genuine flavor over architectural ambition or decorative excess. This particular iteration draws inspiration from Depression-era “wacky cakes” (so named for their unconventional method of mixing without creaming butter), mid-century devil’s food cakes with their characteristic red-brown crumb, and the chocolate cakes that graced every church potluck and homecoming celebration across small-town America.
What distinguishes this version from its historical antecedents is the conscious elevation of technique without abandoning the fundamental simplicity that makes it achievable on a random Tuesday when comfort cannot wait for weekend baking projects. The method employs hot coffee to bloom the cocoa powder—a technique that intensifies chocolate flavor through chemical reactions between heat, liquid, and cocoa compounds. The addition of both oil and butter provides the best qualities of each: oil’s reliable moisture and tender crumb, butter’s incomparable flavor and richness.
The frosting—a luxurious chocolate buttercream that somehow manages to taste both decadent and not-too-sweet—achieves its magical balance through the incorporation of dark chocolate rather than relying solely on cocoa powder. This creates a frosting with genuine chocolate complexity, a silky texture that spreads like a dream, and a flavor profile sophisticated enough for adult palates while remaining accessible to the child within who simply wants chocolate on chocolate on chocolate.

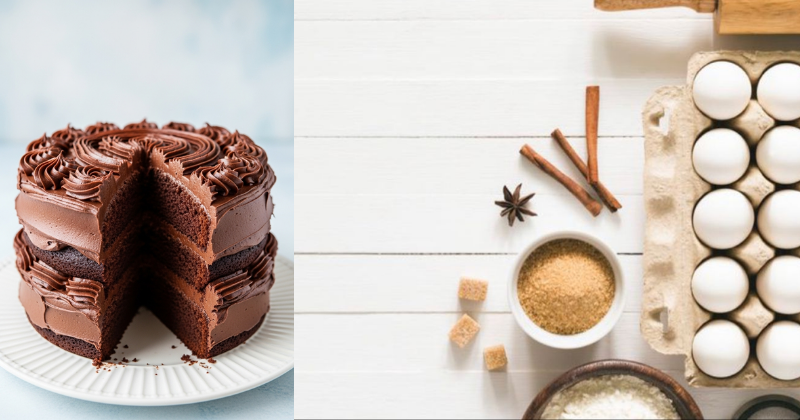
Ingrédients: Gathering the Elements of Transformation
For the Cake Layers (Two 9-inch Rounds):
Dry Foundation:
- 2 cups (240g) all-purpose flour, measured correctly (spoon and level, never scoop)
- 2 cups (400g) granulated sugar (don’t reduce this—it affects texture profoundly)
- ¾ cup (65g) natural unsweetened cocoa powder (not Dutch-process for this recipe)
- 2 teaspoons baking soda (fresh, please—check the expiration date)
- 1 teaspoon baking powder (also fresh—leavening loses potency over time)
- 1 teaspoon fine sea salt (or ¾ teaspoon table salt)
Wet Alchemy:
- 1 cup (240ml) hot brewed coffee (or hot water if caffeine concerns you, though coffee profoundly deepens chocolate)
- 1 cup (240ml) buttermilk, at room temperature (or make your own: 1 tablespoon vinegar plus milk to equal one cup)
- ½ cup (120ml) neutral oil (vegetable, canola, or light olive oil)
- ¼ cup (60g) unsalted butter, melted and slightly cooled
- 2 large eggs, at room temperature (this matters for emulsification)
- 2 teaspoons pure vanilla extract (the real thing—no imitation here)
For the Mama’s Chocolate Buttercream:
The Luxurious Base:
- 1 cup (230g) unsalted butter, softened to cool room temperature (not warm, not cold—crucial for texture)
- 4 cups (480g) confectioners’ sugar, sifted (sifting prevents graininess)
- ¾ cup (65g) natural unsweetened cocoa powder, sifted
- 6 ounces (170g) dark chocolate (60-70% cacao), melted and cooled to lukewarm
- ⅓ cup (80ml) heavy cream, at room temperature
- 2 teaspoons pure vanilla extract
- ¼ teaspoon fine sea salt (this elevates everything)
- 2-4 tablespoons additional cream or milk for consistency adjustment
Optional Enhancements for the Adventurous:
- 1 teaspoon instant espresso powder (dissolved in the hot coffee for even deeper chocolate notes)
- ½ teaspoon cinnamon (adds warmth and complexity without being identifiable)
- 1 tablespoon dark rum or coffee liqueur (in the frosting for sophisticated depth)
Petit conseil pro: The quality of your cocoa powder and chocolate determines the soul of this cake. This is not the moment for bargain brands with mysterious ingredient lists. Invest in natural (non-alkalized) cocoa powder from reputable sources—Ghirardelli, Valrhona, or Guittard all produce exceptional products. The natural acidity of non-Dutch-processed cocoa interacts with baking soda to create the cake’s characteristic rise and tender crumb while delivering brighter, fruitier chocolate notes that balance the frosting’s darker intensity. For the chocolate in your frosting, choose quality dark chocolate that you’d happily eat plain—Lindt, Ghirardelli, or Callebaut all work beautifully.
Préparation: The Ritual of Transformation
Step 1: Establishing Your Mise en Place and Mental Space
Before your hands touch ingredients, pause to prepare both your physical workspace and your internal state. Clear your counters, gather your tools—two 9-inch round cake pans, parchment paper, mixing bowls, whisk, spatula, measuring cups and spoons that you trust, and either a stand mixer or hand mixer with clean beaters. This is not merely organizational efficiency but a form of meditation, the conscious decision to be fully present for the creative act ahead.
Preheat your oven to 350°F (175°C)—not 355°F, not “about 350°F,” but precisely 350°F verified with an oven thermometer if you possess one. Oven temperature affects not just doneness but texture, rise, and that elusive quality called “cake-ness” versus “brownie-like density.” While the oven heats, prepare your pans with meticulous care: butter them generously, paying particular attention to corners and sides where cakes love to stick, then line the bottoms with parchment paper rounds, butter the parchment, and dust everything with cocoa powder (not flour, which would create pale streaks on your chocolate cake). Tap out excess cocoa powder. This multi-step preparation feels excessive until you’ve experienced a cake that releases cleanly versus one that crumbles tragically when turned out.
Bring your eggs, buttermilk, and butter to room temperature—this matters more than casual bakers realize. Cold ingredients don’t emulsify properly with other components, creating batter with an unstable emulsion that can deflate during baking or produce tunnels and uneven crumb. If you’ve forgotten to plan ahead, place eggs in a bowl of warm (not hot) water for ten minutes, and measure buttermilk into a microwave-safe container, heating it for 15-20 seconds until it takes the chill off.
Step 2: Blooming the Cocoa—Awakening Chocolate’s Hidden Dimensions
Brew your coffee strong and hot—not lukewarm, not merely warm, but genuinely hot so it can work its chemical magic. In a medium bowl or large measuring cup with a pour spout, measure your cocoa powder. This mundane brown powder, so unassuming in its dry state, contains within its particles a universe of flavor compounds locked behind molecular doors that only heat and liquid can open.
Pour the hot coffee over the cocoa powder in one smooth motion, then immediately begin whisking vigorously. Watch the transformation: the powder that a moment ago looked dull suddenly becomes glossy, aromatic, intensely chocolate. The hot liquid releases volatile compounds—aldehydes, ketones, esters—that create chocolate’s characteristic aroma while the heat catalyzes Maillard reactions and other chemical processes that deepen flavor complexity. Continue whisking until no lumps remain and the mixture appears completely smooth, almost like thin chocolate syrup. Set this aside to cool to lukewarm—if you add it while scalding hot to the batter, you’ll begin cooking the eggs prematurely, creating unpleasant scrambled bits in your finished cake.
This blooming technique represents the single most important flavor-enhancing step in the entire recipe. Cocoa powder contains flavor precursors that remain largely dormant in dry form or when mixed with cold liquid. The hot liquid-cocoa interface creates an environment where these compounds fully express themselves, multiplying perceived chocolate intensity dramatically without adding more cocoa powder (which could make the cake dry and bitter). This is why this cake tastes profoundly chocolatey despite using the same amount of cocoa as recipes that taste merely chocolate-flavored.
Step 3: Constructing the Dry Foundation—Precision in Simplicity
In your largest mixing bowl, combine all the dry ingredients: flour, sugar, cocoa powder (the additional dry cocoa beyond what you bloomed), baking soda, baking powder, and salt. Use a whisk to blend these thoroughly—not a cursory stir but genuine whisking that incorporates air and ensures even distribution of leavening agents throughout the flour. This step prevents the common problem of cakes that rise unevenly or contain pockets of concentrated chemical taste from unmixed leavening.
Take a moment to appreciate the science assembled in this bowl. The sugar will dissolve into the liquid ingredients, creating tenderness through its hygroscopic properties and participating in browning reactions that develop color and flavor. The baking soda—an alkaline compound—will react with acidic buttermilk and natural cocoa to release carbon dioxide bubbles that leaven the cake while also affecting color (more alkaline batters bake up darker). The baking powder provides additional lift through its double-acting mechanism: once when wet ingredients are added, and again in the oven’s heat. The salt enhances all other flavors through its remarkable ability to suppress bitterness while amplifying sweetness and chocolate notes.
The flour ratio to liquid in this recipe is deliberately lower than standard cakes, creating what bakers call a “slack” batter—almost pourable rather than scoopable. This thin consistency might alarm you if you’re accustomed to thicker cake batters, but it’s intentional and essential for achieving the cake’s signature tender crumb. Trust the ratios.
Step 4: Assembling the Liquid Components—The Foundation of Moisture
In a separate bowl or large measuring cup, combine all your liquid ingredients: the cooled bloomed cocoa-coffee mixture, room-temperature buttermilk, oil, melted-and-slightly-cooled butter, eggs, and vanilla extract. Whisk these together until uniformly combined and you no longer see distinct oil droplets floating separately—you want a coherent emulsion where fat droplets are suspended in liquid rather than pooling independently.
The combination of oil and butter in this recipe represents thoughtful ingredient selection based on how different fats behave in cakes. Oil—being liquid at room temperature—ensures the cake remains moist and tender even when served cold (butter-only cakes can become firm and somewhat dry when chilled). Oil also contributes to a finer, more velvety crumb structure because it coats flour particles more effectively than solid fats, limiting gluten development. However, oil lacks the incomparable flavor that butter provides, hence the inclusion of melted butter as well—enough to perfume the cake with that recognizable buttery richness without making it greasy or heavy.
The buttermilk performs multiple critical functions beyond adding liquid volume. Its acidity activates the baking soda, creating the carbon dioxide bubbles that leaven the cake. That same acidity tenderizes gluten proteins, preventing the cake from becoming tough even if you mix it slightly more than ideal. Additionally, buttermilk contributes a subtle tangy complexity that balances the sweetness and enhances chocolate flavor through contrast. If you don’t have buttermilk, the vinegar-milk substitute creates similar acidity, though you’ll miss the subtle cultured dairy complexity that real buttermilk provides.
Step 5: Uniting Wet and Dry—The Gentle Art of Minimal Mixing
Create a well in the center of your dry ingredients, then pour all the liquid mixture into this depression. Using a large spatula or wooden spoon (not an electric mixer at this stage—you want control and gentleness), begin folding the mixtures together. Start from the center, using broad, sweeping strokes that cut down through the batter, across the bowl’s bottom, and up the sides, rotating the bowl as you work.
The batter will look alarming at first—lumpy, streaky, separated. Resist the urge to beat it vigorously into submission. Continue your gentle folding, scraping the bowl’s sides and bottom to incorporate all dry pockets. The batter will gradually transform from chaotic to cohesive, thinning considerably as flour hydrates. You’re aiming for a batter where you no longer see distinct flour streaks but a few small lumps remain visible—these will dissolve during baking. If you mix until completely smooth, you’ll overdevelop gluten, creating a cake that’s tough rather than tender.
This restraint in mixing represents one of the hardest lessons for novice bakers to internalize. Every instinct screams that lumpy batter needs more mixing, that smoothness equals quality. But in cake baking, gluten—the protein network that forms when flour meets liquid and agitation—is both necessary (for structure) and dangerous (creating toughness when overdeveloped). Your goal is minimal gluten development: just enough to hold the cake together, not so much that it becomes chewy or dense. The thin, slack consistency of this batter actually helps here—lower flour-to-liquid ratios produce less gluten naturally.
Step 6: Baking—Heat’s Transformative Choreography
Divide your batter evenly between your prepared pans. The easiest method uses a kitchen scale, weighing each filled pan to ensure equal distribution—differences of more than an ounce or two will produce layers of noticeably different heights. If you lack a scale, measure carefully with a large ladle or measuring cup, aiming for equal depths in both pans. Tap each pan firmly on the counter three or four times—this releases large air bubbles that would otherwise create unsightly tunnels through your finished cake.
Place both pans on the oven’s center rack, leaving several inches of space between them and between pans and oven walls for proper air circulation. If your oven can’t accommodate both pans with adequate spacing, bake them sequentially rather than crowding—proper heat distribution matters more than time savings.
Close the oven door and step away. This is perhaps the hardest instruction in the entire recipe: resist opening the oven door for at least 25 minutes. Every time you open the door, oven temperature drops dramatically, creating steam release that affects crust formation and potentially causing the partially-set cakes to collapse as they lose their steam support structure. The rising cakes are structurally fragile until starches gelatinize and proteins coagulate sufficiently—premature disturbance can mean the difference between light cake and dense puck.
At 30 minutes, perform your first check. Gently open the oven and observe the cakes—they should appear set around the edges with centers that no longer look liquid or jiggly. Insert a toothpick into the center of one layer (not near the edge where it bakes faster). The toothpick should emerge with a few moist crumbs clinging to it, not wet batter. If you wait until the toothpick emerges completely clean, you’ve overbaked and your cake will be dry. These cakes continue cooking from residual heat after you remove them from the oven, a phenomenon bakers call “carryover baking.”
Step 7: Cooling—The Discipline of Delayed Gratification
Remove the pans from the oven and place them on a wire cooling rack (if you lack one, improvise with a grid-style oven rack positioned over a towel). Allow them to cool in their pans for exactly 15 minutes—set a timer to avoid guesswork. During this period, the cakes’ structures stabilize as starches crystallize and proteins complete their coagulation. Attempting to remove cakes too early results in layers that tear or collapse; waiting too long makes them stick to pans as cooled fat acts like glue.
After 15 minutes, run a thin knife or offset spatula around each pan’s edges, gently separating the cake from the sides. Place a wire rack over the pan’s top, then—with confidence and a single smooth motion—invert the pan so the cake releases onto the rack. Lift away the pan (it should release cleanly if you prepared surfaces properly), peel off the parchment paper, then place another wire rack on the cake’s bottom and flip again so it cools right-side-up. This double-flip prevents wire racks from creating grid-pattern impressions on your cake’s surface.
Allow the layers to cool completely before attempting to frost—at least one full hour at room temperature. Warm cake layers are structurally unstable and will compress under frosting’s weight, squeezing out in bulges and creating a misshapen, messy assembly. Additionally, warm cake will melt buttercream, transforming the fluffy frosting into a liquid mess that slides off the sides. I understand impatience—the house smells glorious, the cakes look perfect, and every minute feels like torture. But this cooling period represents an investment in the final product’s success. Use this time to prepare your frosting.
Step 8: Crafting the Buttercream—Edible Luxury
In your stand mixer bowl (or a large bowl if using a hand mixer), place the softened butter. The butter’s temperature is absolutely critical here: it should feel slightly cool to touch, giving way easily to gentle pressure but not feeling greasy or looking shiny. Too cold and it won’t whip properly, creating dense, separated frosting; too warm and it turns into a greasy liquid that won’t hold air.
Beat the butter on medium speed for 2-3 minutes until it lightens in color and becomes fluffy. This extended beating incorporates air bubbles that will make your frosting lighter and more spreadable. Scrape down the bowl’s sides and bottom—butter loves to cling to corners.
Sift together your confectioners’ sugar and cocoa powder directly into the butter. This sifting step prevents lumps and ensures even cocoa distribution. Begin mixing on the lowest speed—this prevents a sugar-cocoa cloud from exploding into your face and coating your kitchen. Once the dry ingredients begin incorporating, gradually increase to medium speed, beating for another two minutes.
Add your melted-and-cooled dark chocolate, vanilla extract, and salt. Continue beating, then drizzle in the cream gradually while the mixer runs. The transformation is remarkable: what began as a grainy, separated-looking mixture suddenly becomes silky, glossy, and cohesive. Beat for another 2-3 minutes until the frosting achieves what pastry chefs call “spreadable consistency”—soft enough to glide across cake layers without tearing them, firm enough to hold peaks and not slide off the sides.
Taste your frosting. This step is absolutely mandatory and entirely delightful. If it tastes too sweet (though it shouldn’t given the dark chocolate and salt), add an additional pinch of salt—salt suppresses sweetness perception while amplifying chocolate flavor. If it seems too stiff, beat in additional cream one tablespoon at a time. If too loose, refrigerate for 10-15 minutes to firm slightly.
Petit conseil pro: The secret to transcendent buttercream lies in extended beating at the final stage. Most home bakers under-beat their buttercream, stopping as soon as ingredients combine. Professional bakers know that the magic happens with continued beating—five, even seven minutes beyond when it “looks done.” This extended beating breaks down any remaining fat crystals, incorporates countless microscopic air bubbles, and creates a texture so silky that it almost melts on the tongue. Your arm might tire if using a hand mixer, but the difference is profound.
Step 9: Assembly—Constructing Layers of Comfort
Place your first completely-cooled cake layer on a serving plate or cake stand. Many bakers recommend placing strips of parchment paper under the cake’s edges—these protect your serving plate from stray frosting during assembly and pull away cleanly once you’ve finished, leaving pristine edges. This professional trick transforms messy amateur assemblies into bakery-worthy presentations.
Using an offset spatula (or a butter knife if you lack specialty tools), spread approximately one-third of your buttercream across the first layer’s top surface. Work from the center outward, creating an even layer roughly ½-inch thick. Don’t worry about perfection—slight variations won’t show in the finished product. Spread the frosting right to the edges or even slightly beyond; the top layer’s weight will compress the filling slightly, pushing it outward to the rim.
Carefully position your second layer on top, aligning edges as evenly as possible. Press down very gently, just enough to create contact between layers and ensure the frosting spreads to fill any gaps. Now apply what bakers call a “crumb coat”—a thin layer of frosting spread over the cake’s top and sides. This initial coat’s purpose isn’t beauty but utility: it traps loose crumbs, preventing them from marring your final frosting layer. Don’t worry if cake crumbs mix into this coat or if you can see cake showing through—this is expected and desired.
Refrigerate the crumb-coated cake for 20-30 minutes until the frosting firms up. This sets the crumb coat, creating a stable foundation for your final frosting layer. Upon removing the chilled cake, apply your remaining frosting generously, creating swirls, peaks, or a smooth finish according to your aesthetic preferences. Work with broad, confident strokes rather than fussy back-and-forth movements that can lift the crumb coat.
Petit Conseil Pro: The Science and Soul of Chocolate Cake Mastery
Temperature consciousness transforms results: Every ingredient’s temperature affects the final cake’s texture. Room temperature eggs and dairy emulsify smoothly with other components, creating uniform batter without streaks or lumps. Cold ingredients create grainy, separated batter that doesn’t rise evenly or develop proper texture. If you consistently produce cakes with dense spots, tunnels, or uneven rise, temperature inconsistency is likely the culprit. Develop the habit of removing eggs, buttermilk, and butter from the refrigerator an hour before beginning.
The coffee controversy resolved: Coffee doesn’t make this cake taste like coffee—its function is biochemical rather than flavoring. Coffee’s acidity and aromatic compounds interact with cocoa to amplify chocolate perception through a phenomenon called flavor enhancement. Substitute hot water if coffee concerns you (allergies, caffeine sensitivity, personal preference), but recognize that you’ll sacrifice some depth and complexity. The finished cake will still be excellent, simply less profound in its chocolate expression.
Cocoa powder types create different cakes: This recipe specifically calls for natural (non-alkalized) cocoa powder because its acidity activates baking soda, contributing to the cake’s rise and tender crumb. Dutch-processed cocoa—treated with alkali to reduce acidity—produces a darker color and more mellow flavor but won’t work in this recipe without reformulating the leavening agents. They’re not interchangeable. If you only have Dutch-processed cocoa, you’ll need to replace the baking soda with additional baking powder (2 teaspoons total baking powder, no baking soda), but the cake’s texture and rise will differ noticeably.
Buttercream consistency troubleshooting: If your frosting seems too soft and slides off the cake, it’s too warm—refrigerate the bowl for 10-15 minutes, then re-beat. If it’s grainy or separated-looking, the butter was likely too cold or the melted chocolate wasn’t cooled enough; try warming the bowl gently (set it briefly over a pot of steaming water while stirring continuously) until smooth, then chill and re-beat. If it tastes too sweet despite following the recipe, you need more salt—add it in tiny increments (⅛ teaspoon at a time), beating and tasting between additions. Salt is miraculous in suppressing sweetness perception.
The architecture of moisture: This cake’s remarkable moistness comes from multiple sources working synergistically: the low flour-to-liquid ratio creates a tender crumb with less gluten structure, the oil remains liquid even when cold (butter-only cakes firm up when refrigerated), the sugar binds water molecules through hydrogen bonding (hygroscopicity), and the chemical reaction between baking soda and acidic buttermilk creates steam during baking that remains trapped in the crumb. When you see “moist cake” recipes that simply dump in extra oil or butter, they’re treating symptoms rather than understanding causes. This recipe builds moisture into the cake’s fundamental structure.
Altitude adjustments for mountain dwellers: High altitude baking requires modifications because reduced atmospheric pressure affects leavening and moisture evaporation. If you live above 3,000 feet: reduce baking soda and baking powder by one-quarter each, increase flour by 2-3 tablespoons, and reduce sugar by 1-2 tablespoons. Increase oven temperature by 15-25°F and reduce baking time slightly. These adjustments are cumulative—the higher your altitude, the more significant the modifications needed.
Accompagnements Suggérés: Completing the Comfort Experience
This Come-Home-to-Mama Chocolate Cake possesses sufficient presence to stand alone as the centerpiece of attention, requiring no apology or embellishment. However, thoughtful accompaniments can transform a slice of cake into a complete sensory experience that addresses multiple dimensions of satisfaction.
Classic vanilla ice cream creates textural magic: The cold, creamy contrast against rich, tender cake produces that beloved hot-and-cold experience that makes taste buds dance. As the ice cream melts into the cake, it creates its own sauce, each bite offering different ratios of cake to cream. Choose quality vanilla—not “vanilla-flavored frozen dessert” but actual ice cream made with cream, sugar, eggs, and real vanilla. The purity of true vanilla complements rather than competes with chocolate’s complexity.
Fresh berries provide essential brightness: Raspberries, strawberries, or a mixture of both sliced and arranged beside each slice offer acidic counterpoint that prevents chocolate richness from becoming monotonous. The fruit’s natural tartness resets your palate between bites, allowing you to fully appreciate each forkful rather than experiencing diminishing returns as sweetness accumulates. Macerate the berries briefly with a tablespoon of sugar and a squeeze of lemon juice to release their juices and intensify their flavor.
Whipped cream offers lightness: Real whipped cream—heavy cream beaten with a touch of sugar and vanilla until soft peaks form—provides airiness that balances the cake’s density. Unlike ice cream, whipped cream doesn’t compete for attention but rather acts as a delivery vehicle that makes chocolate flavor seem to float across your palate. Whip the cream to soft peaks only; overbeaten cream develops a grainy texture that’s unpleasant against the cake’s silkiness.
Coffee becomes the perfect beverage pairing: Whether a shot of espresso, a carefully brewed pour-over, or a simple cup of strong black coffee, coffee and chocolate share aromatic compounds that create synergistic flavor enhancement. The coffee’s bitterness cuts through sweetness while its roasted notes echo and amplify the chocolate’s depth. For those who prefer tea, choose bold black teas (Assam, Ceylon) or smoky lapsang souchong rather than delicate varieties that chocolate would overpower.
A sprinkle of flaky sea salt creates revelation: Just before serving, scatter a few flakes of high-quality sea salt (Maldon, fleur de sel) across each slice. The salt crystals create little bursts of mineral intensity that make chocolate taste more chocolatey through contrast and that suppress the frosting’s sweetness just enough to allow complexity to emerge. This restaurant technique takes seconds yet elevates presentation and flavor dramatically.
For celebration enhancement: If this cake marks a special occasion, consider serving it with a small pour of dark rum, bourbon, or coffee liqueur alongside. The alcohol’s warmth and complexity complement chocolate beautifully, and a tiny sip between bites cleanses and refreshes the palate. This transforms cake-eating from simple consumption into a ritual of savoring.
The Cultural Significance of Coming Home to Cake
Beyond recipes and techniques lies a deeper truth about what this cake represents in our collective culinary consciousness. The Come-Home-to-Mama Chocolate Cake belongs to a category of comfort foods that transcend mere nutrition to address emotional and psychological needs—foods that communicate care, provide reassurance, and connect us to memories of security and belonging.
Research in food psychology demonstrates that comfort foods activate reward centers in the brain similar to those triggered by social connection and physical warmth. The specific foods that provide comfort vary culturally—for some it’s chicken soup, for others rice pudding or macaroni and cheese—but chocolate cake holds nearly universal appeal across Western cultures. This universality stems partly from chocolate’s unique chemistry: it contains compounds that stimulate serotonin and endorphin production, creating genuine mood elevation beyond mere taste pleasure.
The “mama” in this cake’s name acknowledges the archetypal association between maternal figures and nurturing through food. Across cultures, mothers and mother-figures express love through feeding, and the foods they prepare during our formative years become encoded in our emotional memory as symbols of safety and acceptance. This cake, with its unpretentious excellence and generous portions, speaks that language of unconditional care.
Yet this cake’s significance extends beyond nostalgia. In an era of dietary restriction, food moralizing, and the constant pressure to optimize every nutritional choice, unapologetic chocolate cake represents permission—permission to experience pleasure without guilt, to prioritize emotional nourishment alongside physical nutrition, to acknowledge that sometimes the soul needs feeding as much as the body. Baking this cake for yourself or others becomes an act of radical self-compassion in a culture that often demands we earn our indulgences.
Storage, Longevity, and the Art of Delayed Consumption
This cake’s moisture content—one of its greatest virtues when fresh—requires thoughtful storage to maintain quality. At room temperature, covered with a cake dome or inverted bowl, the assembled cake remains at peak quality for two to three days. The buttercream forms a protective seal that prevents the cake layers from drying while its fat content preserves moisture.
Refrigeration extends longevity to four or five days but affects texture: the cold temperature causes the buttercream to firm considerably and can make the cake itself slightly denser as starches retrograde (crystallize). If you must refrigerate, remove the cake from the refrigerator at least one hour before serving, allowing it to return to room temperature where flavors bloom and textures soften.
For longer storage, this cake freezes exceptionally well—better than many recipes because the oil-butter fat combination doesn’t become rock-hard when frozen. Wrap individual slices or the entire assembled cake tightly in plastic wrap, then in aluminum foil, and freeze for up to three months. Thaw overnight in the refrigerator, then bring to room temperature before serving. The texture will be nearly indistinguishable from fresh cake.
Unfrosted layers freeze even better than assembled cake. Wrap each cooled layer separately and freeze for up to four months. This strategy allows you to bake when convenient, then thaw, frost, and serve when needed—all the satisfaction of homemade cake with the flexibility of advance preparation.
Variations for the Adventurous: Honoring Tradition While Exploring Possibility
The foundation recipe welcomes thoughtful variations that honor its essential character while exploring new dimensions:
Mocha variation: Replace half the coffee with strongly brewed espresso, and add 2 tablespoons instant espresso powder to the dry ingredients. In the frosting, dissolve 1 tablespoon instant espresso powder in the cream before adding. This creates a sophisticated adult cake where coffee steps forward from subtle enhancer to equal partner.
Mexican chocolate interpretation: Add 1 teaspoon ground cinnamon and ¼ teaspoon cayenne pepper to the dry ingredients. In the frosting, include ½ teaspoon cinnamon. The warmth and gentle heat create complexity that makes chocolate taste more like itself rather than competing with it.
Orange chocolate symphony: Replace vanilla extract with orange extract in both cake and frosting, and add 1 tablespoon finely grated orange zest to the frosting. The citrus-chocolate combinationcreates a sophisticated European sensibility, the orange’s brightness amplifying chocolate while adding perfumed complexity that transforms each bite into a discovery.
Mint chocolate indulgence: Replace vanilla extract with peppermint extract in both cake and frosting (start with ½ teaspoon—peppermint is powerful—and adjust to taste). Fold crushed peppermint candies or high-quality chocolate mint thins into the frosting for textural interest. This variation evokes nostalgic memories of mint chocolate chip ice cream while maintaining the cake’s fundamental comfort character.
Salted caramel chocolate fusion: Prepare a quick salted caramel (¾ cup sugar melted until amber, carefully mixed with ½ cup cream and ½ teaspoon salt), cool completely, and drizzle between layers and over the frosted cake. The caramel’s buttery sweetness and mineral salt notes create a three-dimensional flavor experience that keeps your palate engaged across multiple bites.
Peanut butter chocolate embrace: Substitute half the buttercream with peanut butter frosting (beat ¾ cup creamy peanut butter with ½ cup butter, then add confectioners’ sugar and cream to reach spreadable consistency). Alternate layers of chocolate and peanut butter frosting, or swirl them together for marbled visual interest. This variation honors the beloved combination while maintaining the cake’s tender, chocolate-forward identity.
Teaching This Recipe: Passing Comfort to the Next Generation
This Come-Home-to-Mama Chocolate Cake makes an exceptional teaching recipe for novice bakers or children beginning their culinary education. Its forgiving nature—the thin batter that’s nearly impossible to overmix, the moisture content that masks minor timing errors, the generous yield that allows for imperfect slicing—creates conditions where success becomes highly probable even for inexperienced hands.
When teaching this recipe, emphasize the “why” behind each step rather than presenting techniques as arbitrary rules. Explain that we bloom the cocoa because heat releases flavor compounds, that we use room-temperature ingredients because they emulsify better, that we fold gently because excessive mixing develops gluten that toughens cake. This approach transforms recipe-following into understanding, creating bakers who can troubleshoot problems and adapt recipes rather than merely executing instructions.
The assembly and frosting stages offer particular teaching opportunities. Show your student how to test frosting consistency, how to apply a crumb coat, how to use an offset spatula to create smooth surfaces or decorative swirls. These techniques transfer to countless other baking projects, making the time invested in teaching reverberate far beyond this single cake.
Most importantly, emphasize that baking is both science and art, requiring precision in some areas (measuring ingredients, oven temperature) while welcoming creativity in others (frosting decoration, flavor variations). This balance—between following proven formulas and exercising personal expression—defines not just baking but many worthwhile life pursuits.
The Economics and Ethics of Home Baking
In an era where artisanal bakery cakes command $60-$100, understanding the economics of home baking reveals both practical advantages and deeper values. This cake’s ingredients cost approximately $8-$12 depending on your location and ingredient quality choices—a fraction of comparable bakery pricing. Your time investment—perhaps two hours from start to finish—creates value far exceeding the raw ingredient costs.
Yet reducing home baking to economic calculation misses its deeper significance. When you bake this cake, you’re reclaiming skills that earlier generations considered fundamental but that have largely migrated to commercial producers in our convenience-oriented culture. This reclamation represents a form of resistance against deskilling—the gradual loss of practical competencies that leaves us dependent on purchasing rather than creating.
Additionally, home baking allows complete ingredient transparency. You know exactly what enters your cake—no artificial colors, no mysterious “natural flavors,” no preservatives required because you’ll consume it within days of baking. For individuals with food sensitivities or those who prioritize ingredient quality, this control justifies the time investment regardless of cost savings.
The act of baking for others carries its own economics of care. When you present someone with a homemade cake, you’re offering them not just dessert but your time, attention, and the intention behind the gift. This gift economy—exchange based on relationship rather than monetary value—creates social bonds that no purchased item can replicate.
When Cake Becomes Ritual: Marking Life’s Transitions
The Come-Home-to-Mama Chocolate Cake earns its name through its particular suitability for moments of transition, reunion, and homecoming. Consider baking this cake when:
Someone returns home after extended absence—college students finishing their first semester, travelers completing long journeys, military personnel on leave. The cake becomes edible welcome, communicating “you belong here” more eloquently than words.
A friend navigates difficulty—job loss, relationship ending, health challenges, grief. Food cannot solve these problems, but it can provide comfort, and the act of baking for someone communicates care during times when they may feel isolated or forgotten.
You need to mark a personal victory that others might not understand—finishing a difficult project, overcoming a private fear, achieving a goal that matters to you even if it seems small to others. Bake this cake for yourself, acknowledging that you deserve celebration.
Children reach milestones—birthdays certainly, but also smaller passages like first days of school, achievement of long-pursued goals, moments when they need reassurance that someone sees their efforts and finds them worthy of celebration.
You simply need comfort—some days demand chocolate cake for reasons that require no justification. The decision to bake, to engage in the meditative ritual of measuring and mixing, to fill your home with the aroma of chocolate and vanilla, becomes self-care in its most tangible form.
The Perfectionism Trap: Embracing “Good Enough” in Baking and Life
As you embark on baking this cake, you may encounter the perfectionist voice insisting that your layers must be exactly equal height, your frosting impeccably smooth, your presentation magazine-worthy. This voice deserves acknowledgment and then gentle dismissal.
The Come-Home-to-Mama Chocolate Cake isn’t about perfection—it’s about presence, care, and the kind of welcoming comfort that perfectly smooth frosting cannot provide. A cake with slightly uneven layers still tastes delicious. Frosting with visible spatula marks still delights. A cake that looks unmistakably homemade communicates something that flawless bakery execution cannot: that someone cared enough to make this by hand, accepting imperfection as part of the gift.
This principle extends beyond baking into the broader territory of life. The pursuit of perfection in all things creates paralysis, preventing us from beginning projects, sharing our work, or offering our gifts because they don’t meet some impossible standard. This cake invites you to practice “good enough”—doing something well, with attention and care, and then releasing it to serve its purpose without agonizing over every flaw.
Your cake will be delicious. It will bring joy. It will accomplish its purpose of providing comfort and pleasure. These truths remain regardless of whether your layers are perfectly level or your frosting shows some imperfections. Practice accepting your cake exactly as it emerges from your efforts, and perhaps this acceptance will extend into other domains where perfectionism constrains you.
Troubleshooting Guide: When Things Don’t Go as Planned
Despite careful adherence to instructions, occasionally baking presents challenges. Understanding common problems and their solutions transforms frustration into learning:
Dense, heavy cake instead of tender crumb: Likely causes include overmixing the batter (developing too much gluten), measuring flour by scooping (packing too much flour into measuring cups), or using old leavening agents that have lost potency. Solutions: mix just until combined, measure flour by spooning it into measuring cups and leveling, and replace baking soda and baking powder every six months.
Cake sinks in the center: This often results from opening the oven door too early (before structure sets), incorrect oven temperature (too hot initially causes premature rising and structural weakness), or too much leavening (cake rises dramatically, then collapses). Solutions: resist checking before 25 minutes, verify oven temperature with a thermometer, and measure leavening precisely.
Dry cake despite following the recipe: Possible causes include overbaking (leaving cake in oven until toothpick emerges completely clean rather than with moist crumbs), measuring errors (too much flour or too little liquid), or oven temperature too high. Solutions: remove cake when a few moist crumbs still cling to the tester, double-check measurements, and verify oven accuracy.
Cake sticks to pan despite greasing: Usually happens when pans weren’t prepared thoroughly (missing spots or using insufficient fat), cake cooled too long in the pan (fat solidifies, acting as glue), or cake removed too soon (before structure set). Solutions: be meticulous about pan preparation, time the 15-minute cooling period, and consider using parchment paper rounds as insurance.
Frosting won’t stay on cake or slides off: Temperature problems cause this—either the cake is too warm (melting the frosting) or the frosting is too soft (room too warm, butter too soft initially, or insufficient beating). Solutions: ensure cake is completely cool, adjust frosting consistency with additional confectioners’ sugar or brief refrigeration, and beat frosting longer to incorporate stabilizing air bubbles.
Grainy, separated frosting: Results from butter that was too cold (couldn’t cream properly), melted chocolate that was too hot (partially melting the butter), or insufficient beating time. Solutions: ensure butter reaches proper cool room temperature, let melted chocolate cool to lukewarm before adding, and beat frosting for several minutes beyond when it “looks done.”
The Therapeutic Dimensions of Baking
Beyond producing edible results, the act of baking this chocolate cake provides therapeutic benefits that mental health professionals increasingly recognize and recommend. The process engages you in what psychologists call “behavioral activation”—structured activity that produces tangible results, countering the paralysis that accompanies depression and anxiety.
Measuring ingredients requires present-moment attention, functioning as informal mindfulness practice that interrupts rumination and worry. The sensory engagement—the feel of flour between your fingers, the aroma of vanilla and chocolate, the visual transformation of separate ingredients into cohesive batter—grounds you in physical experience rather than anxious thoughts.
The satisfaction of completion, of producing something beautiful and nourishing through your own efforts, builds self-efficacy—belief in your capability to accomplish goals and navigate challenges. In a world where many work tasks feel abstract or never-ending, baking provides clear beginning, middle, and end, with immediate feedback about your success.
The act of baking for others—whether family, friends, neighbors, or coworkers—creates social connection and provides purpose beyond self-interest. Research consistently demonstrates that activities undertaken for others’ benefit enhance wellbeing more reliably than purely self-focused pursuits. Your chocolate cake becomes a vehicle for building community and experiencing the satisfaction of giving.
À Vos Tabliers: Embracing the Journey Ahead
You now possess everything necessary to create a chocolate cake that transcends mere dessert to become edible comfort, welcome, and celebration. The techniques described in these pages—blooming cocoa for maximum flavor, achieving tender crumb through gentle mixing, creating silky buttercream through extended beating—represent centuries of accumulated baking wisdom, refined through countless iterations and offered to you as your inheritance.
But recipes are not magic spells that work through precise recitation alone. They are frameworks, invitations to engage with ingredients and process, to develop the intuition that transforms rule-following into creative mastery. Your first attempt at this cake might not achieve perfection—layers might be slightly uneven, frosting might show spatula marks, presentation might look unmistakably homemade rather than bakery-professional. This is not failure. This is learning, practice, the necessary path that every skilled baker has walked.
Each time you make this cake, you’ll notice new details, develop small efficiencies, understand the process more deeply. The batter’s proper consistency will become recognizable not just visually but intuitively. You’ll develop a sense for when frosting reaches ideal spreading consistency. The timing will become natural rather than dependent on constant timer-checking. This development of skill and intuition is itself valuable, independent of any particular cake’s outcome.
Most importantly, remember why this cake exists—not to impress or compete, not to achieve Pinterest-perfect aesthetics, but to provide comfort, to welcome people home, to transform ordinary moments into occasions worth marking. Whether you bake it for returning loved ones, struggling friends, or yourself during times when you need tangible reminders of sweetness and care, this cake fulfills its purpose through the intention you bring to its creation.
The kitchen awaits. The ingredients stand ready. Your hands—perhaps uncertain now, but capable of remarkable things—can transform these simple elements into something that nourishes body and soul. Trust the process, embrace imperfection, and allow yourself the pleasure of creating comfort from scratch.
What memories will you create with this cake? Whose homecoming will it welcome? What moments of difficulty will it comfort, what victories will it celebrate? These questions have no answers yet—they await your living of them, your baking this recipe and discovering what it means in the context of your own life and relationships.
Begin today. Gather your ingredients. Preheat your oven. And as you measure and mix, fold and bake, remember that you’re participating in an ancient tradition—the offering of nourishment made with care, the transformation of simple ingredients into meaning, the creation of home in its most essential sense: a place where people are welcomed, accepted, and fed.
Bon appétit, and may your kitchen always smell of vanilla and chocolate, your table always hold space for those you love, and your heart always remember that comfort, like this cake, is something you can create with your own hands.