Salut les gourmands!
There exists a moment in every home cook’s journey when they realize that the foods they’ve been ordering from restaurants—those guilty pleasures wrapped in nostalgia and convenience—can be recreated in their own kitchens with even greater satisfaction. Mozzarella sticks represent one of those revelations, a dish so deeply embedded in our collective comfort food consciousness that the idea of making them at home feels almost transgressive, like discovering a secret that restaurants would prefer remained hidden behind their kitchen doors.
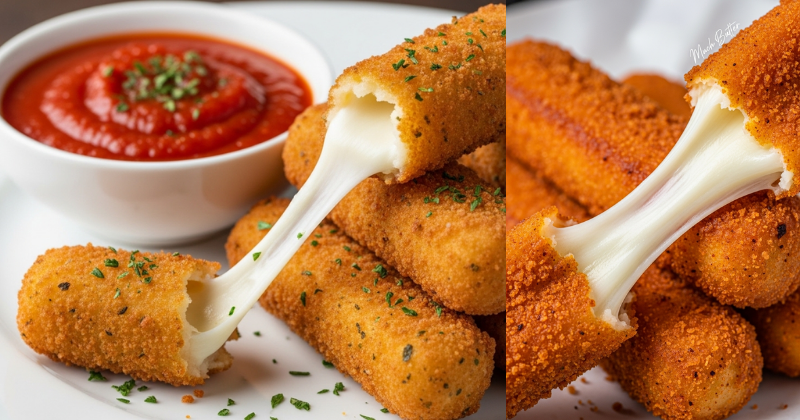
I’ll never forget the first time I pulled a batch of homemade mozzarella sticks from my own oil, watching the golden crust shatter at the gentlest pressure to reveal that legendary cheese pull—the molten mozzarella stretching in glossy, elastic strands that seemed to defy gravity itself. In that moment, I understood that this wasn’t just about replicating a restaurant appetizer; it was about reclaiming a piece of culinary magic, about understanding the precise interplay of temperature, coating technique, and timing that transforms simple cheese into something transcendent.
Today, I’m sharing with you not just a recipe, but a complete exploration of mozzarella stick mastery—the science behind the perfect crust, the techniques that ensure your cheese stays contained while achieving maximum stretchiness, and the small details that separate good mozzarella sticks from legendary ones. Whether you’re feeding a crowd at your next gathering or simply treating yourself to the ultimate comfort food experience, these crispy homemade mozzarella sticks will forever change how you think about this beloved classic.

Présentation de la recette
Temps de préparation: 20 minutes
Temps de congélation: 2 heures minimum (crucial pour le succès)
Temps de cuisson: 2-3 minutes par batch
Temps total: Environ 2 heures 30 minutes
Portions: 16-20 mozzarella sticks (4-5 personnes en appetizer)
Niveau de difficulté: Intermédiaire
Origine: Adaptation américaine d’inspiration italienne
The mozzarella stick as we know it today represents a beautiful collision of Italian cheese-making tradition and American frying culture. While Italians have been coating and frying cheese for centuries—think of the classic mozzarella in carrozza from Naples—the breaded, stick-shaped version we adore today emerged in American restaurants during the 1970s, quickly becoming a staple of casual dining and bar food culture.
What makes homemade mozzarella sticks superior to their commercial counterparts isn’t just freshness—though that matters profoundly—but control. You determine the quality of your cheese, the seasoning in your breadcrumbs, the thickness of your coating, and most importantly, the precise moment they emerge from the oil at peak golden perfection. This is mozzarella stick alchemy at its finest, where understanding the science transforms simple ingredients into something extraordinary.
The key to success lies in understanding one fundamental principle: cheese wants to melt and escape its coating. Your entire technique—from the triple-coating method to the essential freezing step—exists to create a fortress of crunch that contains the molten cheese just long enough to achieve that perfect balance between crispy exterior and liquid interior. Master this principle, and you’ll never experience the heartbreak of cheese-less breading or exploded sticks again.
Ingrédients
Pour les mozzarella sticks:
- 1 pound (450g) low-moisture mozzarella cheese – This specification is non-negotiable; fresh mozzarella contains too much moisture and will explode during frying. Look for blocks rather than pre-shredded cheese, which contains anti-caking agents that interfere with melting.
- 1 cup (125g) all-purpose flour – Forms the first layer of our coating architecture, creating a dry surface for the egg wash to grip.
- 3 large eggs – Room temperature, beaten until completely homogeneous. The protein in eggs creates the adhesive layer that binds flour to breadcrumbs.
- 2 tablespoons whole milk – Added to the eggs to thin them slightly, ensuring even coating without clumping.
- 2 cups (240g) Italian-style breadcrumbs – Choose fine breadcrumbs rather than panko for traditional texture. Panko creates excellent crunch but a different, lighter style.
- 1/2 cup (50g) grated Parmesan cheese – Adds umami depth and contributes to browning through the Maillard reaction.
- 2 teaspoons Italian seasoning – A blend typically containing oregano, basil, thyme, and rosemary that echoes the cheese’s Italian heritage.
- 1 teaspoon garlic powder – Provides savory depth without the moisture that fresh garlic would introduce.
- 1 teaspoon onion powder – Complements the garlic, creating a more complex savory base.
- 1/2 teaspoon salt – Enhances all other flavors and seasons the coating thoroughly.
- 1/2 teaspoon black pepper – Freshly ground for maximum aromatic impact.
- 1/4 teaspoon cayenne pepper – Optional but recommended; adds subtle warmth without overwhelming heat.
- Neutral oil for frying – Vegetable, canola, or peanut oil with high smoke points (375-400°F/190-205°C). You’ll need enough to fill your pot or deep fryer to a depth of 3-4 inches.
Pour la marinara sauce (accompanying):
- 1 can (28oz/795g) crushed tomatoes – San Marzano if possible, for their naturally sweet, low-acid profile.
- 3 cloves garlic – Minced finely, releasing their aromatic compounds.
- 2 tablespoons olive oil – Extra virgin for flavor richness.
- 1 teaspoon dried oregano – The classic Italian herb that defines marinara.
- 1/2 teaspoon sugar – Balances tomato acidity.
- Salt and pepper to taste – Season boldly; the sauce must stand up to rich, fried cheese.
- Fresh basil leaves – Torn at the last moment to preserve their bright, anise-like aromatics.
Préparation
Étape 1: La découpe stratégique du fromage
Begin by unwrapping your mozzarella block and examining its structure. Low-moisture mozzarella possesses a fibrous quality—you can see the protein strands running through it like the grain in wood. This matters. Pat the cheese completely dry with paper towels, removing any surface moisture that could interfere with coating adhesion.
Using a sharp knife (dull knives compress rather than cut, damaging the cheese’s structure), slice the mozzarella into sticks approximately 3-4 inches long and 1/2 inch thick. Consistency in sizing ensures even cooking—thicker pieces may have raw centers while their coating burns; thinner pieces lose structural integrity during frying. Aim for the proportions of your index finger as a general guide.
As you cut, you’ll notice some sticks have cleaner edges than others. This is normal and won’t affect the final product. What matters is creating relatively uniform dimensions that will cook at the same rate. Arrange your cut sticks on a parchment-lined baking sheet, ensuring they don’t touch—this prevents them from sticking together during the initial freezing.
Étape 2: L’architecture du triple enrobage
Set up your breading station with assembly-line efficiency. You’ll need three shallow dishes or pie plates arranged in sequence: flour, egg wash, and seasoned breadcrumbs. This mise en place isn’t merely convenient—it’s essential for maintaining the clean coating technique that produces professional results.
In your first dish, place the all-purpose flour, spreading it evenly across the bottom. In the second, whisk together the eggs and milk until no streaks of yolk remain—this homogeneous mixture coats evenly without clumping. In the third dish, combine the breadcrumbs, Parmesan, Italian seasoning, garlic powder, onion powder, salt, pepper, and cayenne, mixing thoroughly with a fork. The Parmesan should distribute evenly throughout the breadcrumbs, not clump in pockets.
Now begins the meditative rhythm of coating. Working with one cheese stick at a time (patience here prevents coating catastrophe), roll it in flour, ensuring complete coverage including the ends. Shake off excess—you want a light dusting, not a thick paste. The flour creates a dry surface for the egg to grip, like primer before paint.
Transfer to the egg wash, turning to coat all surfaces. Allow excess to drip back into the dish—too much egg creates gummy spots where breadcrumbs clump. Move to the breadcrumb mixture, pressing gently to ensure adhesion on all sides. The goal is complete, even coverage with no bare spots where cheese could escape during frying.
Étape 3: Le double enrobage – La forteresse
Here’s where homemade mozzarella sticks separate from amateur attempts: the second coating. After your first complete coating (flour-egg-breadcrumb), return each stick to the egg wash, then back to the breadcrumbs. This double layer creates a thicker barrier that withstands the thermal assault of hot oil while creating a more substantial, satisfying crunch.
As you complete each stick’s second coating, return it to the parchment-lined baking sheet. Keep coated sticks separated—they’re still slightly tacky and will fuse if touching. This entire process requires about 15-20 minutes of focused attention. Put on music, find your rhythm, and take satisfaction in the repetitive meditation of coating each stick to golden potential.
Étape 4: Le gel crucial – La patience récompensée
Once all sticks are double-coated, transfer your baking sheet to the freezer. This step is absolutely non-negotiable—it’s the difference between perfect mozzarella sticks and breaded, cheese-less disappointment. The coating must be completely frozen, and the cheese must be solidly cold before it encounters hot oil.
Minimum freezing time: 2 hours. Optimal: 3-4 hours or overnight. During this time, the coating firms and dries while the cheese becomes so cold that it needs significant time to melt—time during which the coating browns and crisps. I’ve frozen mozzarella sticks for up to 3 days before frying with excellent results. In fact, keeping a batch in your freezer means you’re always ready for unexpected guests or sudden cravings.
While your sticks freeze, prepare your marinara sauce if making from scratch. In a saucepan over medium heat, warm the olive oil and sauté the minced garlic until fragrant but not browned—about 30 seconds. Add the crushed tomatoes, oregano, sugar, salt, and pepper. Simmer gently for 20-30 minutes, allowing flavors to meld and the sauce to thicken slightly. Tear in fresh basil just before serving. The sauce can be made days ahead and refrigerated or frozen for months.
Étape 5: La préparation de l’huile – La chimie de la friture
As your cooking time approaches, prepare your frying setup. Choose a heavy-bottomed pot (cast iron or stainless steel) at least 4 inches deep, or use a dedicated deep fryer. Pour in enough neutral oil to reach a depth of 3-4 inches—sufficient for sticks to float freely without touching the bottom, where they might stick and burn.
Attach a deep-fry or candy thermometer to the side of your pot, ensuring the bulb is submerged but not touching the bottom (which is hotter than the oil itself). Heat the oil over medium-high heat to exactly 350-365°F (175-185°C). This temperature range is critical—too low and your coating absorbs oil, becoming greasy while the cheese melts and escapes; too high and the coating burns before the cheese softens.
Temperature precision is why I recommend a thermometer rather than guessing. If you don’t have one, test by dropping a breadcrumb into the oil—at proper temperature, it should sizzle immediately and brown within about 30 seconds. But truly, invest in a thermometer. It’s the tool that transforms your frying from guesswork to science.
Prepare your landing zone: a wire rack set over a baking sheet lined with paper towels. This setup allows air circulation around finished sticks, preventing the soggy bottoms that result from draining on paper towels alone.
Étape 6: La friture – Le moment de vérité
Remove your frozen mozzarella sticks from the freezer. They should feel solid as rocks, with no give when pressed. Working in small batches (4-6 sticks depending on pot size—crowding lowers oil temperature), carefully lower them into the hot oil using tongs or a slotted spoon. Don’t drop them from height; lower them gently to prevent oil splatter.
The moment they enter the oil, magic begins. The water in the coating instantly vaporizes, creating the bubbling you hear and see. This rapid moisture escape creates the crispy texture we crave. Watch your thermometer—the temperature will drop as cold sticks enter. Don’t let it fall below 340°F; adjust your heat to maintain the 350-365°F range.
Fry for 2-3 minutes, turning once at the halfway point to ensure even browning. You’re watching for a deep golden brown color—not pale (undercooked, greasy) and not dark brown (overcooked, burnt). The exact timing depends on oil temperature and how frozen your sticks are, but they typically need just 2.5 minutes at proper temperature.
Use your slotted spoon or spider to remove finished sticks to your prepared wire rack. They’ll be too hot to taste immediately—resist temptation. The cheese continues cooking from residual heat for about a minute after removal. Let them rest for 2-3 minutes before serving; this allows the cheese to firm slightly from liquid to that perfect molten-stretchy consistency.
Between batches, allow the oil to return to proper temperature. Trying to fry the next batch in oil that’s too cool guarantees greasy results. This patience, like the freezing patience before, separates good from exceptional.
Étape 7: Le service – L’apothéose dorée
Arrange your golden mozzarella sticks on a serving platter while still warm. The visual impact of their color—that deep, burnished gold that signals perfectly executed frying—creates anticipation before the first bite. Serve immediately with your warm marinara sauce in a bowl for dipping.
The first bite reveals whether you’ve achieved mozzarella stick perfection: the coating should shatter with audible crunch, giving way to cheese that’s transformed into elastic, molten luxury. The pull—that legendary stretch of cheese between stick and mouth—should be dramatic and impressive, the cheese having reached that ideal temperature where it’s liquid enough to stretch but not so hot it burns.
Petit conseil pro: Les secrets de la perfection
Le choix du fromage fait tout: I cannot overemphasize the importance of low-moisture mozzarella. I learned this lesson the expensive way, using fresh mozzarella and watching it explode in the oil, turning my careful work into oily disasters. Low-moisture mozzarella (the kind you find in blocks in the dairy section, often labeled “part-skim”) has had much of its water content removed during production. This lower water content means it melts more slowly and stays contained in its coating. String cheese also works beautifully—it’s essentially pre-portioned low-moisture mozzarella, though you’ll sacrifice some control over stick size.
La congélation n’est pas optionnelle: Think of freezing as building a time buffer into your sticks. When frozen sticks enter hot oil, the coating browns and crisps while the cheese is still solid. As it slowly warms and melts, the coating has time to create a crispy shell strong enough to contain it. Room-temperature sticks have no such buffer—the cheese melts almost immediately, breaking through the coating before it firms. I’ve even experimented with freezing for different durations: 2 hours produces slightly softer interiors with less dramatic cheese pull; 4+ hours creates firmer sticks with maximum stretchiness. Find your sweet spot.
Le contrôle de la température détermine le succès: In professional kitchens, we maintain oil temperature obsessively because we understand its profound impact on frying quality. Too cool (below 340°F) and the coating absorbs oil before crisping, creating greasy, soggy disappointments. Too hot (above 375°F) and you get dark, potentially burnt exteriors with undermelted cheese. The sweet spot of 350-365°F allows the Maillard reaction (the chemical process that creates browning and flavor) to proceed at optimal speed while the coating dehydrates and crisps. If you don’t have a thermometer, get one before attempting these. It’s a $10-15 investment that transforms your frying forever.
Le double enrobage est votre assurance: Single-coated mozzarella sticks can work, but they’re playing with fire. That second coating layer provides insurance against the inevitable weak spots in your first coating. It also creates a more substantial crunch that better complements the creamy cheese interior. Think of it as building a stronger fortress—one wall might hold, but two guarantee success.
La taille des bâtonnets influence le résultat: I’ve experimented with everything from thin sticks (1/4 inch) to thick batons (3/4 inch). Thin sticks cook faster but have less dramatic cheese pull and can overcook easily. Thick sticks require longer cooking times during which the coating might darken too much before the center melts properly. The 1/2-inch thickness represents the golden ratio where exterior and interior reach perfection simultaneously.
L’assaisonnement des chapelures transforme l’ordinaire en extraordinaire: While plain breadcrumbs produce acceptable mozzarella sticks, the seasoned version transcends. The Parmesan adds umami richness and contributes to browning. The Italian herbs create aromatic complexity that complements the mild cheese. The garlic and onion powders provide savory depth. And that touch of cayenne—barely perceptible as heat—adds dimension that makes people ask “what makes these taste so good?” Don’t skip these seasonings; they’re what separates homemade from store-bought.
La friture par petits lots maintient la température: When you add frozen sticks to hot oil, they immediately lower its temperature. Add too many at once and the temperature crashes below the effective range, leading to oil absorption and greasy results. Frying 4-6 sticks at a time in a medium pot maintains stable temperature, ensuring consistently crispy results. Yes, this means the total process takes longer, but each batch comes out perfect. Your guests won’t mind waiting when they taste the results.
Les variations créatives
Once you’ve mastered the classic mozzarella stick, numerous variations await exploration for the adventurous cook.
Mozzarella Sticks Épicés: Add 1-2 teaspoons of crushed red pepper flakes to your breadcrumb mixture for sticks with attitude. The heat complements the cooling richness of cheese beautifully. For more dramatic heat, add 1/2 teaspoon cayenne or even a bit of habanero powder.
Herbed Mozzarella Sticks: Replace Italian seasoning with fresh herbs mixed into the breadcrumbs: 2 tablespoons finely chopped fresh parsley, 1 tablespoon fresh thyme leaves, 1 tablespoon fresh oregano. The fresh herbs create brighter, more vibrant flavor than dried, though they must be chopped extremely fine to prevent burning.
Mozzarella Sticks au Parmesan Renforcé: Increase the Parmesan in the breadcrumb mixture to 1 cup, creating an even more savory, umami-rich coating that browns to deeper gold. You can also add 2 tablespoons of Romano or Asiago for more complex cheese flavor.
Mozzarella Sticks Panko: Replace Italian breadcrumbs with panko for a lighter, airier, even crunchier coating. Panko’s larger, flakier structure creates different texture—less traditional but undeniably satisfying. Season the panko as you would regular breadcrumbs.
Jalapeño Popper Mozzarella Sticks: Cut a small slit lengthwise in each cheese stick before coating and insert a thin slice of pickled jalapeño. The cheese must be very cold and the slit minimal to prevent escapes during frying, but the result—spicy heat encountering rich cheese—is spectacular.
Mozzarella Sticks Stuffés: Use string cheese and carefully pull it apart lengthwise into two pieces. Place a small basil leaf or thin slice of pepperoni between the pieces, press back together, and coat as usual. The surprise filling creates complexity and visual interest when you break them open.
Accompagnements suggérés
While marinara sauce remains the classic and for good reason, mozzarella sticks’ versatility welcomes creative pairing.
La marinara classique maison: As described in the ingredients section, homemade marinara transforms the experience. The bright acidity and herb-forward flavor cuts through fried cheese richness, creating balance in each bite. Make extra and freeze it—you’ll find countless uses beyond mozzarella sticks.
Ranch dressing crémeux: Americans’ favorite dip pairs surprisingly well with mozzarella sticks. The cooling buttermilk, herbs, and garlic create creamy contrast to crispy coating and molten cheese. Make it from scratch by combining 1 cup buttermilk, 1/2 cup mayonnaise, 1/2 cup sour cream, 2 tablespoons fresh dill, 1 tablespoon fresh chives, 1 clove garlic (minced), salt, and pepper.
Sauce pesto basilic: Bright, herbaceous pesto offers Italian authenticity with different character than marinara. The basil’s anise-like notes, pine nuts’ richness, Parmesan’s umami, and garlic’s pungency create complex pairing that elevates mozzarella sticks from appetizer to sophisticated starter.
Aioli citronné: Whisk together 1 cup mayonnaise, 3 cloves garlic (minced to paste), juice and zest of 1 lemon, 1/4 teaspoon salt, and black pepper. This garlicky, bright sauce provides richness that complements without overwhelming.
Sauce arrabiata épicée: For those who want heat, arrabiata—marinara’s spicy cousin—delivers. Prepare like marinara but add 1 teaspoon red pepper flakes and increase the garlic. The name means “angry” in Italian, referring to the sauce’s fiery temperament.
Honey-hot sauce: Mix equal parts honey and your favorite hot sauce (Frank’s RedHot works excellently). This sweet-heat combination creates addictive contrast, the honey tempering the hot sauce while the vinegar cuts through cheese richness.
Truffle aioli: For upscale entertaining, add 1-2 teaspoons white or black truffle oil to basic aioli. The earthy, pungent truffle elevates humble mozzarella sticks to luxury status. Use real truffle oil, not synthetic—the flavor difference is profound.
Le moment parfait pour servir
Mozzarella sticks occupy a unique position in the culinary landscape—simultaneously casual bar food and crowd-pleasing party appetizer. Understanding when and how to serve them maximizes their impact.
Apéritif de fête: Served hot from the fryer as guests arrive, mozzarella sticks create immediate excitement and set a convivial, indulgent tone. Arrange them on a large platter with multiple dipping sauce options, creating an interactive station where guests can customize their experience.
Soirée télé et match: Few foods match mozzarella sticks for casual watching-the-game satisfaction. Their hand-held format, rich satisfaction, and lack of required utensils make them ideal for distracted eating while attention focuses on screens.
Repas en famille: Children universally love mozzarella sticks, making them valuable for family meals. Pair with a simple salad and you’ve created a dinner that satisfies all ages. Let older children help with the coating process—it’s an engaging, educational activity that builds confidence and kitchen skills.
Buffet d’événement: Mozzarella sticks hold reasonably well in a low oven (200°F/95°C) for 30-45 minutes, making them workable for buffet situations. They lose some crispness but retain the cheese pull and remain far superior to any pre-made option.
Menu de restaurant maison: If you’re ambitious enough to create a home restaurant night, serve mozzarella sticks as a first course alongside a simple arugula salad dressed with lemon and olive oil. The rich, fried sticks contrast beautifully with the peppery, fresh greens.
La science derrière la perfection
Understanding the scientific principles underlying mozzarella stick success deepens your appreciation and improves your execution.
La chimie de la fonte du fromage: Mozzarella’s stretchiness comes from its protein structure. During cheese-making, milk proteins (primarily casein) are arranged into long, flexible chains. When heated, these chains slide past each other rather than breaking, creating that characteristic stretch. Low-moisture mozzarella has tighter protein networks with less water interfering, producing more dramatic stretching.
La réaction de Maillard: The golden-brown color and complex, savory flavors developing during frying result from the Maillard reaction—a complex series of chemical reactions between amino acids and sugars when heated above 285°F (140°C). This reaction creates hundreds of flavor compounds and the appealing brown color we associate with perfectly cooked food.
La physique de la friture: When frozen sticks enter hot oil, water in the coating instantly vaporizes, creating steam that pushes outward. This outward pressure prevents oil from soaking in (initially). As frying continues and moisture evaporates, the coating dehydrates and crisps. Meanwhile, heat conducts inward toward the cheese, eventually raising it above its melting point. The key is timing this so the coating is fully crisp before the cheese melts—hence the importance of frozen sticks and proper temperature.
La cristallisation des graisses: When you freeze mozzarella, the butterfat it contains crystallizes into solid form. These crystals must melt before the cheese flows, adding thermal inertia—another layer of protection against premature melting. This is why very cold sticks work better than merely chilled ones.
L’erreur fatale à éviter
Through years of making mozzarella sticks, I’ve identified common mistakes that consistently lead to failure. Avoid these and you virtually guarantee success.
Ne pas congeler assez longtemps: This is the most common failure point. Impatient cooks freeze for 30-60 minutes, thinking it’s “good enough.” It’s not. The coating might be firm, but the cheese hasn’t reached the deep cold necessary to withstand hot oil long enough. Result: cheese explosions, empty breading, disappointment. Always freeze minimum 2 hours, preferably longer.
Surchauffer l’huile: At 375°F and above, the coating browns so rapidly that it darkens before the cheese melts properly, creating burnt exteriors with hard cheese interiors. Worse, at very high temperatures (400°F+), the coating can char while the cheese barely warms. Stick to 350-365°F religiously.
Sous-chauffer l’huile: The opposite problem—oil below 340°F doesn’t vaporize moisture fast enough, allowing oil to soak into the coating before it crisps. Result: greasy, soggy mozzarella sticks that taste more of oil than cheese. Temperature control is everything.
Surcharger la friteuse: Adding too many cold sticks crashes the oil temperature dramatically, leading to the greasy problem described above. Plus, crowded sticks can stick together or cook unevenly. Patience with small batches produces uniformly excellent results.
Utiliser du fromage frais: Fresh mozzarella’s high moisture content (55-60% vs. low-moisture’s 45-52%) means it releases water rapidly when heated, building pressure that ruptures any coating. It also melts at lower temperature, escaping before the coating crisps. Only low-moisture mozzarella works for this application.
Négliger l’assaisonnement: Plain breadcrumbs produce bland coating that makes your hard work seem ordinary. The seasoning blend transforms them from simple breading to flavorful crust that stands on its own merits. Don’t skip this step.
Le stockage et la préparation anticipée
One of homemade mozzarella sticks’ greatest advantages is their freezer-friendly nature, making them perfect for advance preparation.
Congélation avant cuisson: After double-coating your sticks, you can freeze them for up to 3 months before frying. Arrange in a single layer on a baking sheet, freeze until solid (2+ hours), then transfer to freezer bags with as much air removed as possible. When ready to cook, fry directly from frozen—no thawing needed. In fact, don’t thaw; cook from frozen state for best results.
Après cuisson: While best consumed immediately, fried mozzarella sticks can be refrigerated for 3-4 days. Reheat in a 400°F (200°C) oven for 8-10 minutes to re-crisp the coating. They won’t match just-fried quality but beat store-bought by miles. Don’t microwave—you’ll create rubbery, soggy sadness.
Transport: For potlucks or events, fry your sticks, let them cool to room temperature, and transport in a container. Reheat at your destination as described above. This approach works surprisingly well and ensures you’re not frying in an unfamiliar kitchen.
À vos tabliers, my friends! The journey from simple cheese block to golden, crispy mozzarella stick perfection awaits you. This is cooking as transformation, as understanding, as the satisfaction of mastering technique and science to create something that brings joy to everyone who experiences it. Whether you’re feeding hungry teenagers, impressing party guests, or simply treating yourself to the ultimate comfort food, these homemade mozzarella sticks represent food at its most satisfying—crispy, stretchy, golden, and made with your own skilled hands.
Have you made mozzarella sticks before? What’s your favorite dipping sauce? Share your experiences in the comments—I love hearing about your triumphs and even your learning moments. And if you try this recipe, tag me with your cheese pull photos. There’s something universally delightful about that molten stretch, and I never tire of seeing it.
Bon appétit!